Back in April I did a bit of experimenting to see if I could engrave leather with the ![]() PRU, and then tool the leather for greater texture. I’d hoped that this would enable me to essentially skip the first couple of steps in traditional leather tooling. Typically you case the leather, trace the pattern on to the leather using a stylus, and then carve along the traced pattern with a swivel knife before you begin to create texture using tools to stamp along that carved edge. My hope was that I’d be able to engrave my pattern on to the leather and then go directly to casing and stamping.
PRU, and then tool the leather for greater texture. I’d hoped that this would enable me to essentially skip the first couple of steps in traditional leather tooling. Typically you case the leather, trace the pattern on to the leather using a stylus, and then carve along the traced pattern with a swivel knife before you begin to create texture using tools to stamp along that carved edge. My hope was that I’d be able to engrave my pattern on to the leather and then go directly to casing and stamping.
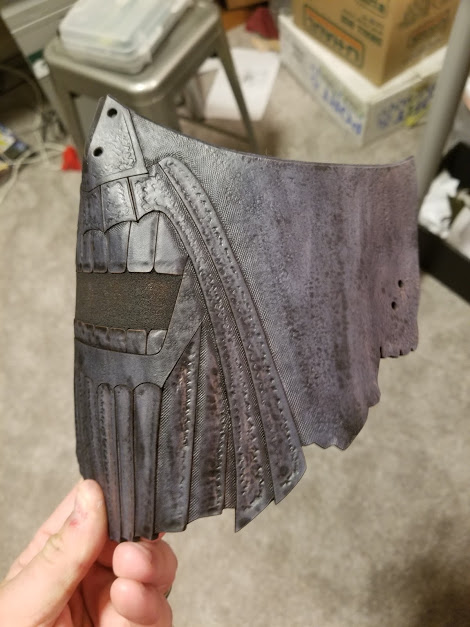
After a few trials and a lot of input from other forum members, I felt that the effect that I was hoping to achieve wasn’t really going to be possible until we had access to some lower power settings. Even with manual settings set to very low power, the resulting engraves at that time were still too “hot”. They cut too deeply into the lower layers of the leather, and created a lot of charring that mashed down into the top grain when tooled:
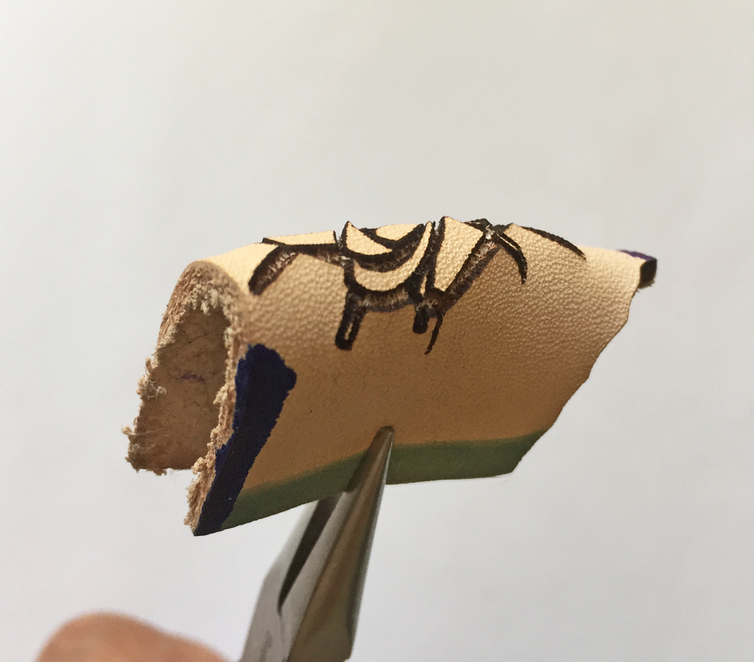
While you could probably cover up the discoloration well enough with dye and/or paint, the cuts were just too deep. The effect is really exaggerated in this photo with the leather bent up, but hopefully it helps to illustrate my point:
So when the new “precision power” settings were announced in the (early) July update I was really excited to give this experiment another try. The photo below shows my first attempt with the precision settings, just over a week ago. For consistency’s sake, I used the same little bee design, printed on 5-6 oz leather, at the same tiny size (all of the bee prints are approximately 1.25" square). The one on the left is the one that I did back in April, with the power dialed way down. The one on the right was printed about a week ago using PG settings for thick leather:

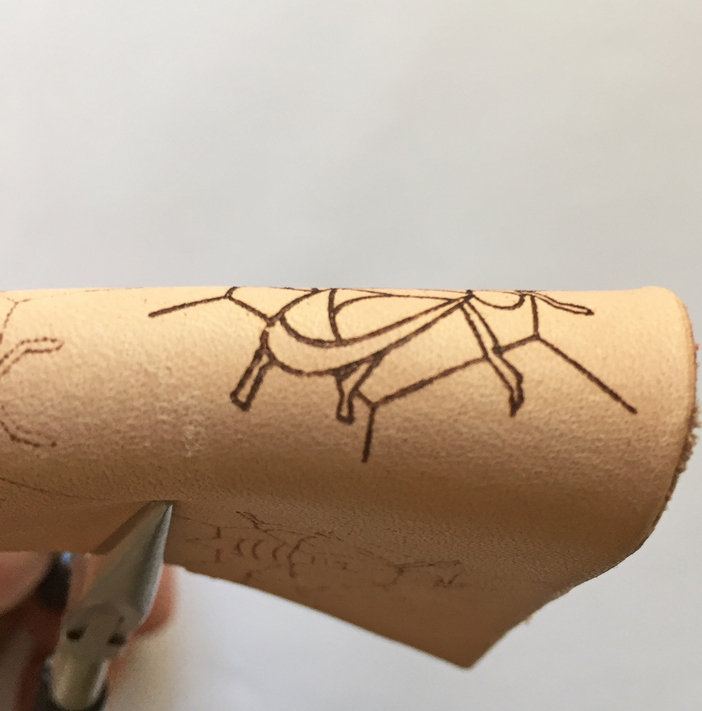
See how much lighter the newer one on the right is? When bent, you can see that the newer version still has a very fine cut where the leather was engraved, but it is nowhere near as deep as the earlier attempt. This cut does not pierce down into the lower, shaggier layers of the leather:
I did three prints on this same piece of leather. The two photos above show the first print, which used default PG settings for thick leather. The next two prints on that same piece of leather used subsequently lower power settings. The photo below shows that first attempt from April, along with all 3 June attempts on the scrap below it. I added little numbers between the antennae so that you could see the print order:
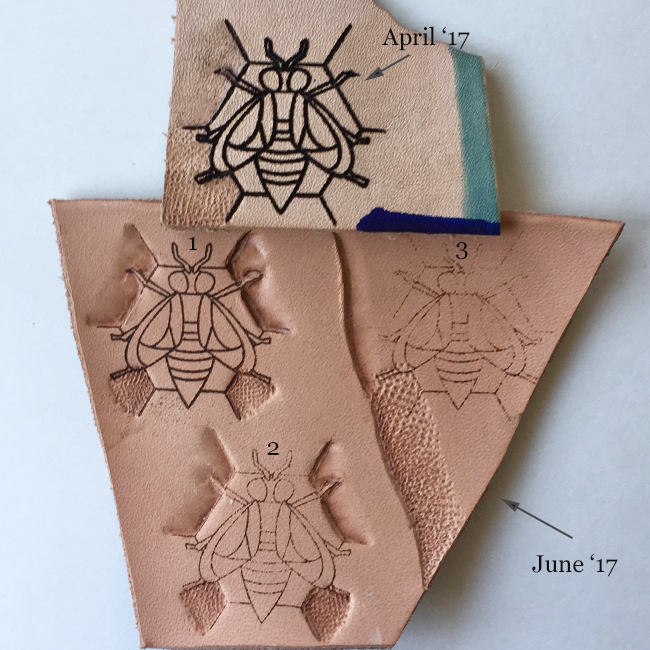
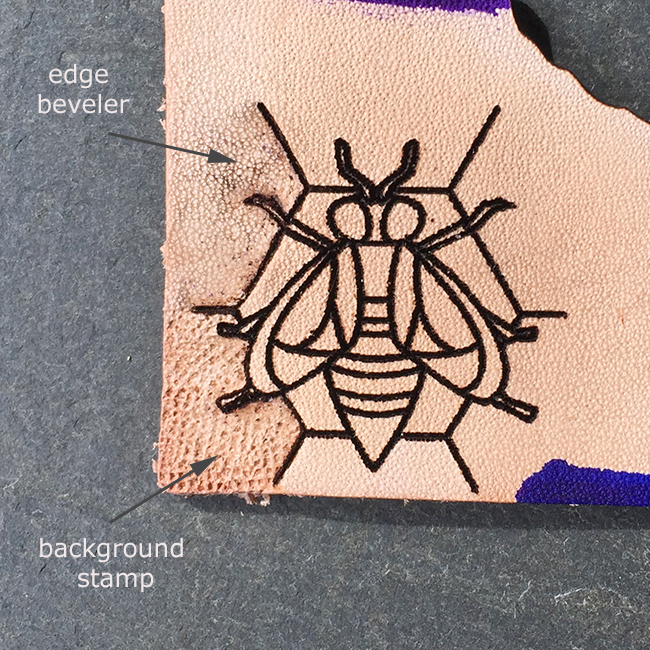
As you can see, I tried to tool on attempts 1 and 2, but didn’t even bother with print #3 (it was just too light). On both prints, I used an edge beveler for the lines at the top of the bee, and a background stamp for the lines on the bottom of the image. The left side of each image shows these tools used without any additional cuts from the swivel knife; on the right side of each print, I used the swivel knife to score along the outside of the engrave before using the stamping tools.
The random cut line to the right of prints 1 & 2 shows a little strip that I cut with the swivel knife and then tooled with the edge beveler (top) and background stamp (bottom), just to give an idea of what these lines typically look like without any laser engraving.
I was pleasantly surprised to find that the swivel knife didn’t really seem necessary with these lower power settings. In fact, the swivel knife kind of seemed like overkill! With print #1, you’ll notice that there was still some minor charring, which stamped down into the grain like before. Print #2 showed little or no discoloration from charring once it was tooled.
Based on these experiments, I have renewed hope for the idea of laser engraving + tooling leather. I’d offer more specifics on the settings used, but for now they seem to be a moving target. Not sure if that’s due to the fact that I am working with a PRU (rather than a production model) or if it simply because they are always honing these details. Either way, this next image shows prints that I ran just two days ago, with very different results. These used the same image size of 1.25", same leather weight, and the same method of starting w/PG settings and then backing off. These came out even lighter than the ones from a week ago, and I did not use a swivel knife at all in the tooled areas:

So the TLDR version is - it’s possible, but for the time being you’ll probably need to experiment with settings a bit.
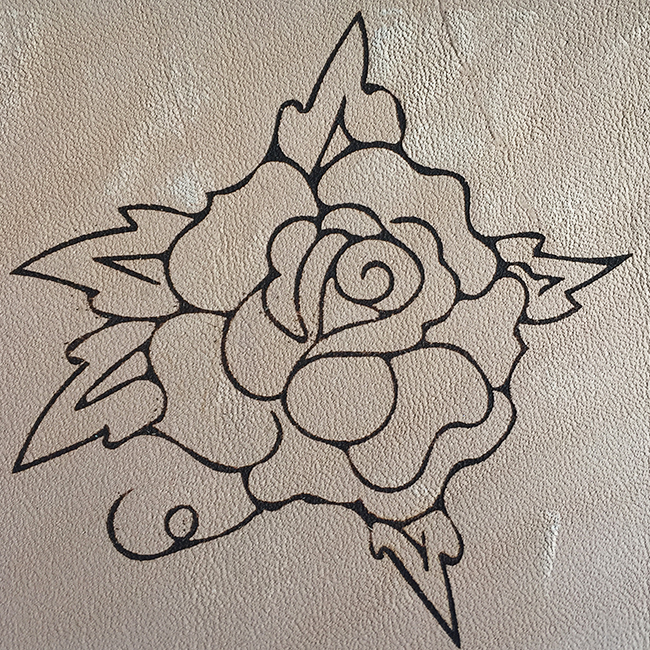
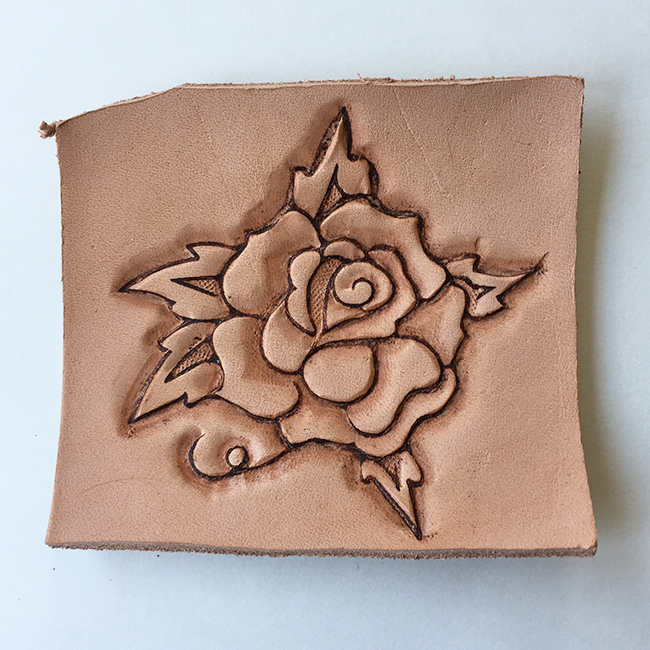
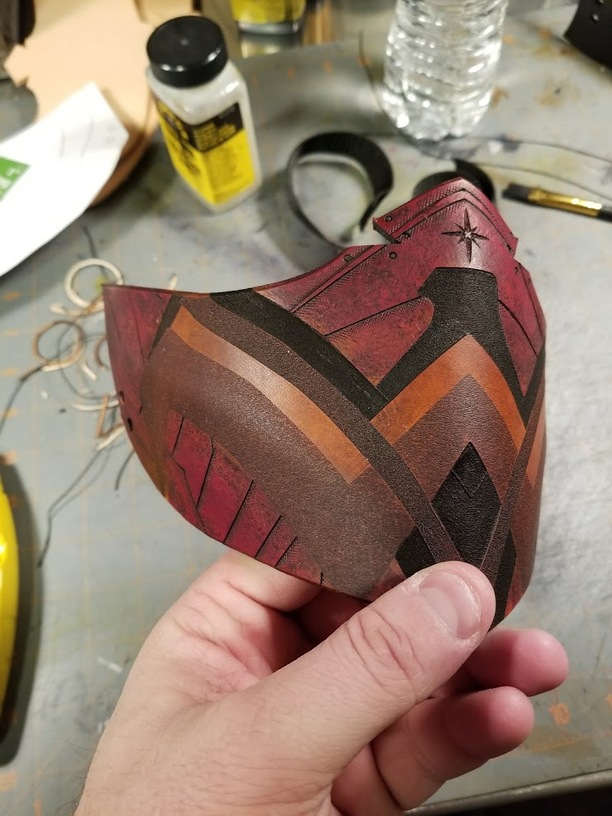
These last two photos show a little rose that I doodled. This image was also engraved using PG settings, but it was printed a bit larger than the bees, at about 2.75":
Here it is with a little bit of tooling:
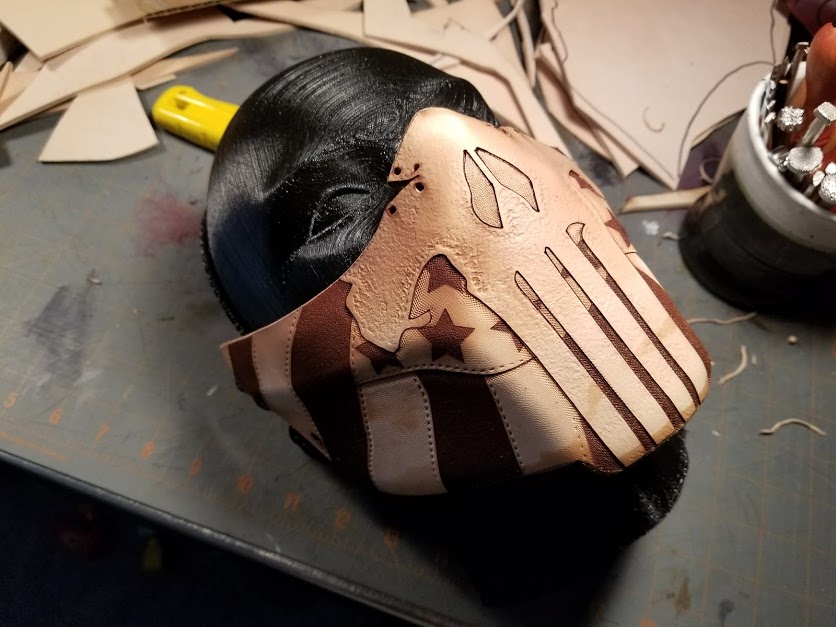
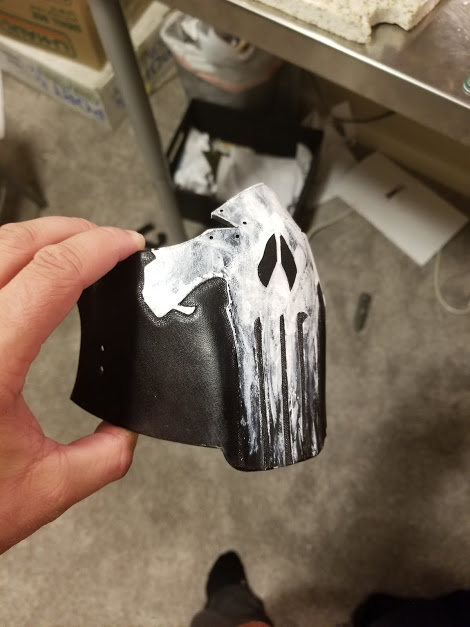
It’s worth a disclaimer that I don’t do a whole lot of tooling in my work, so I’m not terribly skilled in these techniques. I can do passable leather tooling on small accents, but I rarely do large or involved tooling work. There are several forum members who are more experienced with leather carving and tooling, and they’ll likely have more insight (as well as better results ![]() ). Still, I wanted to offer up these photos to tide folks over for the time being. Hopefully it gives a better idea of what you’ll be able to do with the laser + traditional leather tooling methods.
). Still, I wanted to offer up these photos to tide folks over for the time being. Hopefully it gives a better idea of what you’ll be able to do with the laser + traditional leather tooling methods.


 ! So glad ya’ll were willing to share your experiences with leather and the