When you tool a pattern into leather, you must first trace the design onto the leather. Next you carve the design into the leather with a swivel knife. The pattern is then “tooled” by going along the edge of your carving with an edge beveler or patterned stamp and whacking it with a hammer (tap, tap, tap, tap!).
^ That’s a simplified explanation. Nicer work will have a few more steps and a lot more finesse, but that’s a basic overview of the process. My question is whether or not the laser will make it possible to skip those first two steps? Can you transfer the pattern to the leather using a very fine engrave and then tool that just as you would a carved outline? OR, will the singed edges of the engrave change the texture of the leather, making it difficult to tool properly?
I’m not sure that I’ve articulated this clearly, but hopefully you get the gist. I’m having a hard time imagining how the charred edges will respond to tooling. Would love to hear from anyone who has tried this.
Great question and good explanation of what you need. I’ll try it out tonight. Would the design be simple lines or what? What would a design look like that needs to be traced on to the leather? Just anything I can come up with on a Google Image search “leather pattern tracing” Something like flower tracery or acanthus leaves?
“A fine engrave”, do you mean a very fine line that is a full stroke and not a lower resolution lpi?
He starts out with a freehand carving (typically you’d draw an image on to wax paper, then trace it on to the damp - or “cased” - leather with a stylus, and then carve the design). I’m guessing that a very fine/full stroke line would be the best way for a laser to replicate those carved lines?
And yes, any simple design is fine. A google search will turn up quite a few patterns if you really want to get fancy, but a simple doodle - or even a straight line - will do the trick. My concern is whether or not that burned edge can still be beveled.
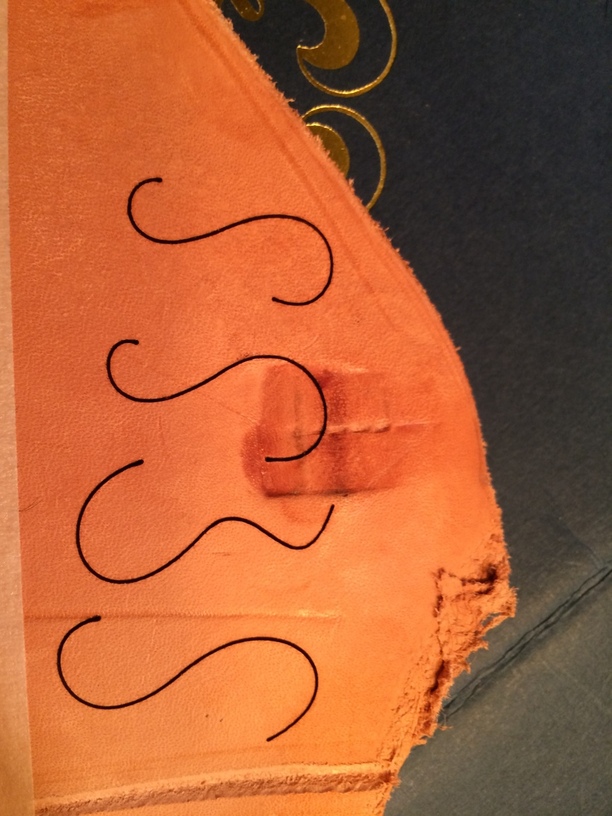
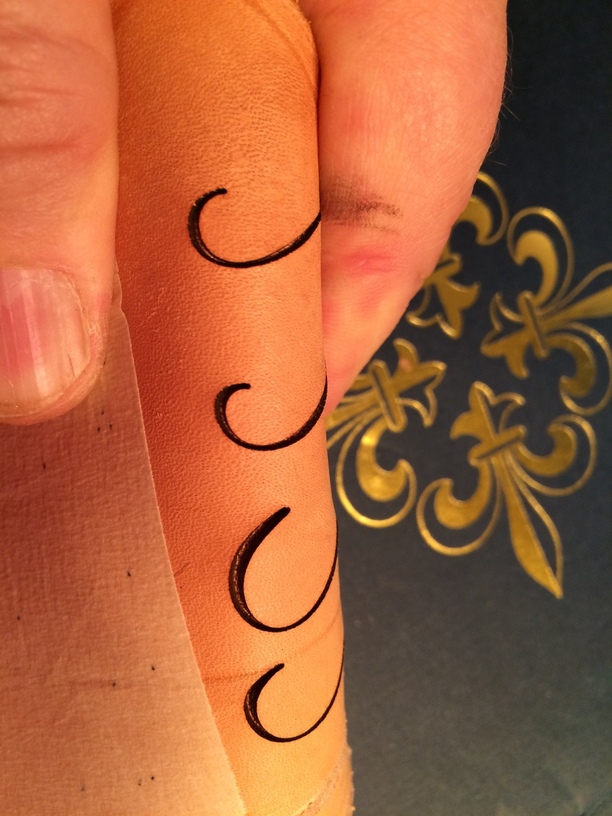
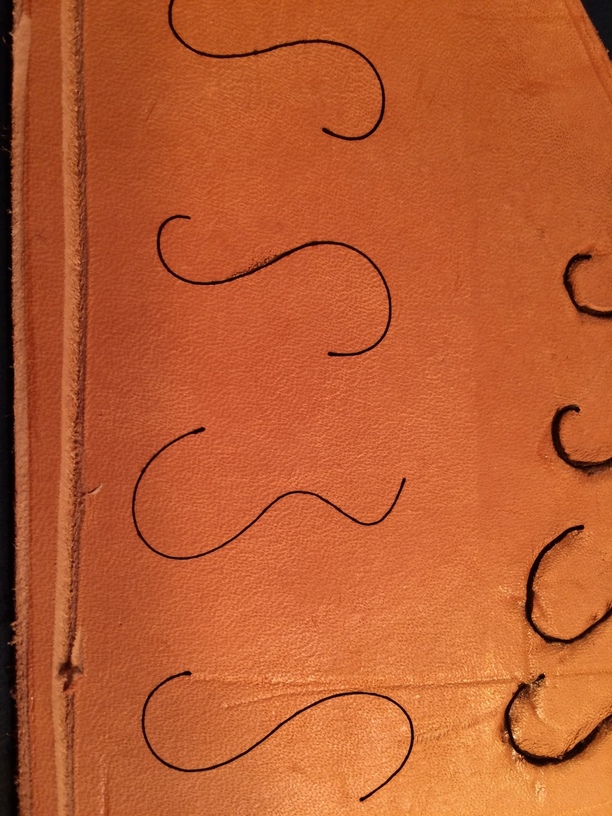
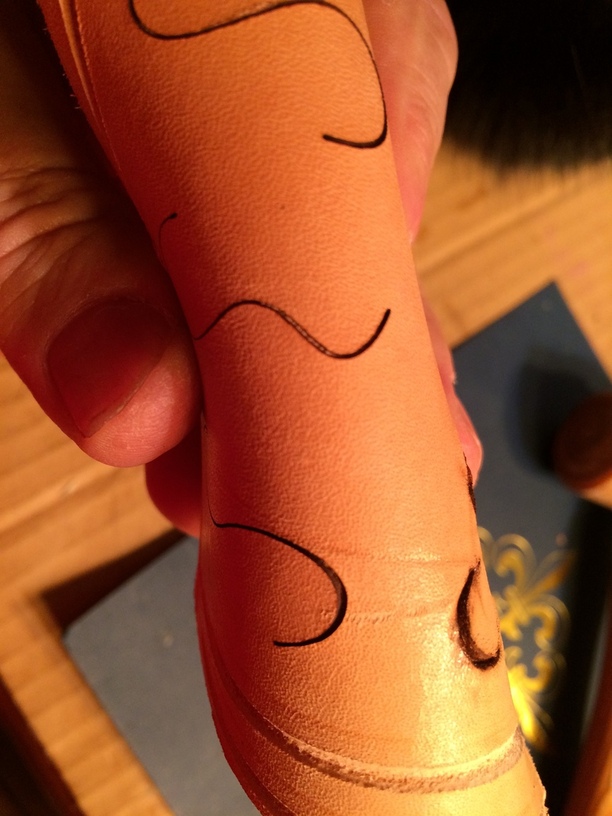
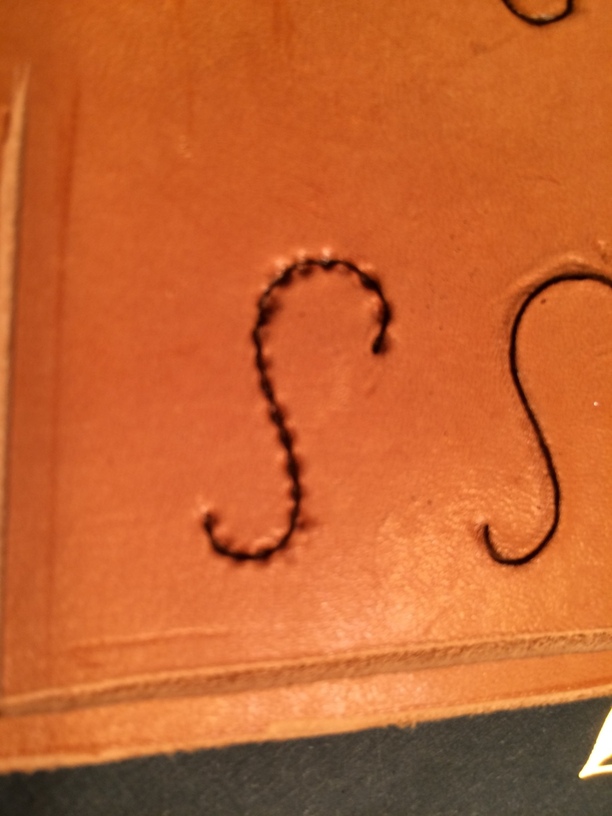
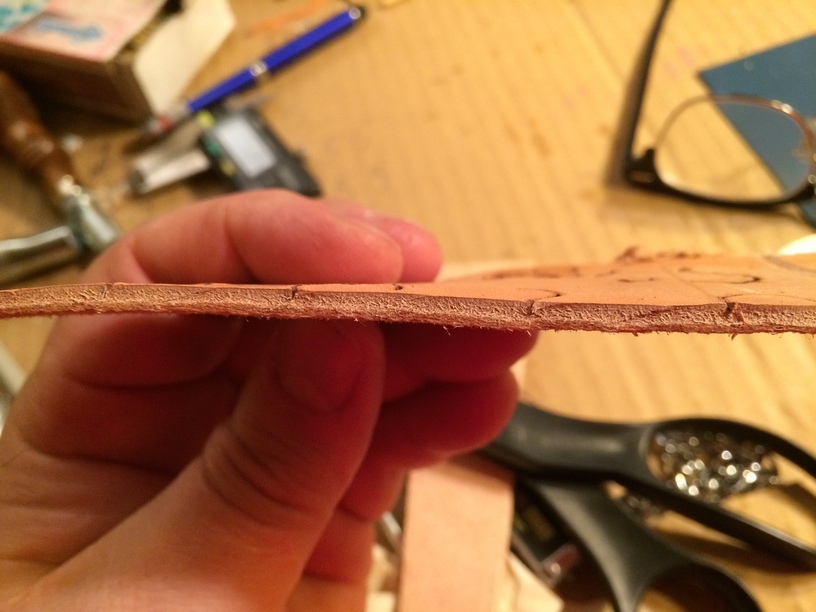
Here are pictures. This leather was .113" thick, fairly substantial. I first did scores and cuts at 20% and 40% power and 100 in/min. It cut pretty deep, more than 1/2 way through.
Then I did a set of 5,10,15,20% power at 197 in/min or top speed for cutting and scoring (really made no difference as to score or cut. 5% power cuts just about through the top dense layer, on this leather about .02" deep. I used masking tape as a masking.
Although the 5% had the lightest char, all of the cuts and scores had darkened the leather noticeably. That may be the determining factor for you in terms of tooling and beveling.
I didn’t have a bevel punch, but made do with some point of a hook tool and the fine and spade tools. Here is a picture dump.
Cuts were about 1.5 inches high.
Wow, thank you so much!! I can’t believe you made time to do this so quickly … that is so kind of you.
I am going to revisit this thread when I can give it more attention. Apparently my family has been conspiring for weeks on my surprise birthday present. Our daughter moved to Germany last spring, and we have not seen her since Mother’s Day. So there are no adequate words for my shock and joy when she walked in to my living room this evening!!
All that to say that I’m very grateful for your effort, but also extremely distracted at the moment. Will look again and ask any questions when I’m through squee-ing (it might be a while)!
@marmak3261, we’ve done some really cool stuff by engraving acrylic and then using it to stamp leather - unlike engraving through the top layer, it maintains the full strength of the material.
This has always been my plan, to eliminate the tracing and cutting the design part of leather making, hopefully with the Glowforge you can cut the leather, cut the design and then tool. Also you will be able to just embossing, but then also make stamps to impress the leather with a logo, etc. It will get fun.
This is one of my major plans for my glowforge. I already make my patterns as SVGs so I can scale them up or down as needed, and many of them are just the right size to fit into the 'forge.
My (hopeful) workflow is going to be:
Drop the leather into the forge
Cut out the pattern (and hopefully sewing. lacing, and riveting holes)
Position and score my tooling lines
Tool the design
Dye and finish.
Depending on the complexity of the design, if this works as I expect, it will save me literally hours of work and be 100x more consistent.
Here’s a couple examples where just cutting out the pattern and then carving the design before tooling took me 4-5 hours:
My Grandfather was a big leather enthusiast. When I was a child he and I used to work the leather together. Cutting, stamping, finishing, painting. He had an entire workbench dedicated to the craft. Leather-working is one of the few memories I have of him as he died 34 years ago.
So I’m trying to imagine this… You engrave the acrylic to use it as a stamp. Do you affix it to something? A post of some sort? Maybe a plate with a post? That you can hit with a mallet to impress the leather? Or some other method? I’m just trying to figure out how the acrylic can withstand the stamping process.
For this, I think probably cutting the design out of acrylic (as a cut-through) and gluing it to another sheet, then using a press (which would give even pressure distribution) would give the best impression. I wouldn’t want to use an acrylic stamp with a mallet.
In general, as with most leather stamps (note design stamps, not tooling stamps), a press will always give a better and more consistent impression.
We started out by only using Delrin, but it’s more expensive and we don’t have a Proofgrade version of it yet. We tried it in acrylic and it worked great!
This is more or less what we do, but use C-clamps instead of any sort of fancy press.