Thank you!! I will try these settings as well.(600speed/50power/270lpi/vary power/1x )
1 Like
Yep. In my case I used Illustrator. But since you’re already dealing with rasterized images, either should get the job done.
Yep!
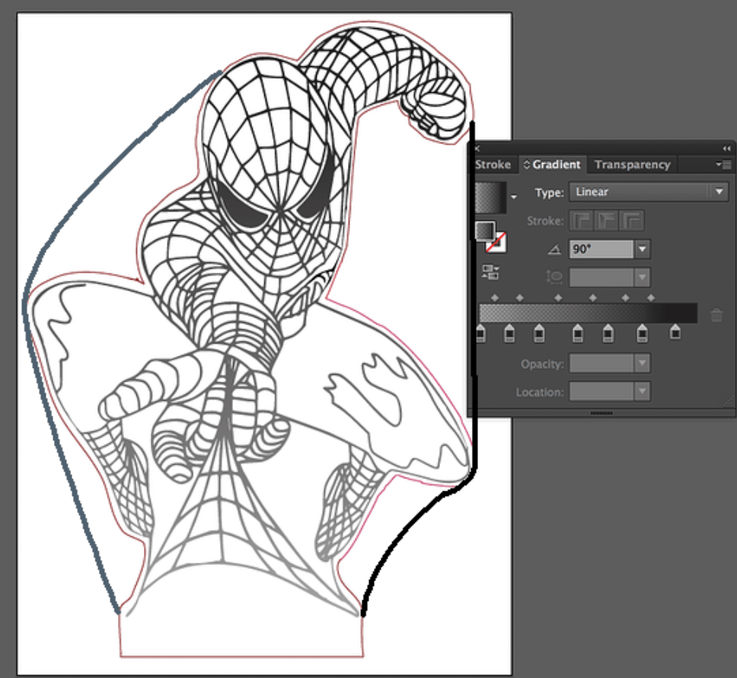
Unfortunately, at this time Glowforge cannot work with gradient vectors, so you have to rasterize it. But you’ve definitely got the right idea.
Still, I don’t think your cut will work. I mean, I guess it’s possible. I just don’t see how light could possibly get to the upper-right without contiguous material from the light source to the destination. I’d cut as I described earlier. Feel free to give it a shot as-is though!
I’m gonna go ahead and call balderdash! (But, kids… I didn’t say “balderdash.”)
There’s no frickin’ way that’s an actual image of what’s possible with a normal LED base. That’s either a special light source, a great photographer, a great post-production editor, or all three. Expect something pretty damn good. I mean, you’ll be happy with the result and all. But don’t expect that. ![]()
Looking forward to seeing your result!
1 Like
It could also in theory be special acrylic. There is light-channeling and light/scattering acrylic that is designed for this sort of application. Also we don’t know how large that is in the photo nor do we know if it has a contour cut or if it’s just printed in a solid piece of acrylic.
I’ve not seen great difference between types of acrylics, there are a couple of dude by side tests out there that I’ve looked at but it’s hard to tell a difference.
I agree with you, I still think photoshop is most likely.
2 Likes
I was growing for some ideas and found it in pinterest …so could be some special designed LED.Sharing the link below.
I didn’t do any post design , for any of the new readers…I simply did a screenshot of the image , loaded it in Inkscape , converted to vector by tracing the bitmap and moved it to illustrator to do cutline and some clean-up.With the help of the all the above suggestions from great minds, I am going to reverse the process by taking the final vector to back to jpg / raster image after applying the gradients and give it a try.Will keep you all posted on the progress.Thanks again!! Right in time to say - Happy Thanksgiving !!! to you and your families.
No I was saying that I think the image on pinterest may have been photoshopped. You may be trying to reproduce something that never looked that way in the first place. There are some physical limits to edge-lighting and how light works in general that makes truly uniform lighting of a side-lit acrylic sign almost impossible. You can combat it a bit with some clever gradient work, but there will always be some level of drop off just because of light dispersion over distance.
2 Likes
I can only assume that his led was on brightest option and, his leds are stronger and or it’s a picture filter that gave it’s “illusion” of being the entire image lit!
In other hand, for the light to travel through the acrylic, I would recommend you to do something similar to this one!
Yes. That’s exactly as I described it. ![]()
1 Like
Sorry! Didn’t read all the messages!!
1 Like
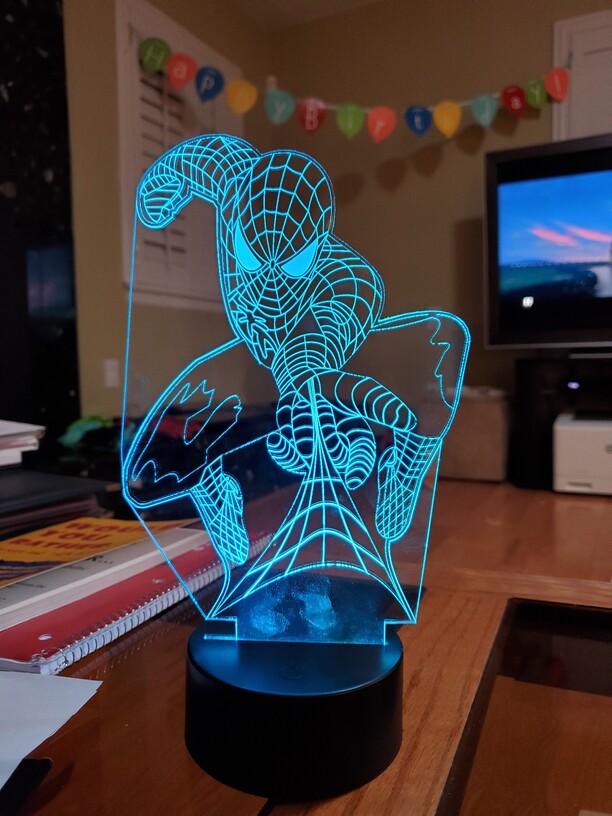
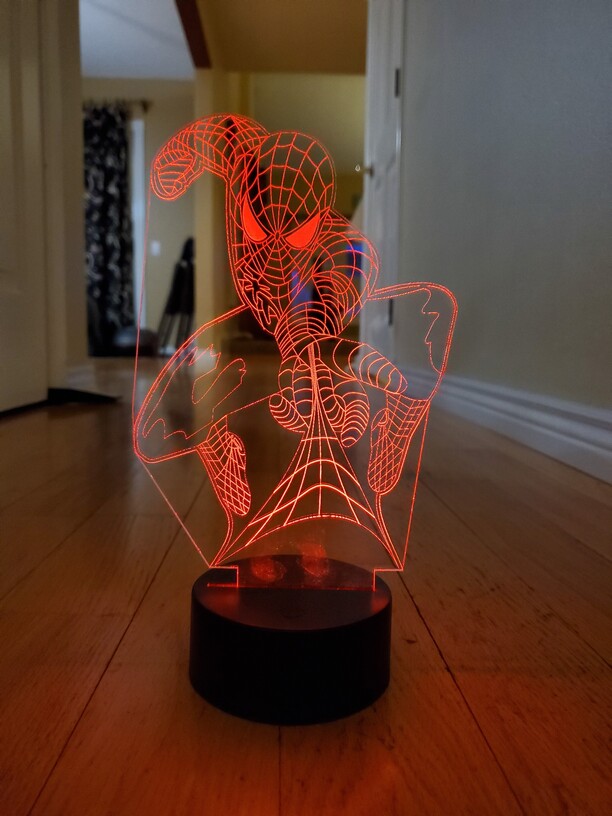
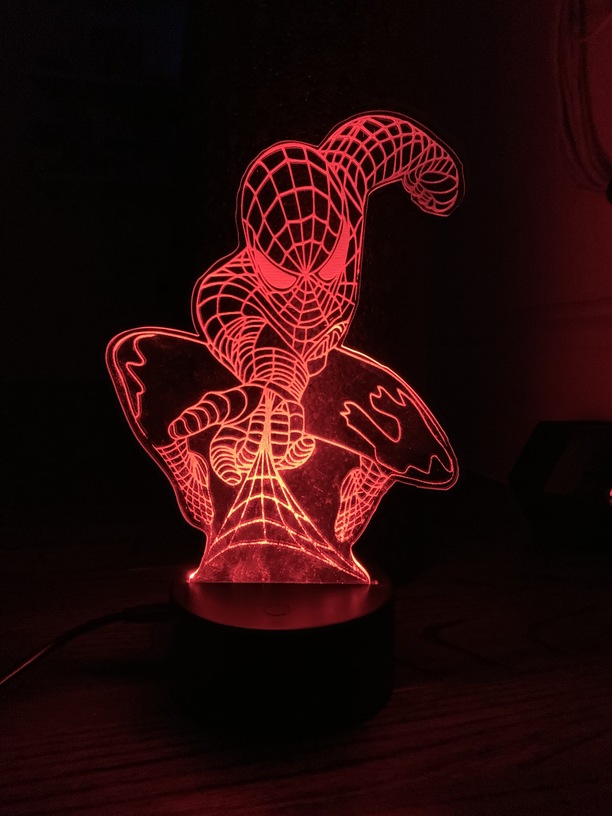
I did this today after reading the thread. I didn’t use the gradient. I uploaded the PDF of the spiderman template and used the glowforge 3d engrave setting ( no change to settings) for the medium proof acrylic. I outlined the template in illustrator with the pen tool and output that as an SVG in order to manually overlay the cut. I made the modification, to keep the arm within the acrylic.
10 Likes
Looks great now.
Thank you for sharing.Looks great!! I havent had an oppurtunity to complete the changes and print today.But Impressed with your results.Agreed on the posts and suggestions to join the hand and leg to direct all the way to the hand(on the top).
In regards to your attempt, when you say - I uploaded the PDF of the spiderman template - you mean the following ? 1)you took a screenshot of the image from pinterest 2) You converted the jpg or png image snapshot into a PDF 3) then processed the cutline with the pen tool in illustrator 4) made svg of the same 5) converted back to an image for 3d engrave option ?? Is that right sequence ? Or you converted the final SVG file into a PDF and uploaded to glowforge …didnt know (or tried before) GF had 3d engrave…will check tonight.
You can use the opposite trick to isolate parts of an engrave and light up specific sections. The vertical cuts separate the columns here and prevent much bleed from one column to the other:
To start, I just bought the GF last week. I’m great with photoshop, so so with illustrator and use cad cam like meshmixer and fusion 360 regularly. So my biggest learning curve here is adapting to the glowforge app and figuring out what it’s quirks are.
I purchased the template from etsy and it came with the PDF, SVG, and Illustrator files. It took me some reading up on the GF app to realize that If I upload the PDF, I only get engrave settings. If I uploaded the SVG, it wanted to cut everyline. I’m sure that I could have really spent the time to change the illustrator file and output an SVG that would engrave and cut, but it seems like alot of youtube videos struggle with this. Therefore, I did the following:
- uploaded the PDF and set it to engrave.
- opened the illustrator file in illustrator, outlined my cut with the pen tool, made that a path, deslected the rest of spiderman, so I only had the cut outline, and output that as my cut path SVG
- in the GF app, I uploaded the SVG to a second layer, which it set to cut.
- I manually overlayed the cut SVG outline over the engrave layer.
I’m sure it might be a headache with harder to match items, but this seemed less time consuming that going back and forth in illustrator trying to see exactly what I had to change to get the GF app to recognize what I was trying to accomplish.
I guess I’m just too impatient!
Thanks for all the insight and help everybody!
You can also export the spiderman artwork WITH the cut path into the same SVG file, which will eliminate the need to manually align in the GF app. All you need to do is make sure the cutting path is set to a different color than the spiderman artwork. The GF app will read the color assignment and make it another step.
3 Likes
Thank you!! for the sequence of steps. I am going to try this as well.At this time,I am trying to learn the and understand the technique correct to make my own work with a baseline.So , I will try to convert the image to PDF and follow your sequence of steps to see how it differs from the gradient method.
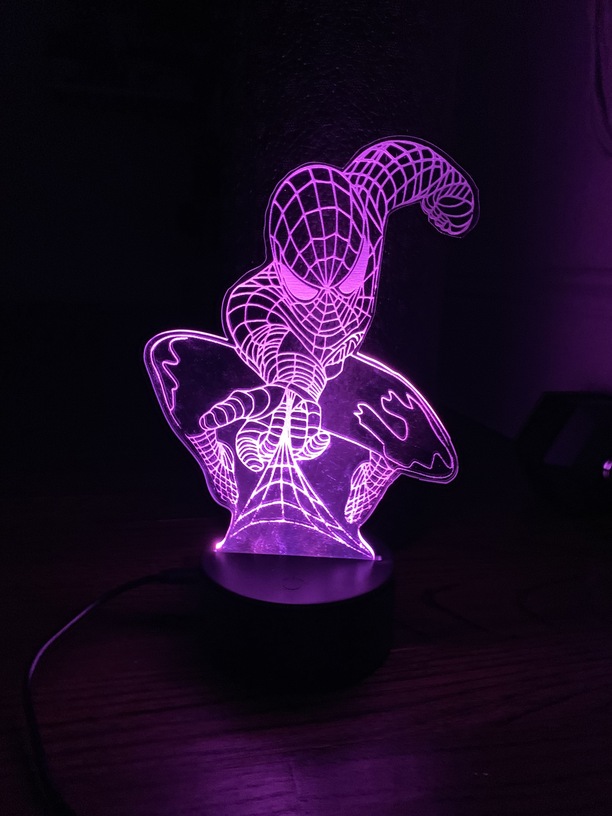
With reference to the initial response and suggestions - Below is the output with gradient ( increasing by 10% - bottom to top (from 40% grey[bottom] - 100% black [top] - as posted in one of the pictures above). I wanted to tryout without the leg to hand cutline merge on for light travel. But with the gradient option - The spider web does look like a web ![]()
I plan to make another with the suggested cut line and the pdf format and 3d engrave options.With few experiments I have done so far…I expect the 3d engrave will definitely take longer time than this.I am happy with the current output…will see if I can put them side by side to compare in the next attempt.
Check it out…thank you everyone!!! Its been an awesome learning experience.
6 Likes
much improved!
I love the sharing of knowledge here. Do we already have a tutorial on this gradient technique in the Matrix?
Hi! I’ve been trying to figure out how you did the gradient in Illustrator, as I’m completely new and my googling hasn’t helped. Do you have a tutorial link to this?
There is a screenshot of where you set the stroke gradient in this thread, above.
It’s one tab over from where you set stroke attributes.
I suppose I’m having more fundamental problems. Here’s what I’ve figured out so far. You bring in your image. You create a gradient box behind it, then create a transparency mask. But I can’t figure out how to get a good gradient this way. It’s always either too dark or too light.