or just cut the whole bottom off, like at least 1 or 2 people have done. but that’s a pretty limited set of GF owners who are going to do that.
2 Likes
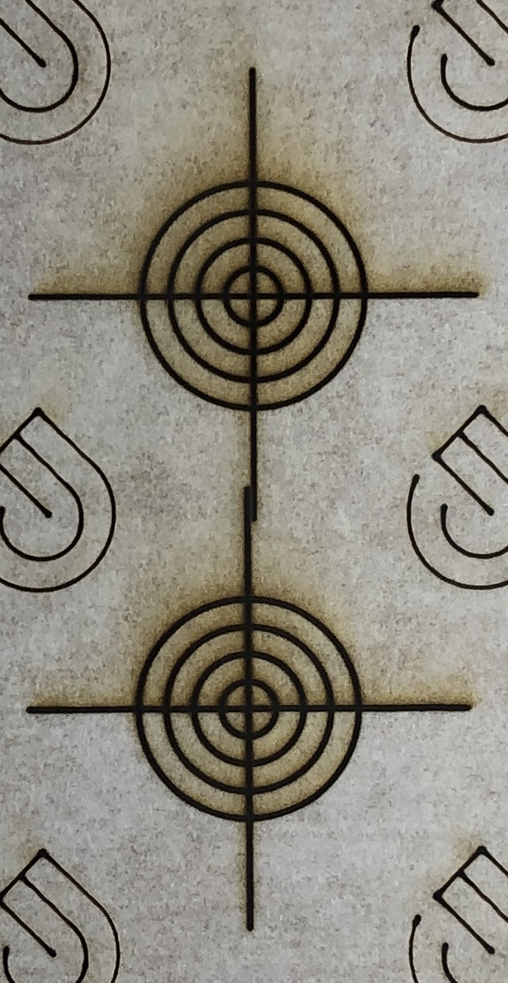
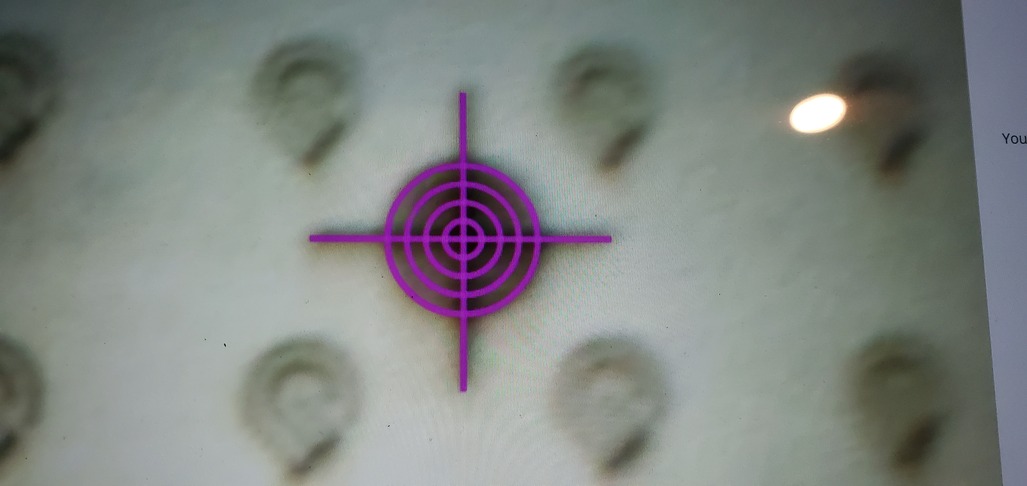
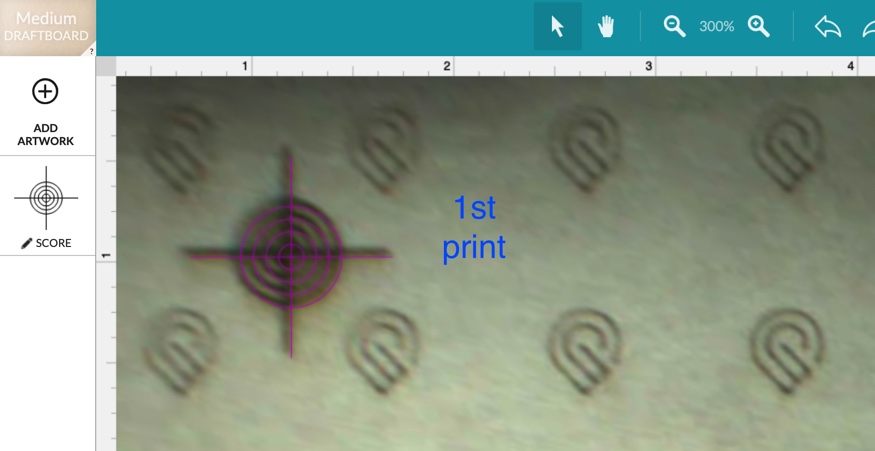
So it has been awhile, but I just had to get excited about finally getting precision back.
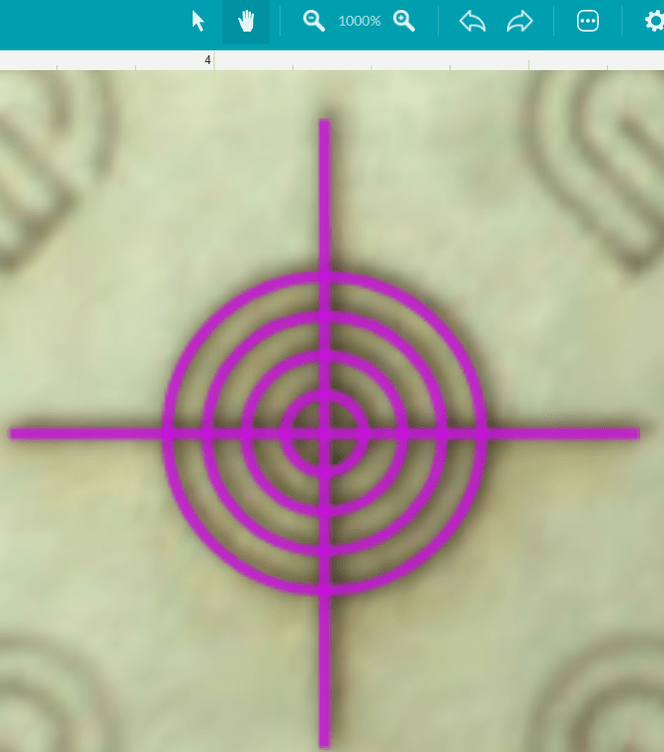
Ran the test (as per the instructions) and check the accuracy in the upper left hand corner with the target.svg. WOW!!! Look at this at 1000% magnification:
But as with any MythBusters groupie, I just had to push Koptis to his limit.
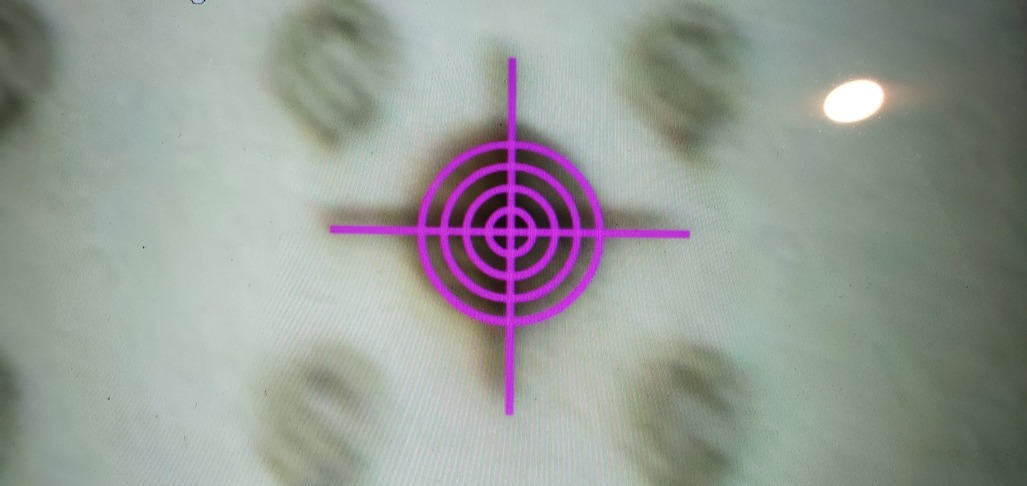
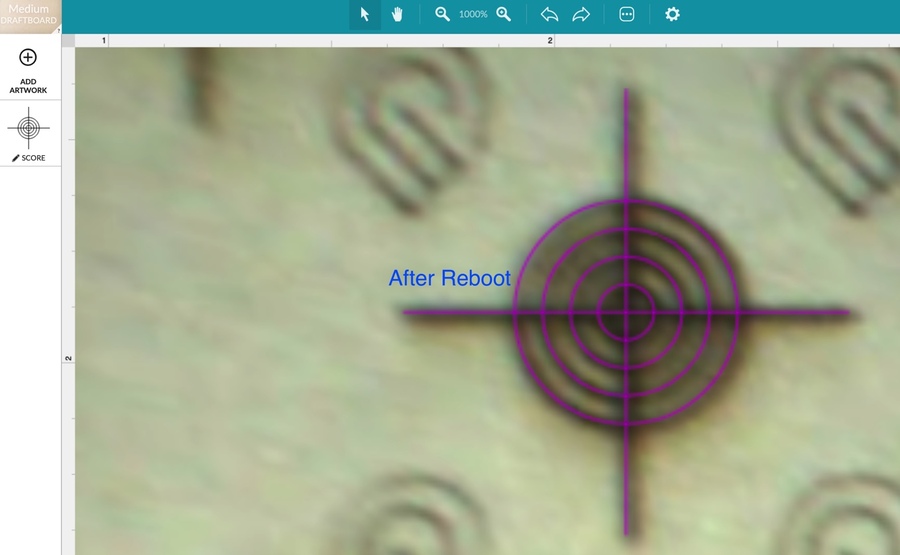
This required putting 2 targets at nearly opposite ends of the material and set the focus on the left target. Pushed the magic button and UH-OH!???!? The left target looked good
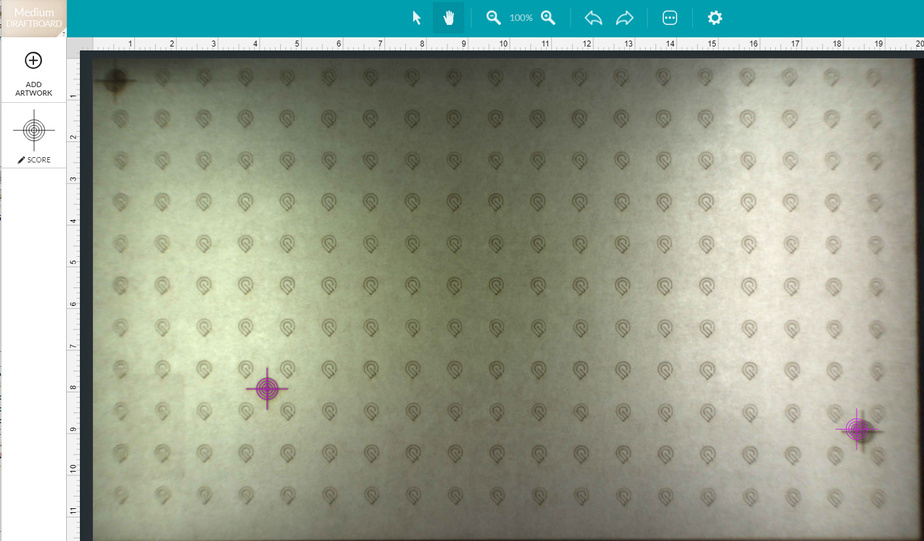
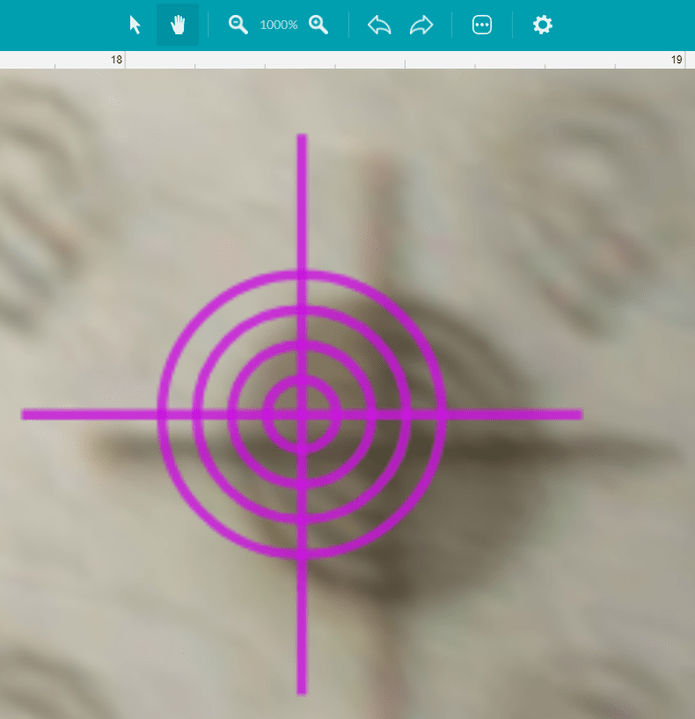
but the right target looked like this (1000 Zoom):
Crap! It must not of worked.
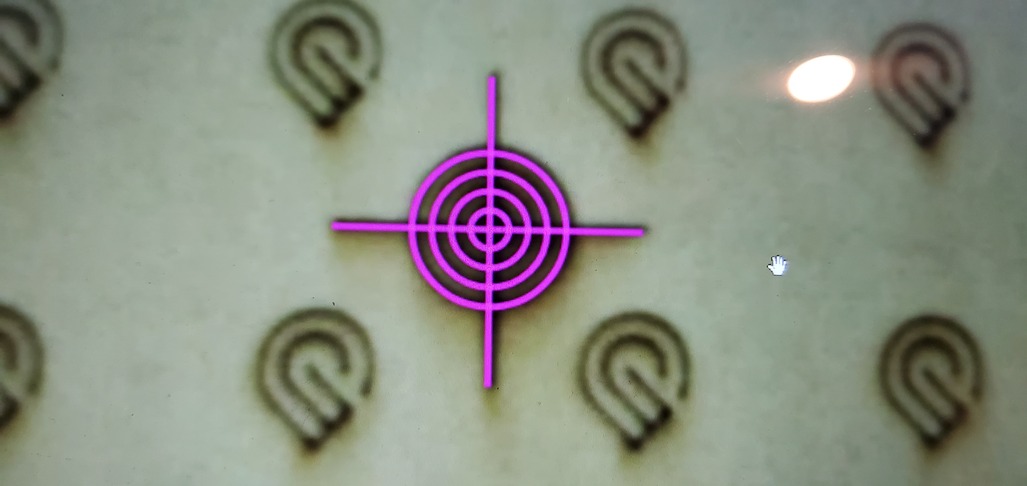
After the initial let down, I realized that the Set Focus was on the left target. Hmmmm ![]() So I decided to do the Set Focus on the right target which did bring the pink image in better alignment, but moved the left target off a bit.
So I decided to do the Set Focus on the right target which did bring the pink image in better alignment, but moved the left target off a bit.
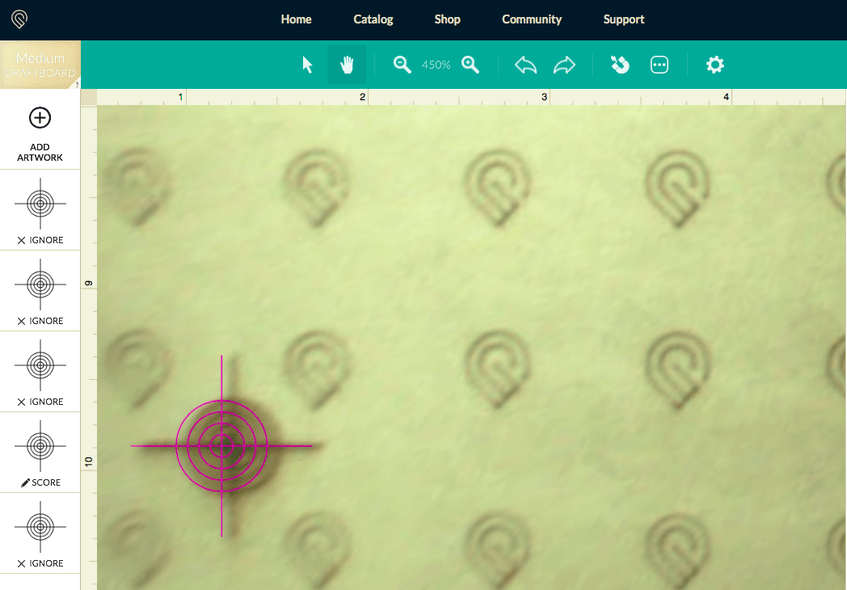
I grouped the 2 targets together and with the Set Focus still on the right target, moved them up (trying to stack the right target on top of the tip of the previous print). Pressed the magic button and got this:

The good news is that the actual print looks like this:
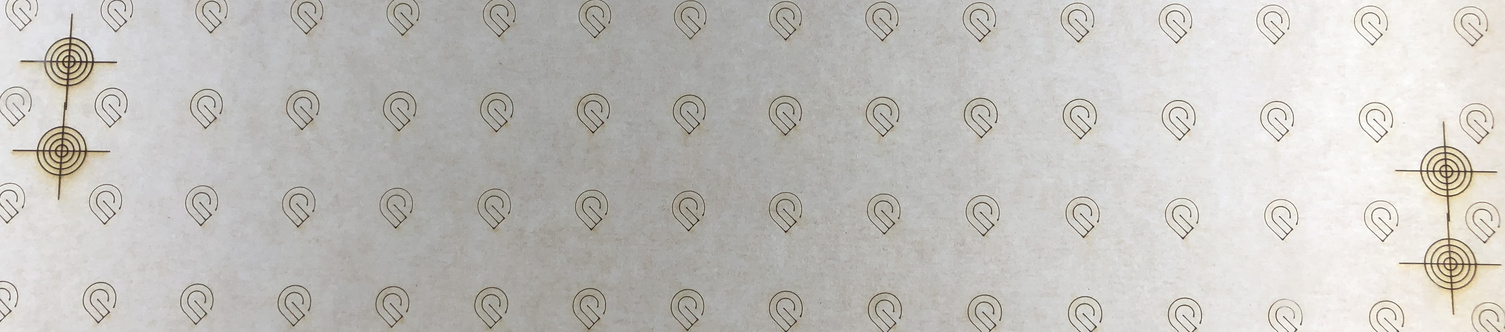
Details (Left)
Details (Right - the tilt is my camera not the GF ![]() )
)

So over all, make sure to use the Set Focus and you will get incredible accuracy.
9 Likes
Yeah, set focus is pretty critical and you can set it multiple times to position different objects.
5 Likes
@vee
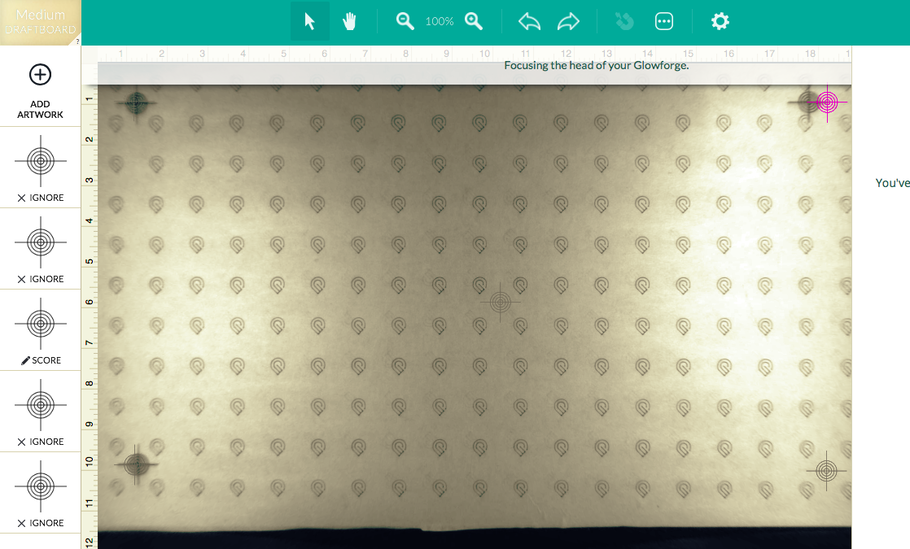
I re-ran the calibration starting at 4:53 PM EST. I got much better results on top Left, top right and center. Bottom Left and bottom Right are still off about 1/16" which I consider pretty good.
I did run into an issue that the team needs to be aware of: I used the new set focus tool on all of the accuracy tests. When I used them on the right side targets the head hit the right side of the machine resulting in lost steps on the stepper and a large error in placement. Even though the placement of the right side targets was inside the outer right GF symbols printed on the calibration sheet.
2 Likes
A word of warning on this: the actual focus is going to be for the last set focus you used. So, if your material is warped, things will be located correctly, but the laser focus will likely be off.
5 Likes
In the center of the upper left Target.
-
Yes it only happened after the calibration
-
May 6, in the evening…i’m not sure of the exact time…8pm ish?
-
Today May 7th around 10am
Hi there. You are spot on. Once I rebooted again, it worked like a charm. I tested in 5 different locations and it was very very good. Thank you. Now to test on something else. Thank you all for your support.
6 Likes
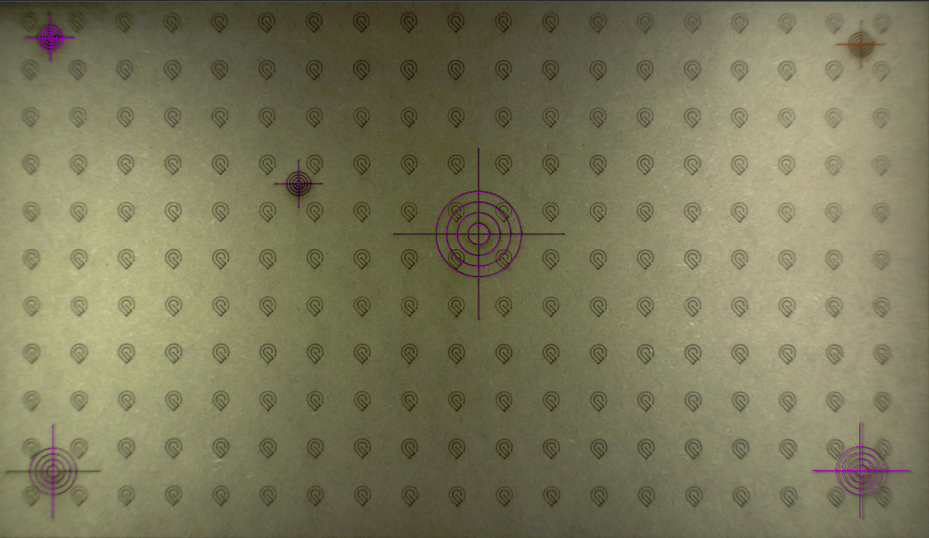
I’d say this came out pretty well! All were pretty dead on except for the bottom right.
Top left.
Top Right
Bottom Right…slightly off.
Bottom Left.

Center.
8 Likes
I feel like this was a success! The first test was off so I rebooted my forge and wallah.!
Great Job GF team!!
Can ya send me a credit for a piece of MDB? @dan ![]()
2 Likes
this is great. nice improvement.
3 Likes
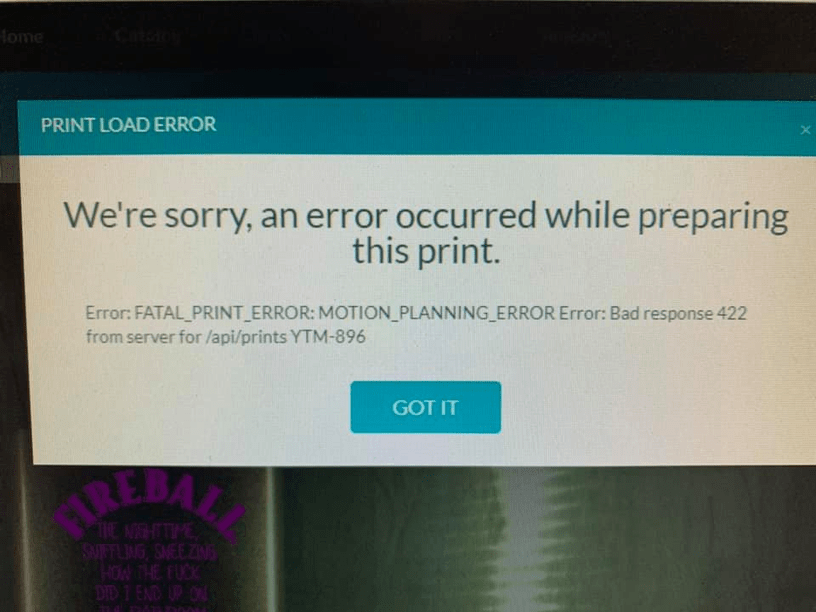
Anyone else getting a “The process was interrupted, so no changes were made to your calibration.” message when it gets to the picture part? I’ve tried to run it twice now with no success. Help!
Just did this one and it works fantastically! It’s a whole new machine now! Thank you so much to all those wonderful Glowforge people working tirelessly on making this a reality!
7 Likes
2 failed calibrations now. Every single corner out of focus. I posted a screenshot this morning, and I tried again just now with the same results. Pull my logs please? Tell me what you see that I’m not seeing?
Looks like the 3rd time was the charm. Pulled the power cord for 30 seconds. got ANOTHER piece of board (my last that I have… please credit my account for 3 draft boards please!) I cleared my browser cache and cookies. Then started the test again. Worked this time.
1 Like
So I did it and alignment is so much better. Maybe <1mm off the targets. However it’s on all points of the board. It’s not enough for me to recalibrate again and waste wood until I need dead on alignment without tolerance.
Is there any reason why we cannot reuse the original calibration piece? I get I could remask it and do it over but why couldn’t use the original one?
1 Like
Exact positioning required.
1 Like
okay! After thinking about it, I realize that material movement would make the test piece unusable. I actually took the test piece out thinking it could be reused and scored the target on scrap daftboard. The fact that it was <1mm off is still amazing. I’ll have to redo calibration again later this week but so happy with the results
1 Like
The calibration was quite good, then something changed and it was off by a lot to the left. Front/back calibration is consistent.
Here is the first calibration test with a new piece of material. The target is in the upper left, magnification is 50%:
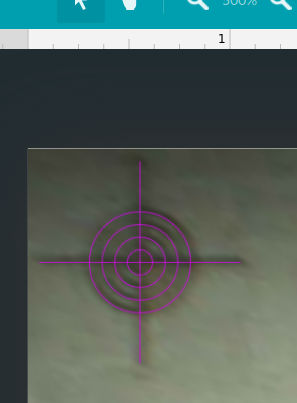
Quite good and not complaints here.
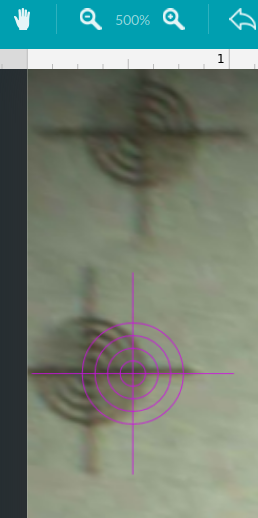
So then I moved the target to the right, upper corner. The results were not as good, again 500% magnification:

It is off about 0.25"
Moved the target back to the left, again at 500% magnification
Now the left side is off about the same as the right.
I did not physically move anything in the glowforge.
A ventilation fan and an ultrasonic cleaner were running during the right side image and the second left side image, which may have not been running when I did the calibration. These devices should have no affect upon te digital electronic of the glowforge. I just thought that I should mention it.
Any suggestions as to what the problem may be?
Is your material flat? Are you using set focus?
1 Like