Yeah, it really didn’t seem like 5 hours! Time flies when you’re having fun. ![]()
Well, I tried to resist saying it, but the Glowforge really is bigger in person. And this is coming from someone who already owns a laser cutter with a very similar width as the Glowforge (within 1 inch). And it really is a sleek lookin’ machine; it looks better in person as well, IMO.
So… let’s see, what did we do that whole time? I guess if I was a better planner I would have made up a list of things I would like to see done on a Glowforge before I got there. Instead, I basically grabbed a bunch of random laser-related objects that were within my reach while I headed out the door.
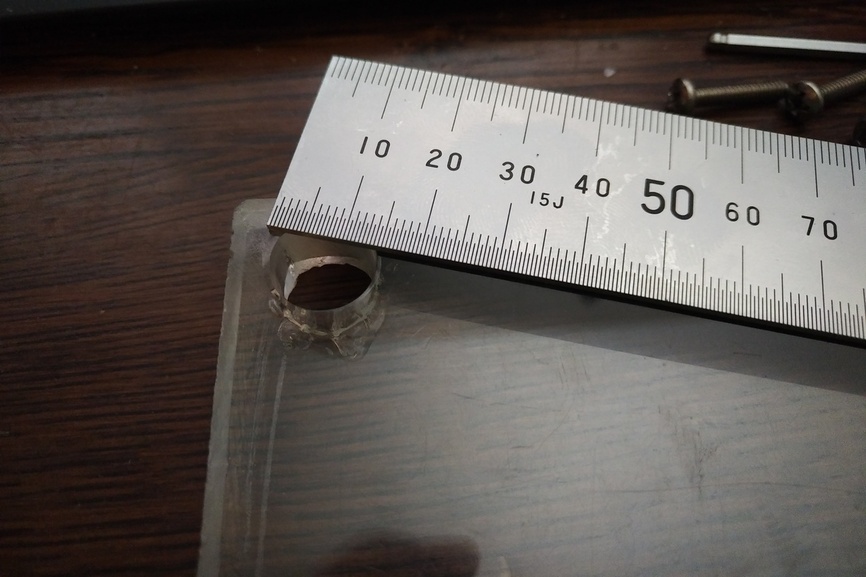
A couple of the things I grabbed were two thick pieces of acrylic that I’ve been kicking around for several years (5 maybe). One of them was about 11.5mm (~29/64") thick and the other was 18mm (~45/64"). After messing around with some kerf-gauging squares for a while (which I mis-remembered how to make) we decided to put the 11.5mm piece in there, just to see what would happen. Not wanting to waste too much time, we cranked the power all the way up and turned the speed all the way down (100% / 4 IPM) and loaded up a small circle to do a test cut. We were surprised/disappointed to see that we couldn’t turn the speed to anything lower than 4 IPM. Oh, we also set it to do 2 passes. We sent the job to Glowforge and waited to hit the print button. To both of our surprise, it cut through on the first pass! It looked like it was making a pretty darn nice lookin’ cut too! Of course, it then continued on to the second pass which seemed to do little other than mark up the bottom with flashback. The small plug of acrylic sorta melted/solidified into the hole so it didn’t drop free after the cut was finished but it didn’t take too much to push it out.
Here’s a pic of the top of the hole.
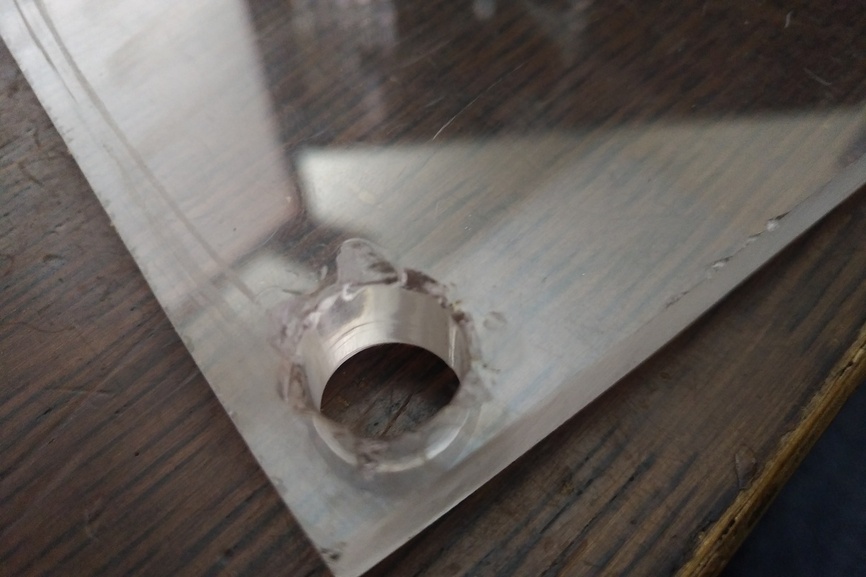
And one of the bottom (with the flashback). I suspect this would have looked nearly as good as the top if it weren’t for that second pass.
So, hot on the heals of that success, we decided to go right to the 18mm stuff. Of course, this necessitated taking out the crumb tray and we used some hardboard scraps to lift it high enough so that it was in the focus range of the laser. We put a tile underneath to try to curb any flashback. Not wanting to only do a circle again, we scrambled to come up with a vector file that @chevalier_jeanpaul had on-hand already. Why not… a Glowforge logo?! We loaded it up and used the same settings as before (most powerful, slowest speed (100/4) with two passes). Once again, to our surprise, it seemed like it was cutting all the way through on the first pass. This time the cut quality was definitely suffering though. Curved striations, the ones that are indicative of the head moving too fast) were very apparent toward the bottom of the cut. Nevertheless, we let it continue. Pass 1 finished and pass 2 started. When it finished, the area around the cut was definitely pretty hot and the “G” was stuck in there pretty good from the melting/solidifying like we saw with the circular plug. With enough fiddling and pressing it did eventually come out. The edge quality definitely could have been better, but nobody ever said it would cut ~3/4" acrylic so even I can’t complain too much about that.
Pretty pleased with our relative success, we decided to cut out a big one to use up most of the rest of that piece of acrylic. The theory was that the thicker sections of the larger piece would hold up the heat better and possibly not melt/solidify as much. In an additional attempt to make it easier to get the “G” out of the stock, we also broke up some of the internal sections with some extra lines, one of which spanned the gap between the point of the round part of the “G” with the square part of the “G”. Something like this…
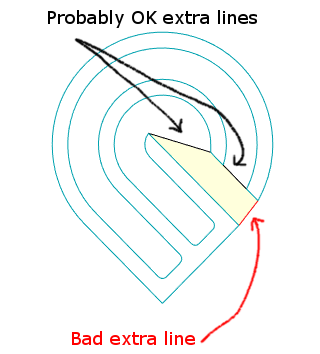
I decided these extra lines should be cut first - that was a mistake. The Glowforge dutifully cut the “helping” lines first and then went on to do the “G” shape. The first pass finished and the second pass started lasing around the outside perimeter for the second time and once it reached that “bad” line, the “G” fell onto the tile that we put in earlier. We managed to lift it back up, through the teardrop-shaped hole left in the material, and rested it down onto a couple more pieces of stacked hardboard. Without much to lose at this point we fired the job back up in the hopes that we hadn’t shifted anything. I guess we did a pretty good job because this “second and a half” pass seemed to trace over the original(s) pretty accurately. Unfortunately, the hardboard we stuck under the partially cut logo ended up discoloring the bottom when the laser passed through those areas.
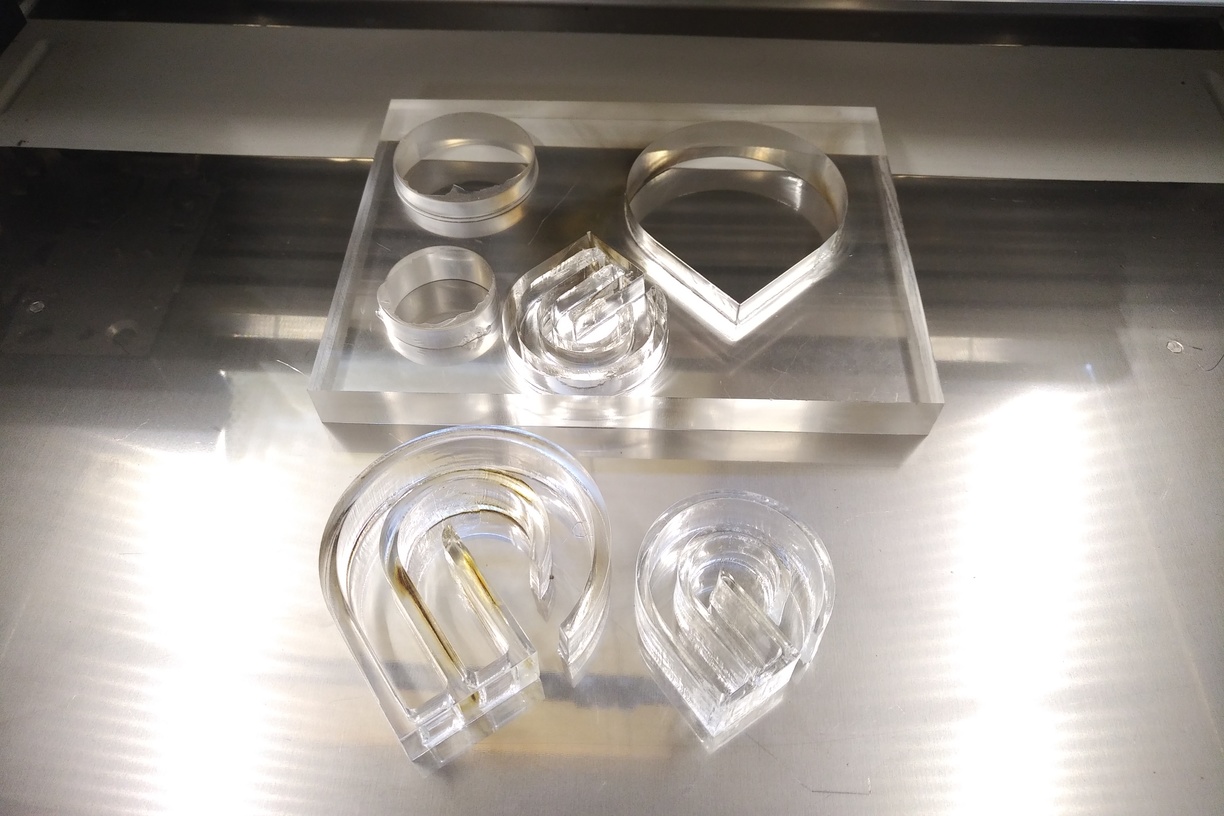
Here’s the two "G"s sitting on the floor of the Lumosforge, with the stock behind them. Check out how much that thick stuff refracts the edge of the metal plate!
Another angle…
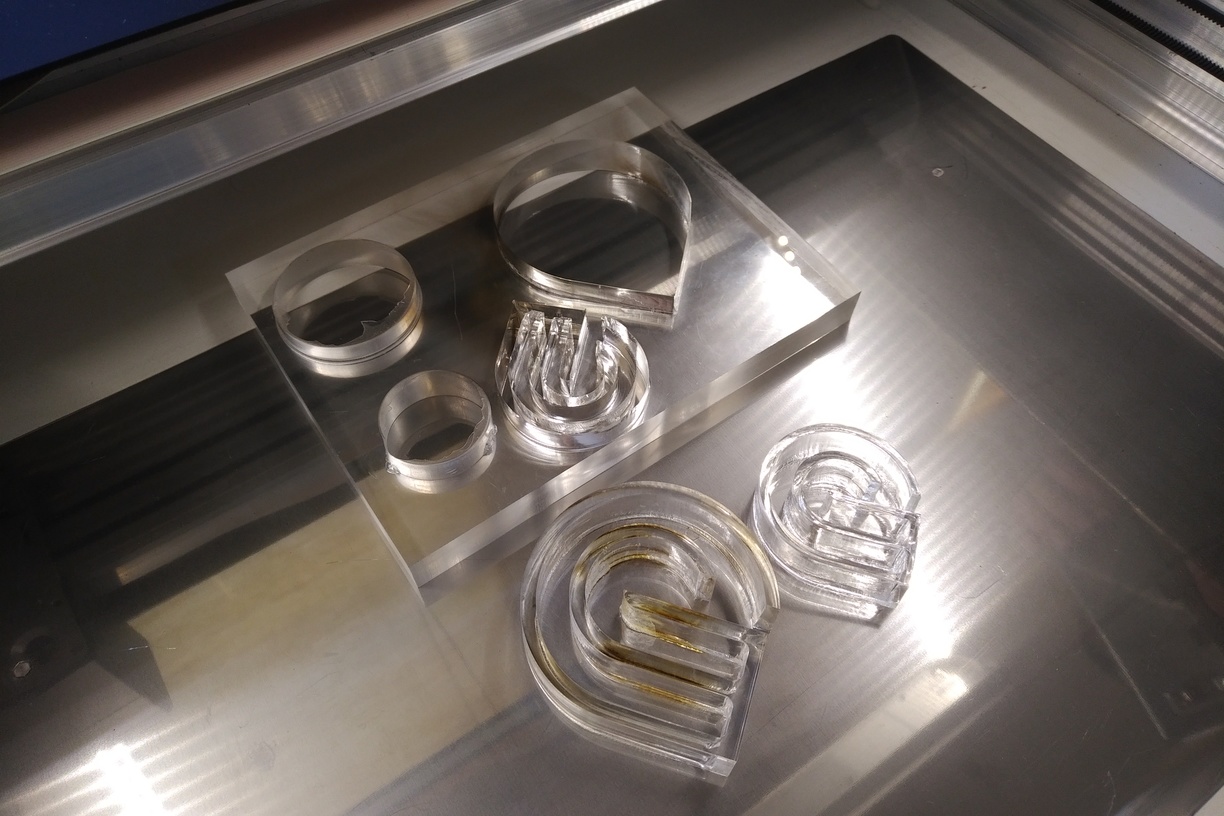
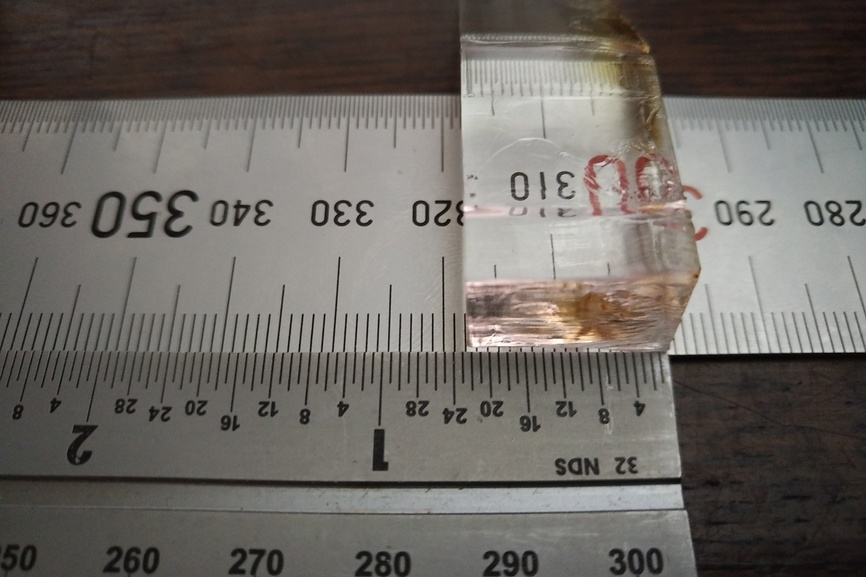
And here’s one of the middle pieces (tinted yellow in the non-photo image above) with a couple rulers for scale.
Anywho, this post is long enough. We did some other stuff too, but this post is already pretty wordy as it is.