I need to make large snowflakes for our school Christmas concert. I am having trouble figuring out or finding a way to do this using two whole pieces of product constructed together to make one large snowflake. Please help!! I am not exactly tech friendly, layman as much as possible.
1 Like
So typically you break the large piece apart and make “puzzle pieces” to join them together, with maybe glue or supporting material behind the joint.
The specifics of exactly how to do it are a little hard to talk about without knowing more about your project. Can you give a bit more context or maybe some pics?
How big is “big”? Will they be painted? Will anyone see the back? Are they going to be hung, and if so from above like from the ceiling or more like on a wall?
How much time do you have to spend on it? How much budget for materials?
All of this might matter when you are planning this sort of thing out.
5 Likes
They gave me a foam board and 5 days. Any snowflake that can be put together with 2 pieces of board, each piece before the cut will measures 11X14. They will be left white and hung on walls. No one will see the back. Puzzle pieces would work, how do you do that using two pieces of material?
2 Likes
We could go down that path, but you’re short on time. If you upload your snowflake here I can probably do it for you in less time than it would take to explain it.
The basic gist is: use whatever vector program you are familiar with to break the path apart, then add shapes that interlock (like a jigsaw puzzle or something) so that the pieces align properly when you assemble it.
Advanced butt joints are cool but you’re looking for functionality so a simple shape would work.
If it were me, I’d probably cut a shape to go behind it so you can glue the backer piece over the seam and make is stronger. Upload the svg if you can and I can wrangle it for you, it’ll all make more sense if you see what I mean.
4 Likes
Any snowflake would work. At the risk of sounding like I don’t know what I’m doing, I don’t know what I’m doing. I can do basics from photos and clip art. The glowforge is a new thing at our school this year and I have been thrown to the wolves to figure it out. I understand what you are saying about breaking the path and creating pieces, I’m just not sure how to get an SVG file on my end. I am so sorry!! Thank you for your patience.


5 Likes
OK so I went to my favorite snowflake generator:
It can save as SVG. I made one that looks like yours, and I’ll split it up for you, just a sec.
7 Likes
OK so:
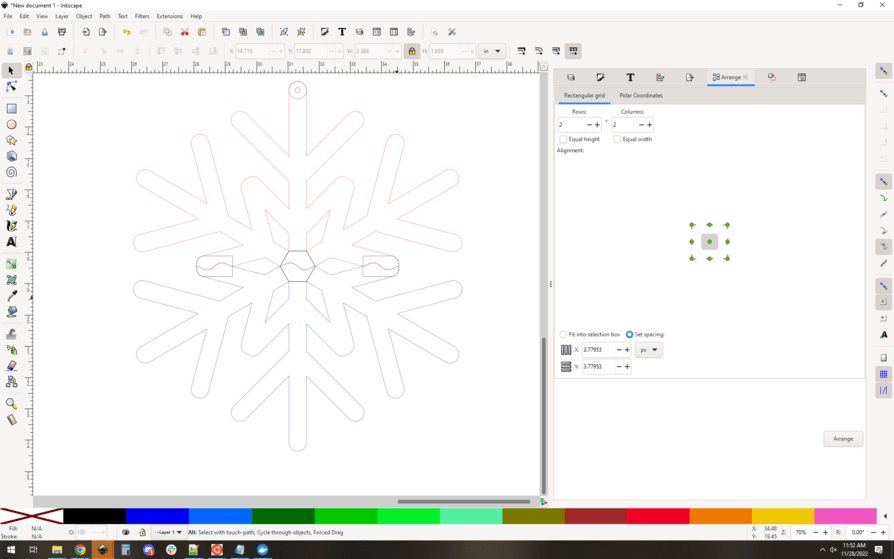
Make the snowflake on that site, import the svg into inkscape.
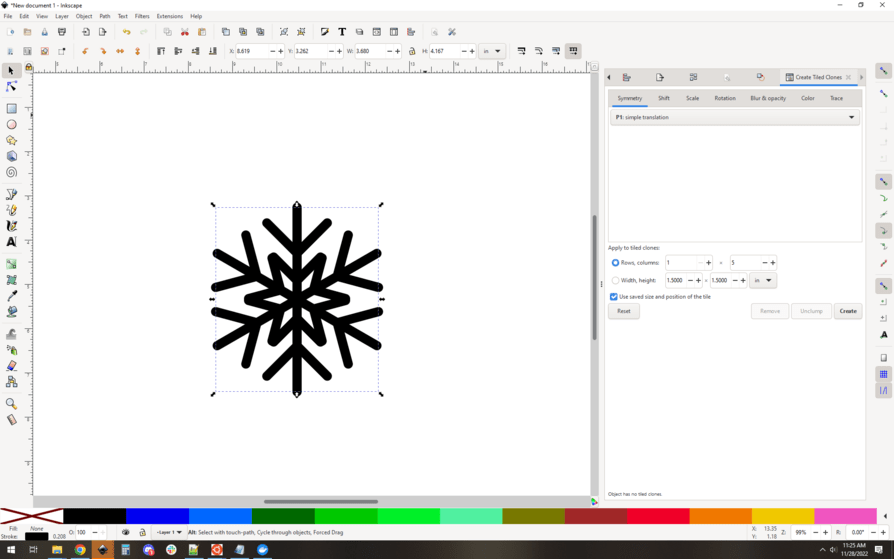
Do a few things (convert stroke to path, union, etc. Things you will want to learn at some point, core skills with SVGs)
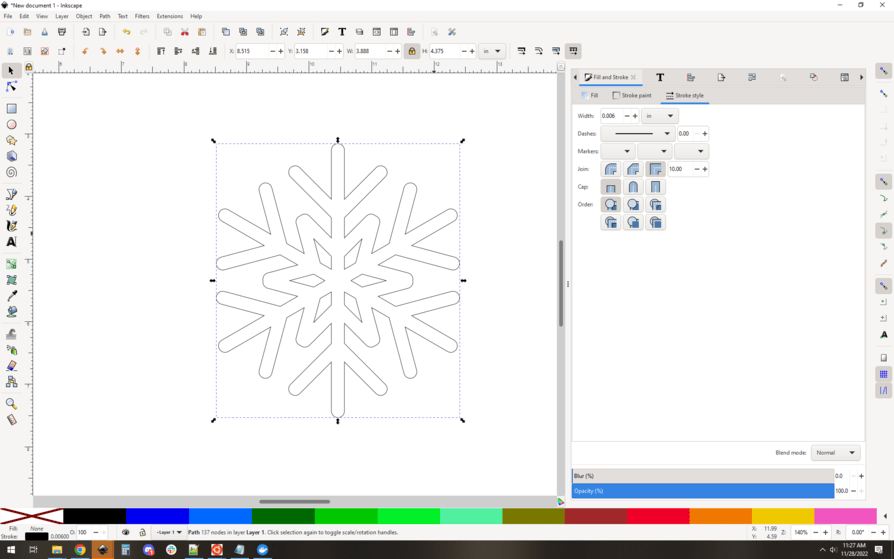
Break it in half:
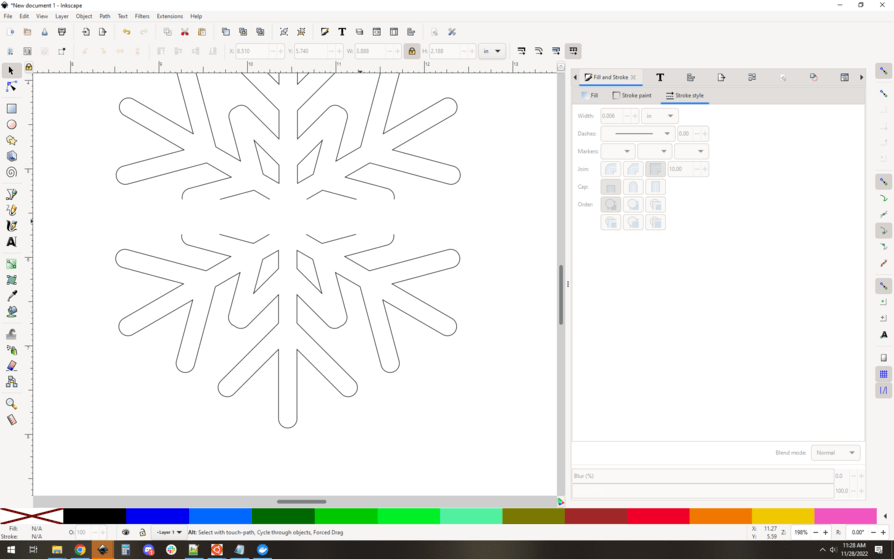
Make some sort of visually pleasing joints that “lock together”. In this case, I went with “align” more than lock. I also took the liberty of adding a hanging hole (optional). I color coded it separately so you can ignore the hole if you want.
You can see how this pieces will mate together nicely and keep you aligned properly.
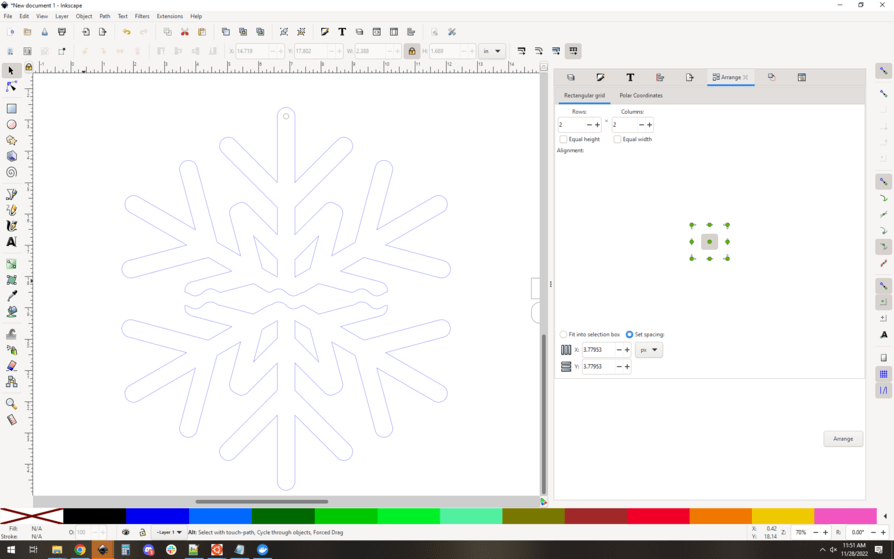
Make some shapes that will fit behind those joints so you can glue to the backing bits and get a strong joint/hole:

When assembling, it’ll look something like this, color coded for clarity:
I might cut out extra circles and glue them at the end of each of the six points to make “feet” (standoffs) so that the whole thing sits against the wall properly, but that’s optional.
Here’s the SVG, and I organized it so it will fit on two of your 11x14 sheets. The final dimensions of the whole flake are limited by the 11x14 material. The final sizeis 13.5 wide by 15.190 tall. I could have pushed it to 14 wide, but it’s a pain to align it so precisely, so I backed off and did 13.5, which makes it les likely that you’ll cut off the edge of your foamboard.[1]

heck I could have gone bigger by using the diagonals of the 11x14 sheets, but that’s a bit of a pain to do unless you really need it bigger. I bet you could get it to closer to 16" wide that way. ↩︎
9 Likes
As an aside, foamcore can be a bit tricky to work with. Settings are hard to figure out, and the foam shrinks away from the edges, especially if you overpower it. You might want to read a bit of these:
https://community.glowforge.com/search?q=foamcore%20settings
This seemed important enough to warrant a separate reply ![]() Have fun, I hope the design works for you!
Have fun, I hope the design works for you!
9 Likes
@evansd2 is da bomb!
9 Likes
Oh also, there’s no reason why your backing material on the joints has to be foamcore. I would be tempted to use posterboard or something… it’ll give you plenty of strength and be far slimmer than the foamcore. Clear acrylic would be interesting too, hard to see and really strong… but gluing to it is tougher. I dunno, you have options ![]()
4 Likes
Agreed - I would use chipboard, but I have a huge stack of three different colors, and save scraps that might be useful. Outside the US, some refer to MDF as chipboard, but the stuff I’m referring to is like heavier cardboard, a about 2-3 thicker than a soda can box or beer caddy.
4 Likes
I cannot thank you enough for all of your help and patience!!! Really saved my bacon with this project and the ones to come.
5 Likes
This topic was automatically closed 32 days after the last reply. New replies are no longer allowed.