For 2.5 years, as I waited not-so-patiently to finally receive my GF (which is, as yet, unnamed, making me feel like a poor excuse for an owner when I read all the cool names other people have given theirs!) I have planned to engrave my MBP with it. I envisioned decorating it with a beautiful mandala design, fantasizing about the glowing apple peeking out through its center. I was like MLK – I had a dream!
So when it finally actually arrived and was, at long last, up and running, I eagerly began browsing my accumulated collection of public domain mandala designs, in between obsessively cruising the Intarwebs in case someone might have posted a better one in the past 5 minutes, and spent endless hours trying to narrow down the selection to just a few favorites. (I’m BAD at choosing favorites. I can’t even settle on one favorite color, or food, or activity, so picking semi-permanent things that I think I will probably still like a week from now is a challenge!)
I figuratively (because I’m a psych NP and know how bad the real thing is for brains!) banged my head on the desk multiple times as I began working through the early growing pains of learning Inkscape, spent hours repeatedly crashing the software trying to make complex bitmaps into vectors and then destroying them in the process of trying to fit them within the rectangle of the MBP template and chop off the overlapping bits without using masks, and then doing test runs on cardboard only to find they weren’t good enough to satisfy me.
At some point in there I totally chickened out of trying to engrave directly on the MBP, and decided I’d do a skin instead, using my one precious piece of walnut veneer proofgrade.
Then, despite the time and energy I had invested up to that point, I suddenly just impulsively tossed out all of the mandala designs I had hoarded and modified and cropped and colored, and bought one on Etsy.
It still required a lot of Inkscape work to get it simplified, sized, cropped, and shaded the way I wanted, but then, at long last, I was ready for its test run. The cardboard prototype, however, sent me back to Inkscape to do some more advanced shading work. I liked it, but it just felt like it was missing something, specifically, another shade of fill besides “etched” and “not etched.”
So then I got to learn how to “rasterize” a vector by exporting it to PNG and then importing it back in, which seems like a lot of work, but it IS free software, after all…AND, learning new things grows new neurons. and due to my afore-mentioned career specialty, I happen to know that when it comes to brains, the more you have to lose, the longer it takes to lose it, so at fiftycough years old, I shouldn’t be cranky at being pushed to learn stuff, since it helps me extend my cognitively functional potential, and every little bit helps! ![]() (Hey, @dan! New marketing spin! Glowforge can help to prevent cognitive decline!)
(Hey, @dan! New marketing spin! Glowforge can help to prevent cognitive decline!)
Finally I had my three-color greyscale raster the way I thought I wanted it, managed to get everything combined in a way that GF would import and split up correctly, and sat back to wait while it printed at 2/3 scale (because I really didn’t want to wait any longer than I absolutely had to!) on cardboard, just to make sure I had things working the way I wanted.
While I was waiting, I fretted about whether the design would engrave well on walnut, and tried to find some good images of bitmap engraving on walnut veneer, and couldn’t turn up anything that really gave me a lot of confidence…ugh.
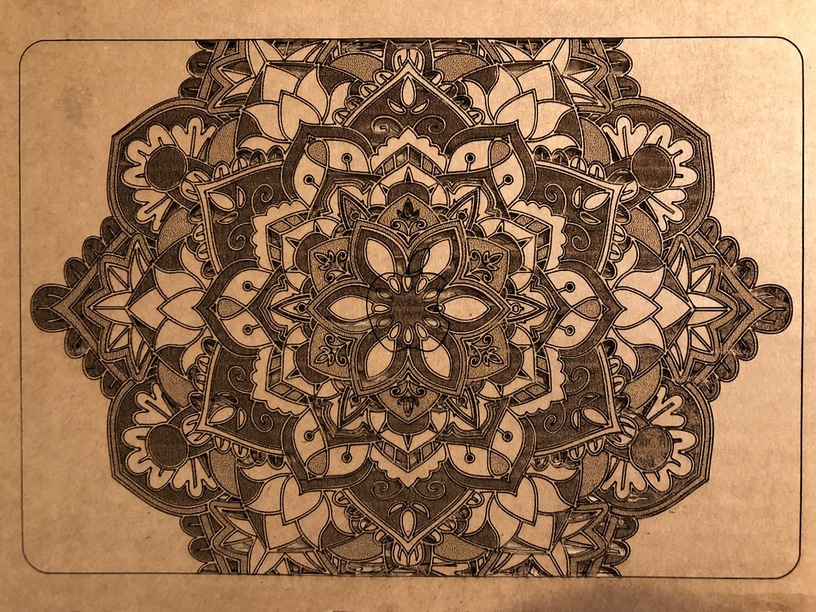
The 2/3 scale cardboard image was utterly gorgeous:
I loaded in the full-sized design and got ready to finally, at long last, print my MBP skin!!! But I was still concerned about my lack of experience with walnut, and worried that the dark design wouldn’t come out as well on dark wood, and so in a sudden rush of last-minute nerves, I pulled out the walnut veneer I had already carefully taped down in the GF, and replaced it with maple veneer, because I’ve done enough with maple that I could predict–well, mostly–how it would look.
Right about then the GFUI informed me, after having pondered the issue for a VERY long time, that my latest modification was too big to process and needed to be chopped into parts.
NOOOOOOOOO!!!
I was panicky enough about the whole thing already, without the added worry of how to make sure the intricate design would really line up, given the veneer’s propensity for curling and the amount of tape I was already using to hold it in place (it had already been in a flat stack for weeks, so there was nothing more that could be done to make it any flatter. Except the giant rare earth magnets that I haven’t ordered yet, but I didn’t want to wait for those!).
So, that’s when I went back to the drawing board and fit it to my iPad instead. Unfortunately, the iPad templates I found didn’t actually fit very well, which meant a few hours of printing and adjusting and reprinting and readjusting until I got things lined up.
The size reduction to iPad was (thank goodness!) enough to make the GFUI happy with it. After 3+ hours of print time, and a couple of repeat engraves on the text, which came out really light using the default proofgrade settings, it was ready for weeding!
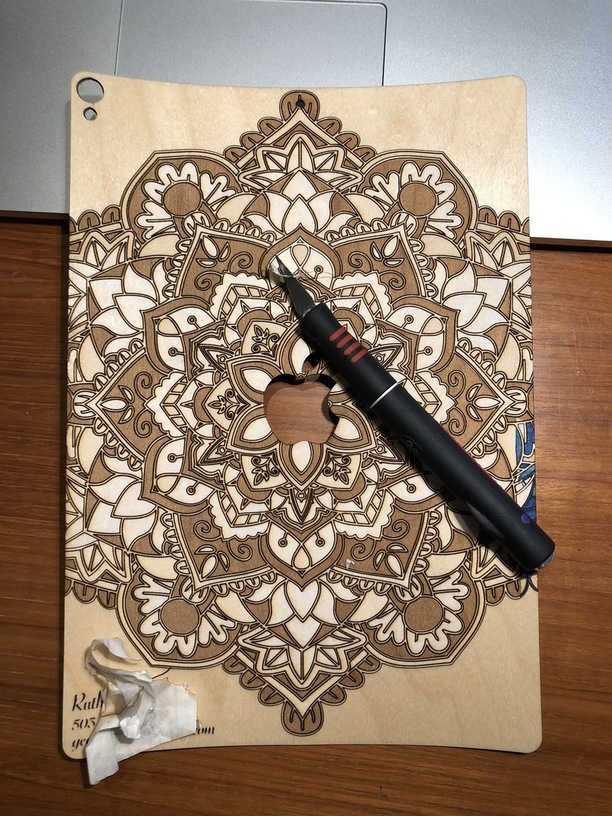
It didn’t want to lie there nicely on my desk while I worked on that, so I went ahead and stuck it on my iPad. Dang, that 3M sticky stuff is STRONG! Once it touches down, it ain’t coming back up, no way no how. So it’s a teensy bit crooked, but I’m really just kind of relieved to have had it lined up as well as I did before it latched on.
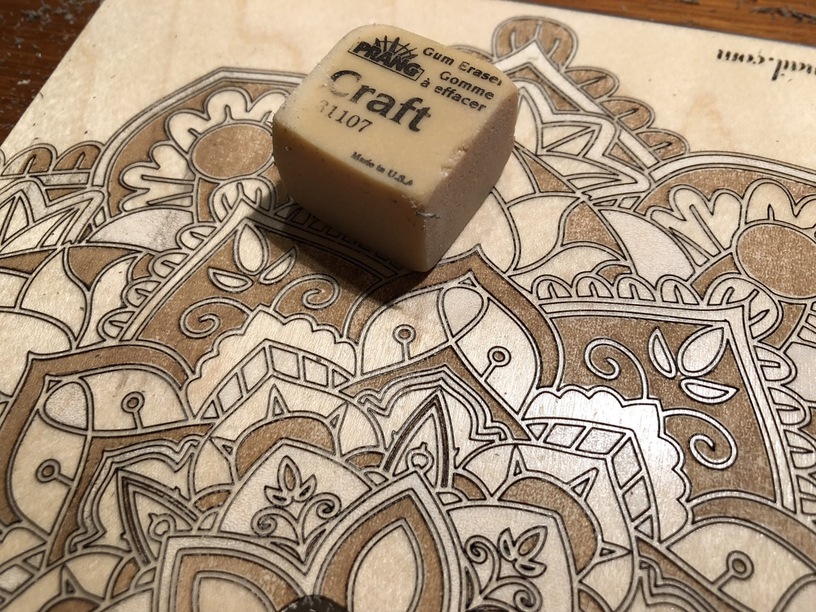
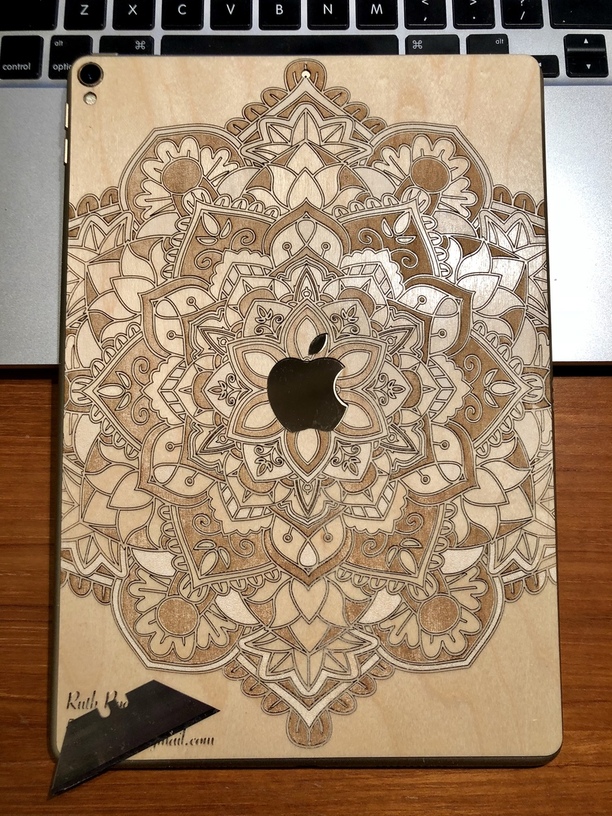
The weeding was pretty tedious, and it turns out the middle shade of gray I chose was just enough to eat off the paper and leave the gooey part of the masking (but not do much more to the surface than slightly alter the shine), and it wasn’t coming off as nicely as it does on the other maple proofgrades (non-veneer) I’ve worked with. I tried alcohol, water, and window cleaner, along with a childhood desk-cleaning trick, globs of rolled up dried rubber cement, to help get off the residue. The rubber cement actually helped more than anything else had, but the real winner was a good old gum eraser. It cleaned up the leftover gummy stuff and burn residue and gave me a good arm workout at the same time. (In the photo, the right side has been cleaned and the left side hasn’t. It’s subtle in the photo, but more obvious IRL!)
I also accidentally overlapped the design onto some of the hold-down tape in the GF, so there’s a little strip on the right side that is missing its colors. Normally this, and the little bit of crookedness, would eventually bug me (after the squee factor over how pretty the design is has worn off!), but hopefully the fact that it’s on the side OTHER people look at, and not the one I look at, will minimize the extent of the emotional trauma it will cause to my inner OCD self.
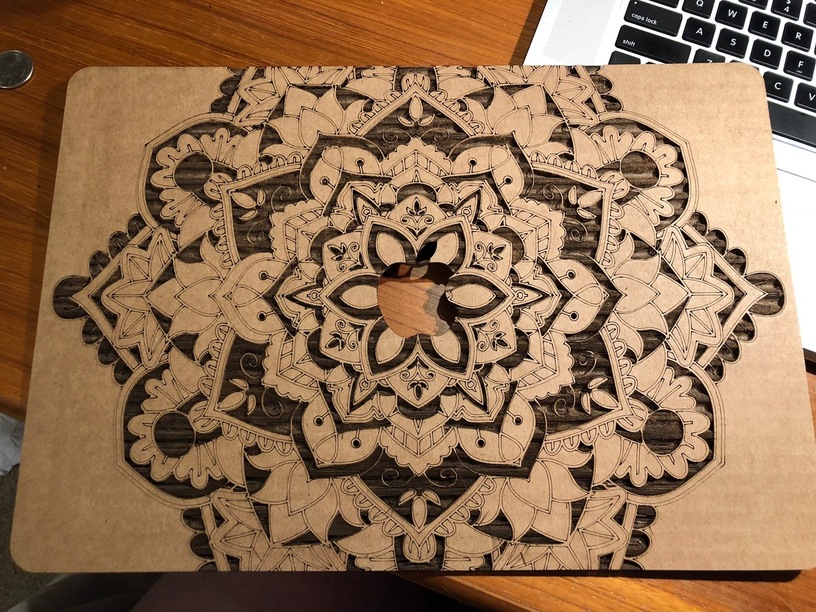
Here’s how it looks all cleaned up, leaning against my (still naked) MBP:
Maybe someday I’ll work up the courage to finally engrave the MBP…but not today!

 I don’t think the veneer would be able to bend enough to actually wrap around, unfortunately.