I’ve only had my Forge for about a week. I made my first prints successfully and 4 other small projects that worked perfectly. My last print was about a 1/4 inch off from what I had lined up but this time it is much worse. In addition to this problem, it did not recognize the QR code for the Proofgrade material. Any advice on how to correct this problem would be greatly appreciated. Thanks!
One of the things that people don’t understand about using this machine at first is that it is critically important for the height of the material to be entered into the Unknown slot at the top of the left column, before you try to place any artwork. (There’s an algorithm that mathematically corrects for the fisheye distortion of the lid camera, and having the wrong number in there will cause your placement to be significantly off.)
Usually, for Proofgrade materials, the camera sees that QR code on the material and the thickness information is included in that code, so it gets filled in for you. But if (for whatever reason) it doesn’t read that code correctly, you can get really bad variances in your placement.
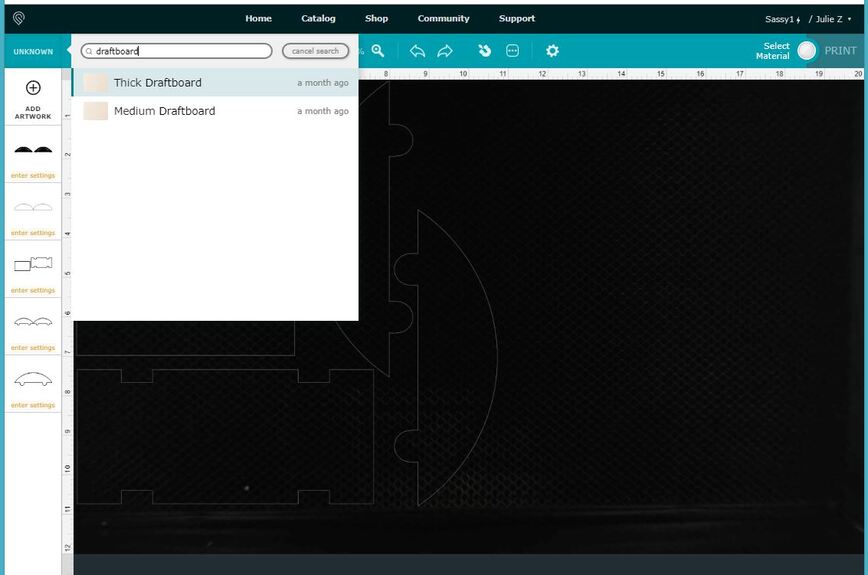
When you have a case of the lid camera not reading the QR code on the material, you can enter the material thickness by clicking on Unknown and use the Search icon there to find the material you are using, then just click on it to enter the correct values. (Just type “draftboard” or “maple” and choose the thickness.) Once you do that, you should get much better placement, and your other settings will be loaded for you as well.
And one other tip…don’t try to cut the design out first and then add artwork to it. Instead, drag your artwork into the design and align it to the cutlines before you try to cut or engrave anything. If you align the artwork to the pink design preview that you see on the screen, before you do any cuts, then the cuts and the engraving will remain correctly aligned relative to each other.
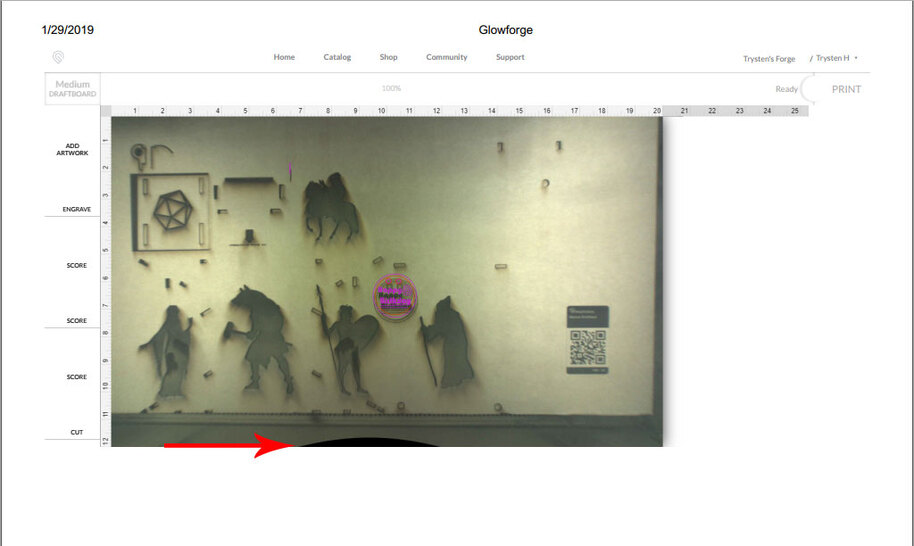
This picture is taken after I canceled the project. I did use the search to mark it as medium draftboard when it was printing. I had read that beginners make that mistake and made sure not to leave it blank when it wouldn’t read the QR code. I made sure the material I used was the same height as others I saw making this design. I’m going to do something really small this morning that and see if it will line up. Something that I’ve done before that worked the first time.
One thing I have noticed during my prints is that sometimes mine are off by a 1/4 inch and others are not. This applies to PG as well as Non-PG material. It ones of those things makes you wonder why…
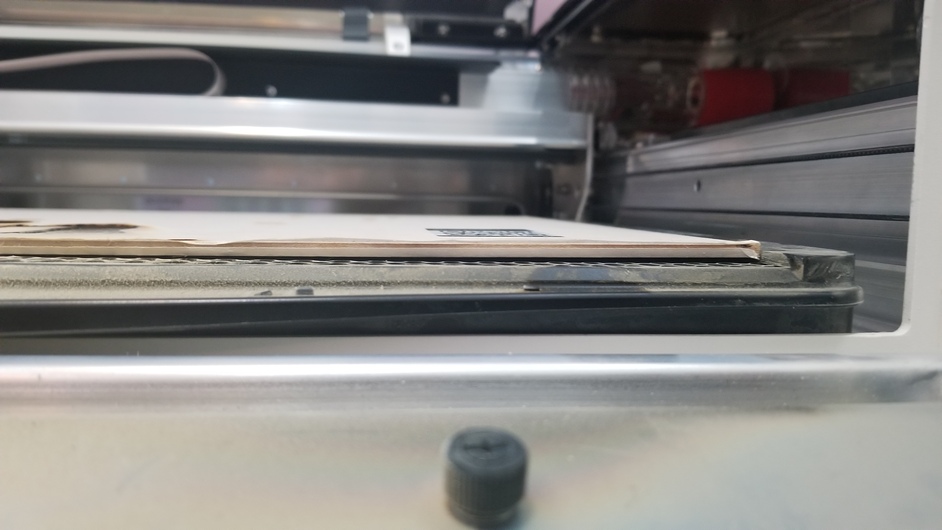
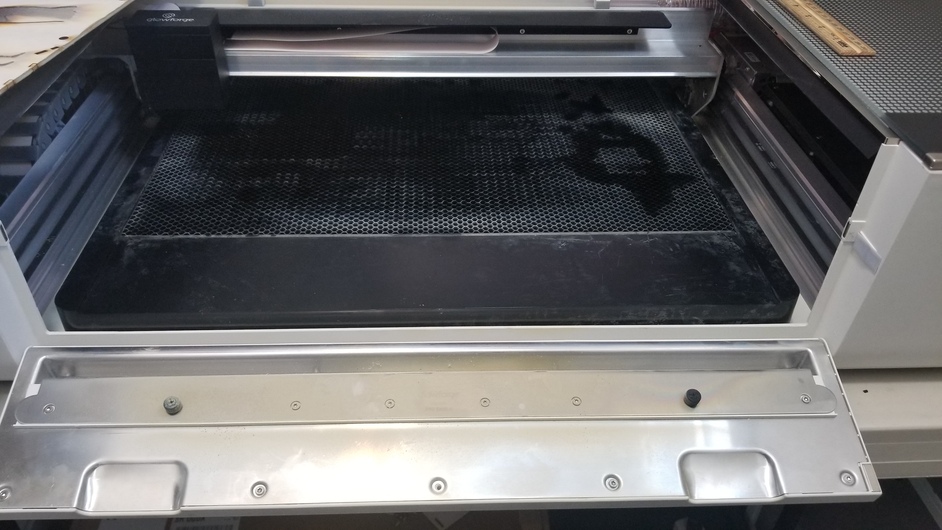
You can check for other physical causes by making sure that the tray is seated down firmly in the dimples in the bottom of the machine (raise the lid, drop down the front panel and slide the tray back and forth a couple of times to make sure the feet are in the dimples), and another thing that you’ll need to check for is the warp on the material.
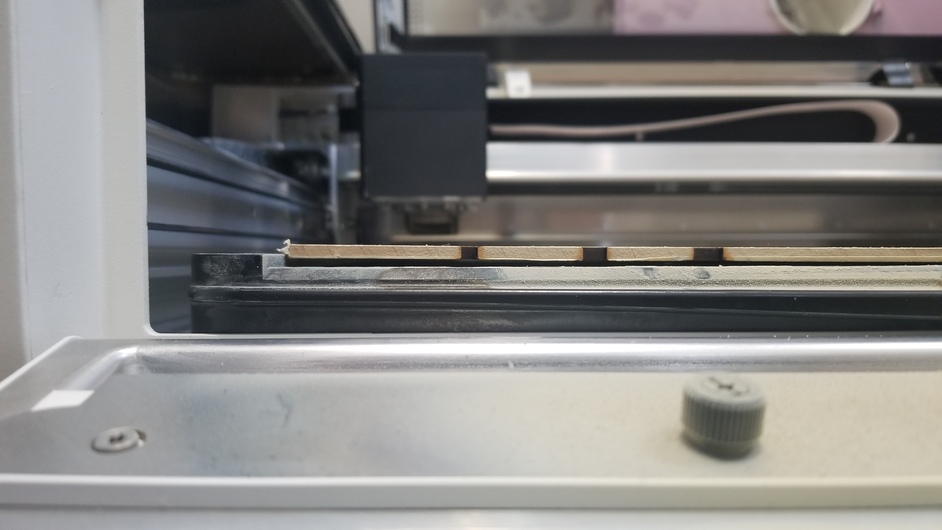
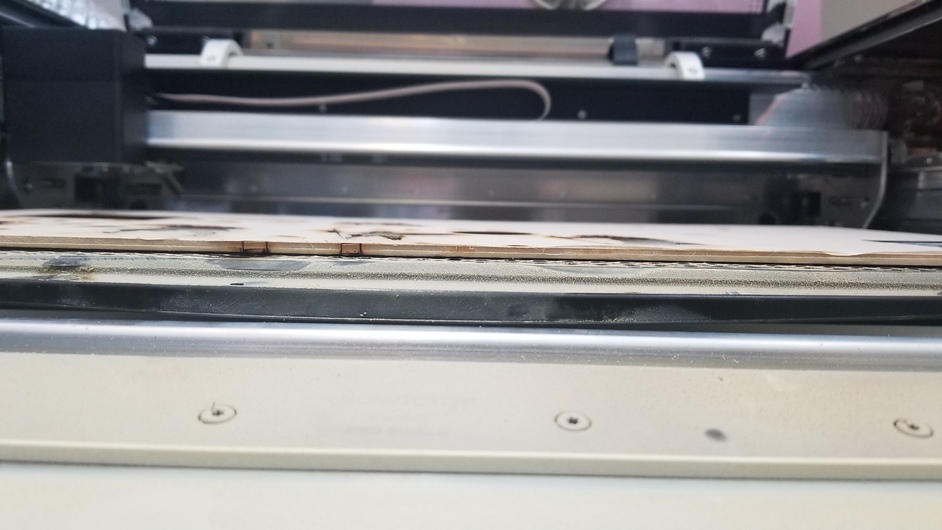
From the actual cutouts and the shadows that they are throwing when the cuts dropped down in your pictures…that material looks like there is some serious warp in it. As little as a mm can make a really big difference in placement, so make sure the material is perfectly flat on the tray. These honeycomb pins are a great item to have in your arsenal, or some people use strong magnets to hold down the material flat.
That black arc at the bottom of your second screenshot looks odd, but it doesn’t hurt to check those other things out as well while you are waiting to hear from support.
As you can see in the photos the board does bow up on the edges. This might be the problem, i’ll have to get some pins and magnets. Also the arch on the bottom is part of the tray. Is it backwards? I switched it around and it still sits in the dimples no matter which way i put it. It looks backwards to me after switching?
It might just be the warp, so try it on a different sheet, tape it down at the edges if it looks a little warped too (all of my stuff warps here) and see if the results are any better.
Im so sad! I made a couple pins to hold down the messed up board from yesterday. When I made the first batch I knew the board was warped so I expected the print to be off, but after pinning the board down I thought it would at least help. It didn’t seem to help. Does anyone else have any other ideas? I’m stumped.
Sorry to hear you’re having troubles with your new Glowforge!
Could you print the Gift of Good Measure design on Medium Draftboard and send a screenshot showing the difference between the artwork placement and the actual cut?
Don’t think that has anything to do with the OP’s issue. I see that arc on mine, when the material height is set between .25" and .5". I think it is a result of the fisheye lens de-warping algorithm. It is smaller at .25, and appears larger as the height is set higher.
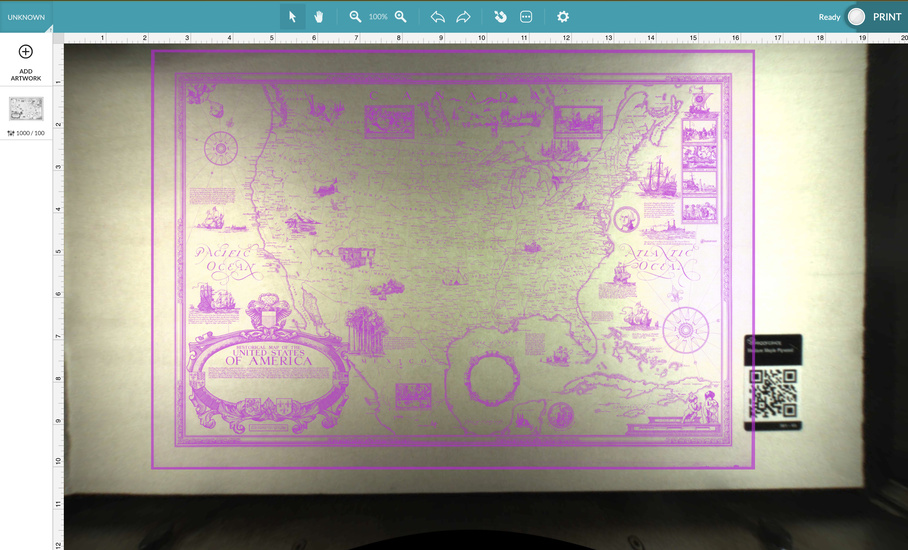
it’s often hidden by the “no-go area” diagonal stripes, and I don’t see it at all using 1/8" material. You can kinda see it in this screenshot (it’s pretty dark), when I set the material height to .5"
Oh yeah…i can see it in that screenshot. (I’ve only done one burn on material thicker than quarter inch, and I wasn’t paying attention then.)
But if that only shows up when the height is set up around half an inch, then the height must be set a lot higher than the medium draftboard setting showing on the OP example. I wonder what focal height is being used for those engrave and score settings?
it may very well show up at different focal heights on individual machines, depending on micro variations in manufacturing/installation of the camera lens, and/or where the lid rests in the closed position. I have noticed that some folks’ cameras give a little more or less view of the inside of the “garage door”, for example, and that not every GF lid closes perfectly level to both sides of the machine when when set up on a “not-a-perfectly-level-slab-of-granite” type of surface.