@JimmyWayneWestie, Whoa!!! I knew there was a lot out there, and have done some reading and research, learned how to use Inkscape for fairly basic things, but had no idea there’s that much out there!! Looking forward to diving in to some of these!
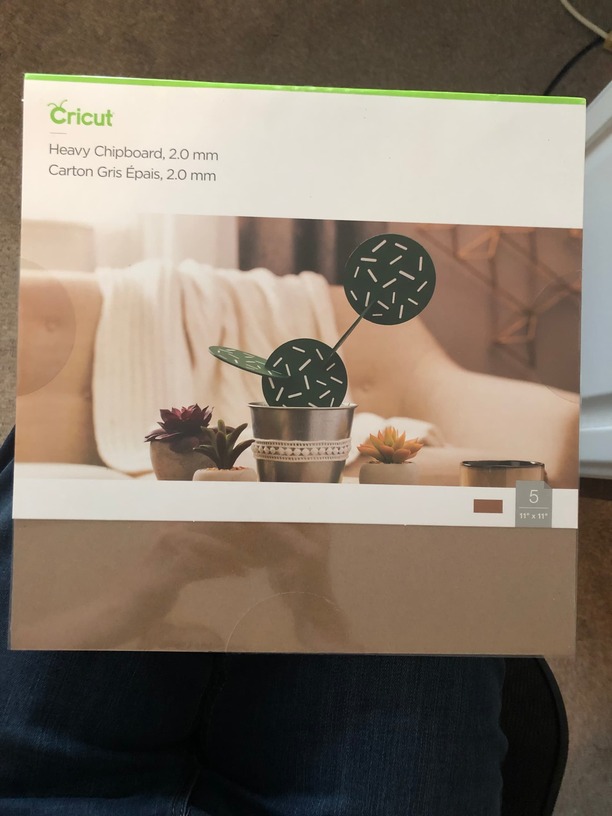
BTW, so I’ve primed and spray painted some of those Cricut heavy chipboard I had lying around the house. Before I go and cut these, do you suggest I mask them as well or did your chipboard cut well without leaving soot and burn marks?
No masking!! The Jimmy Wayne Westie ornament turned out great with no masking.
If you are going to paint the chipboard there is no reason to mask.
I would believe masking on top of chipboard might be the best recipe to catching your Glowforge on fire!!!
You basically have paper on top of paper. If the masking paper is not completely flat there could be air bubbles. You never ever want air bubbles on your masking paper — so easy for a fire to start and get out of control.
The 1st year I had my GF —I masked everything but leather. Now I only mask a few things.
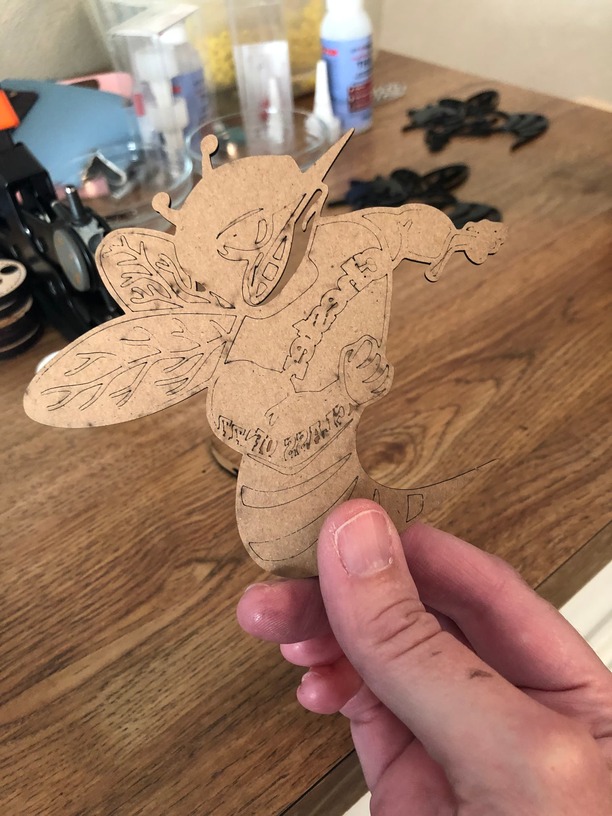
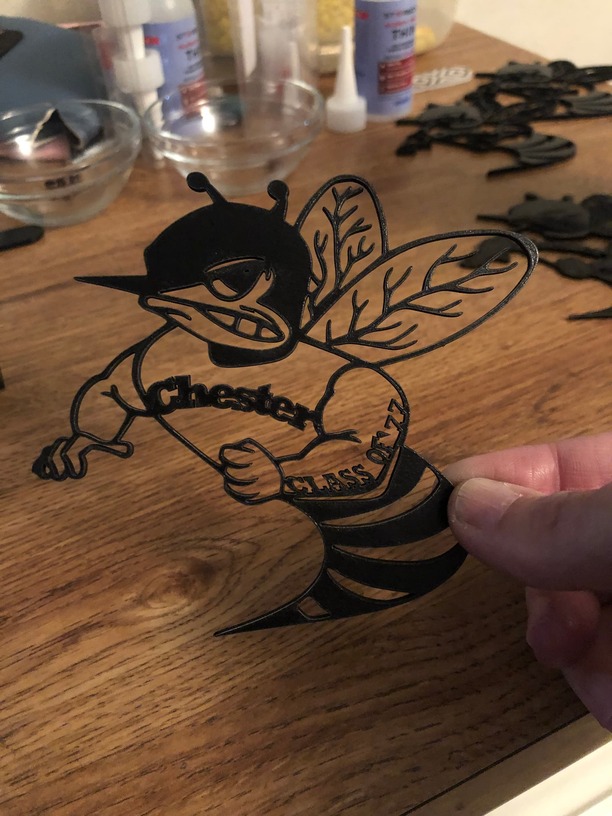
@JimmyWayneWestie, I’m struggling. Maybe the Cricut brand isn’t going to work. I tried the cardboard cut settings for 5/32 inch/ 3.81 mm. The Cricut is only 2mm and it basically just etched the outline in. So then I tried the next suggested on the materials list at 325 Speed/Full Power, and nothing on the first pass. I ran it again at 325/Full and it cut most of it but not up at one of the wings or on the biceps or one of the fists…and it’s got soot everywhere. So then I kept cranking the speed down until I got to 300/Full and still not making a dent in it. You can see on the pics of the backside of the chipboard that you’ll only see a couple of pock marks on all of those tests but the two pass at 325/Full. You think it’s just this chipboard? I have the Glowforge Plus.
Before you cut a large shape out of a new material, I do a test cut.
Find a small shape (I like using a star) and place it in a corner of your material. Try one setting, then check to see if it cut through. (The reason I like a star is because of the sharp corners.)
If it did not cut through, slow the speed down and repeat the process. (The amount to slow it down is relative to how far off it was to actually cutting through. I generally use increments of 10 and then 5 as it gets closer.)
If it cuts through and chars the material, then increase your speed to try to find the right speed that will cut through but not burn as much.
@trually, thank you! I’ll definitely do that on my next sheet since I’ve wasted one now that I already had primed and painted. For whatever reason, not any of the cardboard or chipboard suggested cuts on the Google doc are even coming close to making a cut through it, even using some of them that are for 4mm. Maybe it’s the paint??? It’s just standard gloss spray paint in a can.
Nah. Every material is different. And every machine is different. Just always first make sure the material is laser safe, then start with a default setting and then adjust as needed.
This practice will serve you well long-term.
Every sheet of the same material can be different. If it matters, I always run a test cut before committing to a large job, even on proofgrade material. I have a small test file that I import to test the settings.
@eflyguy, yeah, I have got to start making that a part of my custom and practice so it just becomes second nature to just do it before anything else is done. I have absolutely found so many pieces of the same material will react in different manners. That can definitely be a frustration factor, as I just experienced when I was cutting out 150 napkin rings for my daughter’s baby shower and found every three or four sheets would be different and have extra knots, etc. and cause issues for a few of them out of the batch I’d be working on. Thanks!
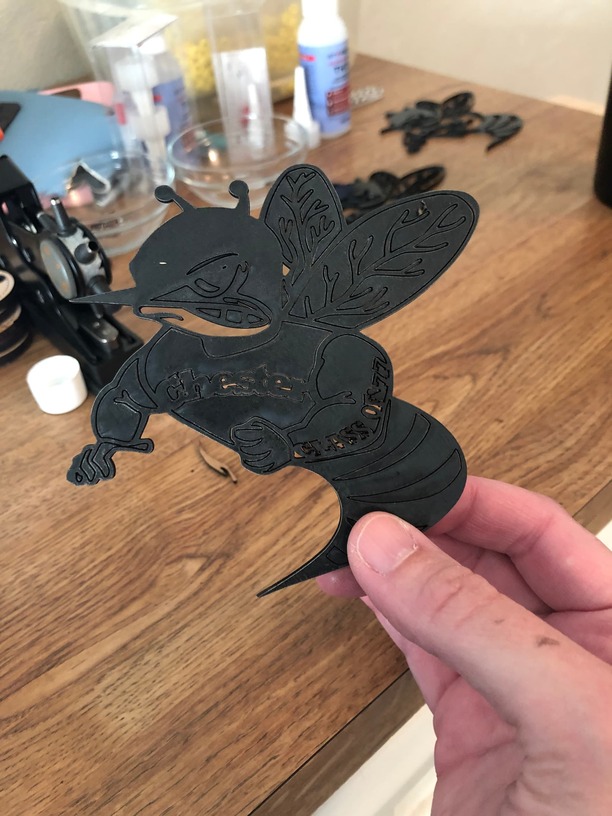
@trually and @JimmyWayneWestie, I finally found the sweet spot settings for the Cricut Heavy Chipboard, primed and painted without masking! It still came out with messy black edges, but it is what it is and I’ll try to wipe them off with a dry microfiber cloth. I went both ways with the settings and it just wasn’t going to work to get a clean enough cut for those small, tight areas without some soot. The final settings that worked for me were 190 Speed/Full Power using my GF Plus. I only cut one out once I finally got a setting that worked. Fingers crossed the rest of the cuts will go smoothly tomorrow and the rest of the week! Thanks again to everyone for jumping in and assisting!
It’s cute! And pretty impressive that it held together being so intricate. I was playing with chipboard previously and this is a reminder that I need to again!
Yes, it’s pretty delicate, but was happy when I saw the center cut pieces pretty much all fall right out when I went to lift it off the tray! I’m going to follow @JimmyWayneWestie’s suggestion and make three layers. I’m going to try wooden coffee stirrers that I’ve got laying around here that are a bit smaller than your average tongue depressor width wise and sandwich it between the bottom two layers for the stick portion of the floral pick, so I’m thinking in the end, they should be pretty sturdy!
Andrew ( @eflyguy ) is one of the “senior” members who rescued me MANY times in the beginning. He was also my private Inkscape professor. Andrew is a dear personal friend who I absolutely adore!!!
If Andrew or Ally (@trually ) reply to a message trust in their laser knowledge.
I am really impressed with the intricate cutting —- it looks AWESOME!
The coffee stirrers is a GREAT idea. I have learned so many things with this thread.
The black/white is dry erase/chalk board. I use it a lot. The other is about 1/8" and 1/4". It all cuts nicely and takes paint very well. If you want to search my profile I have posted UPC’s for some of them. I’m on my phone currently and don’t have access to my computer or I would look for you.
I’ve used a fair amount of the B&W board from THD but the plastic surface coating on the white side comes off easily when you do intricate cuts or engraves.
The people I’ve given stuff to don’t see it, but I do.
That said, it’s not MDF. I’ve never been happy with any MDF from big-box stores. I’ve never bought from Rockler or online.