Ok I know the cut bed size is greyed out to keep you in the cutting area for now. But why is the cut shifting from where it is placed mostly on the top and bottom of the proof grade? It actually does this in all directions no matter where you set the cut to be. And it doesn’t do it every time I cut. Chasing the rabbit here, and messing up alot of proof grade materials. Another issue is the bad proof grade sent and some of it won’t cut all the way thru.if it doesn’t cut thru then my project is ruin if the cut area shifts left or right after the cut. And there’s no lining it back up perfect. Whats happening here?
Thanks
Mike
If there is any doubt wether a cut is complete, it’s a good practice to hold down the material and try and lift the cut with a piece of tape or a pick. If the material hasn’t moved you can run the cut again.
The camera image taken after the cut shows your file displaced from where the cut actually occurred. Again, if the material hasn’t moved you can run the same file again and it will burn in the same place even though the camera image after the cut shows it being off.
So the position of the file shown in the camera image after the operation is not where you placed the image initially, at least that’s been my experience.
The bad proof grade you mentioned obviously isn’t up to the standards of glowforge, and I think reflect the evolution of that program, which like the software is still in beta. If you have any of that substandard proof grade with the bad finish on it you should contact support about being credited.
3 Likes
Yes I know that’s what’s suppose to happen but it doesn’t happen every time. Sometimes it has a mind of its own. This doesn’t explain why the x and y position is moving on the cut from where I want it cut. For example I’m cutting out a tea light. I place it at the bottom of the material leaving close to 1/4 in so it doesn’t go off the material. I run it and it goes off and messed up. This is starting to become a issue causing material waste. I believe it might be camera lighting because it has had trouble reading labels . I might mount a external IR light to brighten things up inside when I get a chance.
2 Likes
Within 1/4” is spec right now.
The combination of you saying it exceeds that, and the material not cutting all the way through makes me wonder if the material is warped?
The placement is very dependent upon material height - if it’s warped, it will cause more camera placement error. The PG settings are also designed for flat materials. With warped material (dips or bows), the part of the beam hitting the material becomes out of focus (since focus is distance dependent, thus height dependent). The PG settings are to make the cleanest cut possible without char, so the power delivered has to be spot on and to deliver that power, the material has to be very flat.
4 Likes
I think this might be related to what I’m seeing, at least with camera placement.
I place my material in the Glowforge, using magnets to ensure a flat surface.
I open the app.
I place my design on screen so that it does not go out of the cutting area (or etching area).
I make sure the placement of my design does not overlay any of the magnets as seen on screen via the camera.
I click Print, and wait for the app to process, and pink version of design overlays the material as seen via the camera…still does not overlay any of the magnets.
I press glowing button on the Glowforge, and design now covers the magnets.
I’m etching, and nothing seems to happen to the magnets, but the design now has magnet shaped blank spots along the edges.
How far out of alignment should I expect the camera to be?
Support will ask you to provide pictures if possible. Might also be easier for us to understand what you are describing if you take a snapshot of the entire bed and post it here.
I think it is related to the issue that’s been discussed elsewhere about the limitations of the fisheye camera.
I would surmise that the solution is going to require multiple sensors (cameras) in a grid pattern, with the images stitched together. Which is, as usual with any software application, both a simple idea, but a real PITA to implement. 
Have you entered the proper height at some point in that process, or are you using PG? Because otherwise I think 0.0 or your last known value will be assumed.
Proof grade and manual entry both this will happen
Another heads up! I have had my GF pro less than a month. Today when I started it and it started homing the laser head it looked like it was rubbing the side and grinding when moving forward. I powered it off a set the head close to home under the camera. This is when I noticed the side lens on the laser head was loose and screwed out. I got it back right and ran as usual. Still the cut was off from where it was placed to cut. But it looks like the glowforge will need a little routine checks before every start. Like setting the laser head under the camera to home , checking if items are loose and regular cleaning.
Exactly what’s happening to me. If your cutting or engraving this happens . I learned to keep magnets back a little further because of this variance in where it decides to cut or engrave.
I was having some alignment issues and figured out that my lid camera was dirty. May not be your issue though.
I clean that bad boy on a regular basis 
1 Like
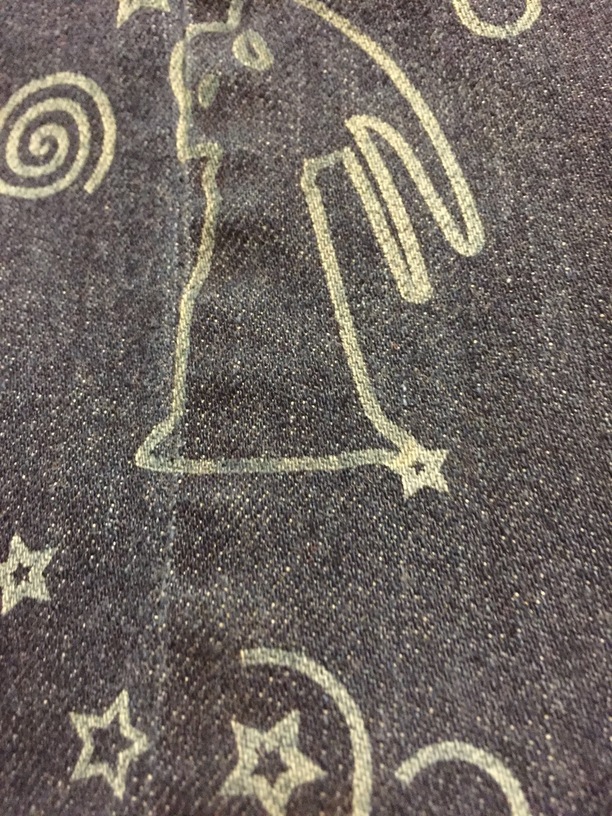
It’s not just the magnets. I need to do pieces that are 6-9" wide and 24-30" long. I can break the image into parts easily, but still need to align the parts, without elements “overwriting” another element, and without there being an obvious break line. In the attached image, when I placed it an the app, it showed at least 1/4" between the star from the first section, and the angel which was in the 2nd section.
I’m going to have to do more experimenting to try and get more precise with where it LOOKS like the image is going to land, and with where it ACTUALLY lands. I see lots of note taking in my future.
Yep. That’s what happens to me. But it seams to go up or down in the wrong place. I thought of putting a taped scale on both sides of the tray lined up. This way I can maybe find the sweet spot where it will cut right. And could log the variance. Maybe it will get better.:)
I’m so sorry you’re running into trouble, @gmikewilliams. Could you please take a look at our troubleshooting guides for Alignment and Cut didn’t go through material, and let me know if these steps help?
Regarding the greyed out area you see in the app, there are a few reasons this area could change. First, you will see a different printable area based on whether you are cutting or engraving. Second, the printable area will be reduced somewhat when the head is moving at higher speed, as it can take space for the laser to decelerate. Last of all, the view of the bed will change when the material height is changed or if you manually select a type of Proofgrade material other than what was detected. It might be helpful to decide on the final placement of your design after making all the necessary changes to settings for your print. Please let me know if that works better for you.
1 Like
For working with the fabric you might want to look at some form of sticky mat–either a Seklema mat or something like this
That will allow you to position your fabric nice and flat and keep it from moving around with out having to worry about whether magnets might interfere with the head motion or laser.
Also, if you’re going to do longer pieces, you may want to look at manual indexing rather than visual alignment. Something like I wrote up here:
4 Likes
If you notice the picture I sent it is a 3.25 inch round piece of proof
grade I cut out with the label still intact. I started at center under the
camera. I moved it across the to the left and it off the material everytime
even though centered on the screen. This might not happen everytime but
seems to be worse when it does. This is wasting money I spent on
proofgrade. And actually I haven’t had as much trouble running non proof
grade material.
I’m sorry to hear that didn’t address the issue. If you see an alignment problem of more than 1/4", could you please:
-
Turn your unit off and back on
-
We included an extra piece of Proofgrade Draftboard with your materials shipment for troubleshooting. Place the Proofgrade Draftboard in the center of the bed and print the Gift of Good Measure using the default settings
-
When the print finishes, without moving your artwork or your material, take a screenshot of the workspace to show us the difference between the artwork placement and the actual print placement. Make sure to include the rulers in your screenshot and show as much of the bed as possible
- Mac: Press Shift-Command-4 and click and drag a box around your image. You’ll find the screenshot file saved on your desktop
- Windows: Click on the Start Menu and search for the Snipping Tool. Open the Snipping Tool > New then click and drag a box around your image. Click the Save icon and name and save your file
-
Send us the screenshot along with the date and time of the print, and I’ll be happy to take a look
1 Like
Ok will do