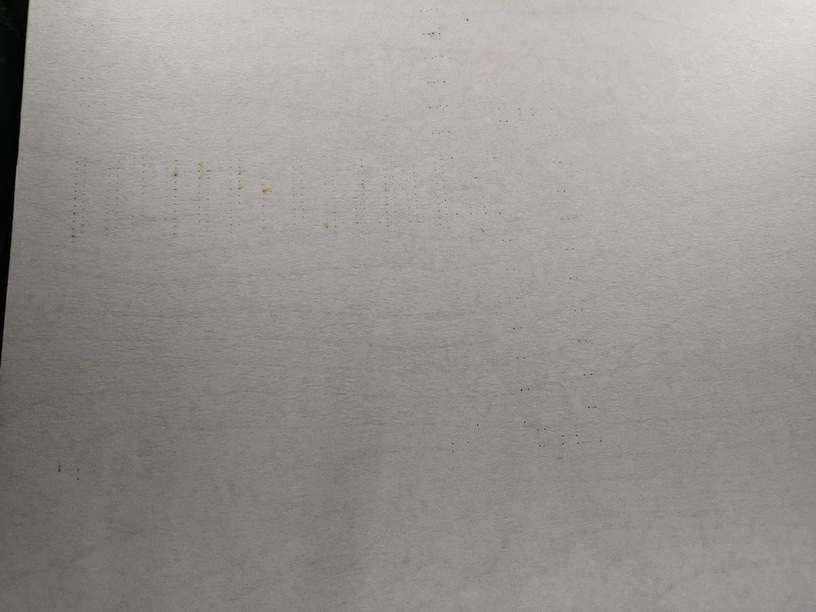
I have made 2 projects so far on the proofgrade medium draftboard and neither cut all the way through. On the first project I reran the cut and it still didn’t get all the way through. On the second project I ended up using a utility knife to get through the rest of the board. I have yet to try the plywood or other materials. I will attempt paper and cardboard and see if the cut completes.
I have had some issues with this related to material not being flat on the crumb tray - magnets help! If that doesn’t help, then slowing down speed (‘zooms’), or pushing power up a bit (‘pews’) should do it.
Sorry you had some problems with the material. :-/ I don’t know if this may have been the problem, but warped material is often the culprit here. Having even the smallest warp in it can effect the cut. If the problem was just in isolated areas and other areas cut OK, it’s a good indication this may have been the case. Another thing that can cause it is tiny debris on the tray that raises the material.
A few suggestions to insure good cuts is to make sure your material is flush with the tray. (A lot of folks use magnets to flatten the boards. A search will bring up lots of info about it.) It’s also a good idea to store the boards flat to help avoid them warping. Always run your hand across the tray to check for tiny no-see-ums hiding on there somewhere. Upping the power just a bit like dwardio suggested is a good plan as well. Good luck!
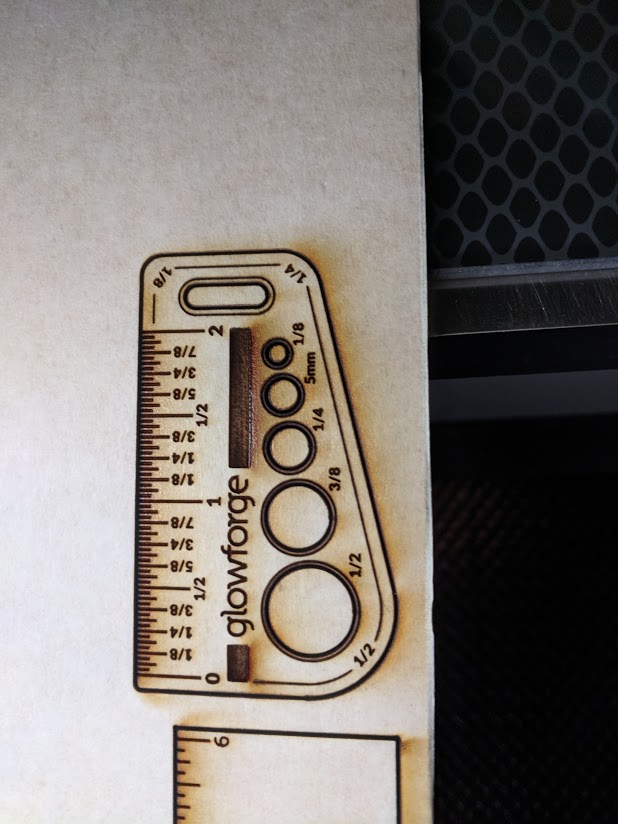
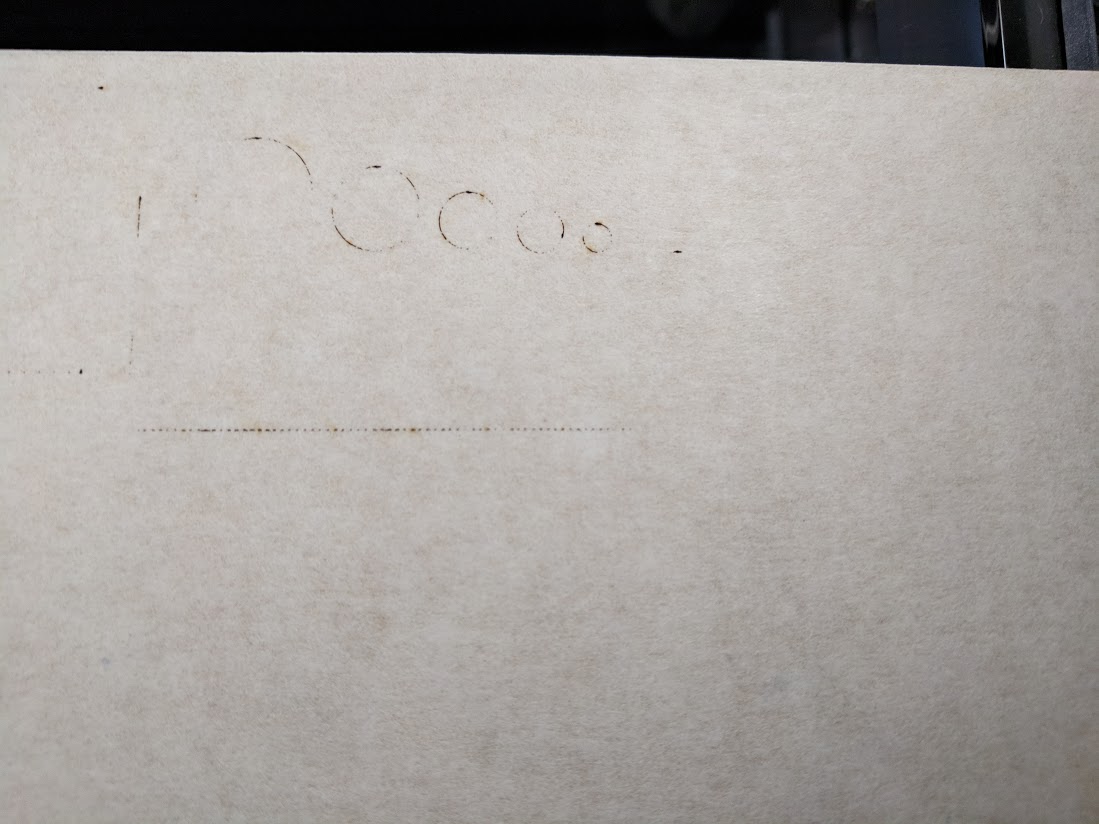
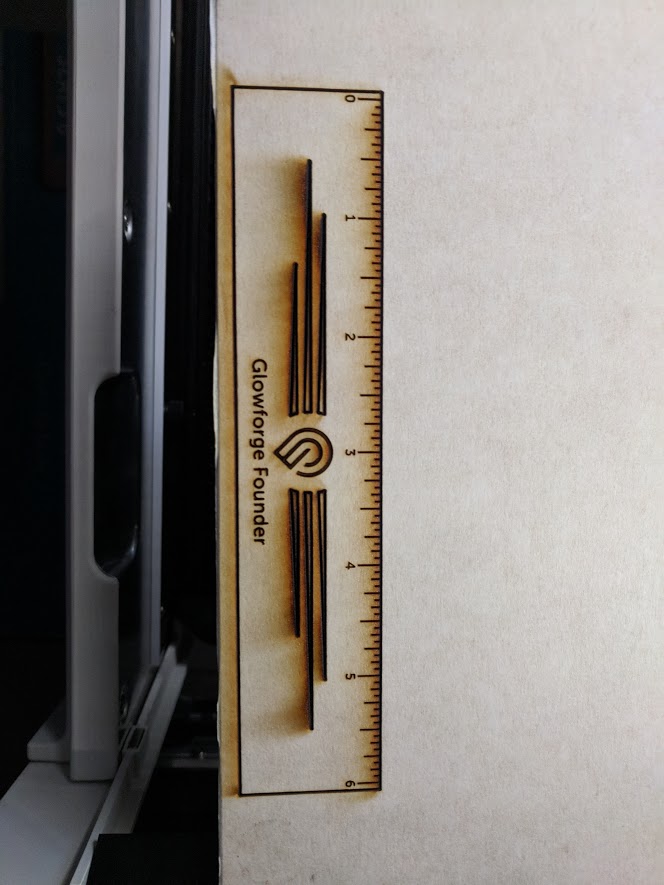
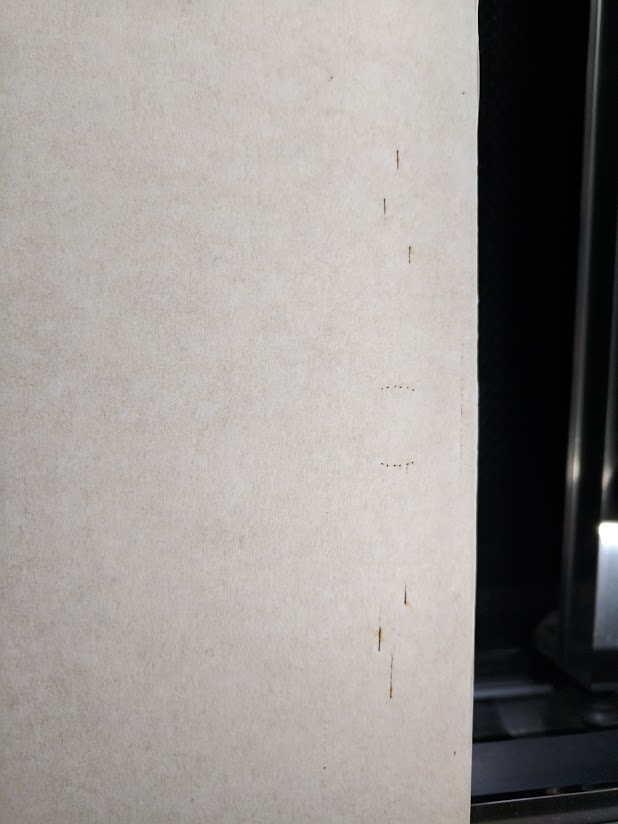
Literally the first and second cut. It didn’t poke through anywhere. On the upside I was able to align a second cut very easily over the first one.
The material seems flat and the crumb tray had just been installed. being a 1/4" it is less susceptible to warping especially since it was stored in a bundle with the other materials. I did not tinker with the settings as it is supposed to be proof grade and auto set.
If it were not proof grade material with supposed auto settings I would have no issue with the answer to adjust settings. But one of the primary benefits of PG material is that you don’t have to have a chart of settings as GF is supposed to do that for you.
In fairness I have to do some additional cuts on additional material to see how it fairs with the other materials in the proofgrade pack but the first try was unfortunate.
I just recently started having the same issue. I’ve cut plenty of draftboard since getting my machine about a month back but all of a sudden I don’t get a full cut through. My board is not warped and I’m using the standard settings. The latest few projects, including just simple cuts and a 3D engrave with an outer border cut aren’t going all the way through on the cut step.
Thanks for letting us know. I’m sorry that your print didn’t come out beautifully! Could you please try another print and see if this is still happening? Please print the Gift of Good Measure on Proofgrade Draftboard and let us know the result. If it doesn’t print well, please let us know the date and time of your print and send photos of the front and back of the print.
Wondering what you’re getting at with this. I mean, the head moves across the bed, so the laser is always firing straight down regardless of its position. Are you suspecting the gantry or tray are warped?
Thanks for taking the time to run these tests and provide the photos. I’ve let the team know and we’re looking into it now.
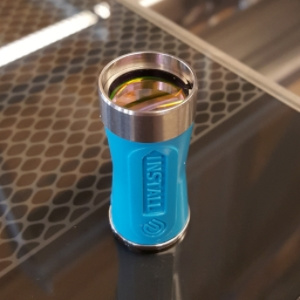
Your Glowforge unit’s laser is powerful, yet it can be stopped by a tiny amount of dirt or damage to the lens or windows. If something gets between the laser light and your materials, they won’t cut through. Here’s how to check for damage and clean your lens and windows at the same time.
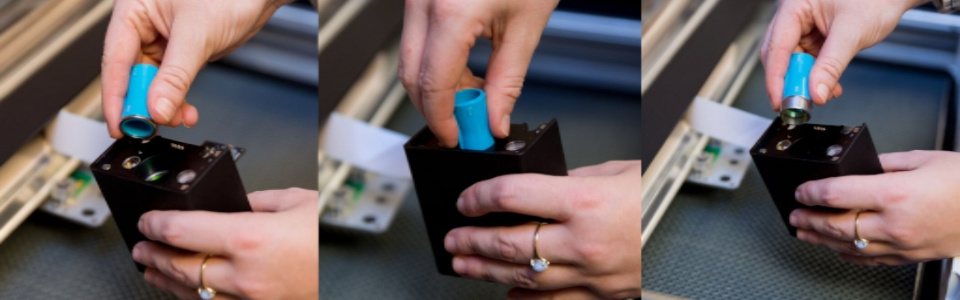
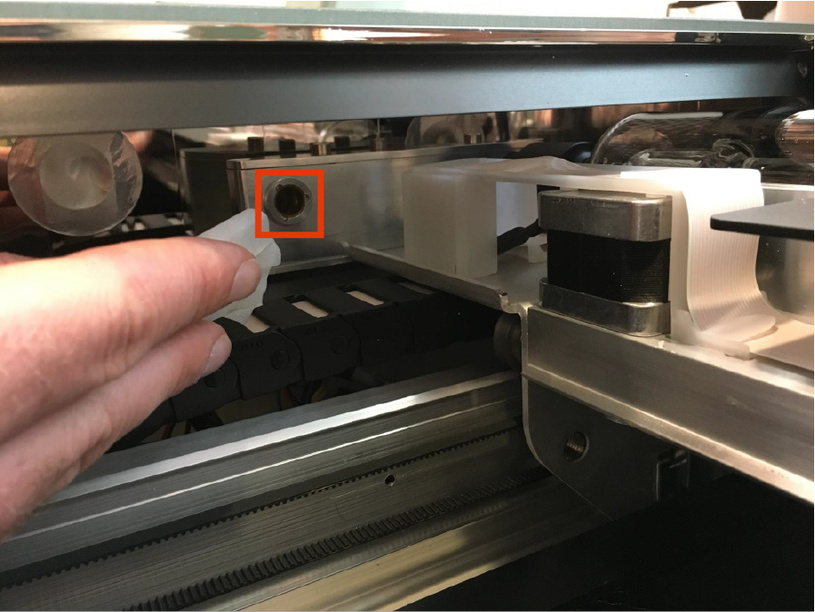
Remove printer head
Turn off your Glowforge. Grasp the printer head as shown, and pull gently up and back to disengage the magnets and remove it.
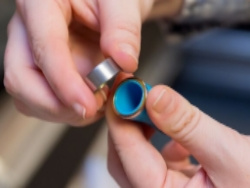
Remove lens and check for scratches or dirt.
Gently insert the lens tool into bottom of the head with the “Remove” arrow pointing in. When you hear the magnet click, withdraw the tool and the lens.
Look at the lens on the tool. It should be resting on top of the tool like a bowl, with the top open and with the orange-colored optics on the bottom. If it’s upside down, it won’t work properly.
Gently slide the lens off the lens tool. Be careful to touch only the metal ring to avoid fingerprints on the lens.
Check the lens for fingerprints, dirt or scratches. If you see a scratch, you can order a new one at shop.glowforge.com.
Wipe both sides with a Zeiss lens wipe.
Put the Lens Back In
If the lens appears clean, you can put it back.
Flip the lens tool until the “Install” arrow points up.
Set the lens down on the lens tool. The open side goes away from the blue plastic, so it looks like a bowl on top of the tool.
Slide the lens tool up into the printer head until the magnet clicks, then remove the tool.
Replace Printer Head
Review instructions for snapping in your printer head, then put the head back on.
Inspect the Head Window and the Laser Window
Check the windows for damage. You can find one window on the left side of the printer head, and another just over the left rail. Shining a bright flashlight at an angle onto the window may help you to see more clearly.
If you see damage, let us know.
Otherwise, wipe the window clean with a Zeiss wipe.
Once you’ve inspected and cleaned, could you please run a print? Also, could you try printing on another material, such as Hardwood, and let me know if the same problem occurs?
 material, but the OP mentioned that magnets were used, so maybe not so much.