Ever since receiving my Glowforge I have noticed the proofgrade settings never would cut all the way through any material I have cut from acrylic to wood. I started running 2 passes to get all the way through. The other day while cutting a sign for a customer out of medium maple ply I cut at 150 speed and full power and it didn’t cut through so I ran a 3rd pass and still wouldn’t cut all the way. I had strong magnets holding the material to the bed so I’m certain it was flat. What could be causing this?
I haven’t yet. That is next on my to do list. It was pretty clean until I ran this job as it had a large engrave and created lots of dust. I haven’t really ran my machine a lot and I noticed this issue the first cut I made so I’m not sure it’s because the lense is dirty.
Well, you can’t tell…you’d be surprised how much crap these things generate.
It’s just the next thing to check. 150 should have been slow enough to get through it under normal circumstances, even if you got a batch that had super thick finish on the veneer or something. (I ran across a sheet recently that was thin…I think you got my finish.)
It’s a pro. Just doesn’t make sense to me. It’s never cut through any material with 1 pass on proofgrade settings from my first cut with it. I’ll clean it and run a test to see if it cuts all the way through.
I’ve noticed that the maple ply is harder to get through than the other plies, mainly because it has what looks like a slightly thicker veneer and finish, so I usually run that one at 150 as well…have you tried any of the other materials? Those all seem to be right on the money.
Well that’s not good. Definitely try cleaning the lens and make sure the lid is level and all the way closed when you run a job.
Have you made sure that the feet of the tray are all the way down in the dimples? If it’s sitting a little too high, the focus will be off, and that might be causing the non-cutting issues as well. (Front drops down and you can check to make sure those feet are all the way down in the dimples.)
That is really weird as the PF setting should work just fine. For sure check the cleanliness of the mirrors and lens. If that doesn’t work and the tray and material flatness isn’t a issue, there very well could be a mechanical issue with your GF. :-/ Hope not, but I’m sure support will step in and help you out.
I’d check the front window on the head to see if there are fingerprints (easy to get them there when installing the head). Also check that the lens is installed correctly and is also clean. While you’ve got the head off, Zeiss wipe the LED and window on the bottom to makes sure it’s not getting the height reading wrong.
I took the head off and made sure it was all clean. Everything looked fine. I also made sure the tray was sitting in there correctly and that looked fine as well. I ran another job and it still wouldn’t cut through. I did notice that it cuts through towards the middle of the bed but on the edges it struggles to cut all the way.
That’s usually a sign of just a little bit of warp. As little as a mm can throw that off.
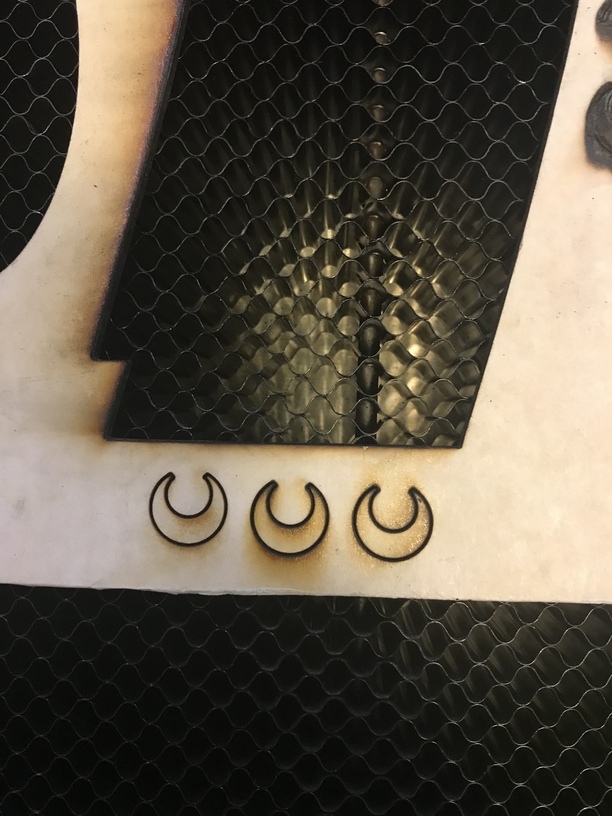
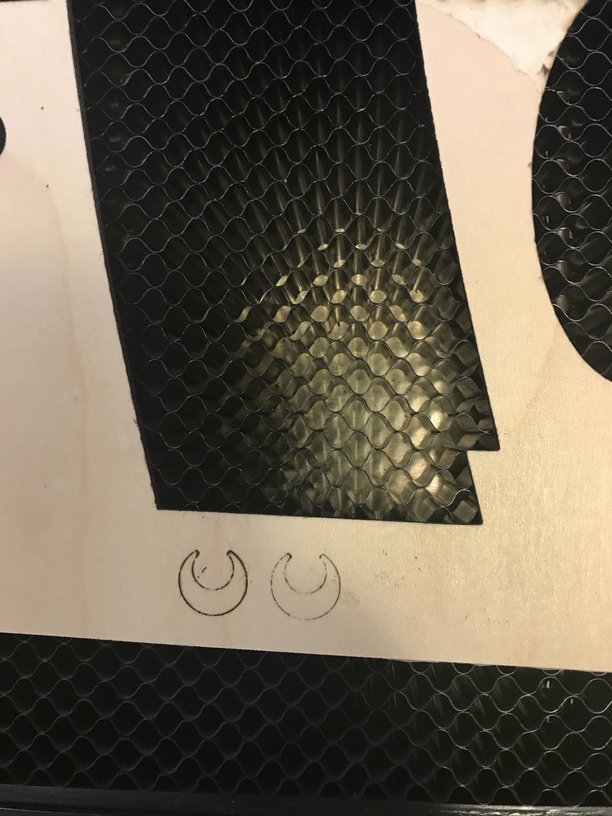
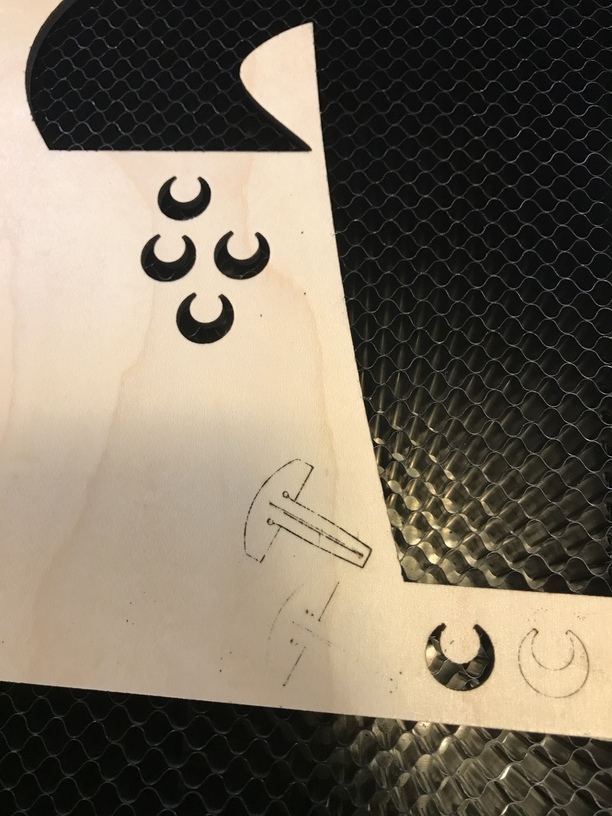
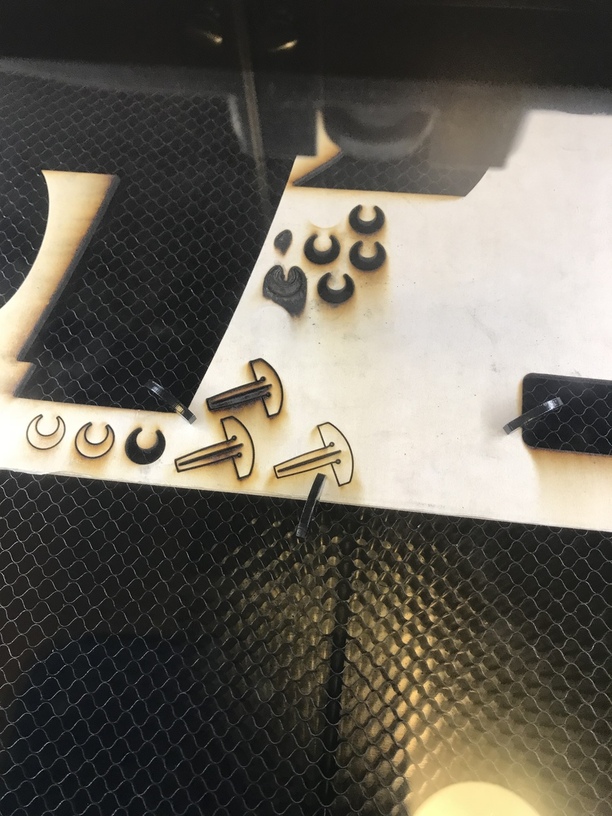
You might want to try printing a few of these pins…I swear, they hold down the material like nothing else, including magnets, tape or anything else I’ve tried so far. (You can break them off if you are not careful…be gentle sticking them in and pull them straight up when you’re done.)
You might notice a real difference. (I’d like to kiss the guy that posted them.)
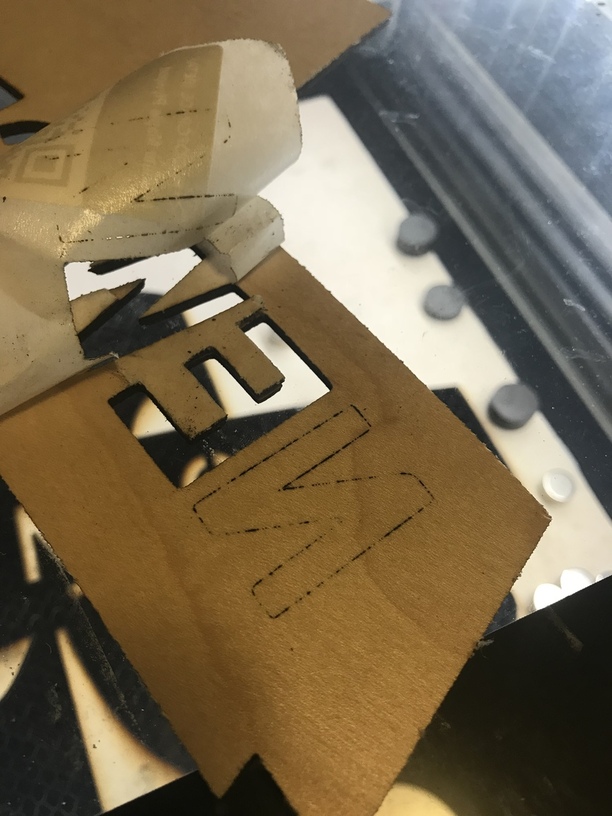
Well I tried really cleaning the lenses again and printed the honeycomb pins and tried to cut again. Still not cutting all the way through. Cut 1,2 &3 passes from left to right. Can see from the back the 3rd pass almost cut all the way through but not quite.
Not sure I like those pins. They break easy and don’t hold in some positions. I feel my magnets do a better job of holding the material flat. They are plenty strong enough.
Thanks for letting us know. I’m sorry that your print didn’t come out beautifully!
To cut successfully, there are three important things to check. First, your material must lie flat. This requires a clean, properly installed crumb tray and flat materials. Second, there must be no obstructions, dirt, or damage preventing the laser light from reaching your material. Third, your design must be set up properly - for example, with lines that are fully on the material and that are set to cut.
It’s hard to know which issue might be affecting your print, so please read through our troubleshooter and make sure to clean or inspect anything you haven’t already looked at.
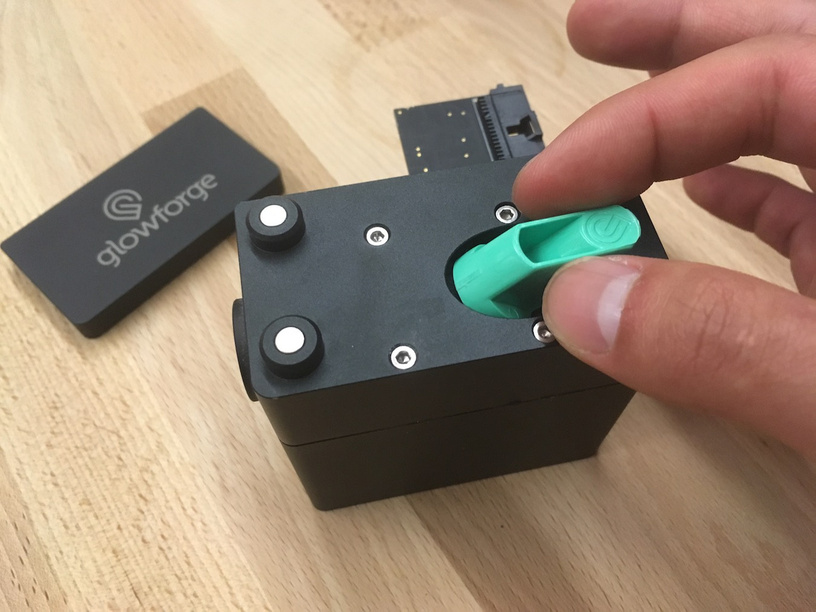
Then, while you are cleaning, please check the printer head mirror by following these directions:
While the head is off, set it on a table (or on the honeycomb).
Lift up just the very top part of the head, and it will come off like a cap.
Pull on the little greenish handle, and you’ll see a mirror.
Wipe that with a lens wipe.
Put the mirror back down so that the little green part is more or less parallel to the ground (so you can see the glowforge logo easily)
Put the cap back on. It’s designed to align properly without you needing to do anything else.
Once you’ve inspected and cleaned, please try another print. We included an extra piece of Proofgrade Draftboard with your materials shipment for troubleshooting. Please print the Gift of Good Measure on Proofgrade Draftboard and let us know the result. If it doesn’t print well, please let us know the date and time of your print and send photos of the front and back of the print.
@jaz - I have cleaned all the mirrors and made sure the crumb tray was clean and sitting in the dimples correctly. I’ve also made sure the material was laying flat on the tray. I loaded some draft board and tried to upload the gift of good measure file but every time I attempt this it loads with no artwork. I can load all the other files except for this one for some reason. I attempted to cut another file of mine on medium maple again and I am getting the same results still. If I can get the keychain to load I will print it on draft board.
Thank you for the help in this thread, all! @coreyk, the details you’ve provided have been very helpful. Unfortunately, it looks like your Glowforge has a problem we can’t fix remotely. I want you to have a reliable unit, so I’m recommending we replace this one. I’ll be in touch via email to sort out the details. I’m so sorry for the bad news.