Merging Layered Mandalas

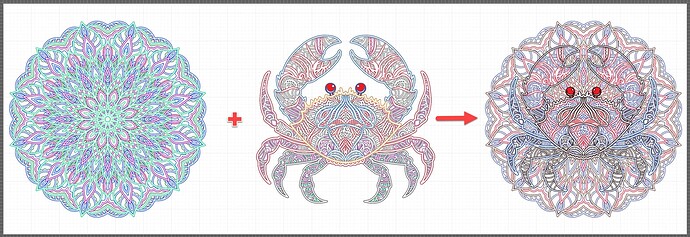
I know there are fans of layered art with many exceptional examples posted here on the forum. I have personally done a few of these including both ones I purchased and also pieces I designed myself. Looking for a new challenge, I’ve gone down the rabbit hole of merging 2 different layered art pieces into one unique piece. I’ve done this in the past and know what a pain in the ass it is using Illustrator and the pathfinder tools. Well, I discovered an easier method using the Astute graphics plug in buried in the Vectorscribe menu, so I thought I’d share my process.

Example #1: Adding Text to Mandala
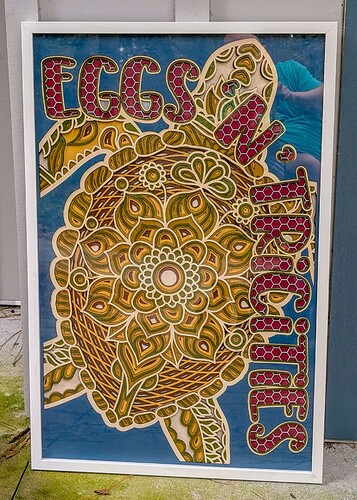
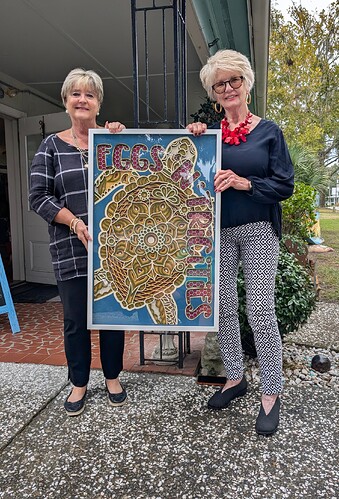
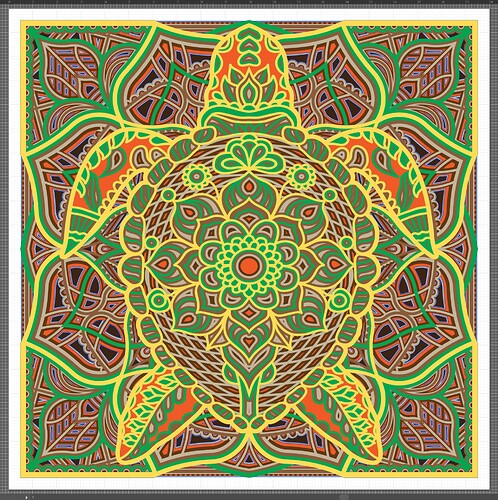
I sell laser engraved items at a local boutique, and decided to make them a sign as a thank you for continuing to work with me. The goal here was to add the name of their store into a layered sea turtle mandala.

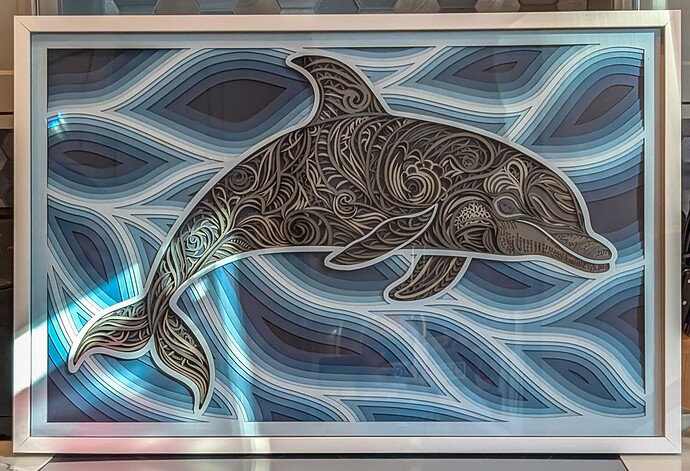
Example #2: Merging 2 Layered Art Files Purchased from Etsy

Example #3: Merging 2 Layered Art Files Purchased from Etsy

In the past, I’d use the built in Divide tool in the Pathfinder tool set, but this was problematic as it created duplicate overlapping lines which took forever to clean up. The Path Intersections tool, which is part of the Astute Graphics Vectorscribe plugin doesn’t have the issue of replicating paths. Now it doesn’t automagically merge the layers together, so you still have to go in and deleted the path segments you don’t want. This takes a long time. Like a painful amount of time, but still way faster than before. The Astute tools are not free, but this one tool makes it worth it for me.
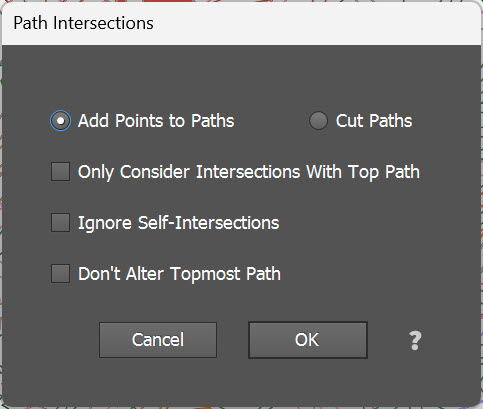
path intersections tool

Results
Please notes that these examples were cut on a Mira 9, not my Glowforge.


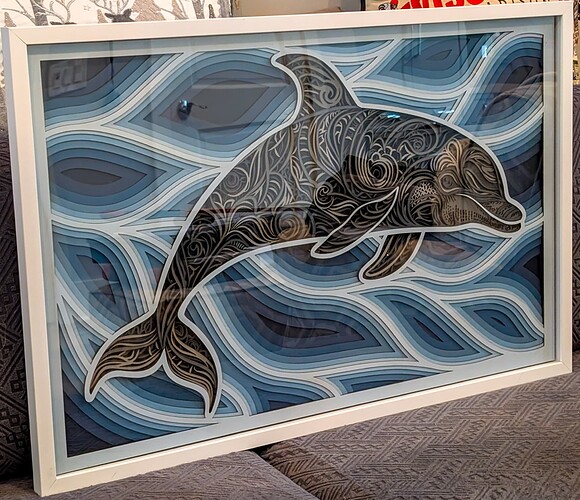
22"x34" Shadowbox

This is a present I made for my mom for Christmas. Also 22"x34" shadowbox.

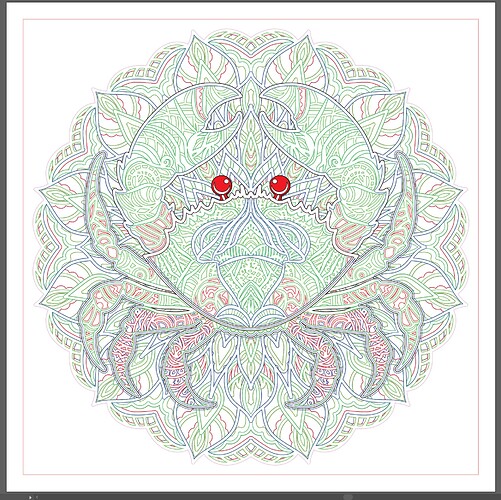
The layered crab is currently in process, and will end up in a 22"x22" shadowbox. If anyone has question on these methods, I’d be happy to share.

This one was done a few years ago, but using the same layered sea turtle.

23 Likes

Whoa. Is this going to be your new focus for a while? Because I need to see a whole bunch more of it! :slight_smile:

12 Likes

After the sea turtle is done, I may need a break from this, as it’s extremely tedious and time consuming. We’ll see!

13 Likes

Wow - that rabbit hole is the size of a major canyon. Thanks for sharing the journey with us.

11 Likes

image

At one point easily 4+ years ago I started to attempt something like this manually. This was even before I’d learned some of the shortcuts in Inkscape that would have sped it up - I noped out quickly.
So very cool that there is technology that helps, even if it’s only a bit!

Your pieces are incredible.

I imagine the folks at Egg N’Tricities were both gobsmacked and thrilled with theirs!

13 Likes

These are stunning!! I’ve only done smaller mandalas … but these make such a statement. Wow!

10 Likes

Considering what we pay for Illustrator on a monthly basis, it seems like they could provide more useful functions like this without having to go to a third party provider. And don’t even get me started on Illustrator for iPad, which Adobe has apparently abandoned since it hasn’t received even a minor update for months.

10 Likes

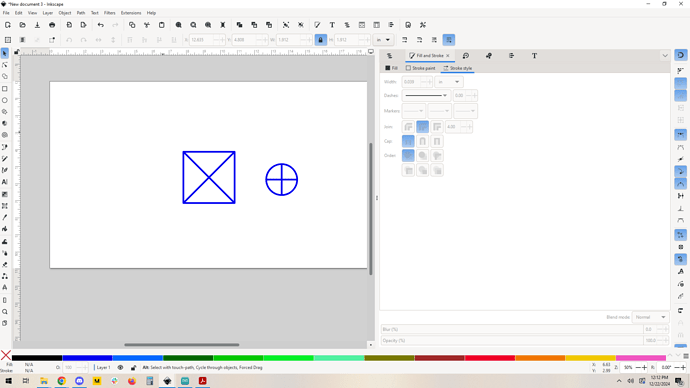
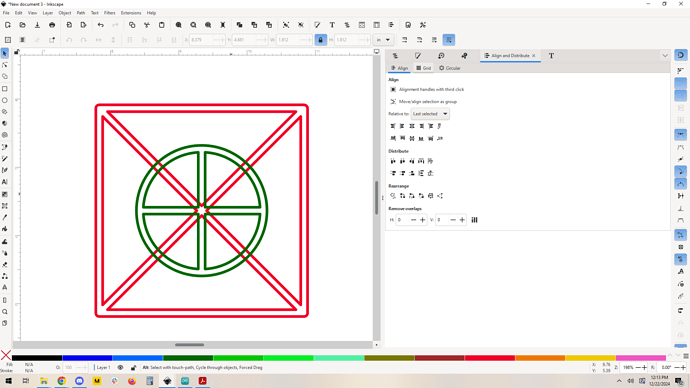
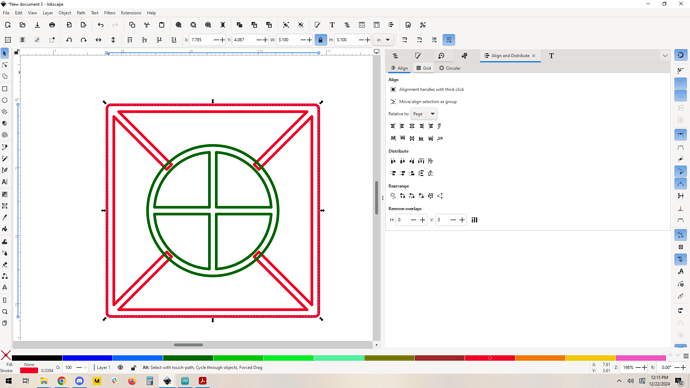
So after talking it over with @pubultrastar, I think there is a simple way to do this kind of thing. Here’s a very simple example of what he’s trying to do.

Start with our “mandala” layers, we want the circular one inset into the square one.

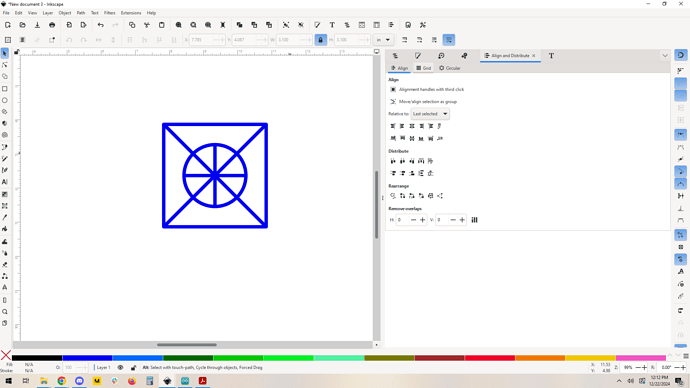
Align them with alignment tools

Then I am going to ditch the fill, set a stroke and color so we can see the differences and make it easier to talk about.

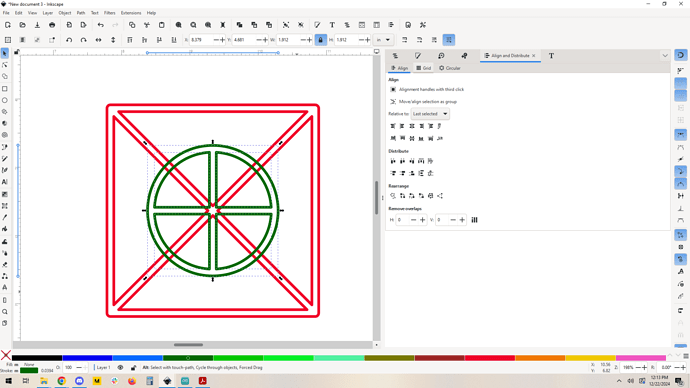
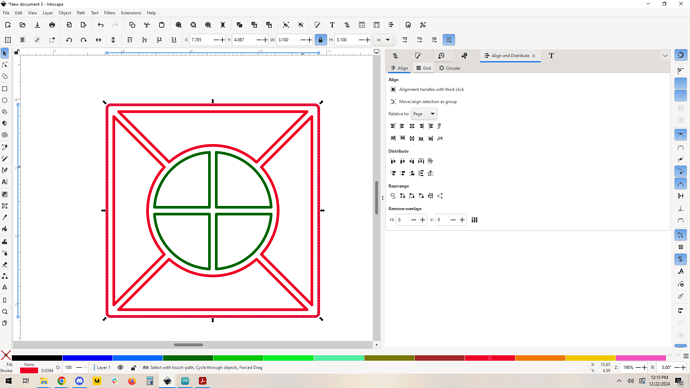
Great, now I need to path->break apart the green shape. You can see here that it’s now a collection of separate path objects.

Now we need a duplicate of the outer edge of the circle. Copy and paste in place (Edit->Paste…->in place) the outer green circle. This gives you a copy right in the same spot. Now use the inset command.

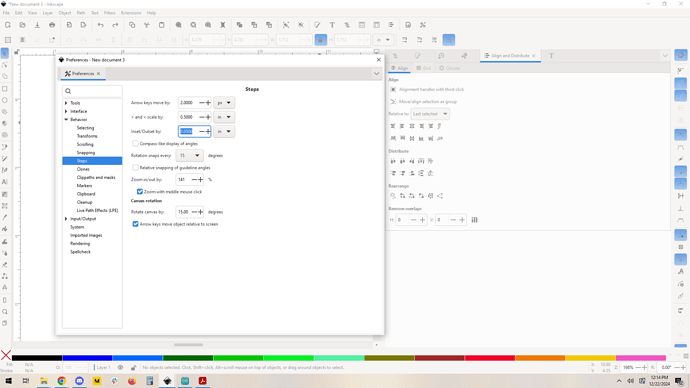
Inset moves the original path you select in a bit, by a set amount. You can adjust this step size in the preferences here:

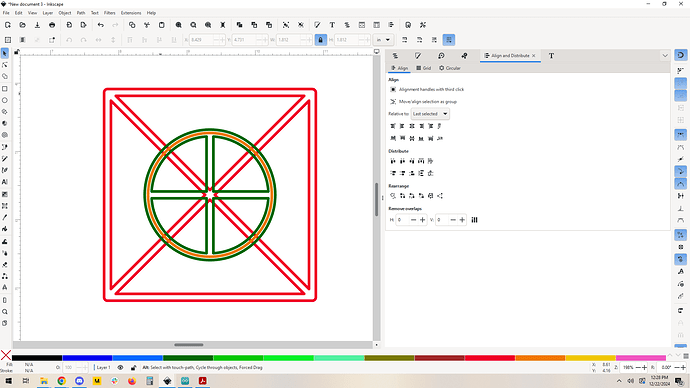
You want it to inset just a bit, no more than the thickness of the original green shape. You should see your new inset line inside the old one, like this I’ve color coded it orange to make it easier to see and talk about:

Now you want to do Path->difference between the new orange inset line and the red outer shape.

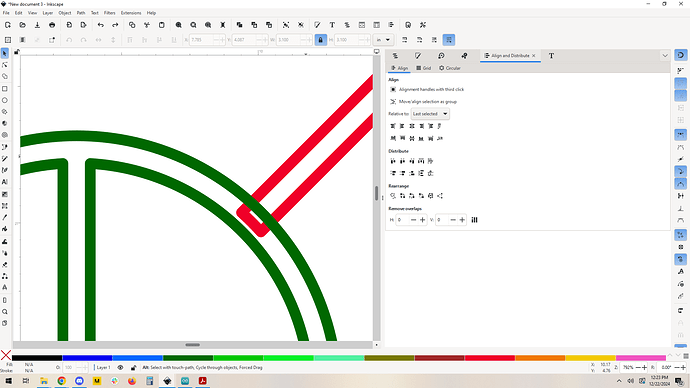
You can see how the red shape now overlaps with the original green outline, this is good:

You want that overlap to ensure a good result in the next step, which is to merge (union, weld, whatever you call it) the outer and inner shapes.

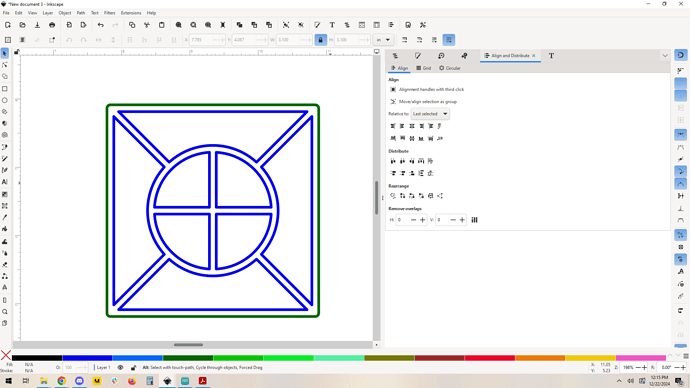
Now select the green outline and the trimmed red shape and do a Path->union:

And that’s it, you’re effectively done. Best practice is to change the color of the outer path to be different from the inner so that you can cut it last. I’ll shorthand that: Break apart the outer red shape, select the whole thing, and set it to one color, then select the outer edge by itself and give it a different color. In the end you’ll have something like this.

Don’t forget to group it, so you don’t accidentally pull it out of alignment.

With some practice this should only take a minute or two, even with a complex mandala.

8 Likes

These are so amazing! Just wow!

4 Likes

Not a criticism, just a couple of things I do differently. Instead of copy/paste-in-place, I use “Duplicate” (⌘D), and I set my inset/outset at .1mm (“⌘(” or “⌘)”) and just hit it repeatedly when needed. The combine/union/difference shortcuts are just a keyboard touch away as well.

I’ve designed several layered “mandalas” and the only thing that bugs me is not being able to preserve sharp corners as I would like, but they are so intricate and lovely when assembled, I’ve learned to just let that go. I’m probably the only person that would ever notice.

7 Likes

Yeah those are good suggestions, I prefer copy and paste in place just because it’s muscle memory for me. Control C, control alt V.

I use that trick all the time to remove clones using cut/paste in place and then put them back in place after moving the original etc. it’s also handy for when you need to work on something and you need something out-of-the-way temporarily. Cut it to get it out of there and then paste it back in place when you’re done. Duplicate won’t do that.

I also never use the inset command for things like Mandala or inlay when I’m creating them; the stroke to path method is more reliable and customizable. I think if you did stroke to path, break apart, and then union/difference you would find that you could preserve your sharp corners by changing the nature of the corners of your paths.

You have to be careful that you don’t exceed the limit of the sharp corner extension when you’re doing something like that but that’s a variable in the path stroke options, so you can prevent that issue.

I do love a good process discussion.

4 Likes

Thanks for that. In all the years I’ve been using Inkscape and used that concept for print, I can’t believe I never thought of it for something like this. I kind of moved to working in “outline” mode for the most part when I got the GF, and completely ignored stroke properties. Silly me.

4 Likes

Awesome!

The one caveat is that you have to make sure that your path is adequately constrained so that you don’t introduce errors from approximations of Bezier curves when converting stroke to path. And essentially the trick there is just to add more nodes, especially on long spans of curves. I wrote it up here:

4 Likes

@evansd2 - Using the process you demonstrated in inkscape, I have successfully figured it out in Illustrator. Although there are still a few quirks that don’t work exactly the same, I was still able to significantly reduce my workflow time. I redid the Blue crab one I was working on and knocked it out pretty quickly. Thanks!

and another sea turtle…

8 Likes

Awesome. You’ll only get faster as you refine the process!

4 Likes

now that you mention it…

4 Likes