Yesterday was Worldwide Pinhole Photography Day! Yes, it’s a thing. I am a day late but let’s hope not a dollar short, because I have not only one, but two posts on ![]() pinhole cameras! This is the first. The second is here.
pinhole cameras! This is the first. The second is here.
So far, my cameras have been fairly simple because they use either sheet film (which has holders), or 120 film which is simply a roll of film with a lightproof paper backing, but I have a need to tackle 35mm film. 35mm is still the most widely available film format and can be processed at many locations (just not in hour like the old days ![]() ). With 36 exposures to a roll you can take a lot of pictures without reloading, making it ideal for travel. However, the negative is small so the soft character of pinhole photography is somewhat exaggerated. This is why 120, 4x5 and larger formats are usually the film of choice for pinholes. But that softness and graininess (since you have to enlarge it more) is a nice aesthetic as well. 35mm is also a format I need to master no matter what - more on that toward the end.
). With 36 exposures to a roll you can take a lot of pictures without reloading, making it ideal for travel. However, the negative is small so the soft character of pinhole photography is somewhat exaggerated. This is why 120, 4x5 and larger formats are usually the film of choice for pinholes. But that softness and graininess (since you have to enlarge it more) is a nice aesthetic as well. 35mm is also a format I need to master no matter what - more on that toward the end.
The problem (as far as building a camera is concerned) with 35mm film is that the transport system relies on perfs (short for perforations, namely the film sprocket holes) to get consistent spacing between frames. Often, 35mm DIY pinholes cameras ignores the perfs entirely. The transport system is an approximate, “give the knob about three or four turns to advance the film.” That’s cool - I’m not knocking it - but I need something more accurate.
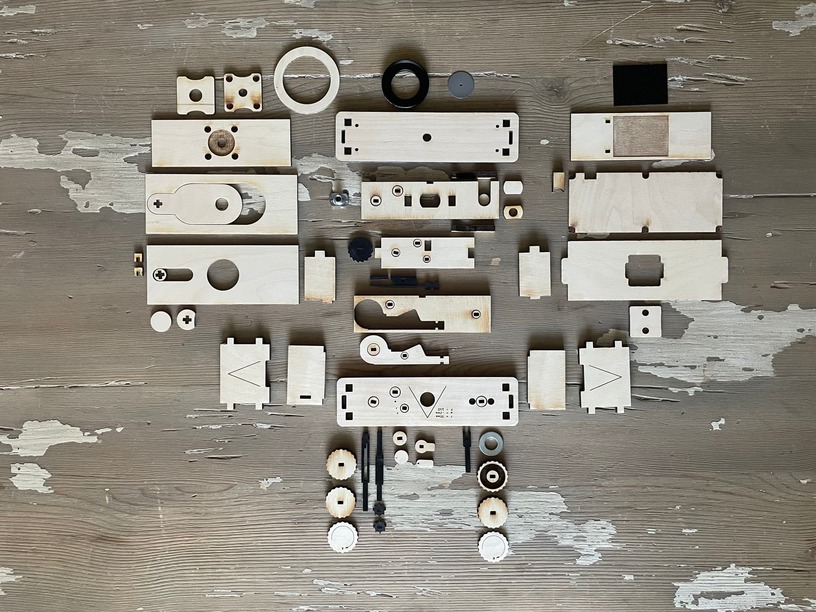
However, dealing with perfs meant dealing with gears and I admit I was pretty daunted by that. But I just rationalized: one frame on a 35mm film negative is 8 perfs long. I just need to make a gear that has 8 teeth and spaced so that when it does a full rotation, I’d have advanced the film by one frame exactly. The perfs are about 2mm tall so the teeth had to be quite thin and that meant plywood was not going to cut it. I ended up using Delrin that came in 3mm thick sheets. I then made a simple jig to hand sand the parts down to the right thickness.
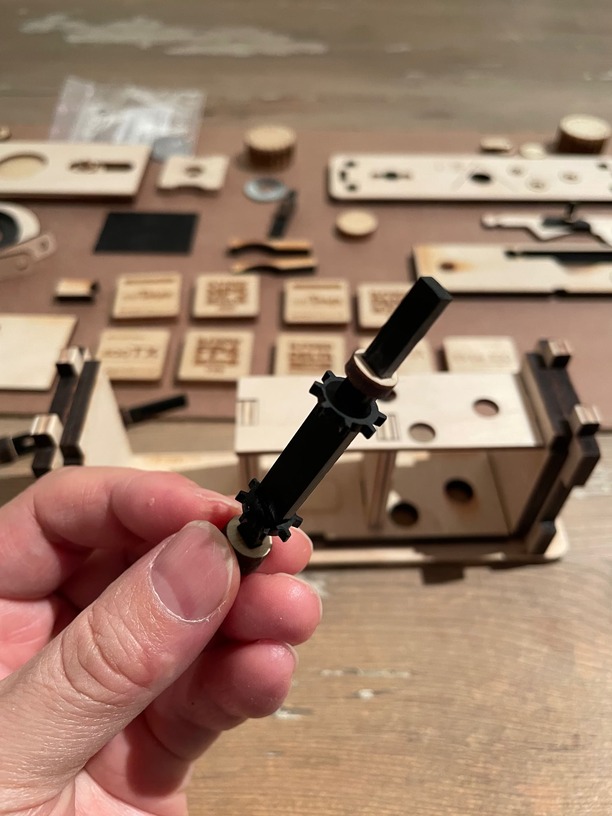
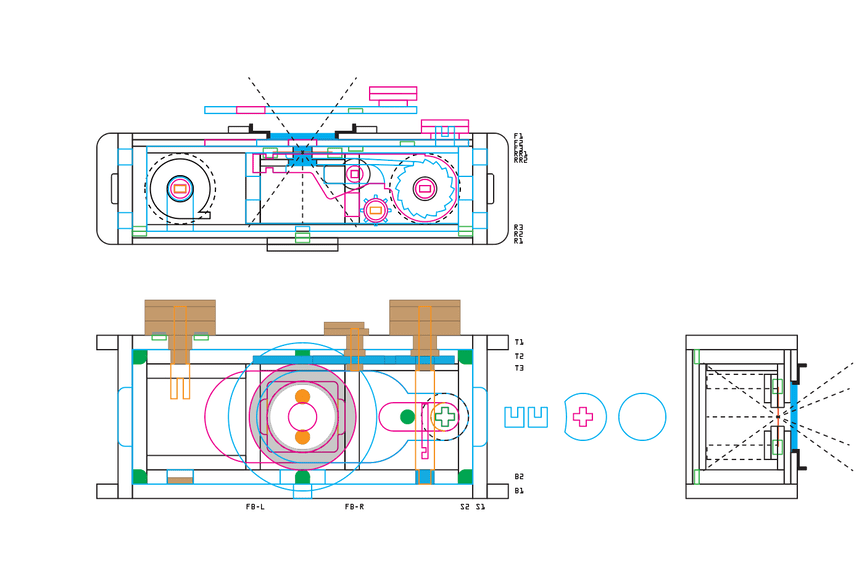
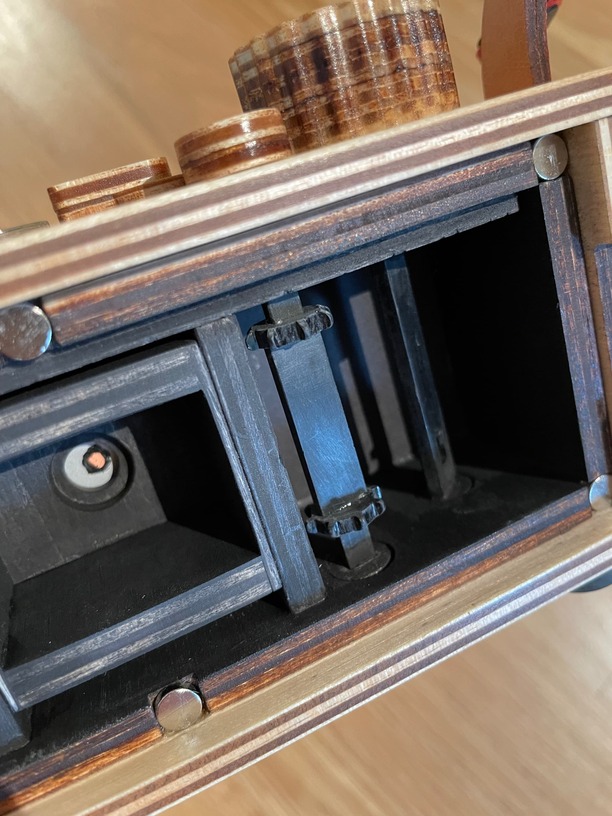
I made two gears so I could use both the top and bottom row of perfs to track the film advancement. The gears were mounted on a spindle and the top of that spindle, outside the camera body, there was a disc with an indicator arrow. There was also a corresponding arrow on the top plate of the camera body. Rotating the arrow around once would mean that the film advanced 8 perfs or one frame.
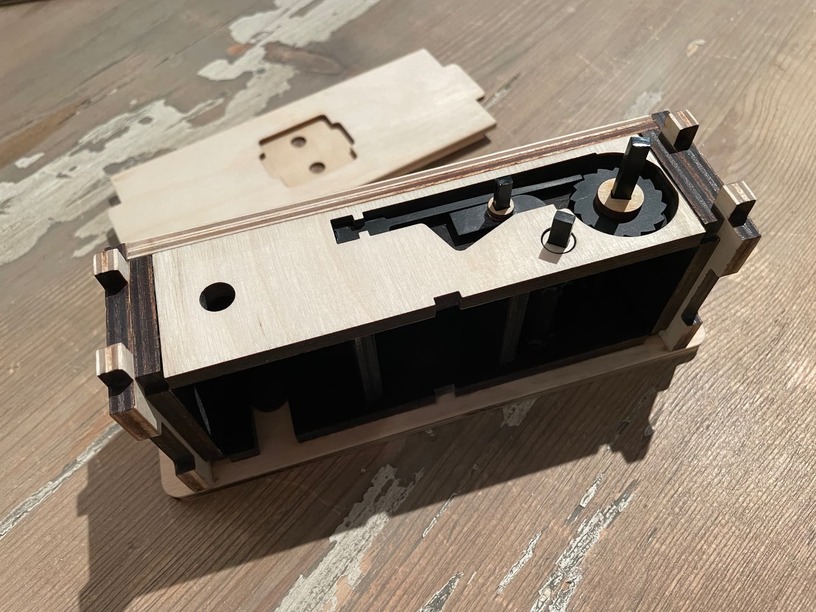
The spindle that receives the film has a gear on top that has teeth skewed in such a way that a narrow arm would prevent the gear from moving in the opposite direction. A lever would then disengage the arm when I wanted to rewind the film. All of this needed to fit in the space of the inner layer of the top plate and that was just a 1/4” thick sheet of plywood! A cavity in that inner layer would house the gears and a “middle stage” of 1/8” plywood was placed underneath to support the mechanisms.

The gear release system originally did not have a return spring, but I noticed on a test that just touching the lever just a little cause the arm to disengage and since the film was wound up on the receiving spindle with tension, the roll would unwind in an instant. Since at that point there was no room to insert a commercially available spring, I tried making my own. First I tried with spring steel, then I tried coiling some wire, but none worked very well. I ended up dropping in a small o-ring and that provided enough tension and flexibility to suit the job. It’s a prototype. I’ll figure out a better solution next time.
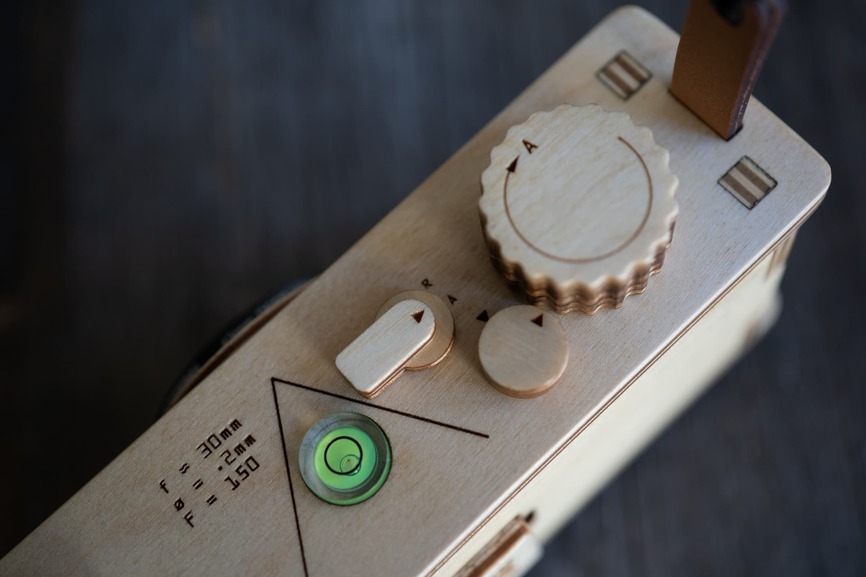
A typical roll of 35mm film takes 36 exposures, I wanted a simple system on the camera to remind me what film was loaded inside since it was bound to take longer than a day to get through the entire roll and my short term memory is… not what it once was. Some cameras from the old days had a little frame that you can slide the paper lid of the film box to remind the photographer what was loaded. I emulated that idea ![]() style!
style!
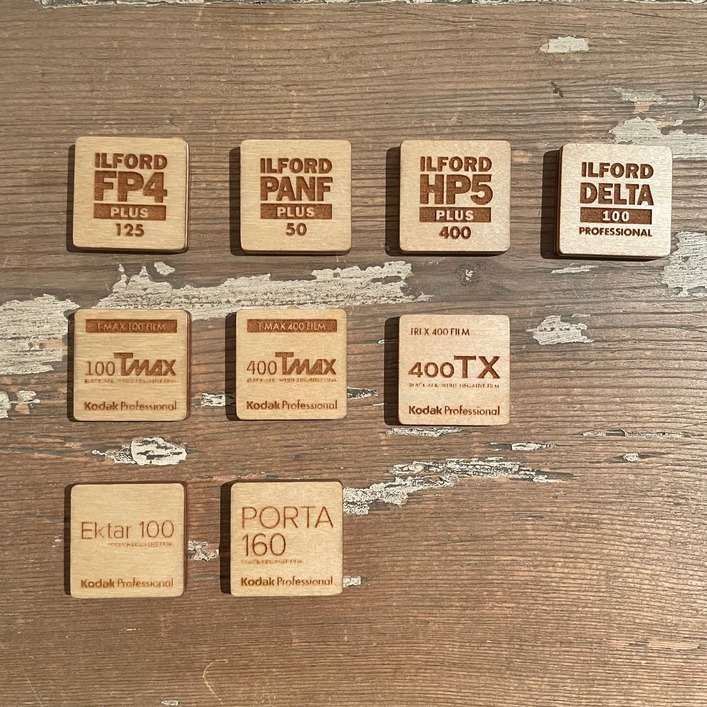
I made a bunch of plywood tabs that would lock onto the back of the camera with magnets.
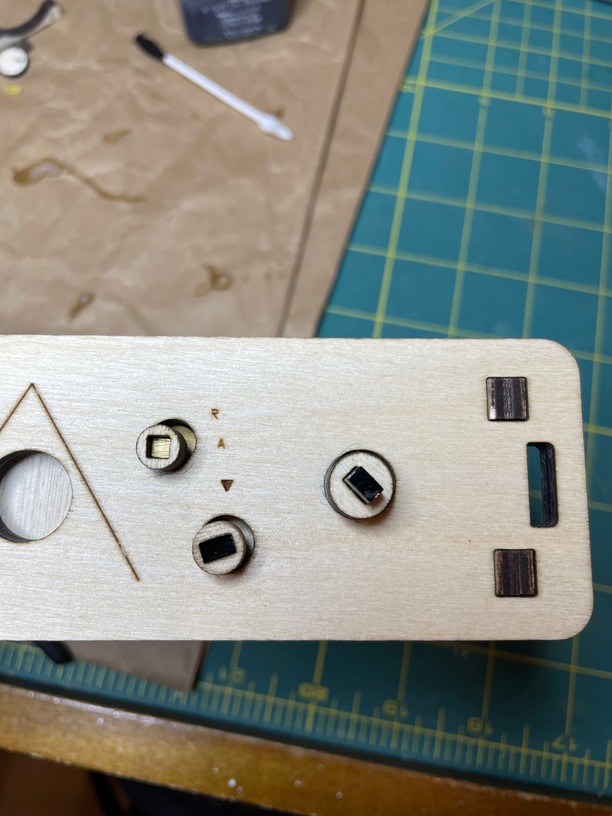
I was very careful but the final test fit showed the outer and inner layer of the top plate were off register. It turns out that the middle stage that supported the gears was off and that threw everything above it off. I could have started over but I decided to redo the outer layer of the top plate by adjusting the holes to where they needed to go. The axis discs showed how much things were off by so I traced them with pencil, scanned the top plate, and placed it in Illustrator where I made the corrections and cut a new top plate. Now there was more to this since there was kerf and scanners are not 100% accurate, but it worked. Of course, the spindles were going to be slightly off from being true but it was not too big of a deal.
After a shooting test, I thought I was done. I was ready to do a victory lap but noticed things were not quite right when I was rewinding. When I opened the camera I discovered the film had snapped in half. The “fork” of the rewind knob had also broken. The perfs were torn up in certain places as well. Initially I thought it was because things were off axis but reasoned that alone would not cause tears. It turned out that the two perf gears, which I sanded down became too sharp as a result. While advancing the film, this gear would sometimes cut the perfs. When rewinding, those torn perfs prevented the film from getting back into the film canister. Not knowing this, I turned hard enough that a tear from one of the perfs travelled down and weakened it enough that it snapped. Note to self: Film is actually quite brittle and susceptible to tears!
I was really frustrated and was ready to start all over again. However, I cooled off and decided a few adjustments would be all that I needed for this to work - and because it’s a prototype that’s all it has to do: work. So I swallowed my pride and started filing those gears to make it looser and sanded all edges round, which was awkward because they were already on a rotating spindle inside the body of the camera. The fork of the rewind knob was rebuilt with Delrin. There were a bunch of other adjustments I won’t list here since this write-up is already too long.
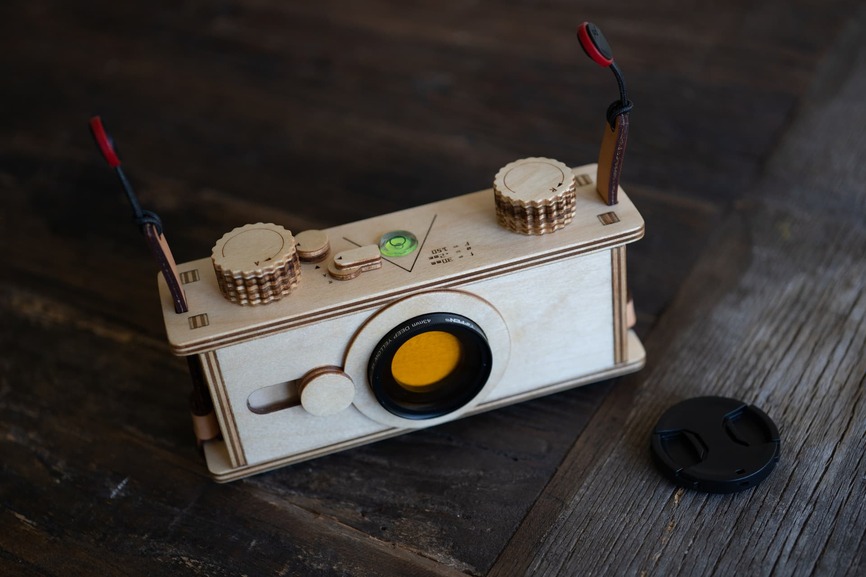
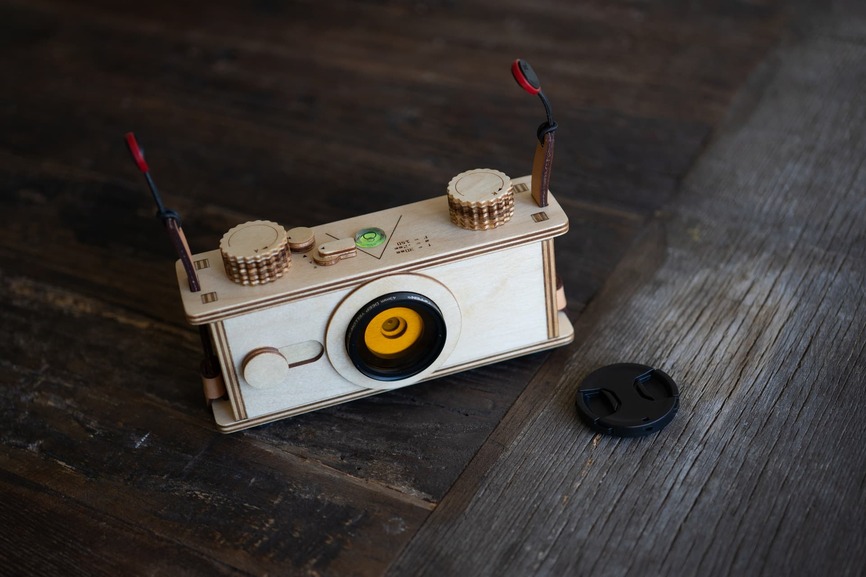
So here it is in all it’s glory. I must say I do like how it turned out. It has that 35mm camera look while still being a pinhole.
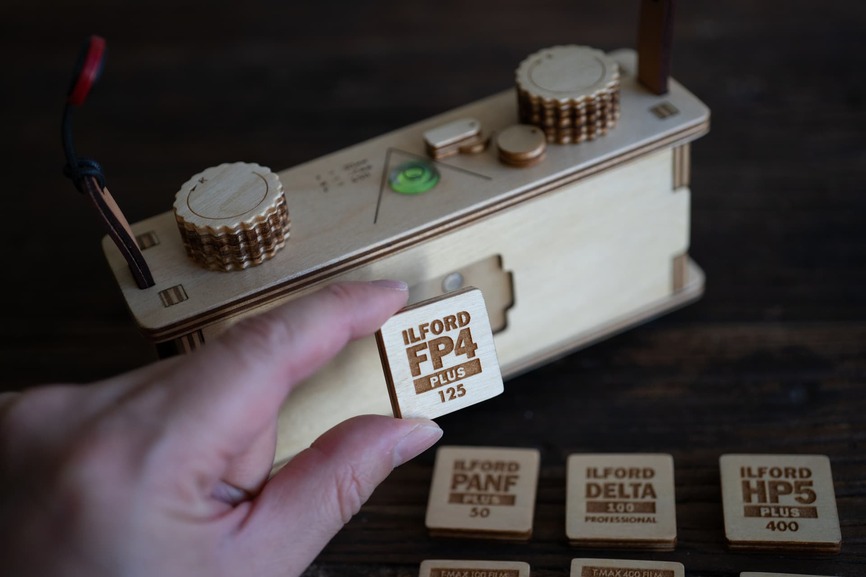
It was fun making the tabs. I designed them to have the same look as the film packaging in homage to the box lid solution I described above. This turned out to be so useful, that I’m going to make a tab holder that I can put on other camera straps so I’ll be able to use them on my cameras that don’t have a film type indicator.
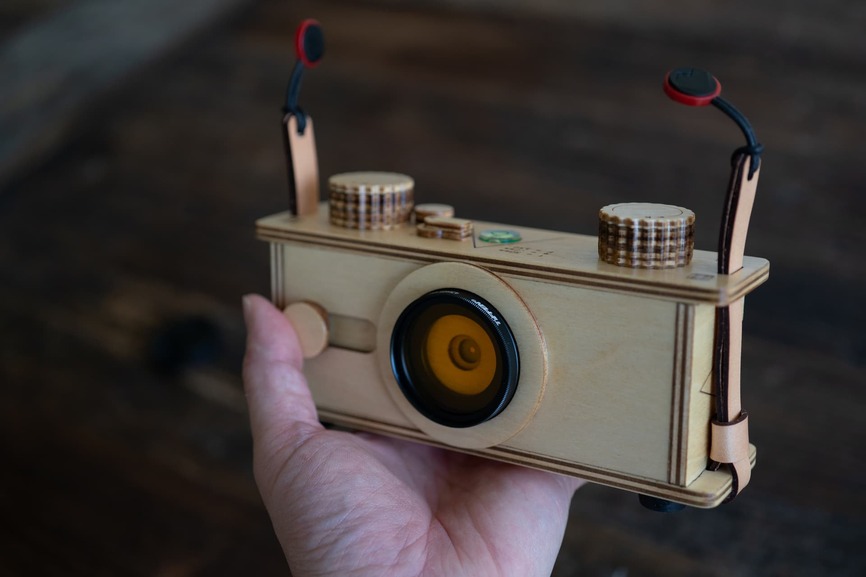
In the field it handled very well. The size was great - I could take it anywhere. I could mount it on a tripod or take hand held exposures. I want to say it was stealthy, but even small it draws attention because I look like a guy walking around with a small wooden box and that’s not something you see everyday, oddly enough ![]() .
.
The gear system does not incorporate a frame number indicator, which means I won’t be able to tell how much I film I have left. That’s a bit of a drag but adding the gears necessary to make that happen would have made this camera a lot bigger than I wanted because what would be the point of making a 35mm camera that was as bigger than a 120 film camera? Well, there is a point and so the next step will have to incorporate a counter. Indeed the goal of this build was NOT to produce a 35mm pinhole camera ![]() . This prototype was only intended as a stepping stone to yet another camera that required a 35mm film format! It is not the second camera I will introduce today - it should be ready… soon?
. This prototype was only intended as a stepping stone to yet another camera that required a 35mm film format! It is not the second camera I will introduce today - it should be ready… soon? ![]()
Anyway after building it and shooting with it, I am quite happy with it as an end in and of itself. It allows me to shoot in a way the other cameras do not. I already have some improvement ideas so, I’ll probably comeback to this project for further refinement.
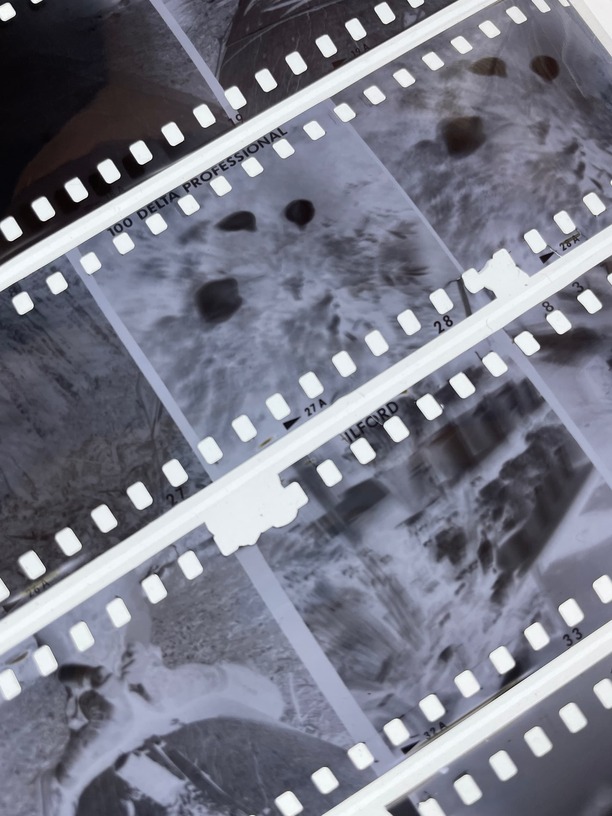
But for now, some shots.
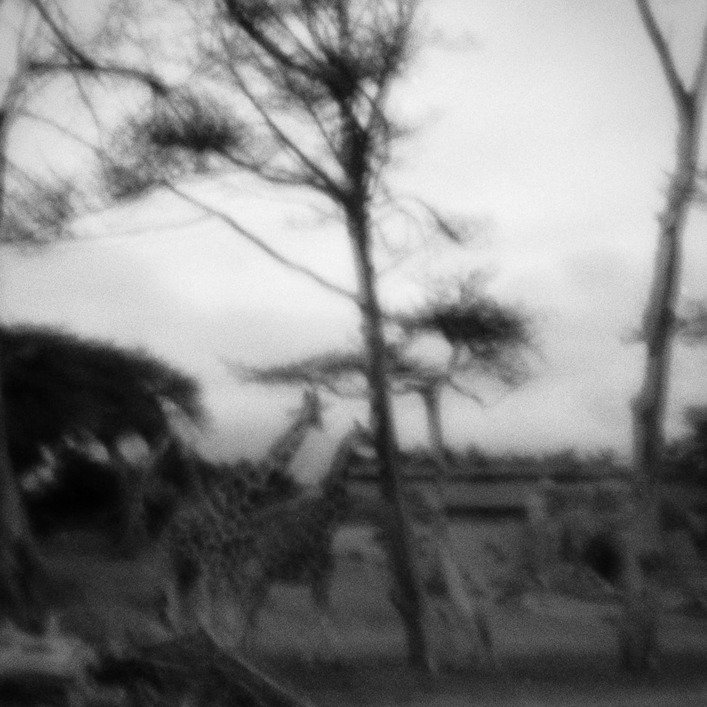
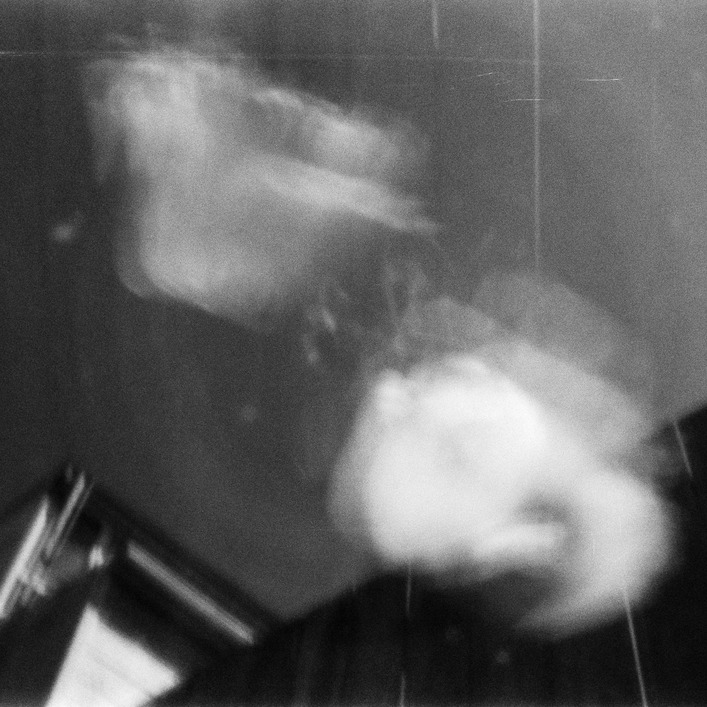

In case those were too grungy to make out, they were: giraffes at the San Francisco Zoo, tulips in my backyard (blowing in the wind), my youngest daughter in the Presidio.
Thanks always for your time and I hope to see you in my second post for Worldwide Pinhole Photography Day: the stereo pinhole!