
Still a newbie here, but love everyone’s posts and projects your all so talented. I wanted to engrave these two photos on wood for Christmas but not being tech savvy they need some cleaning up, if anyone could help me it would be greatly appreciated I tried a test run and it was not good
Use the forum search function for “preparing photo for engrave”.
Here is one of many results. (How I Prepare Photos for Engraving Using Photoshop)
There are other examples with different software, but essentially the same process.
6 Likes
‘Cleaning upa’…are you wanting the background removed?
@PrintToLaser has it right, you might find this useful too, check out #9:
3 Likes
Yes I would like the background removed. Any help greatly appreciated!
Lori
Here’s a bit of cleanup-background removal then adjusted levels for more black/white and midtones and sharpened it quite a bit. There’s quite a bit of noise in the pic and it’s not too clear (a bit blurry) but i think it should engrave ‘fairly’ well. Hope this helps. Good luck!

BTW, what a little cutie!
9 Likes
Thank you sooo much I really appreciate it. This is a pic of my late son in law lost to suicide and my grandson, making a remembrance for his mother.
2 Likes
Oh wow. What a precious picture. And kudos to @rvogt for background removal.
5 Likes
Sorry for your loss! That will be a wonderful piece that will be treasured. I hope you will share it when it is done.
4 Likes
So sorry for your and your family’s loss.
3 Likes
Thank you all, I will definitely share when it’s done 
So, I’ll add a few things to what everyone is saying.
First, the best way to get a good result is to start with the best possible picture. This picture has a challenge, I suspect it is a reflection that makes an unfortunate washed out area:
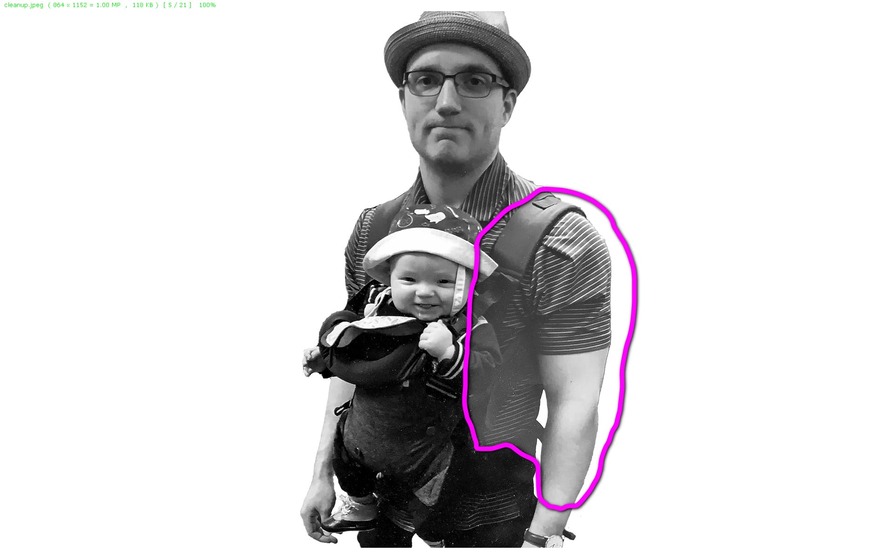
You can probably edit that and get it looking a lot better, but ideally you’d retake the picture (I assume it’s a picture of a picture) and get one that is a bit cleaner to start.
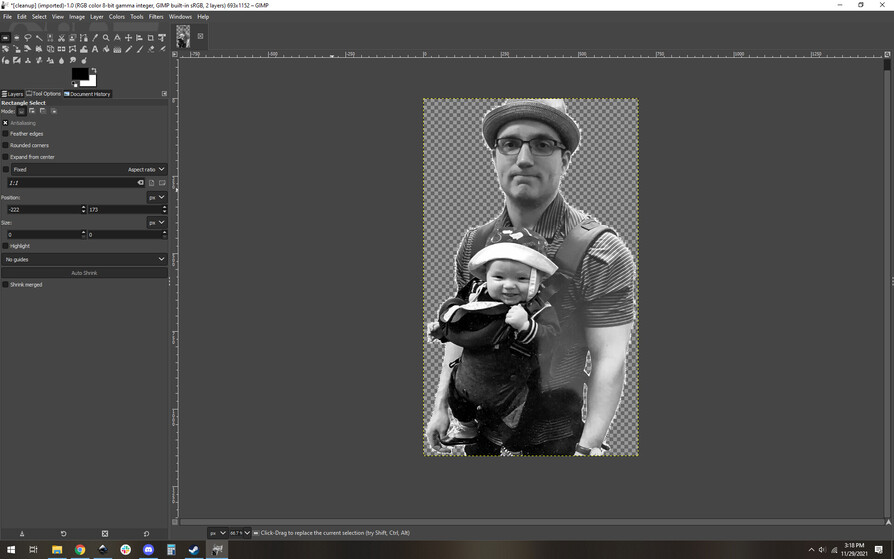
Next up is to crop the image down and completely remove the white background and make it a transparent background.
Then when it comes to images like this you really want ridiculous contrast levels. We can look at the curves (aka histogram) to see where the distribution of greyscale sits:
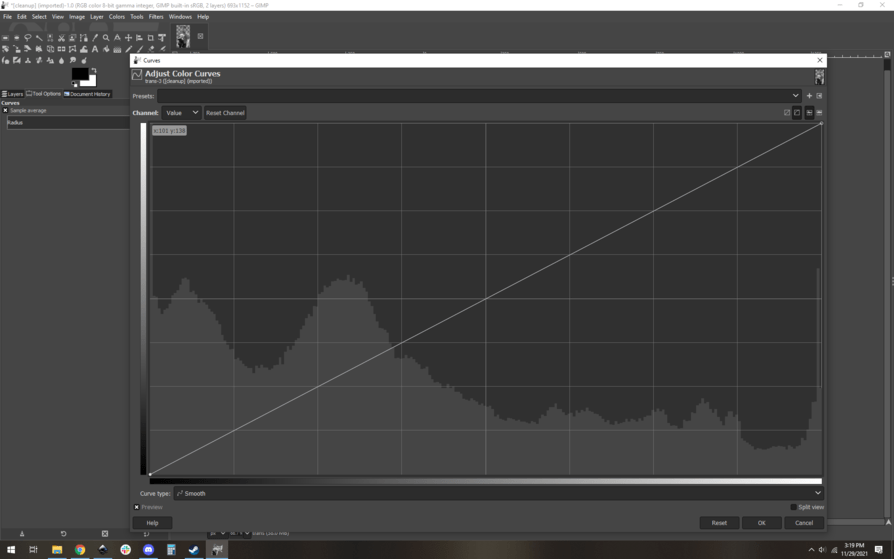
This shows you immediately that an awful lot of your photo sits in the darker range of things. We kind of knew that, but there it is in graphic form. This usually leads to a muddy end result.
I will use the curve to both keep the blacks black but also to give you more variation in your midranges. I usually eyeball this but it looks a bit like this:
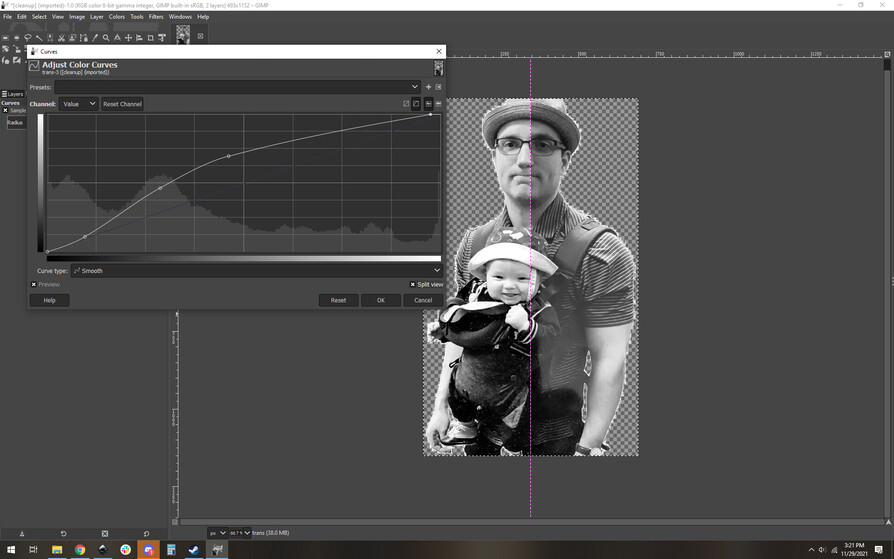
You can see the side-by-side comparison. To human eyes, the picture looks too bright and washed out now, but that’s what you want with the laser. Dynamic range is all you can work with here, so you’re trying to make sure your image uses the entire range of greys.
Once you’ve saved that you can look at your curve again, you’re hoping for a little more even distribution:
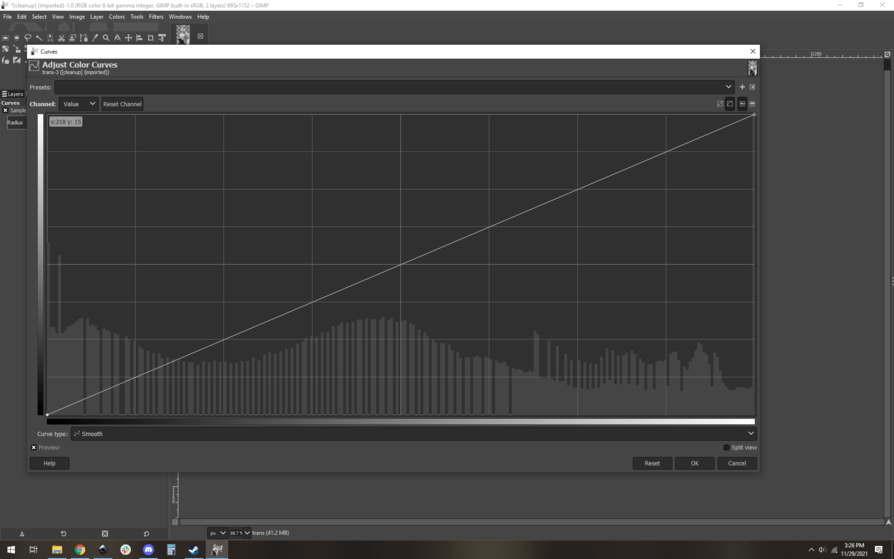
Good, good. The curve is a bit more even. Now of course the final vote is your eye, if it doesn’t look right, just undo it and try again. You can always run your curves several times.
Anyway, here’s the final result. You can unfortunately really notice the washed out area now, but I think this is a better starting point to get a good engrave. This is all subjective of course, you are the final word on this.
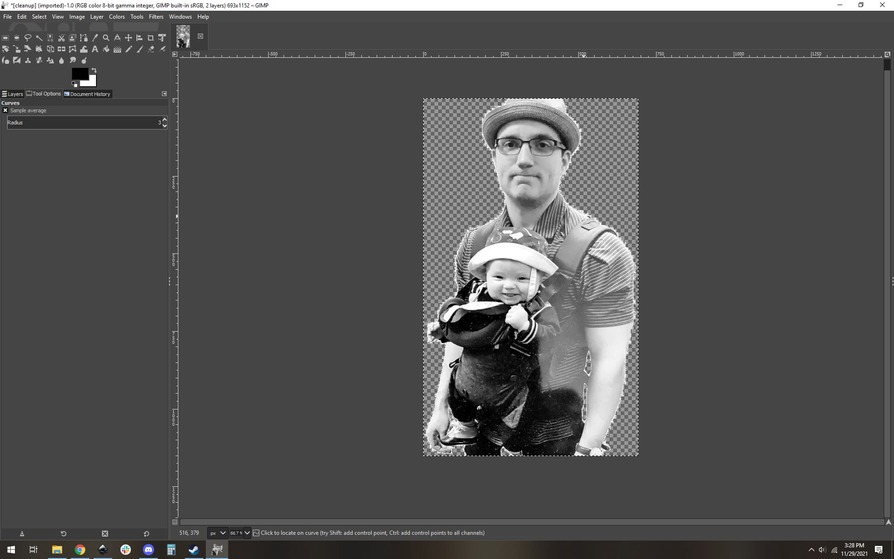
Then export it as a PNG (pngs can have transparent background, jpegs do not)

6 Likes
OMG thank you so much, as this picture cannot be retaken unfortunately. This looks much better. This is such a wonderful community I am learning so much and admire all of you for your talents and knowledge.
Lori
3 Likes
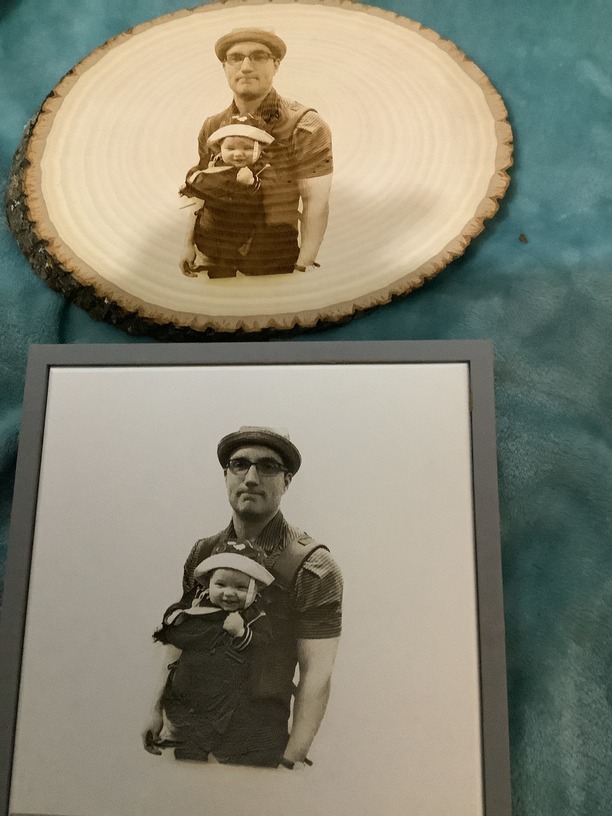
Here are the finished projects so far, special thanks to awesome rVogt, and evansd2 for their wonderful cleanup.
Also thank you all for the kind words this community rocks!!
9 Likes
Oh hey those turned out really nicely. Glad to see it.
2 Likes
Beautiful! What a lovely gift 
2 Likes
One thing you can do on unfinished materials like the wood round is give it a light sanding with a fine grit sandpaper, 220+, and it will help it develop a bit more contrast as well!
2 Likes
Thanks to your help! I was very pleased with the results
Thanks I will give that a try
The best accessory there is for your laser!
1 Like