Okay, hang on a second, I’m going to have to prepare a graphic.
Thanks! I could split the file up to do the cuts in 2 sections, but then my next question will be about how to ‘register’ a new file with the previous cut…
Okay, take a look at the thumbnail where the arrow is pointing - those are the cuts you have set up…it looks like it’s going to turn your board into confetti.
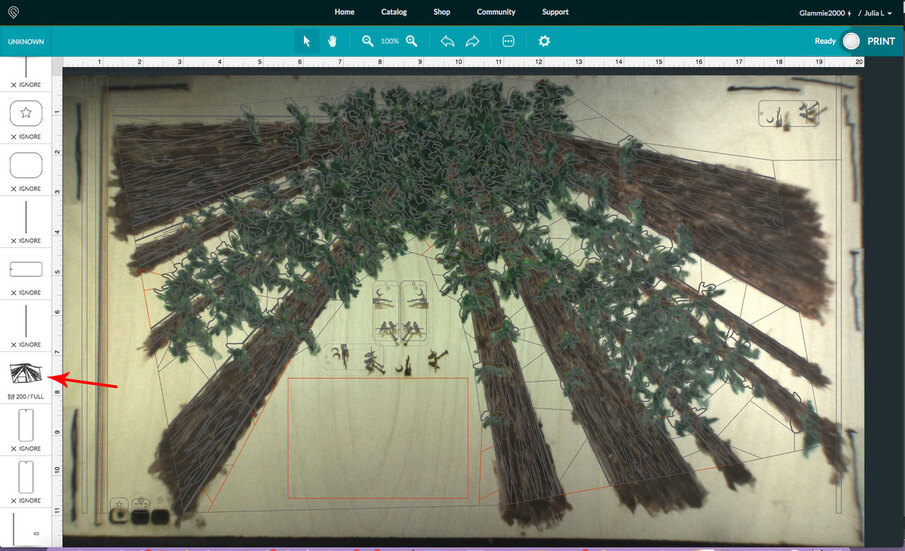
Do you really want to re-score or cut all of those lines in there? You will already have engraved all of the bark scoring.
Is this a puzzle? Scaling the image down just a hair might let it work and it shouldn’t affect the placement too much with the coloring. I don’t see anything else it could be.
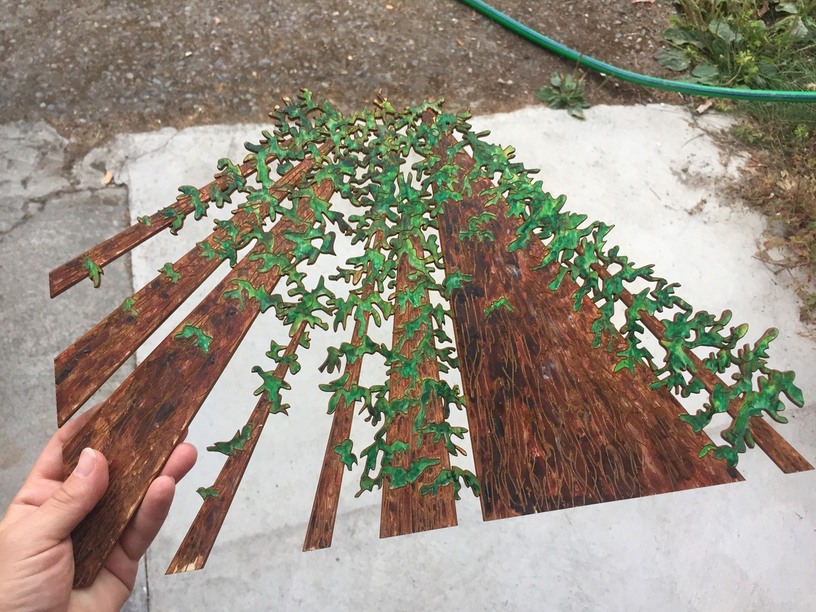
I know it looks chaotic, but actually I DO want to cut all those lines shown there… here is a picture of the other half of the design which I successfully cut 2 days ago. I was originally planning to do this as a ‘pass-through cut’ but quickly learned that registration would be impossible, so I cut it up into 2 halves, which I will then glue to a larger, painted and then rastered backing-board.
3 Likes
Wow! Cool effect!
I think you’re going to have to scale it down just a little bit. 
1 Like
Good thing I kept it simple for my first GF project!  Lol
Lol
1 Like
Oh man… if I do that, then I am going to have to re-do the entire other half…
Sheeeet! 
Listen, you might be able to move the board farther down towards the door - just a hair, then you can shift the whole image down as well. I’d try that first.
1 Like
Ok… before I resort to that, do you have any thoughts why the plain vertical bar that is the same height as the rest seems to print fine?
Did you shift the material on the bed at all after doing the vertical bar? Is it possible that it was moved back a little?
Nope, the black lines on the wood show where it is taped down. And I intentionally have tried my darndest not to have to re-upload the digital file so as not to change the registration.
Okay, do this, (and don’t freak because CTRL+Z will undo it):
CTRL+A to select everything.
Press the down arrow on the keyboard, one click at a time, but count how many times you do it. (And don’t forget.)
That will shift the image down in tiny increments, but if you haven’t cut or engraved anything yet, the engrave lines will remain in alignment with the cut lines. The only thing to watch is the painting underneath.
If that doesn’t do it, you might actually need to shift things up. (And in the future - try to design for 10.875 inches on the height - it’s not actually 11 inches - they round up a bit.)
As long as everything in the image is selected together, it will stay aligned to itself.
(Let me know if that makes sense.)
(You know, you might have to try shifting everything left a click or two too - looking at that file, if the cutlines are connected somehow, they might be too far to the right.)
Ok… testing it out.
SO, it definitely has pretty much no room for error. 1 click up and it goes gray, and 2 clicks down and it goes gray…
I am still confused why the vertical ‘test bar’ prints fine though.
If you got them all to light up you succeeded, congratulations!
Not quite… in that instance I was referring to the ‘raster layer’, but when I was looking at the cut layer, there was no discernable difference based on slight movements.
I will definitely be designing for 10.875 inches in the future…
Did you try taking them left and right too?
Yep, no noticeable difference.
Well, the only other suggestion I have would involve me taking a look at the file first, I might be able to split it or see something else that can be done with it.
Unfortunately, that is going to involve having to reload the file I’m afraid, so not a fabulous option…you’ll have to realign it with your painting.