Hi Community!
I just got my GF about week ago (yay!) and am at work on my first big project. I’ve run into several learning curves along the way, but up until now have found ways to work around them.
I have a file that I uploaded and it worked last night, but now certain portions of it are ‘not printing’. They are being visually rendered, but when I select ONLY the important parts of the file (ie more complicated part, versus small test pieces) the whole file says ‘No artwork’.
I have tried the basic things like reloading the page, and restarting the glowforge. I could really use some tips for the next steps here.
Did you set a height for the material? (Necessary if you are using anything other than Proofgrade, which comes with the information coded into that QR code.)
(If you did that too, we might have to take a look at the file to see if there is anything going on with it…sometimes overlapping nodes and vector paths can keep the interface from recognizing a file.)
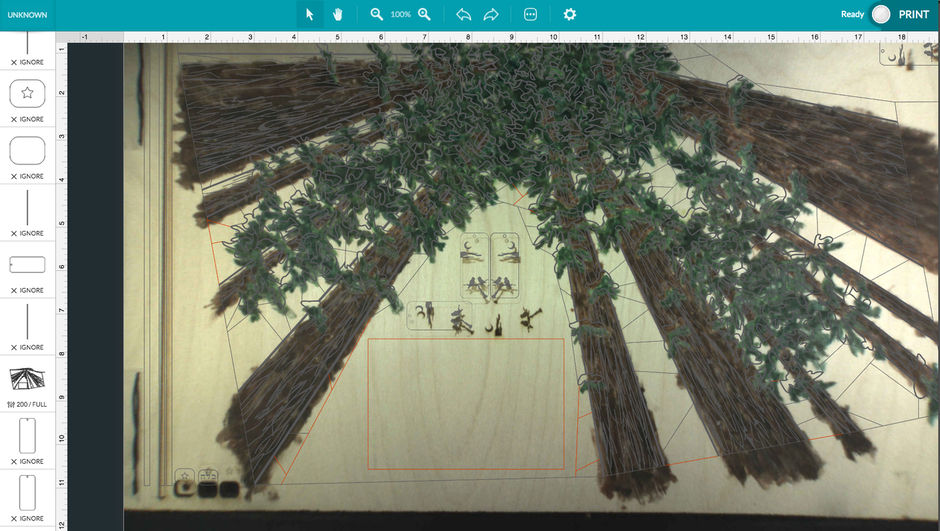
There are 17 different colors. I tried ignoring all but 1 raster color/section. That one is set to 1000 speed, and 80 power, 225 lines per inch. It’s on ‘home depot’ maple 1/8 inch plywood.
I originally made it in Illustrator, and tried uploading it as a PDF but that didn’t work, so I saved it as an SVG, and successfully got it to upload and print last night.
Oh, you might have picked one that is too close to the bed limits for engraving.
The side limits on the bed shift smaller for raster engraving, because the head needs room to decelerate at the sides. 1000 is highest speed, so the limits will shift out farther into the bed.
You can reduce the speed and power and make that larger, or move the engraving away from the edges.
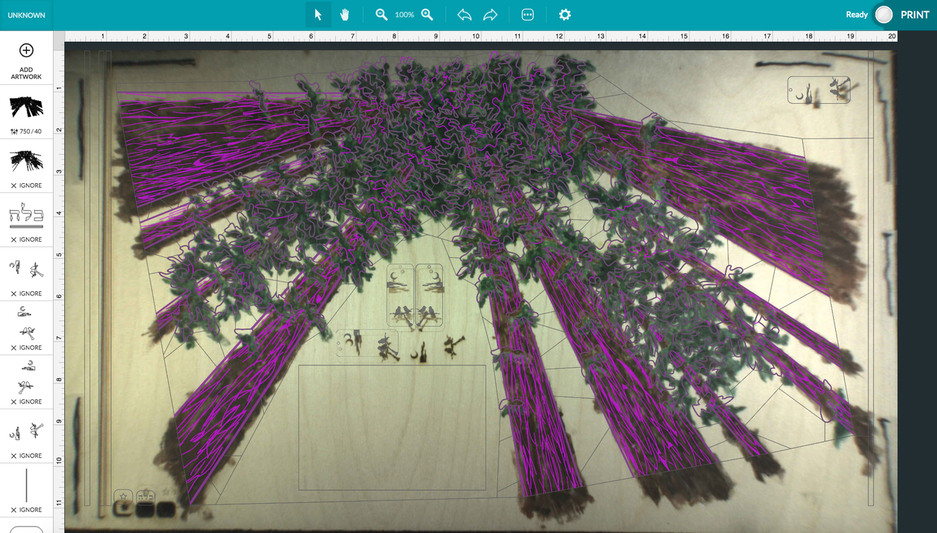
It does appear that the raster portion is now ‘available’ when I reduce the speed! Sweet.
Just did a test for 500 speed and 40 power though, and it is definitely not equal, so I am doing tests to find a roughly equivalent speed/power ratio (it has to match another piece I made already). I will keep you posted when I successfully get an equivalent speed/power ratio.
You are a lifesaver! (the multi-piece project has to be done in a few days, of course, lol).
So, the raster portion seems like it will work at 750 speed and 40 power (close enough for my purposes). But now there is another ‘cut portion’ which is giving me troubles.
Do vector cuts have the same kind of speed limitations that rasters do?
Hmmm. I wonder why only about 10 of the ‘vector cuts’ appear to be ‘selected’ on my important ‘cut layer’ (there are probably a few hundred on that color/layer if I had to guess)…
Sorry my terminology is probably not quite accurate
Also, the raster layer says it will take 2.5 hours, so I haven’t ‘pressed print’ yet, so I can determine how to get the ‘cut portion’ to work. Thanks for all your trouble shooting tips!
Okay, I’d suggest temporarily setting the raster section to ignore and see if all of the cut portions will then show up. You’ll need to take it in steps. First process all the raster work, then when that is done, set the engraves to Ignore and set the Cuts to go. (Do not move either the material on the bed or the images on the screen if you do it that way…it’s going to look like it’s going to cut in the wrong place, but if you don’t move anything, it won’t.)
It looks like some of the cut lines are off of the bed into the uncuttable area at the top - you might have to shift the whole thing down just a little bit.
(Oh maybe not - I see the ruler is not showing zero on the vertical scale.)
Shoot- as you can sort of see, I am trying to align the whole thing with a painting did based on a ‘score mark’ I did yesterday.
I did, however, successfully cut and score a vertical bar on the left side which should be exactly the same height as my whole design (I was concerned about that limit in the first place). It could be slightly off by like a thousandth of an inch or something… but in Illustrator it measured exactly the same height.
Also, is it normal for the camera to be so ‘off’ from where it actually prints? Since I’ve only had this baby for a week or so, I just wasn’t sure if that is normal or what.
It can be off by up to 1/4" right now…they are working on improving that.
You could conceivably split the actual cuts or scores into two colors - if you make half the lines green and half the lines purple, then you can process them in two batches.
For this particular cut layer, here is a better picture showing the upper margins… it is close, but I think not off? You can see the vertical bars on the left and right side to measure the height. It’s a bit hard to see with all the overlaps, but it is obvious where some of the ‘angled lines’ are grey -they should be red to match the ones that are working.