No, I spent all my money on a laser that doesn’t work. lol. Tried a different piece of draftboard though and having the same issue.
1 Like
Well, if you can borrow one from a neighbor…the one thing I haven’t had you do is check the actual thickness of the material.
Older draftboard tends to absorb humidity badly, making it swell in places and not cut through completely. Medium draftboard is supposed to be about .125" thick. Mine never is, because I live in a very humid environment on the coast…it generally swells to from 0.134" to 0.139" with the humidity. When that happens, I have to slow down the cuts a little to get through in one pass…183 speed is just too fast.
Another thing that you can do is change the material height in the manual settings to correctly reflect the actual thickness. It will over-ride the defaults. But it’s generally easier to just slow it down by about ten points.
Anyway…checking the actual thickness of the wood might point out that the problem is just with that sheet of draftboard. (Which would save you the round trip and wait on the replacement machine.)
1 Like
I’ll see if I can find some calipers this weekend. The wood is only a couple weeks old. I’ll keep you posted. Its weird though because you’d think if it was swollen wood that it would be fairly consistent, but this has spots that cut and spots that don’t on multiple pieces of PG draftboard, so its seems unlikely that the issue would be all over, and the fading laser mark is also a weird issue.
I’m gonna have a glass of wine and try again tomorrow!  hahahaha
Is the crumb tray flat against the bottom of the forge?
The crumb tray is flat and is seated in its little dimples.
1 Like
I went through a similar ordeal…
1 Like
Interesting. It just seems odd that my first laser less than 2 weeks ago cut just fine and now this new one seems to not cut. Also it seems to make a ticking/clicking noise when starting up, which I don’t remember in the first laser? I don’t know. Hopefully GF support will have some answers.
The ticking/clicking noise is the laser head focusing. It does this when the machine starts and at the end of each print, so you’ll hear the clicking at both of those times. It’s basically just moving the lens up and down inside the head. On a semi-related note, I would inspect and clean the lens, the windows, and pop the top off the print head and make sure the mirror is seated at the right orientation. Any of those being dirty or misaligned could result in reduced cutting power.
Thanks for letting me know about the clicking/ticking noise! Makes me feel a bit better!
As for the cleaning/checking mirror etc I’ve already done all of that. Its incredibly dissapointing that this is the second laser I’ve gotten and I’m again having issues.
Can you check your settings for the “Cut” section of the print? Click on it (should be the bottom one on the list) - it will say Proofgrade Cut - then click on the arrow to the right to reveal the actual numbers.
Your cut doesn’t even seem to be as strong as the score. I’m wondering (again, like Jules) if this file is not being processed correctly.

Yeah, that was my first though too. The settings when I click over from proofgrade cut show 183/full just like hours.
The only other thing I thought of is it being a bad batch of PG, but that’s not possible because it’s not even scoring the masking at the end of that cut path, definitely laser power issue…
Hi @ashleyn, I am so sorry you are having issues with your replacement Glowforge! I would like to check over a few things. Could you do the following for me?
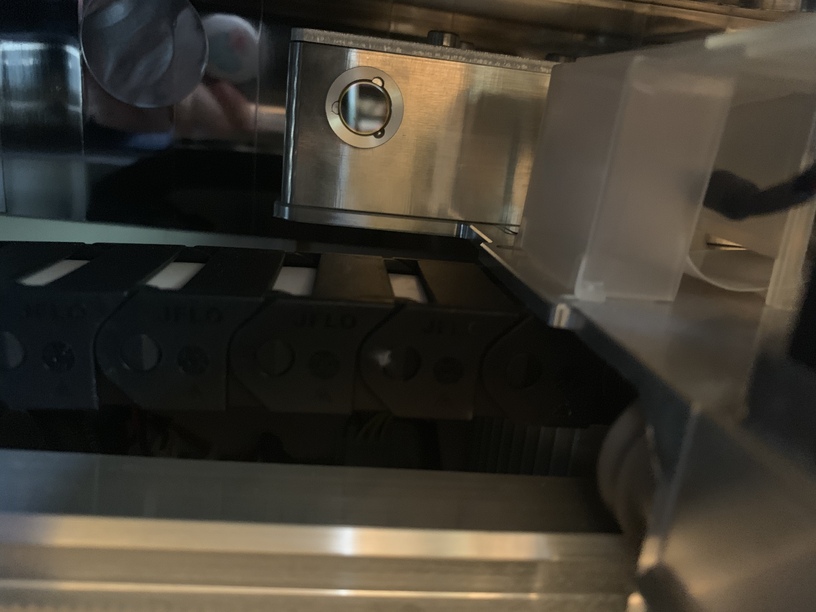
Please send photos of all your cleaned optical components, with special attention to any damage you might find:
- Both windows
- The printer head window, on the left hand side of the printer head

- The laser window on the inside left of the Glowforge

- The printer head window, on the left hand side of the printer head
- The printer head lens
- Both sides of the lens, top and bottom

- Both sides of the lens, top and bottom
- The 45 degree mirror inside the printer head

- The bottom of the printer head

Once we have those pictures, we’ll follow up with next steps.
Thank you in advance.
1 Like
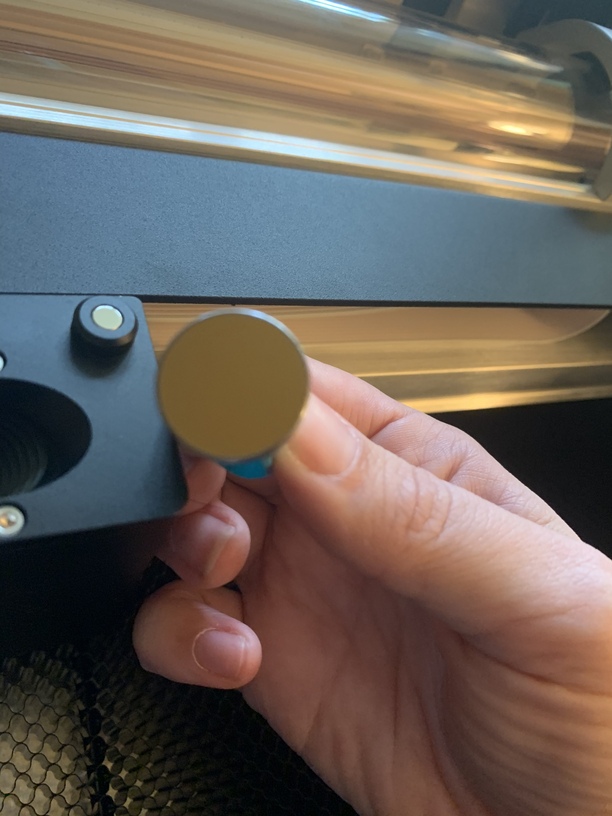
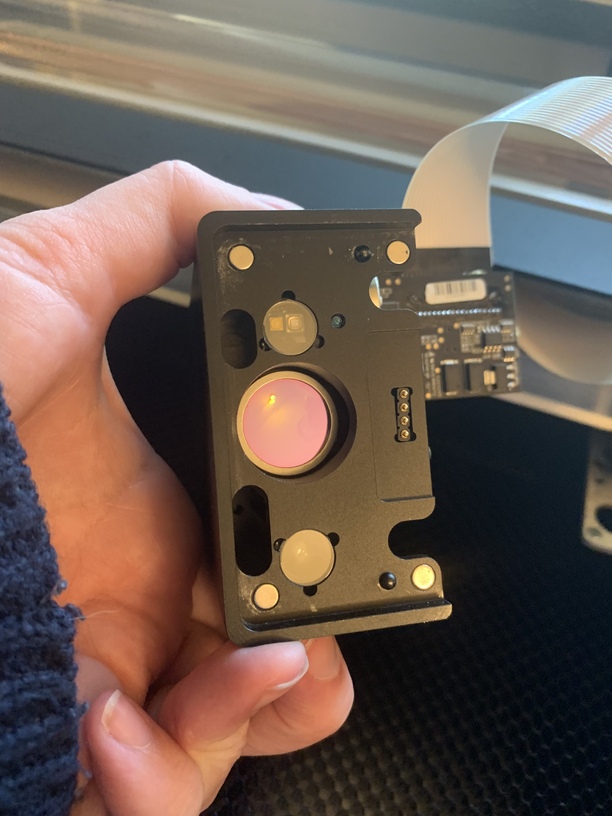
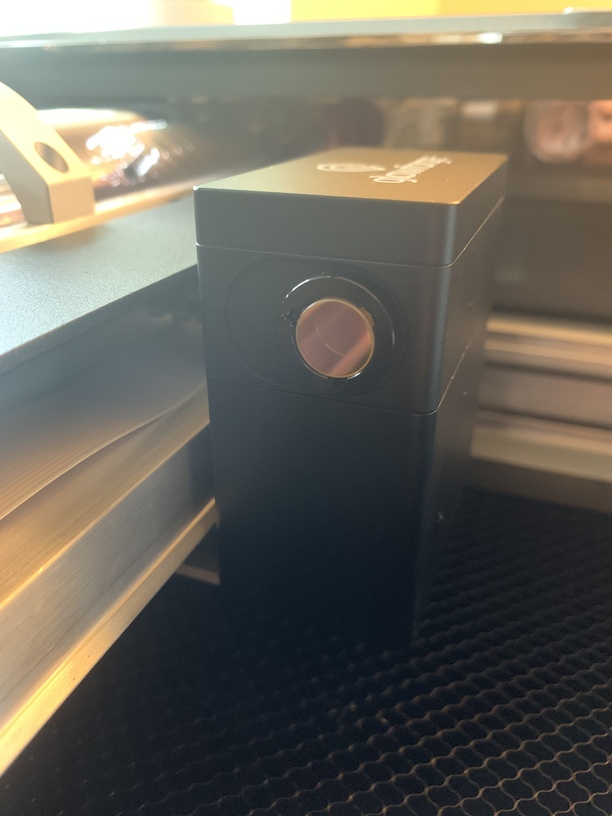

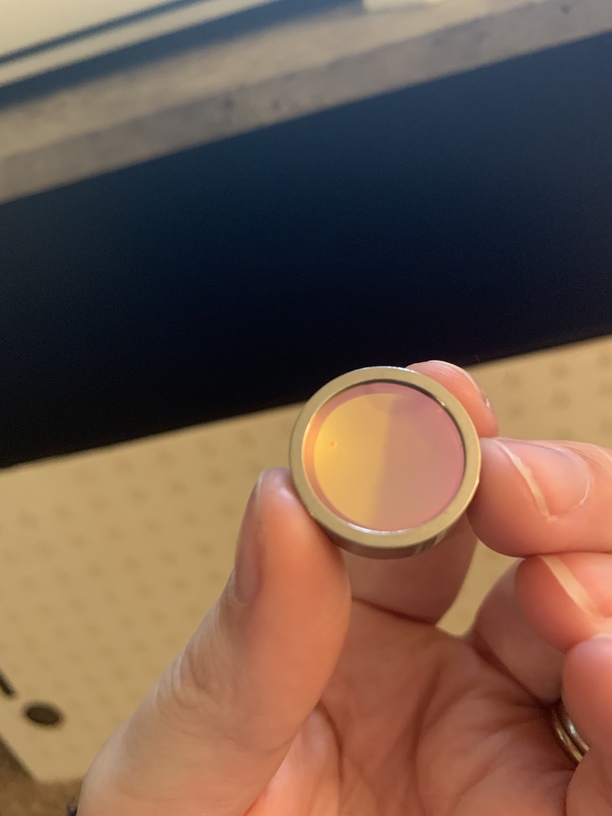
I don’t see any obvious scratches or blemishes on any of these lenses. On the camera head lens there might be the smallest dot in the center. It almost looks like dust but won’t come off with a zeiss wipe, and won’t seem to capture on camera at all.
1 Like
I am having the exact same problems with my laser not cutting through proof grade materials. All of my components have been cleaned as well. Interested to know how this turns out!
2 Likes
Support won’t respond to 2 issues on 1 ticket so if you’re having the same issue you should take the same series of photos and post them in a new ticket so someone on Staff can help you out (presuming no one in the community can figure out yours )
and also, that bites! It should work and we/they’ll get you there!
3 Likes
Thanks, that’s good to know! I actually just tried cutting the GOGM one more time after cleaning everything, and it worked- It cut through this time! My laser window on the inside left of the glowforge was extremely dirty, so I bet that’s what was giving it issues. Glad that @ashleyn posted about this problem so I could learn and solve mine! Thank you! Hope @ashleyn gets the problem figured out soon!
3 Likes
Thank you for all of your great help everyone!
Unfortunately, it looks like your unit is experiencing an issue that we can’t resolve remotely. I want you to have a reliable unit, so I’m recommending we replace this one. I have reached out directly via email. I’m so sorry about the bad news.
I will now close this thread.
1 Like
This topic was automatically closed 30 days after the last reply. New replies are no longer allowed.