one of the things I found when this was happening was that if I opened the artwork back in photoshop, or inkscape, and clicked on it - low and behold there was additional blank space below the image. Think of it as canvas size… there was no artwork, so you didn’t see it on a screen view, but the actual image still contained the space. When this would extend below the bounding box on the GFUI it would cause the “no artwork” indication.
I would recrop the image, and everything worked as planned.
1 Like
A Ctrl-A will select everything so you can see what is outside the boundaries.
1 Like
I want to cut- I brought in a PDF and it says sorry you can’t cut, only engrave, a bitmap (pdf)
Hmm, might be the way you are saving the PDF. I’ll take a look at my settings when I get home.
thank you!
It might help if you post the actual SVG you’re using so someone can look at the file itself. It’s easier to troubleshoot that way.
Also have seen this problem with both SVG and PDF. Will likely write to support soon though I suspect they are aware of this bug. It’s not you, the file type or cutting area.
I had luck with the same files trying again/restarting.
^^^^^ This.
If you can zip the SVG file and load it here, it would be a lot easier to diagnose what the issues might be. Looking at a PNG file doesn’t really tell us what’s going on. 
I assume the red lines in it are vectors and you are wanting to cut along the lines? (Not engrave them, right?) And it was created in AI?
I already set up the non recognized material, thickness, and print settings.
1 Like
Sure…GFmylarLoveLaceStencil.svg.zip (255.4 KB)
1 Like
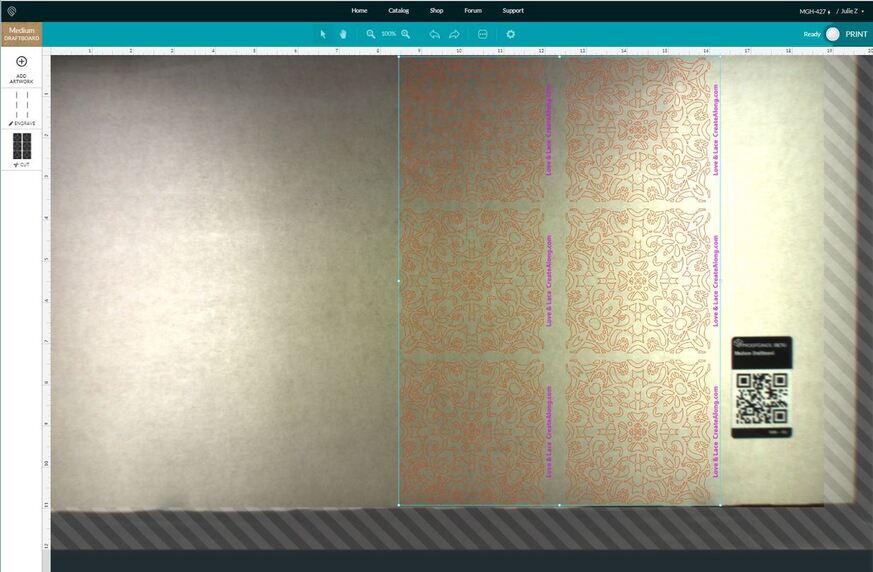
So I think the biggest problem you have is that the max vertical cut height is 11-ish inches (just a wee bit under from what I’ve seen others post) but your design is 11.3319 tall so both top and bottom patterns are outside the cutting area. So at best only the 2 lace patterns in the middle row and all of your text would have been ready to process in the GF.
Then I went back and looked at your original picture at the top, you were trying to engrave your lace pattern. That makes the “printable area” smaller, along the lines of 18.25 x 10.75 inches.
I’d recommend you rotate your art, and I’d put the whole thing out as a PNG file if you’re engraving everything. In the lace patterns you’ve got about 18000 nodes total and that will take a long time to process. The PNG will at least set-up and start faster.
Good luck.
5 Likes
Okay thanks, that did actually help to find what the problem was, and it was really simple - the spacing on your lacy things was just a hair too large - they spread across just a bit more than 11" tall, which is too big to fit on the currently cuttable area.
So by making those a little tighter fit - they can all be placed on the artboard.
The file below is space distributed for 10.8" if you want to do three tall, and should cut just fine.
GF2mylarLoveLaceStencil.zip (273.7 KB)
Or if you want to have more spacing between each lace thing, you can rotate it 90° like @hansepe suggested (beat me, doggone it) ![]() and create a jig to align the material off the front of the machine.
and create a jig to align the material off the front of the machine.
Then you can space them out a little more if you need to.
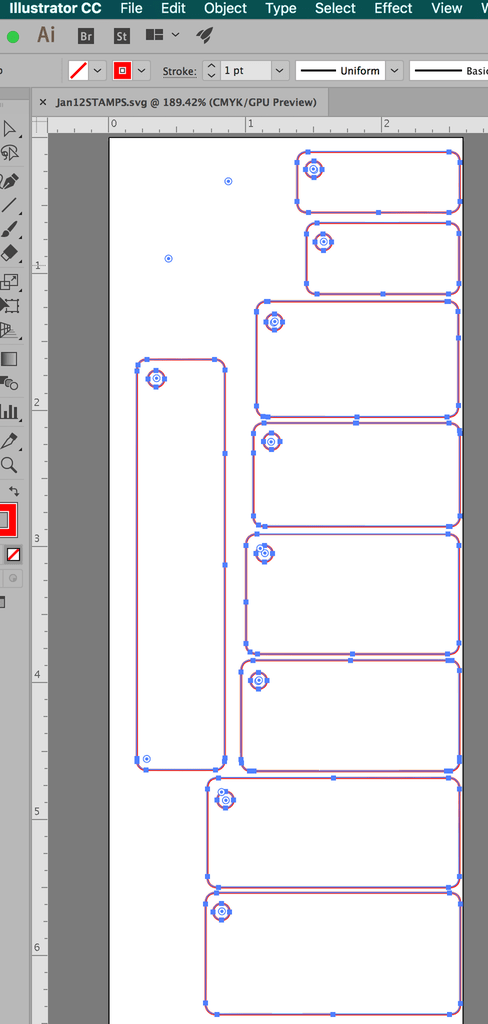
If you are wanting to cut the red lines, that is how they are set up in the file. I did increase the stroke size to 1 pixel. The width of the stroke has absolutely nothing to do with how it cuts, and it’s easier to see 1 pixel.
One other thing - the file name suggests you are cutting mylar. Reflective materials cut better with a white paper tape applied over the top - the camera is expecting a light color background for focusing, and a reflective surface might have some issues with cutting. I use a lightweight transfer tape that you can buy by the roll in 12 inch widths.
5 Likes
I’m totally writing that down! Doesn’t happen often ![]()
5 Likes
Once again, this is coming in all wrong… please help me what the heck am I doing wrong? It’s coming in as black shapes when clearly there is no fill and only red strokes…

support: It’s really a misleading error message since it seems to imply there is no file loaded rather than outside printable area which would at least inform you what to do to correct the problem. Also It would be great if stuff is going outside the area to color it somehow (yellow?) so you can see what is hanging off more easily.
2 Likes
EVERY svg I bring in today is just a big black box. Is this due to an “Update?” even things I have cut before.
I’m seeing this, too. I find that if I hit the reload button on the web browser (after the black boxes appear), the art will come in as it’s supposed to. Sometimes it takes 2 refreshes. I’m using Chrome, on Windows, at the moment. My next plan is to disable various browser plugins and see if that affects anything.
(And I have to admit that, seeing as how this is the first day with my new GF, my worries about having a only web-based interface are slightly enhanced…)
Check the settings in the thumbnail on the left to see if it says Engrave. Those do look like they are set up correctly, were they created in Illustrator?
When you save your SVG files, make sure you are doing it according to the suggested settings in the tutorial below, and Glowforge currently prefers that you use Save As instead of exporting the SVG. (Fewer interpretation problems.)
If this doesn’t resolve the problem, you’ll want to start a new topic for the black filled shapes so that support can address it. Your original missing artwork issue was resolved I believe, and they don’t read all the posts for additional issues that folks might add to threads. ![]()
Is this before or after you’ve entered a height (for non-pg material), or after it’s detected PG material? The newest update keeps the design black and white until you’ve entered either a material thickness OR it’s detected/you’ve input that it’s Proofgrade material.