The extruder is the drive unit that pushes the filament into the hot end. The hot end gets the filament up to temperature and the nozzle controls the position and bead diameter. You want to clean the nozzle - I heat the nozzle and then wipe it down with a dry cotton q-tip or a cotton cloth. You should be able to see the brass color show up again. If you run longer prints, the filament will eventually burn onto the nozzle, leaving a black crust. You can usually knock this off with a brass or aluminum wire brush while the nozzle is hot.
I like Octoprint on a RPi for mine. It allows all the control I need and the option to either slice with Prusa Slicer or Cura on the Octopi.
The brass is still fairly clean. I’ve been brushing it off. I’d say I am under-extruding a little on this. X is 20.000 mm for this calibration cube and 20.06 for Y. Z is 19.85. It’s kind of squished on one side. I’m going to do an extruder calibration using Tom Sanlander’s video.
The size looks good! The height is probably because of the Z height calibration. Bring your live Z up .15 mm if you can and see if that solves it.
The squish is warp. What material are you using for that cube? Make sure you clean the bed surface with IPA. I also use a ScotchBrite scrubber to rough the surface a little and that seems to help.
I’m using PLA. I understand the warp a little better now. The front left of the prints seems to be an issue. I did the 3D boat test and it finished very well but the boat and another calibration cube all had the front left of the print warp a bit. I tried a raspberry pi case and the first layer looked good but by the end of the layer it started coming up. So I cleaned the bed very well and did a little glue stick. I thought that the glue stick was supposed to help. I remember Makers Muse has a whole video on the first layer. I watched a lot of his videos but didn’t have a frame of reference.
Second attempt at the pi case looks promising. First layer sticking well on first side. Next layer looks good.
I tried to get OctoPrint going on my Ubuntu server but ran a snag with Cura. Not the most hospitable for installing on Linux. There is a repository that someone has packaged it for, but it’s throwing an error message. I think I may have to upgrade to a later Ubuntu version. Server is working fine though. Don’t necessarily need Cura.
But anyway I’m doing the OctoPi setup this morning. That’s what the case is for.
Here’s 3D Benchy. It is pretty good. Some funny artifacts along the way to decode. Getting excited to make some practical parts now. I have some connectors for my laundry hamper that broke. I would be thrilled to print them. They function a lot like the Y corner stops for the threaded and smooth rods to connect with the x rods on the Prusa i3.
Warp with PLA means adhesion issues. The first layer isn’t adhering, maybe because there is oil or something else on the bed.
The PEI cover on the bed should give good adhesion. Glue stick should be used for TPU and TPE which stick really hard to the PEI.
One other possibility is that your bed isn’t flat. Check that there isn’t something keeping one edge or corner up too high or down too low.
Benchy looks good! I don’t see any issues in the photo.
I’ll put a metal straightedge from my combination square on it to see if there is something wonky with the bed. I did wipe it all down with an alcohol swab and made sure it was preheating correcdtly. I’ll get my infrared thermometer this afternoon and check it out for heating consistency. Was not sure if the glue stick was supposed to be used for all filaments. Thanks for clarifying. So many things to read up on here. The pi case is going well 40 minutes in so here’s hoping.
Alcohol dissolves grease but can leave a very thin layer behind because you are just diluting it. Bleach actually destroys grease. See : https://youtu.be/HiL6uPNlqRw?t=657
Nice benchy! One suggestion on your clip prints…if your parts are going to be stressed, you want to use a fairly high infill (60%) with PLA or you’ll snap them. (Just lost an early printed part to that very issue.) Bleh!
I should have read all the posts before replying about using alcohol. I am deferring to Palmercr. He’s an expert on all things 3D printing. I’m going to give bleach a try in the future
Cool machine! We still have a mostly-finished RepRap Mendel Prusa sitting around – I worry that we’ve become so spoiled by newer models that we will hate it when it’s finished.
Do you have any Tabbed Box Maker pointers? I’ve always found making dividers in TBM to be a sensitive and time-consuming task. The last time I used the plugin, it only made six-sided (and five-sided?) boxes with tunable tab length, and there wasn’t any support for more complex shapes. So slotting in tabs was a tedious affair of copying dimensions from the tabs, then breaking and healing existing lines while hoping that I hadn’t inadvertently modified any of the shapes.
For the laser yes. For the 3D printer I don’t have experience with that. I have found the Inkscape extension to be very accurate
And consistent. The challenge was figuring out what the different fields refer to in the extension. What are you trying to make? Give me dimensions, dividers and thickness of material and I’ll work something up. Do you want tabs of a particular dimension? you might want to just start a new topic and call it Inkscape tabbed box extension help. I’ll jump in as I’m sure others will.
As to the Prusa. I’m just please with this thing. It works! I know there are some issues but I was prepared to have to slog through a few days of problems before I had success. It’s not perfect but it’s usable.
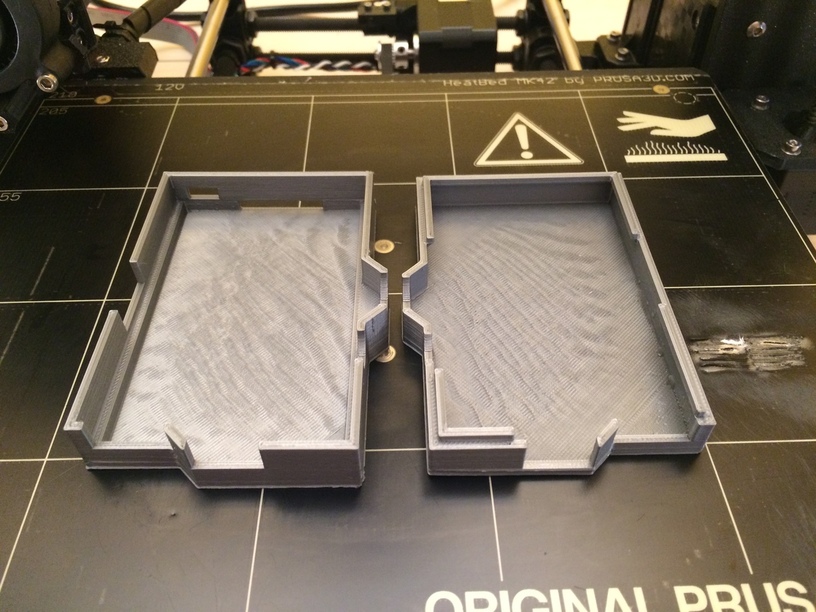
Here is the raspberry pi case. Should have checked the design more closely. No standoffs for fixing the board to. But Four hours and it looks good. No squished corner this time.
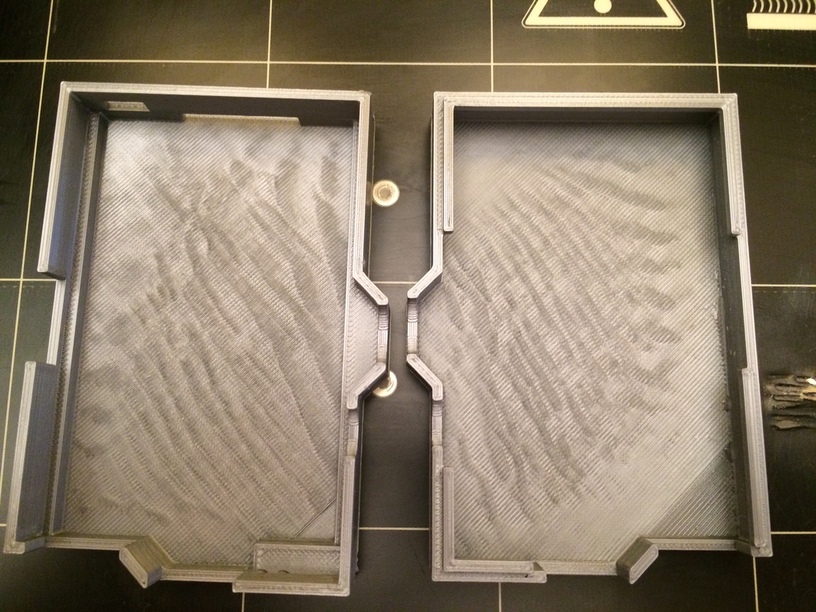
Here is an overhead look. There is something going on in the transverse fill lines. Some type of resonance or wave artifact. The line parallel to the x and y axes are dead flat and straight. It’s the diagonals that have some wave to them.
The wave is overextrusion - the material can’t come out of the nozzle as fast as it is being pushed in, usually due to something at the nozzle preventing it.
Make sure your nozzle wasn’t damaged by the earlier crash and then look at calibrating the extruder.
Yes they look like over extrusion waves. When there is nowhere for the filament to go it actually lifts the nozzle slightly. When it comes back to do the next line the nozzle is lifted by the solidified previous line, so a wavy oscillation builds up.
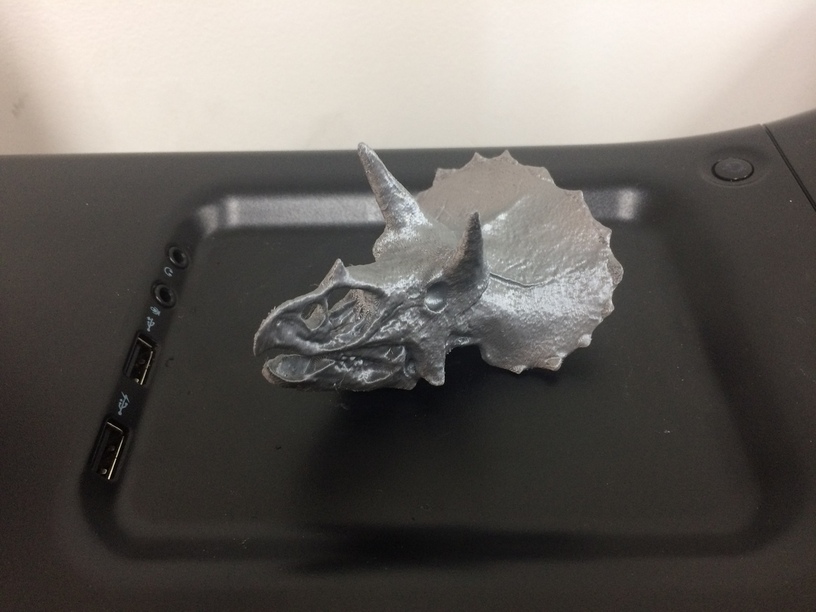
I am absolutely floored by this technology. When I was little I had a Safari set with African animals. I had a farm set and l played with them all the time. Dinosaurs were not quite as popular back then. Now I can make up for it. But to be able to make something like this is so cool. To be able to replicate things for play and study. And this is with it not fully tweaked. Just amazing.


 . I am going to have to buy a 3D printer.