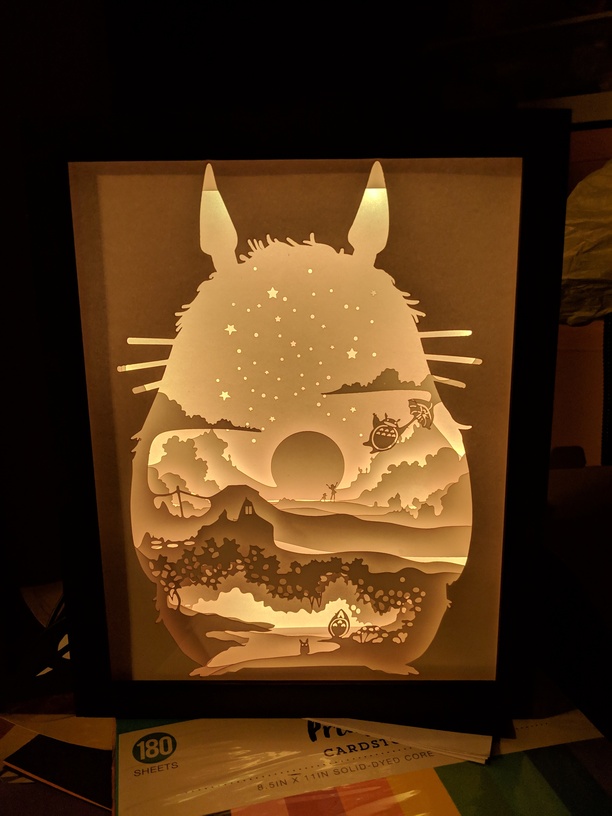
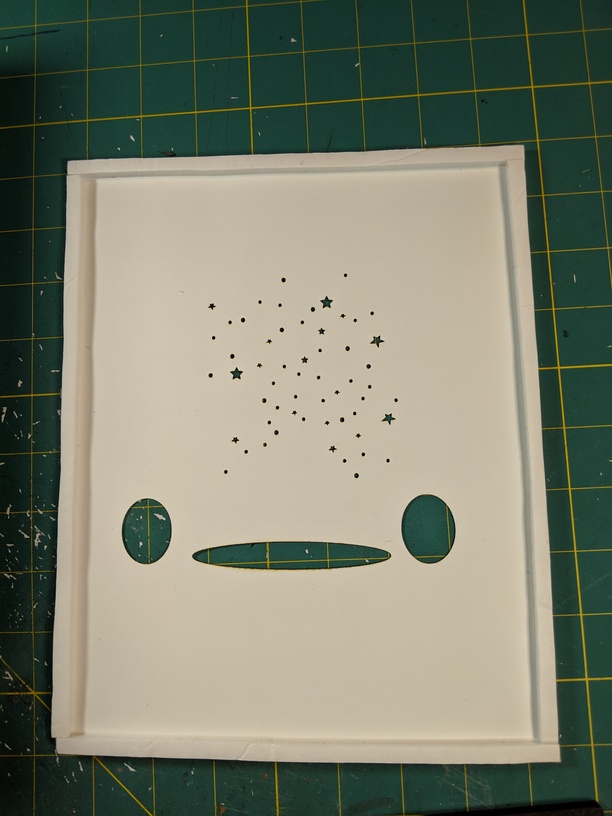
I have only had my GF a couple of months (I’m in Canada) but I have been very excited to try some paper crafts. I’ve recently gotten interested in papercut light boxes. I could cut these on my electronic die cutter, but I figured the GF would do a much better job. Most people cut these by hand!
The one issue that I knew I would have would be smoke stain because the pieces for these projects are usually cut from white cardstock to allow the light to shine through. GF community to the rescue! I did a bunch of research and then posted a plea for help to figure out how to engrave cut, rather than cut the card stock. It worked so well! Very minimal smoke stain. Of course, it takes longer but the result was worth it!
I used 65lbs cardstock for the paper layers and 1/8" baltic birch plywood for the frame. I bought an LED light kit and mounted strips on the back cover. The lights are controlled by a remote. You can change the colour, brightness and set patterns for light changes or keep it a solid colour.
Nice work. Care to talk about how you spaced your layers?
What about overall dimensions (specifically depth of frame)? Kind of hard to see here.
When you did your engrave cuts, did you split the resulting shapes vertically to reduce time or just suffer through all the back and forth over the empty middle spaces?
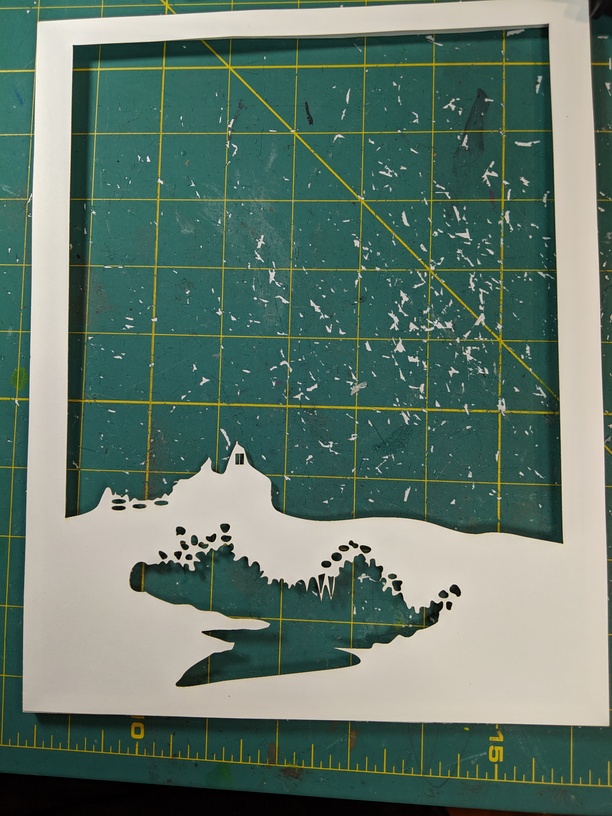
I used foam board - I hand cut it since I knew the inner layer would melt quite a bit if I cut it on the GF. I bought the files from an Etsy seller but resized them slightly to fit an 8 x 10 frame. I purchased a cheap picture frame to get the glass out of it.
I cut the frame to be 8.125 wide and 10.125 high to give me some wiggle room. The layers (10 of them) stacked up were 2.25" wide so I cut the frame sides with a 3" depth to leave room for the lights in the back.
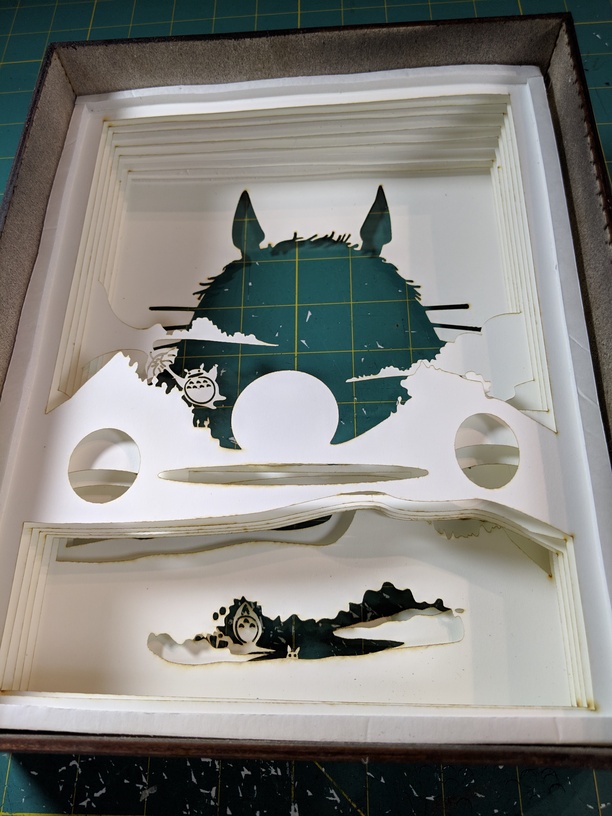
Here are a couple of pics of the inside from the back so you can see the layers and foam core.
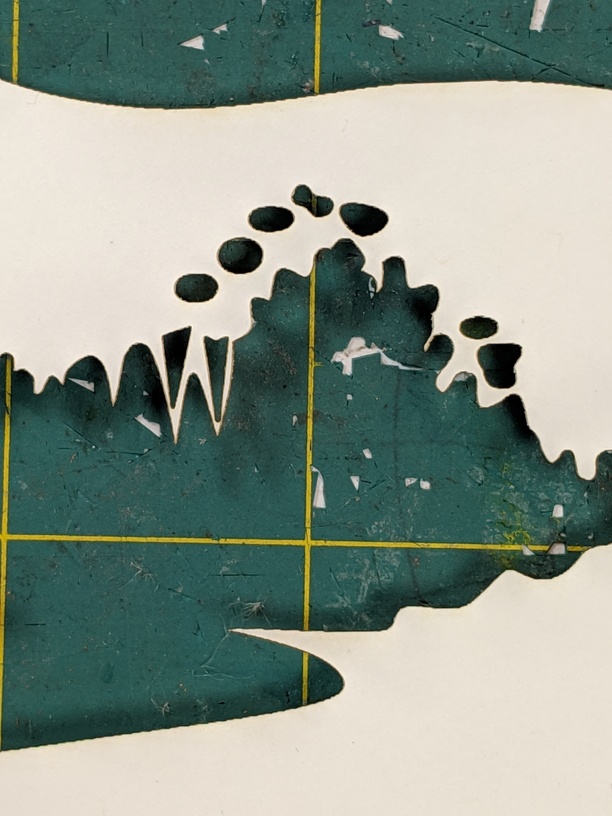
I did split the verticals and cut those, rather than engrave. It cut the time in half! Thanks for asking because I meant to mention it and forgot. Original cut time for each layer, with the vertical lines, was over an hour. By separating those and cutting rather than engraving, it knocked the time down to 20-30 minutes per layer.
I actually just used a piece of thin plywood (laser safe) that I sprayed with Krylon Easy Tack. It worked really well. As you can see, I’ve been using it for quite a few projects. The spray seems sticky enough to keep the paper down but peels off easily and the paper doesn’t feel sticky after.
Thanks for the info - so nice to know that a low cost approach works! I’ve been hesitant to invest in one of the expensive mats so I’ll give this method a try : )
For those of us who are having trouble following along, can you either explain or point us to some key words to search for that explains the “split verticals” and “engrave cut” methods you mention? Thanks in advance.
Can’t help you with the split verticals, but see this post for engrave cuts. An engrave cut is when you cut something by using the engrave settings. When working with paper and similar materials you can avoid or at least greatly minimize the smoke/char. The downside is it takes much longer.
@caribis2 linked to my original post when I was trying to figure this out.
What I meant about cutting the verticals is…I cut the path where the vertical lines are. So essentially, my GF was cutting the vertical line up, horizontal line along the top and vertical line down, and then engraving the rest of the not straight lines.
Unfortunately, Inkscape doesn’t have a knife tool (that I am aware of) so I do that step in a more simplistic vector program - Sure Cuts A Lot. That’s what I use to cut things on my die cutter. Then I do the “stroke to path” action in Inkscape. Usually, the GF would cut along the center of the path, no matter what size your stroke is. Similarly if you told it to engrave, it would engrave the negative space in the center of your shape. By using stroke to path, you change the original stroke into two different paths. Then the GF will only engrave the former stroke. I realize this probably sounds confusing but if you click on the post above, some lovely people were kind enough to provide picture examples that are a bit easier to follow.
Also the reason that I cut the vertical lines away from the rest of the design…It takes a lot longer to engrave than cut because the laser head is travelling back and forth horizontally along the entire width of your svg and the laser just fires when it hits a spot to engrave. For a vertical line, this takes a ridiculously long time. So a single layer would take over an hour if I engraved the vertical lines but only 20-30 minutes if I cut those and engraved the rest.