Amazing idea, thanks!
1 Like
So, is anyone making good use of this tool? Any feedback since its been out there a while? Would love to hear what people think after using it.
I personally use it all the time and try to put it in most of my designs so I can get them exactly where I want
Would love to try it out  , but I still havent heard any word about Snapmarks and my GF… im waiting patiently, nervous but patiently:wink:
2 Likes
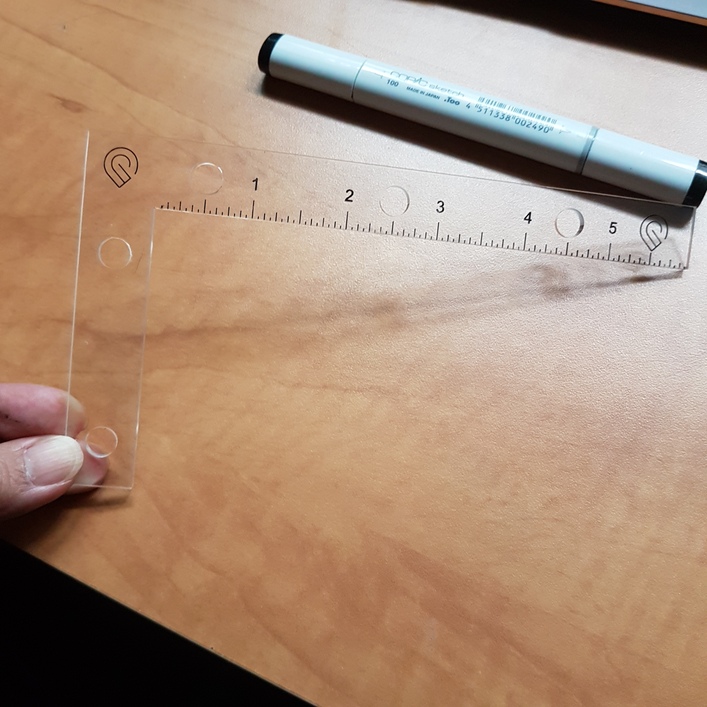
Works great for me. I tried your ruler today on a small bit of scrap Baltic Birch Ply and it cut exactly where I hoped. Incidentally, I also discovered that you can copy & paste extra parts after the Magnet scan, snugging them up to the pre-existing parts, then print.
5 Likes
Yeah I use that quite often! I cut a lot of. If batches of things, so I often just put the alignment ruler on the corner of the material and arrange everything based on that. Sometimes the image is a 1/4” off, but I know everything is correct as long as snapmarks are working.
It’s a huge load off to know it’s just going to work
4 Likes
Spent the weekend helping my youngest build and test her catapult design. Pass-through plus snapmarks to the rescue! Perfect cuts of two 10x30 (outline) side plates, followed by normal cuts of struts, gears, etc.
Then to the decorations, color printed on paper, snapmark-cut to cover the curved sides and avoid gears, holes, etc, sprayed with sticky tack and pressed on. Easy, fast, and professional looking!
Edit: Hah, sorry, thought this was the general snapmark thread… Just cruising along through my stack of unreads. I’ll just leave this here anyway. Haven’t printed your universal tool yet, but I will! I’ve needed it in the past many times.
8 Likes
Thats amazing, thanks for sharing!
1 Like
You’re welcome! Happy to!
1 Like
I was thinking an alternative to magnets. Would be pins that would lock together the jig would be nice. As well as interface with the honeycomb bed. Aka longer honeycomb hold down pins that would take the place of magnets. And great job on the jig.
Thanks! You can definitely do that!
I like the magnets for the times that I have to put the ruler on top of materials and it still has some hold through 1/8” stuff. Also connecting the pieces together or stacking them is easy with magnets
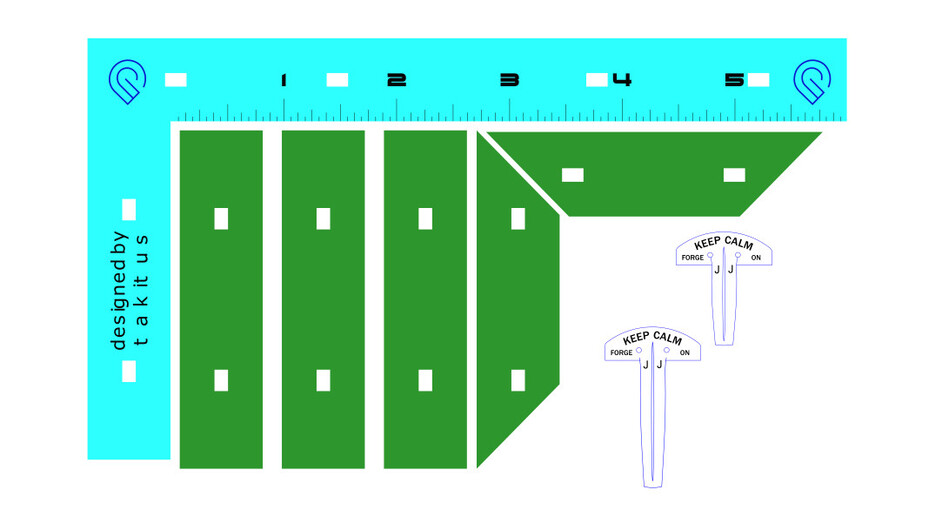
Well this is what i came made off your designs. Have yet to test it out. But if someone wants to fill free. fiducial_ruler upload.pdf (17.4 KB)![fiducial_ruler%20upload|640x400]
16 Likes
Always nice to have another tool in the toolbox!
3 Likes
I made the original design and used UV resin to hold the magnets. Seems to have worked but haven’t had the chance to test.
2 Likes
Hello, I just came upon your file but cannot seem to open it or even get an image to trace that is true to the measurement. is there another way for me to download this image or file, thanks for your contribution.
@takitus Best tool ever, thank you for the generosity… now need to use Snapmarks to put a rular on the X axis side
Wish I had white acrylic. I have to tape the backside of the marks
8 Likes
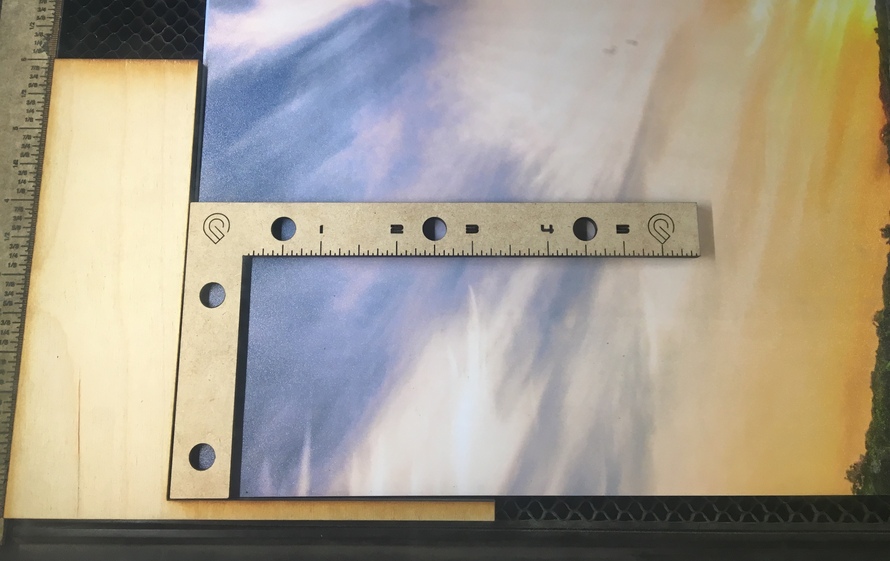
This is pure gold, @takitus ! I was struggling with a way to use Snapmarks on the larger puzzles; I mostly do print and cut (print the snapmarks on the image and snap to those) on the smaller puzzles, and just didn’t have the room with the large ones. But, I made a small square frame out of Baltic Birch to square up the puzzle board, it’s tall enough so that I can snug the ruler right into the corner against it as well, snap, remove ruler and cut away. Perfect results!
I’ll have to add it to each puzzle I already have created, but that’s simple. I just grouped the Snapmark and ruler outline together and added it to a graphic library. To add it, just option-drag the asset to your document, and it keeps everything intact so that the Snapmark info is in the file code.
16 Likes
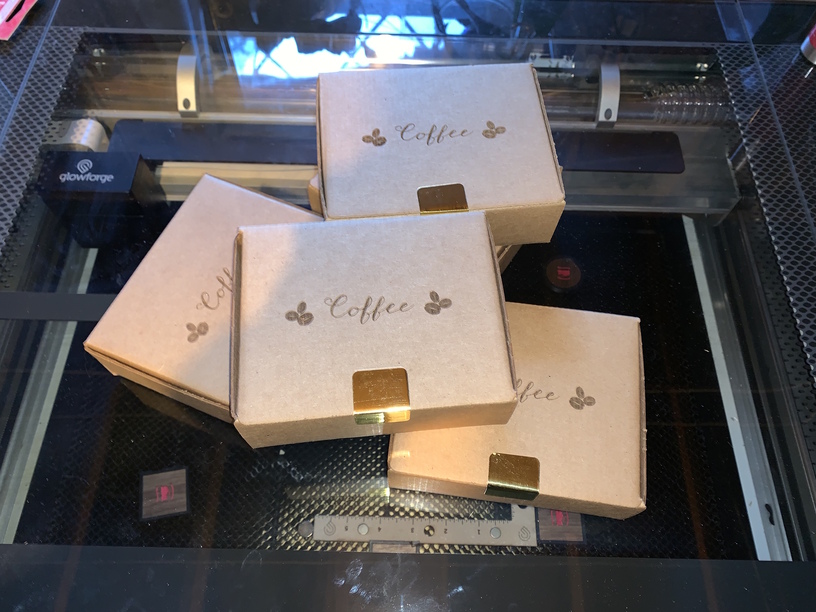
Used your ruler today! I wanted to engrave on a bunch of cardboard boxes (before folding) and didn’t want to use up a huge sheet of cardboard to make a jig. The L ruler worked perfectly upside down:
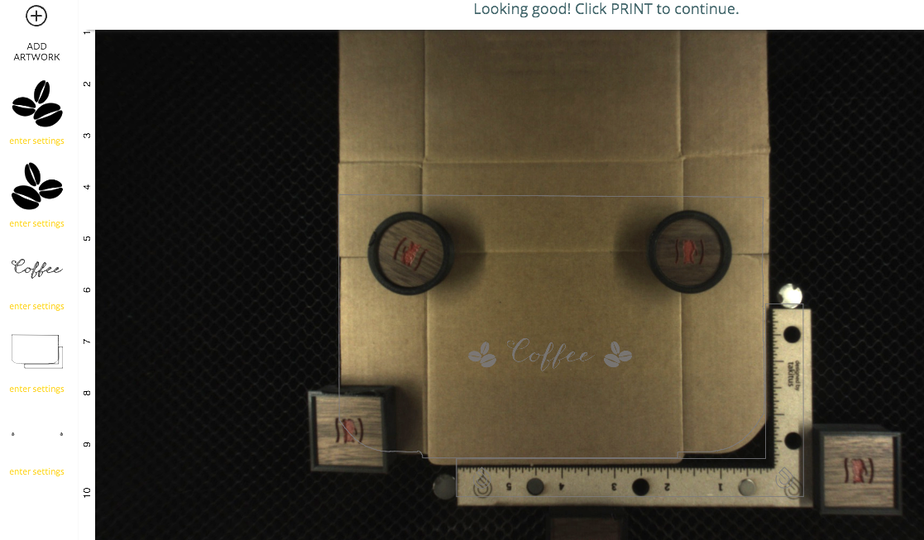
And here’s the finished project (boxes filled with coffee concentrate pods and a selection of instant coffees); I made 10 of them:
24 Likes
I love those! Gold seal and all. I’m finding myself more and more curious about that fiducial ruler. When my curiosity gets the best of me, I’ll be going to read more about its function.
3 Likes
oh thats awesome. I wasnt aware it could work upside down. you learn new things every day!
3 Likes
I LOVE YOU. THANK YOU!
breaks into song

1 Like