Weird issue going on here. I’ve had the machine for about 6 months. I engrave annodized aluminum in several colors. Normally my power is between 85-93 and a speed of 900 and I get great crisp results. I finished a recent order that turned out great about 3 days ago. Same batch of dog tags and the power seems really weak. Today I’ve had to drop the speed down to 200-300 to get the same results and have power set to full. I’ve noticed at the high speeds (over 600) the laser doesn’t look as bright during engraving as it used to. I’ve cleaned all the lens multiple times with the preferred wipe. They look clean.
Anyways when I slow the speed down to 300 or less the power (brightness of the laser) looks better like it did before. What does this mean?
Ok update…the main lens that can be taken out with the magnetic tool is sliding down during the engraving process. Every time I removed it to clean it I noticed it was low. Meaning I could push it back up into the normal position. I just finished a test where I pushed the lens up and then ran a job in which normall settings showed not enough power. After the job i checked and the lens slid down about 1/4”. So it seems me to the lens is loose and sliding down which is putting the focus out?
That lens is the focus lens it moves up and down when you set the height if im not mistaken so thats normal. Your problem will probably be elsewhere,
Thanks for the info…back to square 1 I guess.
At the impact location or the purple in the tube? Speed won’t impact the purplish color.
The first thing I would do is check focus. Aluminum is very sensitive to having proper focus. Are you using set focus? Setting manual focus? Just putting a material height and letting it do its thing?
I would try this:
Put in the actual material height, for example .025”
Then, in the engrave operation, set the focus height to .024” and run the job.
This will override the autofocus. It’s possible that it’s scanning or taking the autofocus in a spot that falls off of the tag.
Thanks for the info. I use manual settings. I set the focus height in the settings to 0.05” and then I select uncertified material and set that to 0.05”.
The light difference is at the impact location. It’s barely noticeable at speeds above 600 and really bright at 200-300.
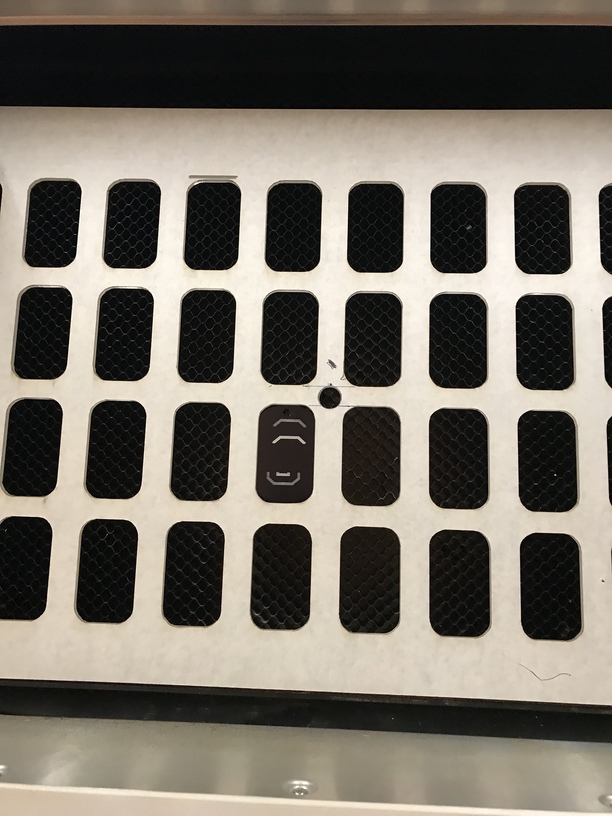
I have a template i put the dog tags into so I can run 40 at time. I’ve probably done 5,000 dog tags in 6 months in different colors and have never seen this issue. The only thing I ever adjust is power which is slightly different based on color. I’ll try changing the focus height to different settings and see if that makes a difference
Also double check you’re putting the lens back in the correct way, as it’s easy to forget which way is “up” after cleaning both sides, and this will cause “low power” (lesson learned myself). Also make sure the top mirror in the head is clean, too!
This is why I suggested the method that I did. If the focal height and material height fields are the same, it takes an autofocus measurement at the beginning of the job. If you set the focal height to a different value than the material height, it will respect the focal height field.
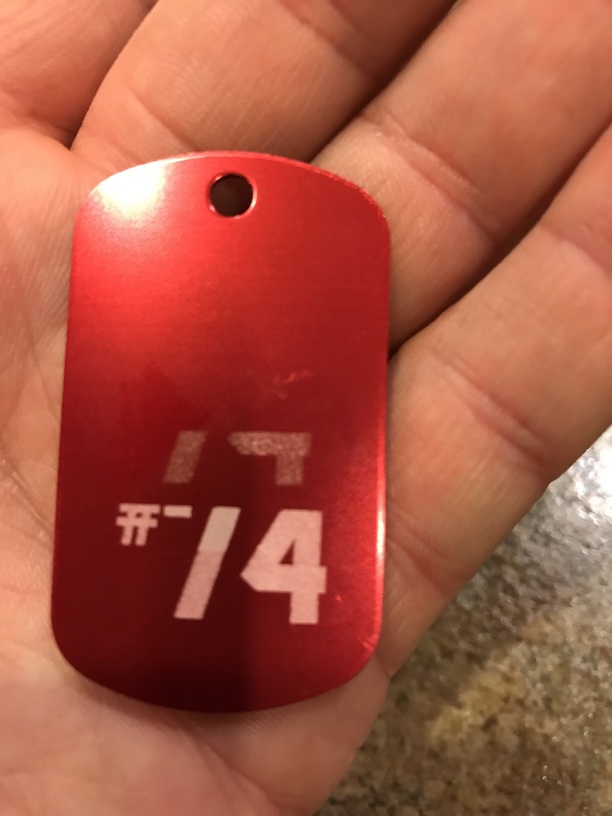
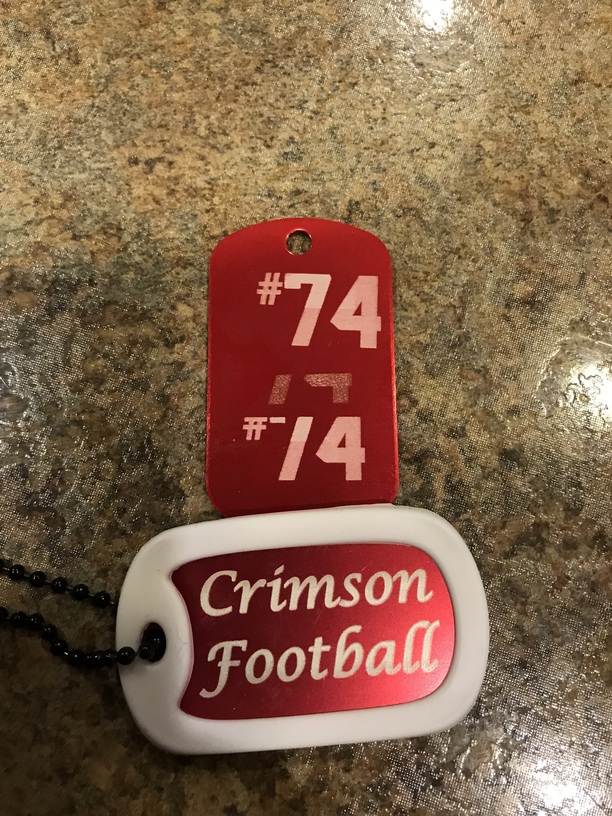
So I tried a few things. For the black dog tags the power is always 93 and speed 900. So I kept it for this test.
- Double checked the lens was in the right way
- I put the dog tag in the template and set the focal height to 0.049” and the material height to 0.050”. In the picture that’s the top engraving. Wasn’t any better. Under the black annodize is a white substrate that should show up crisp.
- I took out the template and just sat the dog tag in there with the focal height set to 0.049” and the material height to 0.050”. Same result…bottom of the dog tag. Bad.
- The engraving in the middle is when I set the speed to 200 and full power. It’s shows up perfect.
So it doesn’t appear to be a focal height issue.
Support will probably ask you to run the “Gift of good measure” on med draftboard to further troubleshoot any power issues.
Did you use the same LPI both times? Looks like the top and bottom ones might have burned deeper…there might be a white coat underneath the black, and if you burn through that too - you’re into the gray metal.
Yes I used 340 lpi on all the tests. I do appreciate all the help! This is great.
It seems to be a focus issue? I’m trying some things out and I set the focus height to 0.05” and just set it on the bed. I’m changing the material height from 0.05” all the way up to 0.30”.
Basically setting material height to
0.1
0.15
0.2
0.25
0.30
It gets better each time on my std settings of 900, 93, and 340 lpi.
So right now I have the focus height set to 0.05” and the material height at 0.30” and it looks ok. Not great. It’s also inconsistent
See pic. Top engrave is 0.05 focus height with 0.05” material height.
Bottom engrave is 0.05” focus height with 0.30” material height.
What I don’t understand is that I’ve been using the same setup and settings for this long and now it’s acting up.
Is your crumb tray sitting in the recesses on the bottom of the machine correctly?
When you defocus the engrave, there is less power that will hit at the surface point, giving you a shallower engrave, and letting you take just the top layer of the paint off. That might be what is happening here, and I hate to say it, but the thickness of the paint on the tag might have something to do with it…it might not be uniform, although it’s going to look uniform from the outside.
Don’t know how many you did before…if it was a different batch, that might have had something to do with it.
What I would suggest is defocus the engrave even a little more, and see if you like the results. If It doesn’t quite make it through the red, run a second defocused pass at higher speed without moving anything on the bed, and see if you can just carve away the top layer of the paint.
Try the material height at 0.5 with multiple passes…it might let you carve down. (Try one pass, if it’s not deep enough, try a second pass…that kind of testing.)
Yea…I hoped that was the issue initially. Unfortunately it wasn’t. It’s sitting in there correctly.
Ok…so I tried what you asked on the top #74 I set the material height to 0.5” and focus height to 0.05”again just ok. Still not perfect. I did a second pass and it did nothing. Again the contact point is still dull (laser brightness)
I ended up running another one (crimson tide) with speed 200 and power full. Perfect. But it’s not even close to what they ran 3 days ago. I wouldn’t complain if running 40 at a time wasn’t such a big time difference (900 speed vs 200) now
The red and black dog tags I ordered 500 at a time the settings have always been 0.05 focus and 0.05” material and speed 900 and power 93 and lpi 340
So I’m just confused now.
I think I’m going back to laser power as the issue. Once i go over a certain speed the brightness of the laser light on contact drop way down
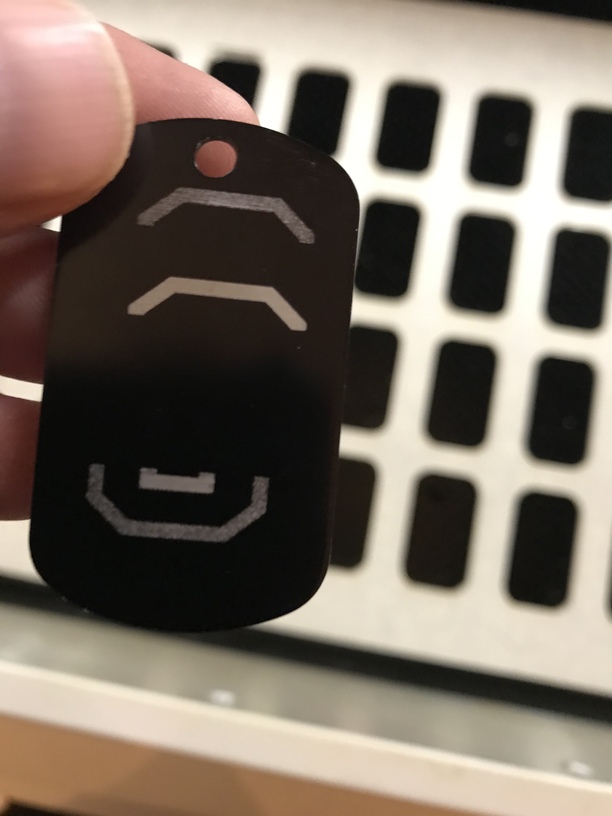
Can someone confirm about the focus lens…the lens that comes out with the magnet tool. Someone else commented that it might move based on what you set the height at.
Each time I run a test it seems the lens slides down inside and isn’t consistent. Sometimes it slides down 1/8” and sometimes it slides down a lot more. There doesn’t seem to be anything mechanical inside that moves the lens up or down based on material height so maybe the lens is just loose and shifts down as the head moves around
The lens absolutely moves, it’s how focus is set for various material heights. It attaches magnetically, if it isn’t attached it would simply drop back out. It cycles every time the machine is powered on, and also during focus operations.
You should not be able to move it once it is engaged, however - and forcing it would likely damage the mechanism that moves it. Not saying you’ve done that, but it’s not something to poke around with.
Just to give you an idea of what’s going on - the lens is a 50mm focus lens. So that means the focal point is 50mm from the lens. The Glowforge has a 0.5” focal range; to accomplish different focal planes, the lens moves up and down to achieve the required 2” distance from the material.
Are you absolutely positive that the lens is being inserted correctly? The behavior you describe with focus getting better as you go what should be out of focus is very symptomatic of the lens being inserted incorrectly.
It should be like a bowl, the glass on the bottom nearest the crumbtray.