It’s probably a good idea to get some cardboard to test your first prints on…it can be expensive to run tests on the large sheet proofgrade. (You are going to mess up at least a couple dozen prints learning how to use it…guaranteed.)
If it is not cutting all the way through, you might have to make adjustments to your settings…slow the speed down by about 10 points…because we don’t get a second chance with this. Using the passthrough is an Advanced function. Run some tests on the wood first, in a corner somewhere, and make sure the beam always cuts through the material. (I automatically slow the speed down by 10 points to be safe.)
Also:
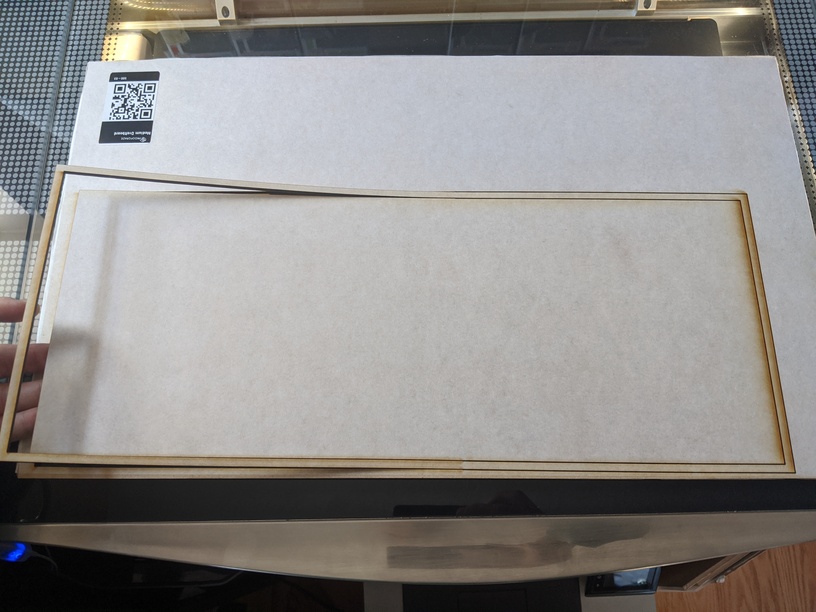
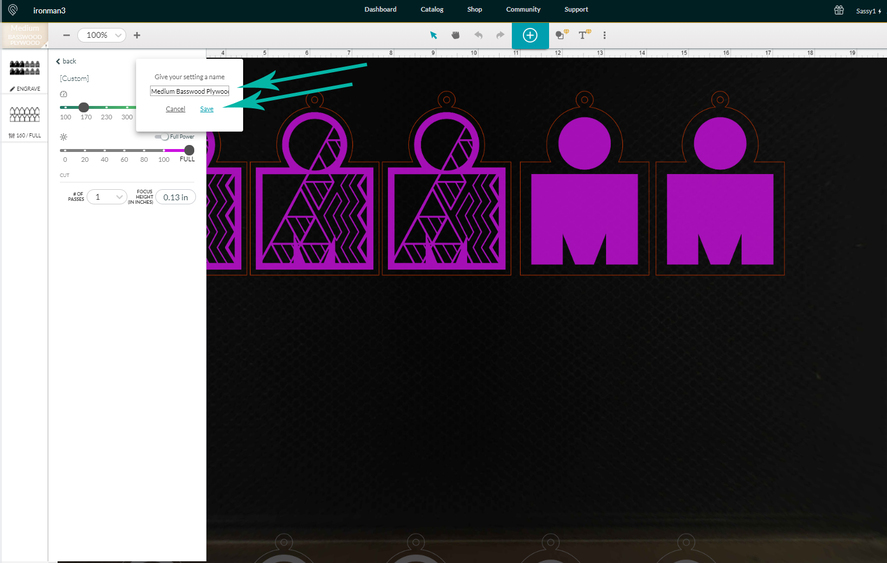
First: This one is critically important - start the print with the material pressed flush against the left lip of the tray, and keep it tight against the left lip during each transfer. If you are working on something that is skinny, you can use a spacer bar against the left lip to bring the material out into printing range. But do not start with the material against the right lip of the tray. Place your design against the left edge also. The mechanics of the way the system works and what the camera can see in each stage, can make it fail in the final stages if you have the material too far over to the right, and the design runs too close to the right edge.
Second: Make sure the material is pinned down flat at all times. Use the Honeycomb Pins not magnets.
Third: Be sure the weight of the material is supported both in front of the machine and behind the machine. Once partial cuts are in place, the weight of the material hanging down will cause parts to pop up in the bed, and can cause shadows that will confuse the camera. (In addition to ruining some of the work if you are going for a complex design with multiple operations.)
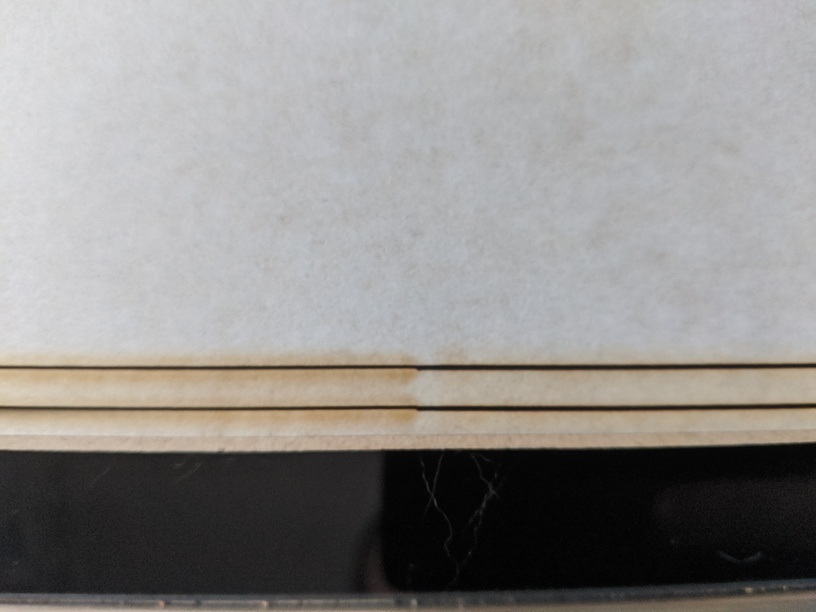
Fourth: The way that the alignment works is that the camera is matching before and after pictures…sometimes you have to leave center cutouts in place near the match point in order for the camera to recognize the match point. Easiest way to do this is to just remove interior cuts below about an inch or two underneath the match point, but then tape the ones near the match point with a strip of clear tape before shifting the section, so they don’t get hung up while shifting the material.
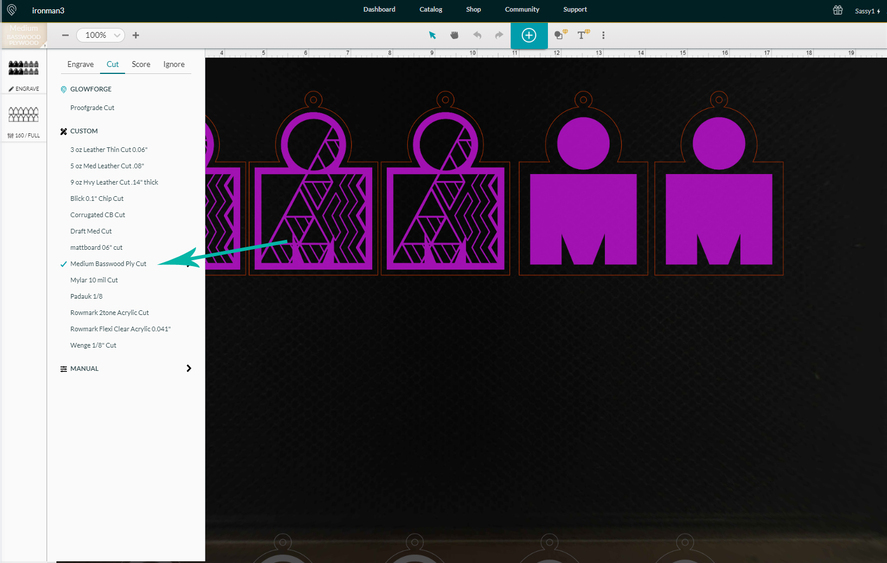
Those are the most common causes of alignment matching failure, so if any of those are applicable, make some adjustments to the way you’re doing it and see if it helps.
The most common cause of flat out “fail-to-print” errors are file errors. Get into the habit of testing them once on cardboard if you’ve never run that particular file before.
Passthrough cuts require a lot of user interaction and thought up front, but they are tremendous time savers overall. You just need to get familiar with the process. 
 was so excited to do my 1st big pri t and got super stress