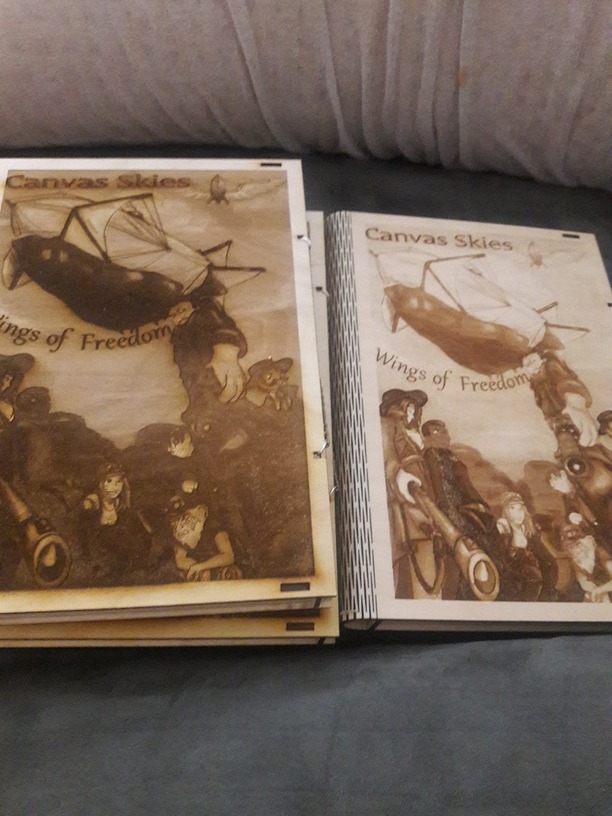
I had done about 20 engraves of the same thing, an engraved image on a book shaped box. I had done it as a grayscale to power, and it turned out really well in PG maple and Baltic Birch. The client I had made these for asked for a few more, but I can’t get them to turn out at all right. It seems like mapping grayscale to power assumes a certain minimum threshold so it burns a firm amount over the whole image, and so it looks over burnt. And the details that used to show on the previous ones are now completely lost.
Is there a trick for this since the conversion happened, or is there a better setting?
Which is exactly the problem. It’s acting like there’s a minimum burn percent… Perhaps to get through the masking if it was masked? In which case it’s not like, 0-100% power, it’s more like 20-100% power.
I didn’t see it anywhere above. What actually is your process here? Are you using Proofgrade 3D settings? Switching to manual and using vary-power there?
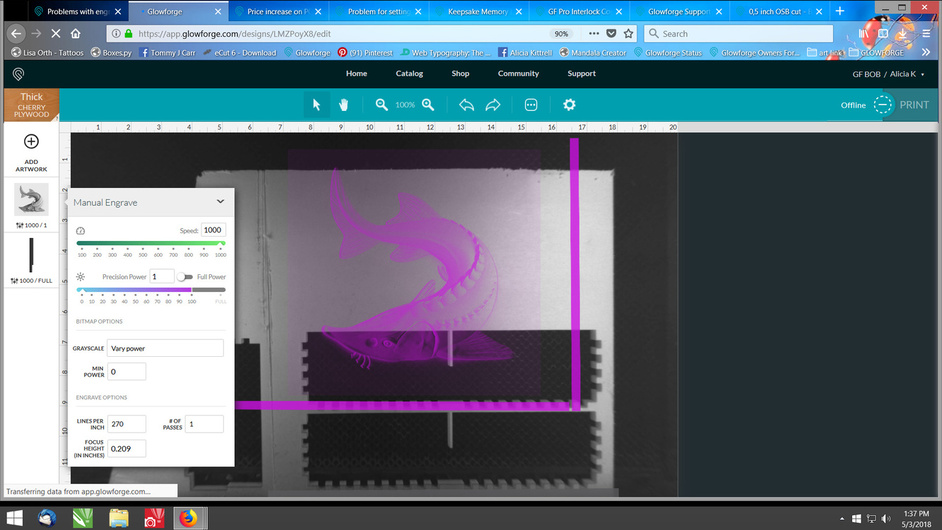
I put a sheet of unmasked Baltic birch in. I load the file. Usually pre detects as pg maple, if not I set it to go maple, change the cuts to manual power, 170 - 165 speed, 90 to 95 power depending on if there’s a knott in the cut paths or not. Leave the vector engraves as SD graphic(default, there is some text on the backside that this applies to). The height is the same on the material, and the grayscale image is an imported PNG file in the svg file.
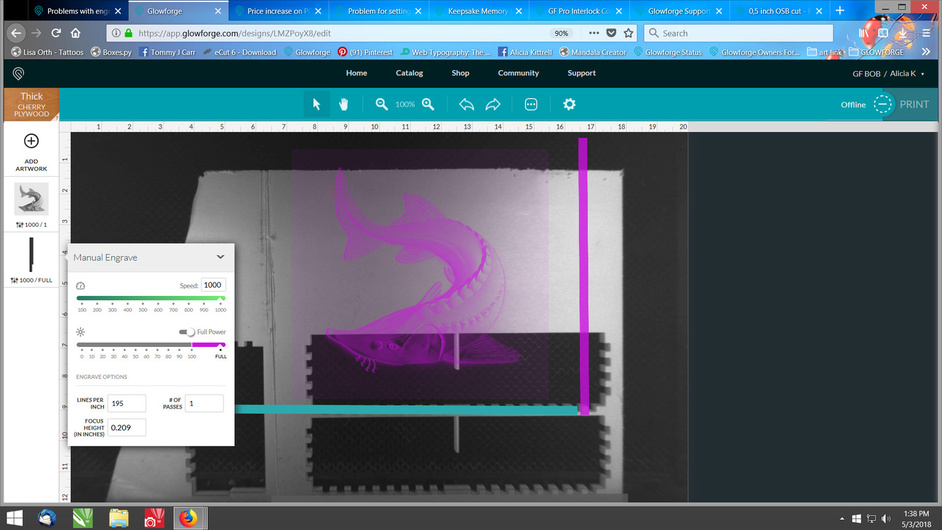
I did another at 1000 speed, 40% power, grayscale to power and the minimum burn is still present, but the whole thing is faded, as if it was ran at less power.
But the percieved minimum burn is still present across it. The image, making it look poor.
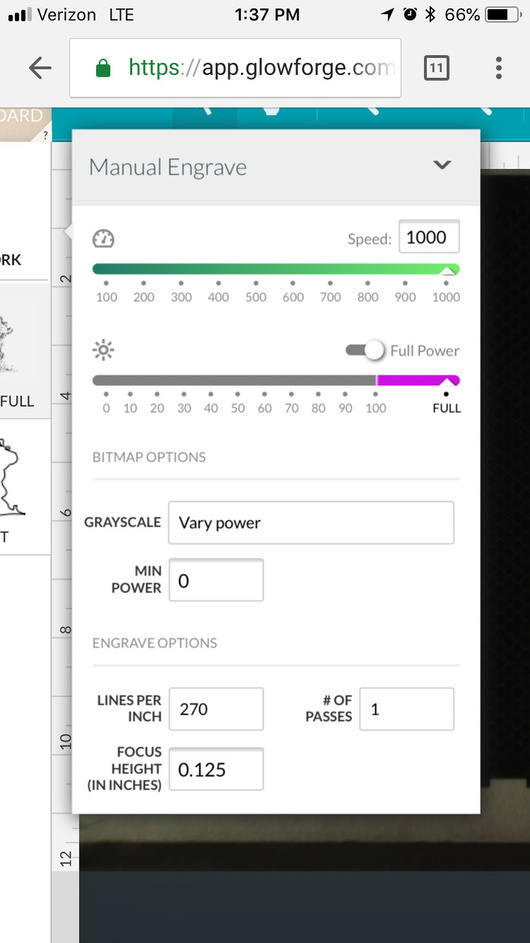
And like @markwal, I didn’t have an option to change min power like in that screen shot.
Thinking out loud here, but is it possible that because the file contains two separate PNG images it is pulling in a defaulted minimum burn pattern? There is also an image of some wings on the back.
I’ve tried, to get some screenshots, but I can’t navigate the app.glowforge.com portion on my phone while my desktop at home is logged in. About every 30-40 seconds it tries to kick me off and says oops an error occurred. It was like this when I was at the makerspace last weekend too. I’ll get pics tonight.
Vari-power has never been there for vectors. They are treated as single power engraves and each color has its own settings (different operations).
Just like for PNGs, if they are separate files (embedded or added), they will come in as different operations and require settings to be input for each.
Yeah. I was just a bit too quick to judge from my phone. Back at my PC, if I choose a raster image, manual engrave and “vary power” as the type, min power is still there. I’m using Chrome.