I have an engraving project the 11x18 job says 3 and a half hours for the pre settings . Is there a way to shorten this ? It is a sheet of clear acrylic ?1/8 ?
Surface area is usually the big factor with time. If you are cutting at 225 lines per inch, the laser head has to make 225 passes for every inch of engrave height. You can do fewer lines per inch, but you lose quality.
One other issue can be with multiple smaller engraves on a large piece. Let’s say your design has 4 separate images which are 5 inch square each. The machine engraves the first one at the previously mentioned “225 passes for every inch of engrave height” and then starts all over with the next one. In this case, combining things into one image can help.
Does that make sense?
Curious I changed it to draft and it now says 1 hour and 21 minutes . do you think this would be good ? I plan on applying a white paint after engraving to make it pop more also ?
Unfortunately the best way to know is to test. If you have any spare material the idea is that you’d crop down a small part of the image(about a square inch is my usual test) , engrave it on the scrap, and then see how it looks.
Engraving is definitely a patience game. Good luck!
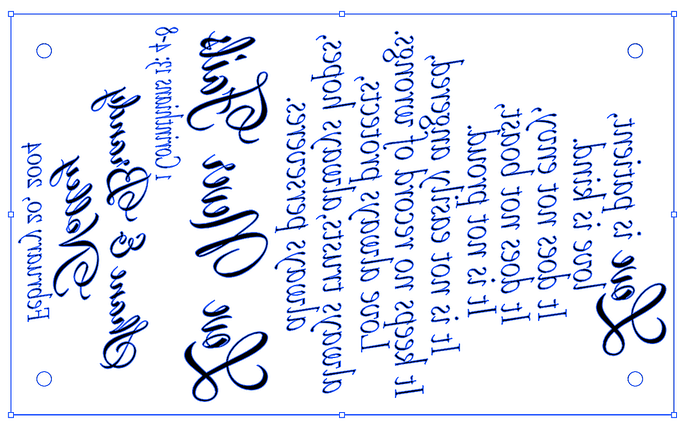
As a vector engrave it will engrave all at once. At a greater LPI you can up the speed and it will engrave faster. Higher speeds take longer to stop and move the other way but getting from one side to the other faster can make up for that. As wide as you are doing the advantage is for faster. I would engrave some scrap first and keep a sharp eye on it as Acrylic is the material most likely to make an ash of your Glowforge.
At a low LPI (lines per inch) the distance between lines grows wider and some narrow parts of your design might not be cut at all in places. No matter what that design is particularly challenging, and you need to like the result. I would consider the length of time you will be sitting watching it vs the length of time you will be looking at it wishing you had taken longer watching it.
Definitely experiment first.
At draft the thinner letters will be a gamble of how much of the letter gets cut. Instead of engraving a square inch I would engrave a quarter of an inch high band as wide as your piece. Only then will you see the difference in time between high and low speeds. At an inch wide higher speeds can take longer than lower speeds due to all the time taken to turn around.
Thank you !
One other thing to consider (not time-related) is that defocusing engraves on acrylic ends up with a smoother end result. You might like this post if you haven’t seen it before:
There are other techniques to speed up “engraves” but they almost all have tradeoffs in terms of appearance and are much more time consuming to set up. I wrote up a post on some experiments a long time ago:
It was an interesting experiment, but I never came back to it just due to the work involved in setting it up.
I like that comment!
The only way to know is to test to see how your design prints with those settings. Nobody can tell you whether you will be happy with different settings.
Take small samples of the image and engrave them on scraps to see how they look at different settings to determine what works best for you.
I hope you have a higher-quality version to engrave. With that low resolution, settings won’t make much of a difference. Also curious why you have all the letters outlined in a different color.
To me it just looks like the art is selected in the design app. If I select vector shapes with fill but no stroke in Affinity Designer, it looks similar.

OK.
The image posted would not engrave well at all, so I guess they have it figured out.
This topic was automatically closed 30 days after the last reply. New replies are no longer allowed.
