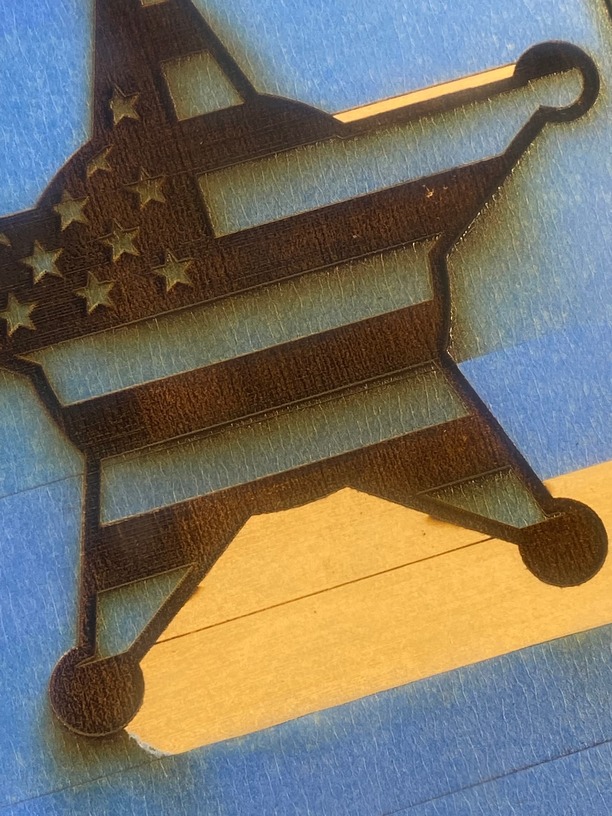
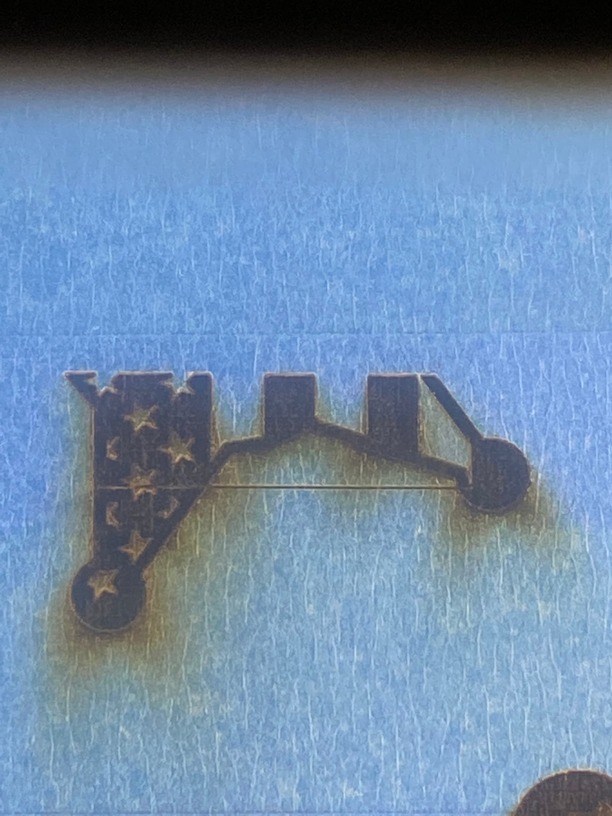
I am trying to engrave this file. I did it without issue the first time I used the file. Now, every time I engrave I get a random line either across the bottom or vertically. From what I read, there must be an open node but I have no idea how to find it. Can anyone help? Thanks in advance!
SheriffStarFlag.dxf (123.0 KB)
There may be some forum members that work with DXF files, but for the most part we work with PDFs or SVGs. I’m not able to open your file in my design app (Affinity Designer). If you can attach it in another format, I’m sure several of us can take a look at it.
1 Like

1 Like
I opened in my design app and saw nothing as you describe. Then I loaded it into the GFUI and it looked just fine, too. What app did you use to create it? And, are you loading it into the UI as a DXF?
2 Likes
GFUI? UI? No idea what those mean. You can’t upload a DXF into the Glowforge directly. I had to open in Silouette and then save as an SVG. I engraved other files without issue tonight. I also engraved the same star another time without issue but only once. Please see attached photos for what I’m getting. The line across the base happened two more times. I engraved this file at least one other time without issue so I have no idea what the problem is.
GFUI = glowforge user interface
UO = user interface
1 Like
No open paths or points in that file that I can find. You might be getting hit by an extremely rare bug in the motion planning that I’ve seen only twice in five years…it has to do with a sharp direction change in a path that occurs in your design, like at the circled points below:
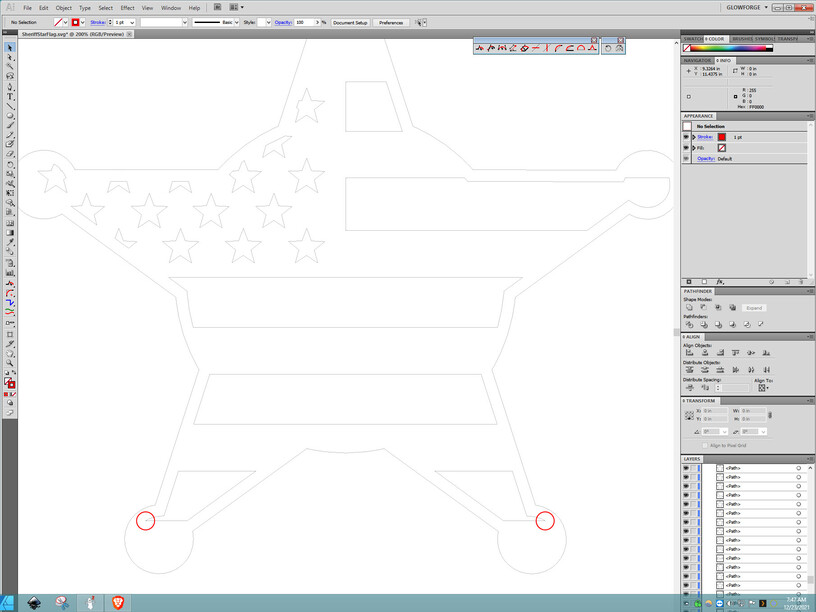
Because the steppers can’t make the head shift instantaneously like that, it might get dropped from the code. I don’t know what exactly causes it, but you have a couple of options:
If you slightly round out that sharp corner, by adding additional points into it, it will prevent the error. (We used to have to do that with digital cutter files as well to keep the knife from tearing up the corners as the knife turned.) Or you can just rasterize the file, with the black areas filled, and it will engrave without issue that way.
(It’s a fairly rare issue and I doubt they have time to chase it down, it’s been about four years since it was first reported, so you might just want to rasterize the file. It’s the quickest way to deal with it.) ![]()
5 Likes
Can you rasterize something on Silhouette DS? I have no idea how to do that. If it’s just filling the open areas, I have done that already and it didn’t help.
I’ll pop it into inkscape and see if there are any “floating” nodes that might be causing this.
1 Like
Not unless Silhouette has added a lot of functionality since my ancient version. It’s easy to do in Inkscape and one of the Inkscape experts can show you how if you need it.
Open the file in Inkscape, fill it so that the colors appear the way that you want it to, then select everything and choose Edit > Make Bitmap Copy. (Then shift the Bitmap over and delete the originals underneath.)

So I had this issue and it was something on one of my lens. 
Double check to see if everything is clean. Sometimes it’s the simplest thing
1 Like
That was coincidental. There is zero affect of a dirty laser lens, mirror, or camera lens on how a file is rendered or even how it is engraved other than the amount of power to the material. Dirty lens, windows or mirror can cause a lot of issues, and a dirty camera lens will cause other issues but not this one.
An extra line is always because of an problem within the file or how the GF cloud S/W interprets the file. Could be either.
4 Likes
So happy that you figured it out!
1 Like
Hi, @slpsteph12 My name is Mercedes and I’m part of the Technical team here at Glowforge.
It looks like this is occurring because of a problem with how the software interprets certain path properties in SVG files. We’ve heard from other customers who ran into this and reported that removing or otherwise mitigating overlapping path nodes from the file using design software helped eliminate the issue. Depending on the software you use and the techniques you prefer, there are a few different ways to do this. If you’re not sure where to start, I expect you could find a helpful tutorial in the Tips and Tricks area of our community forum.
Alternatively, you can engrave the design by converting it to a bitmap, which will also eliminate the issue. In Inkscape you can do this by following these steps:
1. Open the file in Inkscape.
2. Go to Edit > Preferences > Bitmaps.
2. Under Create, change the Resolution for Create Bitmap Copy to the resolution of your choice
3. Close the Preferences window.
4. Select your image.
5. Choose Edit > Make a Bitmap Copy.
6. Inkscape will make a bitmap copy on top of the original artwork.
7. Click the top artwork to select it, drag it off of the original artwork, and delete the original artwork. You’ll be left with the bitmap copy.
8. Select File > Save As and save the file as a Inkscape SVG file.
9. Upload your file to the app and print.
Or, in Adobe Illustrator:
1. Open the file in Illustrator.
2. Select your image.
3. Go to Object > Rasterize.
4. Select File > Save as and save the file as an SVG.
5. In the SVG Options dialog, under Options, select Embed for Image Location.
6. Upload your file to the app and print.
I hope this helps!
1 Like
This topic was automatically closed 30 days after the last reply. New replies are no longer allowed.