Re-skinning a knife

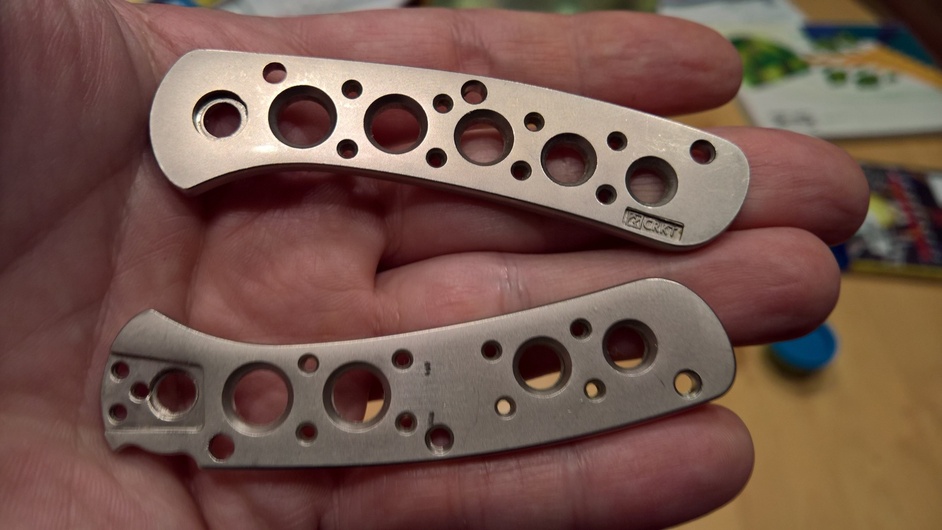
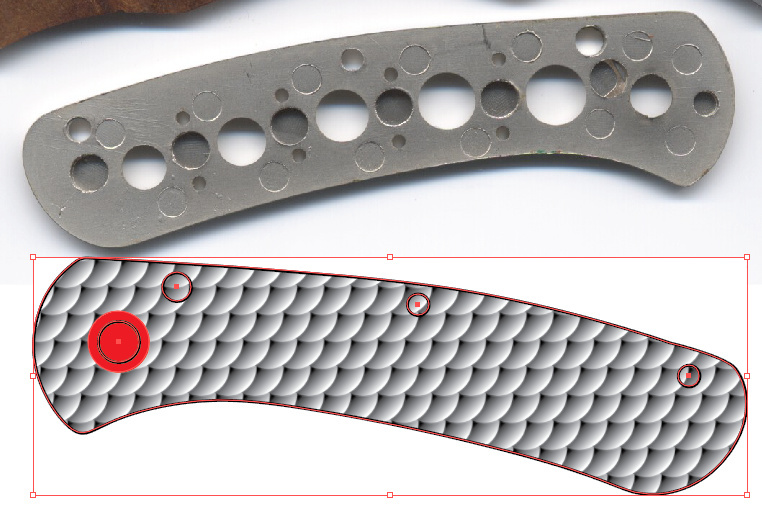
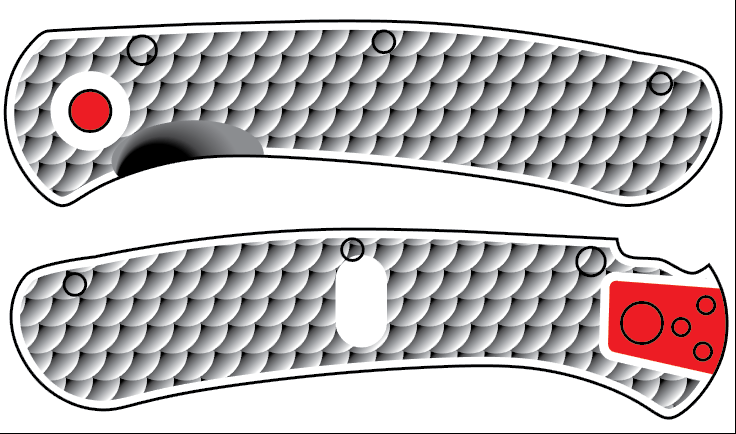
Since I was able to get some practice in with creating 3d textures via deep etching I decided to try making something more practical with them. I had an old knife that I wanted to dress up a bit. First I took the existing side plates off of it so I could scan them into the PC with my scanner.

I then took the scans into Illustrator and traced the outlines. I used a pair of calipers to measure the sizes of the different mounting holes and placed those over the scan in Illustrator as well. Then I applied the texture I’d made to the shape and added some etched counter sinking to holes that needed it.
On my first try I had the countersink etch set a bit too high in power so it actually etched all the way through making a giant hole. The second try I was able to get it to work much better. The holes all lined up the way I had hoped and I was able to install it on my knife pretty easily.
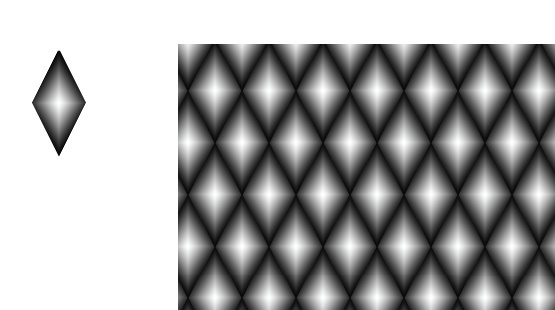
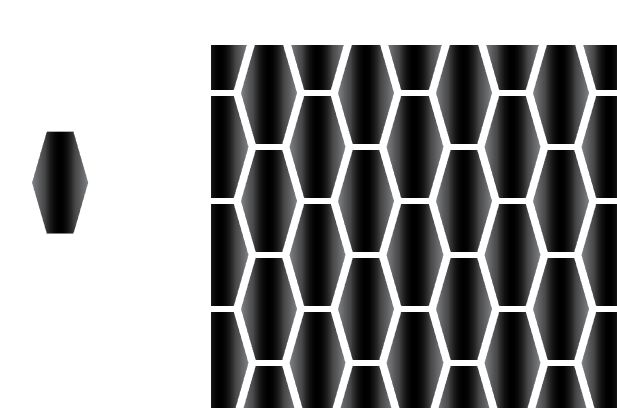
I was pretty happy at this point. The texture was comfortable, grippy and looked nice as well. However, I wanted to try making some more textures to test so I made two more. A traditional checkering and a hexagonal one.
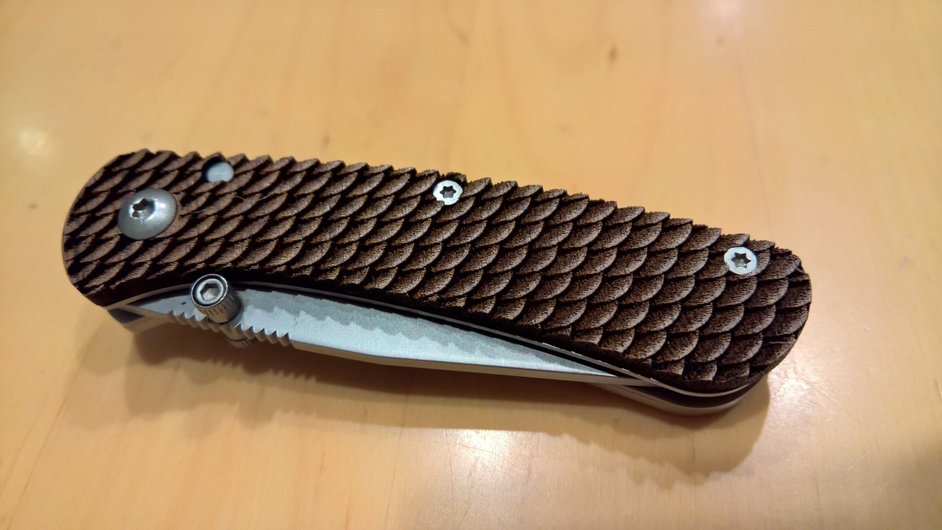
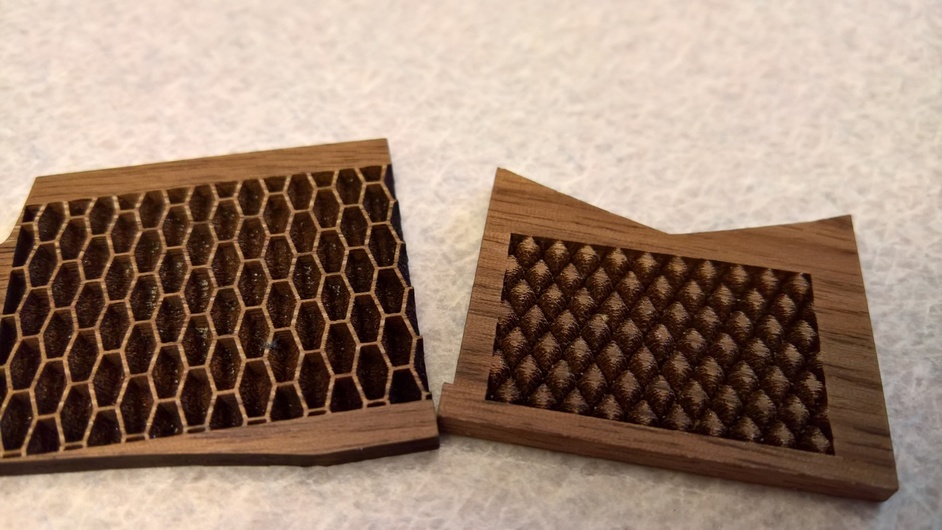
They etched pretty well too.

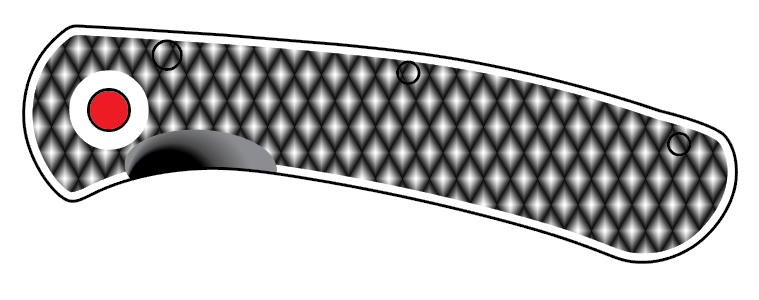
I decided to try and add some thumb relief to the design as well so it’d be easier to open the knife and a border to smooth out the edges of the handle and ended up with this.

so I tried the different designs on different woods to see how they’d look.

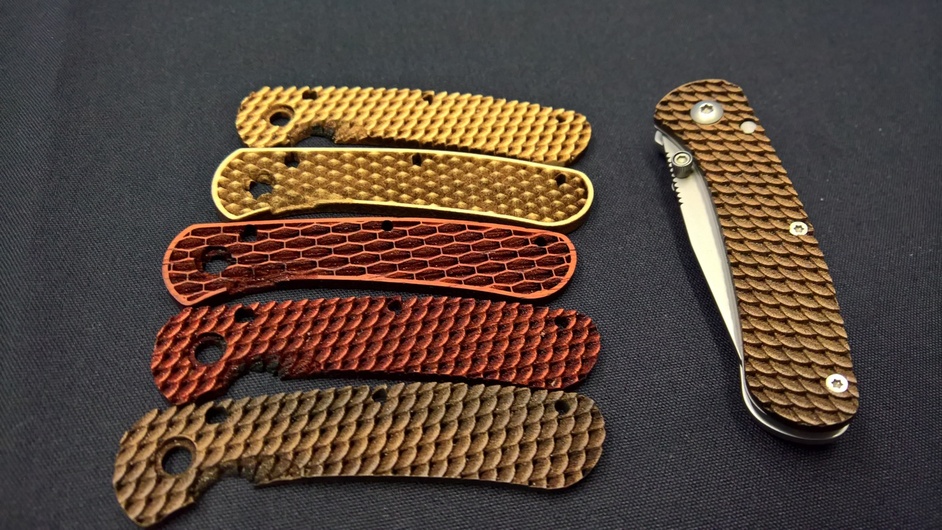
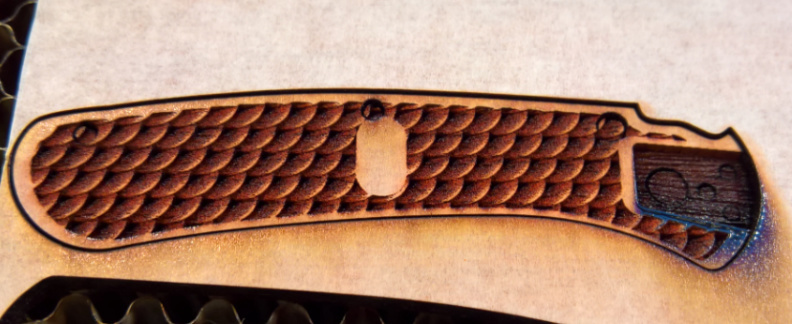
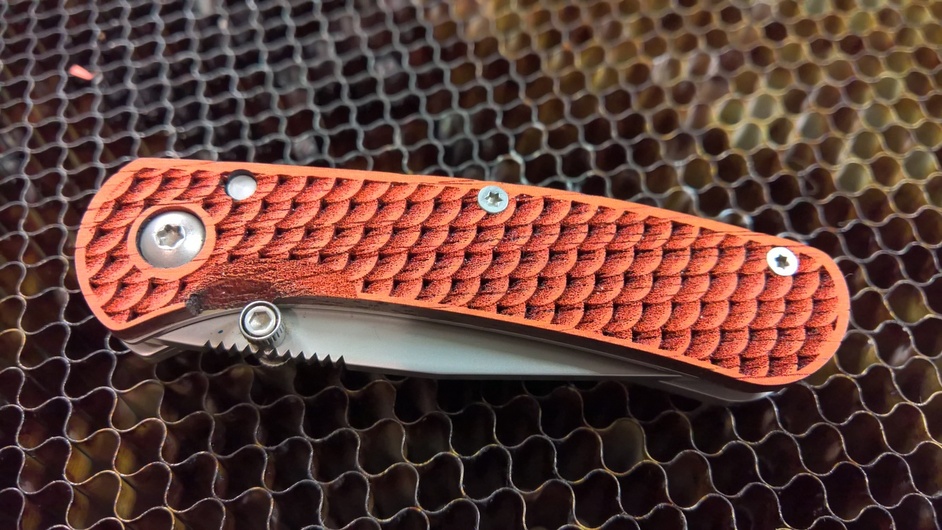
as you can see, sometimes the etched thumb relief was just too deep and burned through. I decided I liked the fish scale in Padauk (?) best and updated it to have a ridge around the edge. I also had to design the back side of the knife which was a little different, but fairly easy to model giving me this:
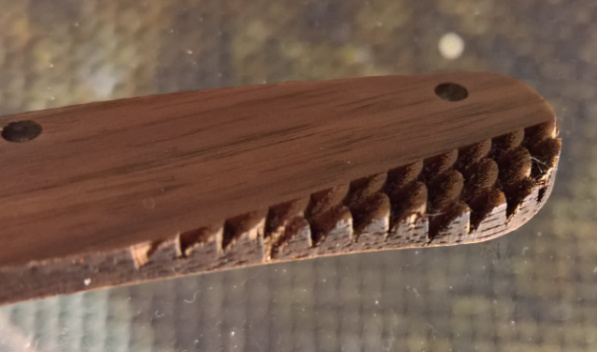
The texture etches about halfway down into the wood, so around 1/16" deep grooves. This was one of my earlier tests, but shows how deep I was going with it (single pass with room to go deeper if I wanted).

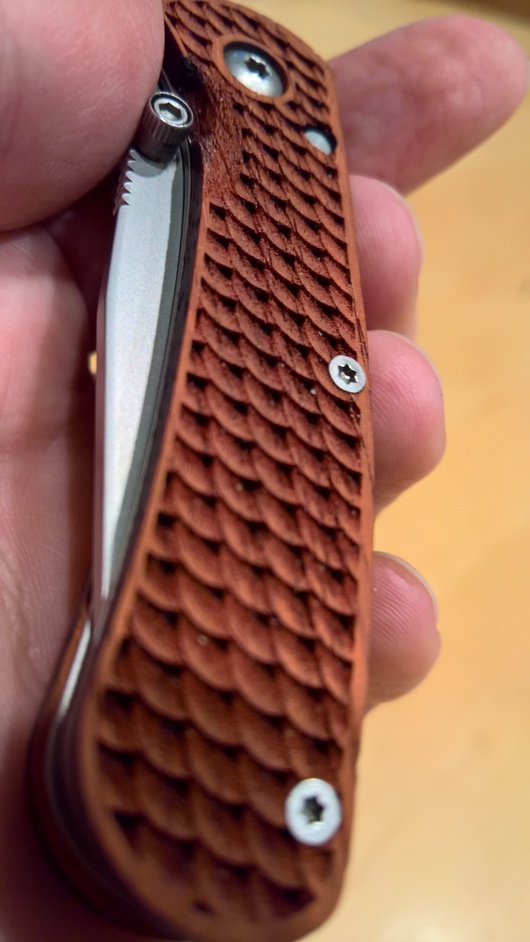
Even right off the laser it’s pretty much fit to go other than needing a bit of cleaning.

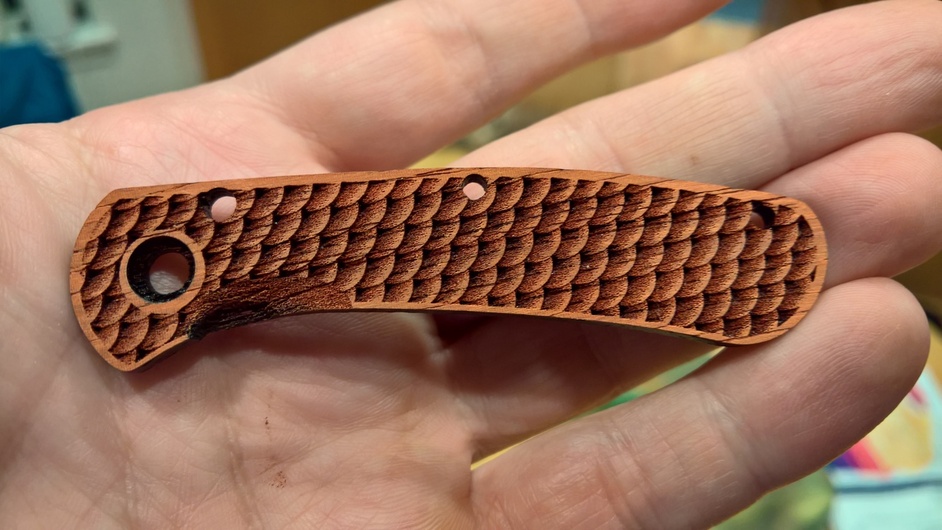
Washing it with a toothbrush and some scrubby soap and it looks pretty good.
Some quick work with a screwdriver and it mounts nicely.

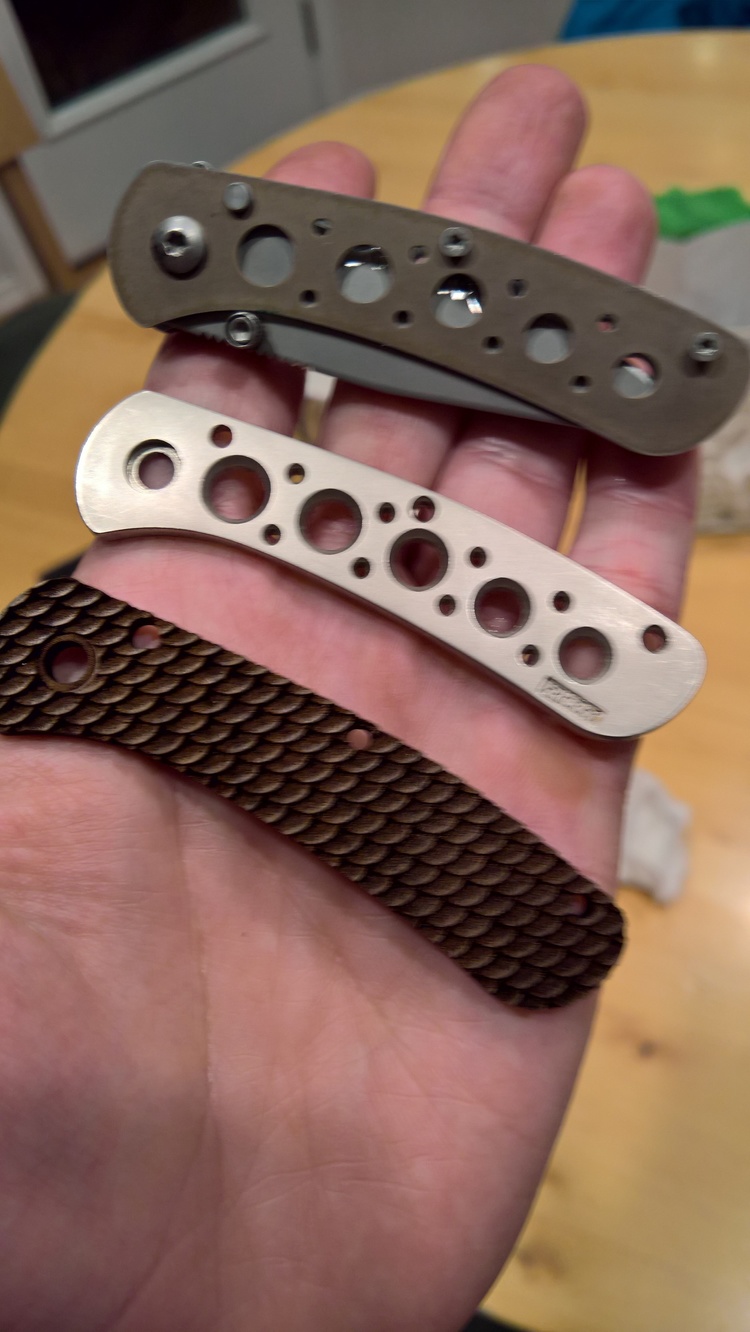
The main screw countersinks nicely and the smaller ones fit flush without countersink etching.
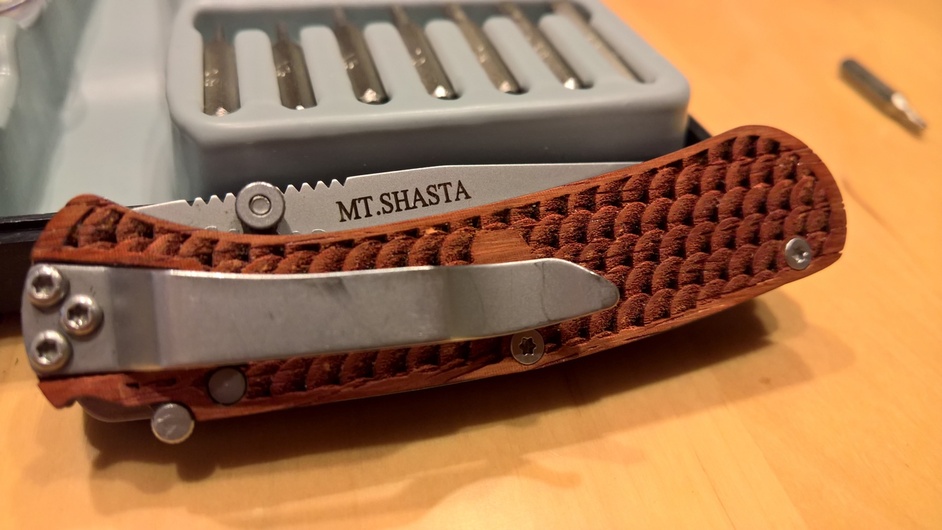
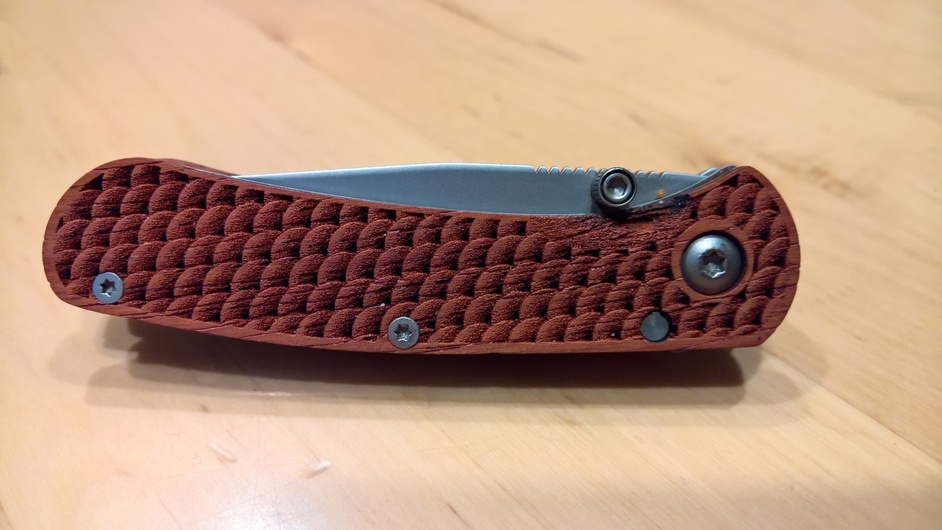
I may need to enlarge the main pivot hole on the back plate because the nut doesn’t sit flush on the back which props the clip up a bit when I screw it down.

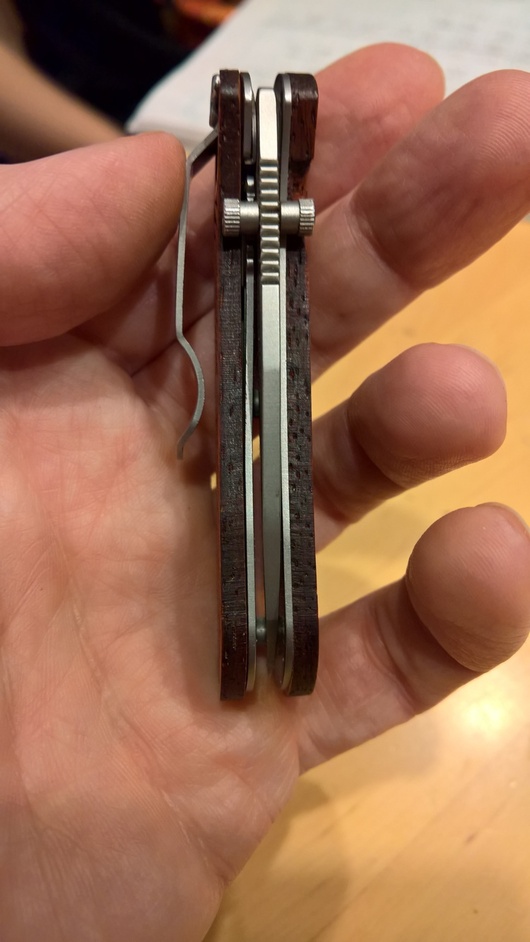
But, overall I’m pretty happy with how it turned out. I think I’ll try the other two textures in the other woods later and see how they look as well. I may also just sand/file the thumb relief, but not sure yet.

97 Likes

These look great!
I have a similar knife with titanium bolsters that I want to try to put a color pattern on.
It will be interesting to see how well the wood stands up to wear and tear. You might want to round the edges a bit with sand paper to reduce chipping.

8 Likes

Wow. Very nice work! This is such a cool project and looks great! Thanks for the detailed writeup ax well.

6 Likes

Wow! We’ve only touched the surface of engraving for mechanical, rather than aesthetic, purposes - or in this case, a mix of both. This is brilliant!

16 Likes

Un-freaking-believable! (Gift ideas are racing through my head now…starting with one for me!) :squeeee::squeeee::squeeee:

15 Likes

All my likes!!
You just did a huge amount of my R&D for me. This will be one of my first use cases. First on my knife sharpeners, then knife scales, then all kinds of things.
Can you say scalloped, exotic wood key holder?

17 Likes

I’m thinking it might work well to stabilize the wood after cutting and sanding. I’ve been experimenting with minwax wood hardener.

16 Likes

That’s awesome!! Do you live near mount Shasta?

5 Likes

Fantastic project, thanks for sharing! This is the kind of project where it would be great to have a vacuum pump & pot for treating the scales with epoxy after the laser work.

9 Likes

Got to say I always like to see awesome stuff I can change to inject some of my personality into. This has given me some cool ideas. It also allows for some upcycling awesomness!!

11 Likes

Great post. Really enjoyed all the detail you went into, and the different revisions of the piece. Awesome

11 Likes

I really like your write up and all of your detailed pictures. I have a suggestion on the cut out you are making to make it easier to open the blade. What about engraving a line where the cut out is so that it looks more finished…_like the cut out wasn’t an after thought. :relaxed:

4 Likes

WOW. Amazing application of your textures.

2 Likes

These are great! Personally i think the thumb relief would be better with a border too.

4 Likes

Wow, those are really beautiful! What a clever and practical idea!!

4 Likes

I wonder how many people will order a Glowforge just upon seeing this technique? This is one of those use cases where you say, I bought a Glowforge to do this and it’s worth this and more.

14 Likes

It’s absolutely amazing, totally a must on the to-do list :smiley:

Congratulations, sincerely!

2 Likes

@macphee You just created my next hobby endeavor!!! Always wanted to make knives skins, your photos are the motivation to proceed!!!

Now that you have made some of the most beautiful knife skins, all your knives will have to be sharp, sharp as in you can shave with them! My wood tech professor taught all his students, on the first day, how to sharpen a knife so you could shave with it. Has to be that sharp to cut the end grain in wood so it is clearly visible with a hand lens in order to identify the wood species.

Here is a great sharpener, in case you have not seen this, that makes it fairly easy to sharpen a knife in the field to “shaving sharpness” to ensure you have the perfect skin and knife sharpness!

12 Likes

Our own @markevans36301 has an awesome sharpening solution too! I say this as a delighted user of it. :slight_smile:

21 Likes

Well, it looks like I will have to get yet another sharpener. I own more of them than anyone else I know because I want to know what mine are up aginst. I make a lot of sales by just being honest about the pros and cons of mine compared to others. To do that I have to try all the significant competition.

The Work Sharp belt grinder works great and is my go to when a blade is too messed up to fix with one of my own.

The main advantage of my design is that there is zero setup. Leave one in the kitchen or office and when your knife starts to drag, give it a few strokes and go back to cutting.

19 Likes