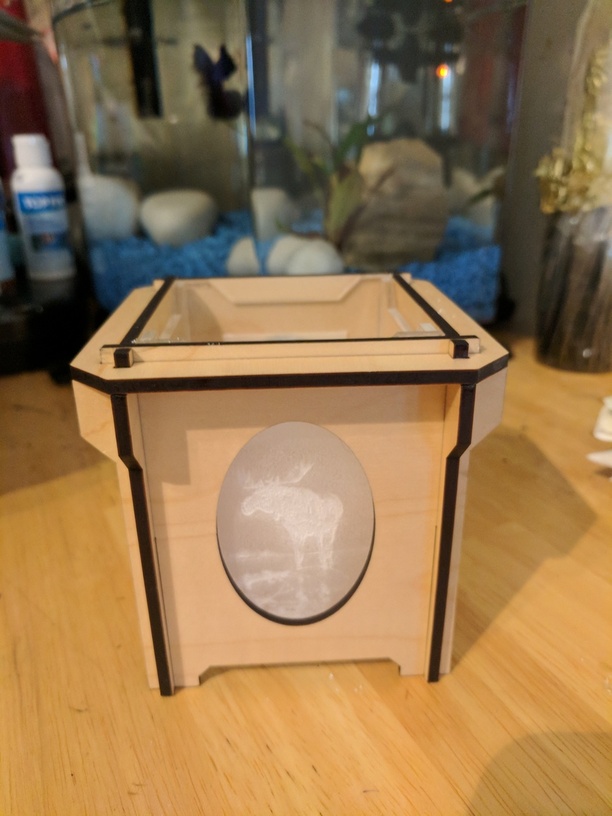
So I too downloaded the svg and made a version. I opened it in Inkscape and without modifying the dimensions cut the outside in medium maple plywood and the inside in medium clear acrylic. The acrylic pieces had to be glued together. The plywood pieces fit, but loosely. I dabbed some glue onto the tops of the corners and then pushed down the top bracket. So it is glue on a burnt edge against a finished surface. We’ll see how well it holds. The inside container fits snug, but loose, inside the outer container. So when someone picks it up to look at it there is the danger of the inside piece dropping out the bottom. I would have used a darker wood, but all I had was maple. The engrave in the acrylic is from a pencil drawing I found on the Internet. Unfortunately I cannot figure out where so I cannot provide attribution. As the drawing didn’t have many, if any, white pixels in it the 's automagic engrave “frosted” the clear acrylic.
The engraving, which is just barely larger than the oval, took about ten minutes per moose. I also engraved out a cylinder in the bottom acrylic piece for the tea light to sit in. Here is a poor shot of it in daylight:
One lesson learned is that wax just pops off smooth acrylic and it has to be scraped off of rough acrylic (the bottom of the cylinder that holds the candle.)
I haven’t yet made this lovely thing, but played around with it to make sure I got the measurements correct. I opened the SVG in Affinity, copied it, and saved it into a ‘new’ 20 x 12. It goes into the UI at the correct size. I would never have known to do it that way, were it not for all you brilliant people on here! Thank you!
I have that same question. Noticed that one other poster said their build needed a bit of glue. Can anyone point me to a good thread on snap-fitting and kerfs? My first approximately two hundred projects are likely to be making custom bins and little shelves and such, just because it’s so much easier to join 1/8" materials with interlocking joints than with tiny screws or nails or glue or brackets.
I’m having trouble thinking of a single thread on this. It has been discussed quite a bit though.
I make a lot of boxes and bins so my F360 tutorials lead you through the design process but I’m afraid they lack a good section on kerf.
There are tutorials on kerf for the major 2D vector programs in the Matrix in the Table of Contents in the Tips and Tricks category. (Can’t link from the phone…it’s the first topic)
To be fair to polarbrainfreeze, I believe his design assumed perfect 1/8" thickness and material thickness is as important as kerf in designing for snap fit.
Another issue to consider is how much use will your bins receive (assuming a wood product and not a manufactured product like acrylic) and what is your climate like? Even if they are kept inside a climate controlled building all day the changes in humidity between summer and winter could see the wood shrinking and expanding so that what is snap fit in one season is loose in another. I own an old house, it’s climate controlled, and there is one closet door that is essentially sealed through the summer and opens freely in the winter. I have similar plans for bins and storage, and gluing can be a messy PITA, but I’ll be doing it anyways. This may not be an issue for everyone, but I think it will be for some of us.
It is really nice when you can design without needing any fastening agent, but it gets difficult, especially as @caribis2 pointed out with changing humidity. I made a nice stamp box that that fits together perfectly immediately after a cut. It’s doing pretty well after four months, but the joints are a bit looser from use. I’ve also noted that things dry up in the winter and that can cause some issues.
As to kerf, I do .007 for very tight joints in Proofgrade. I do .006" for very tight acrylic joints of .21" acrylic.
@PFI-Guy any idea how to save in chrome on a mac (single button mouse). My wife had problems with the previous mouse upgrade so I went back to the 1 button (oops).
Thanks guys
If your mouse is one of the Magic Mouse variety, I want to say that pressing and holding on the top right side of the mouse will give you a dialog box to “save as”.
I will verify that in a couple hours on my Mac Mini.
@PFI-Guy is correct, if you have a Magic Mouse click the mouse with your finger on the right side.
If you don’t have a Magic Mouse (or even if you do) hold down the “Control” key on your keyboard while clicking and that will bring up the same right-click menu where you can select “Save Image As”
Out of curiousity, did you anneal the acrylic prior to the cut or did you do the cut pieces afterwards? If you did the cut pieces afterwards, I guess its safe to say there was no deformation?
I’m a bit fascinated with the idea of this. I’m assuming you just did this in your oven, or do you have a kiln of some sort?

 … I have not had a chance to cut it myself. I’m looking forward to being able to test my designs before sharing them.