There’s been a lot of chatter on the forum lately about material dimensions and how to scale things. It’s all great info, but a bit too advanced for my “pretty little head” at the moment. What I do know is that I’m going to need to alter any project plans that I purchase or create which have finger joints so that they fit the actual size of my materials. (Ex: the design says “this is for .125 inch material” but what I have is actually .136.)
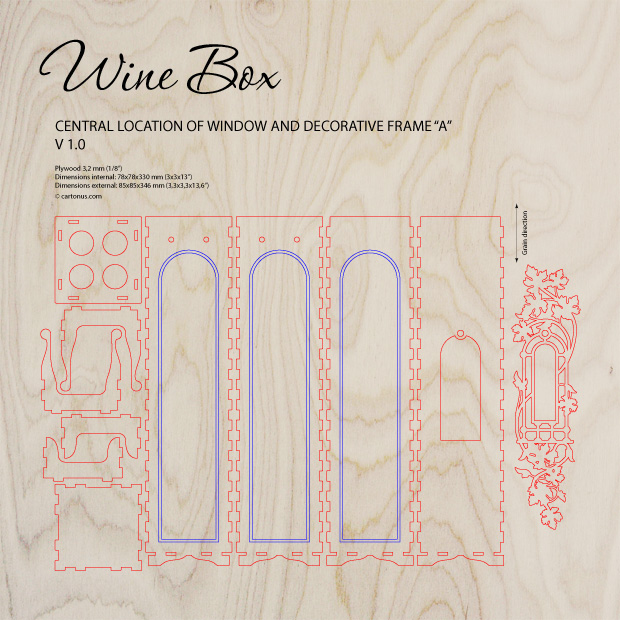
Once my GF arrives, I’m going to start with very simple designs, probably even purchase one or two to get started. I’ve had my eye on this one from cartonus.com:
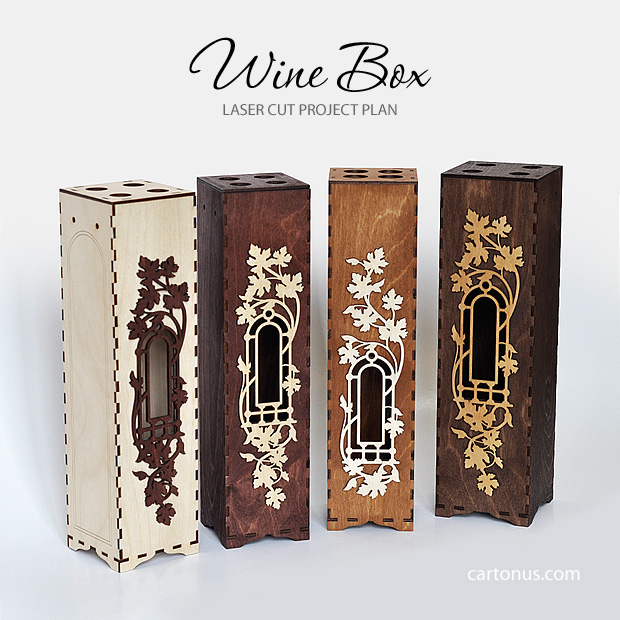
It’s seven bucks, and I’ve been drooling over it, and though there are probably plenty of free wine box patterns out there, I’m happy to support the artist - I’ve enjoyed drooling over this design seven dollars worth!
So… This is an example where the design spec says it is for 1/8 inch material (.125), and the proofgrade material, according to my cheap calipers, is closer to .136 inches (or so: I don’t have it in front of me, but I recall it being a smidge bigger than .125).
Here is my “keep it simple” plan for dealing with that - This is all conjecture at the moment, so please let me know if my logic is off or the math is wrong or there’s something I’m missing…
EDIT: before you begin, make sure Inkscape is setup to NOT resize stroke width when you resize objects (see comments by @chadmart1076 below followed by my/@cynzu’s walk-through for how to do that in Inkscape v .91)
- Get the whole plan for the wine box into Inkscape.
- Figure out how much to shrink or grow the whole thing so that the finger joints are correctly sized. [details below]
- Select all the objects.
- Make sure the check box for “maintain aspect ratio” is checked so that the width and height ratios stay in tact.
- Determine what the new width needs to be [related to step #2 above, more details below].
- in the “width” window at the top of the screen, set the width to that new value.
The whole project plan will then be scaled to meet the actual dimensions of my proofgrade material so that the finger joints will work. (Let’s hope! again - this is conjecture, so let me know if my logic is faulty)
Here’s the Simple math for figuring out how to set the width (with “maintain aspect ratio” turned on):
Take the current width of all the objects in the project (“select all” then look a the width).
Multiply that by X to get the new width to set.
X = [actual material thickness] divided by [material thickness in the design]
In my example:
X = .136 / .125
X = 1.088
My material was a bit bigger than the material in the project plan, so I’ll scale everything up just a bit (by 1.088).
I understand that taking this approach will shrink or grow the whole box, so this is useful only if the outer and inner box dimensions don’t really need to stay constant.
ok, let the pseudo-code review begin! thanks.


 Draftboard and plan to do lots of experimentation with it
  My GF hasn’t arrived, but my box of goodies did, so I’m drooling over the