People want to know about the settings I ended up on here:
It was done in Baltic birch non pg ply
Speed 600
Power 80
Vary power
225 LPI
As a bonus, I cut at 220/Full (pro) (These cut settings really are subjective and only apply to this specific batch of baltic birch. I have long since moved to a test-first method: anytime I get a new batch of BB ply I test a piece to dial that particular batch in. I’ve had some that 220/full wouldn’t have been reliable, so now I always test. For more info see #6 here:
This image is one that I aspire to emulate. It seems like the Gold Standard! Thanks so much for the information. I’m thinking of repeating the image I recently engraved using your settings, but I suspect the quality of my input image is so inferior to this one that I might still be disappointed with the output (GIGO).
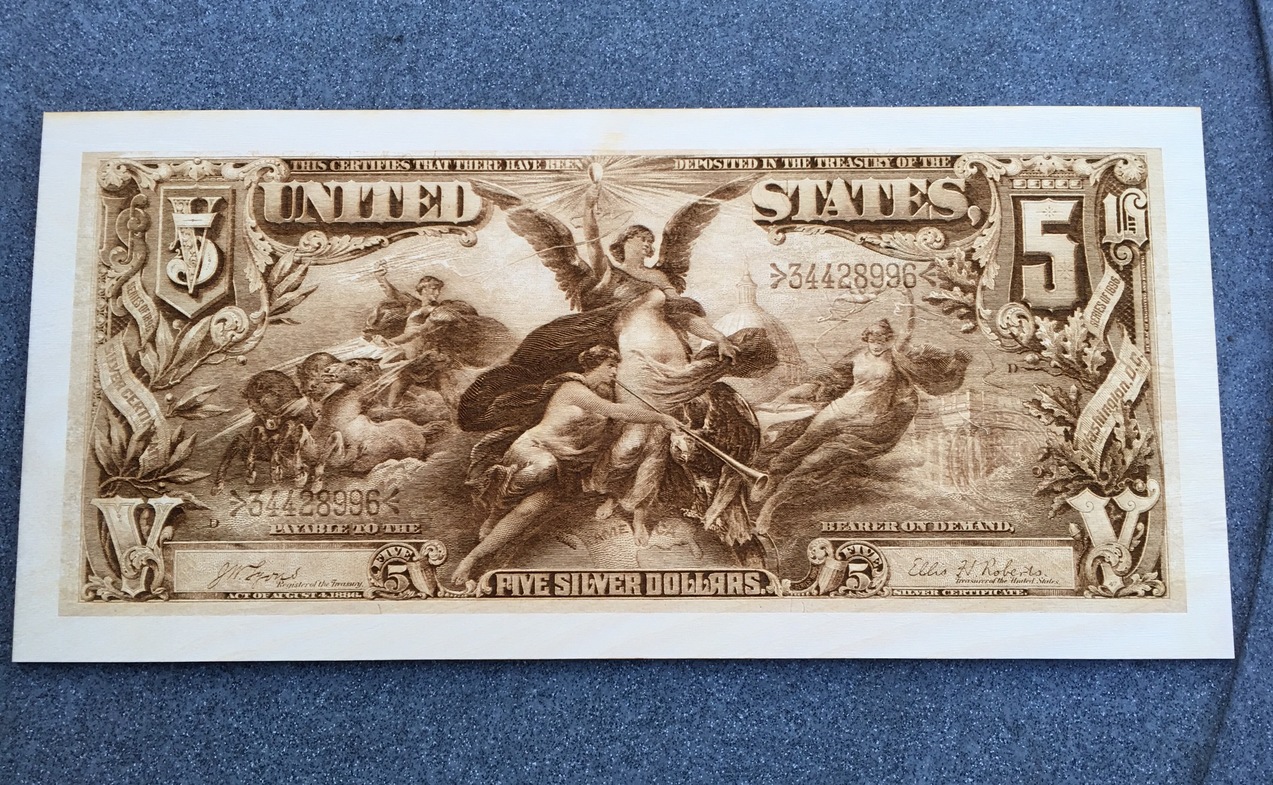
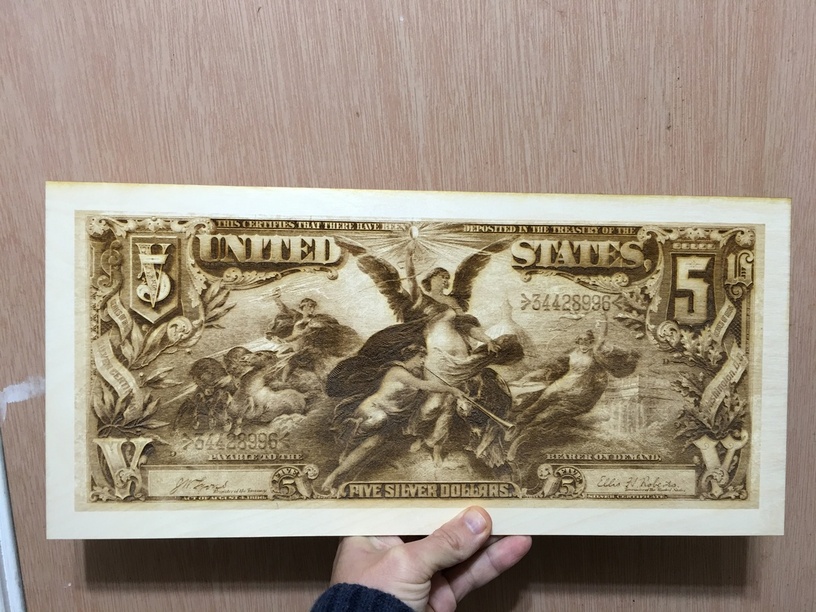
Thank you for iterating on this to see just how impressive you could get the results! And so one can find this post easier in the future by searching based on the mental image let me just write" ‘silver certificate five dollars’.
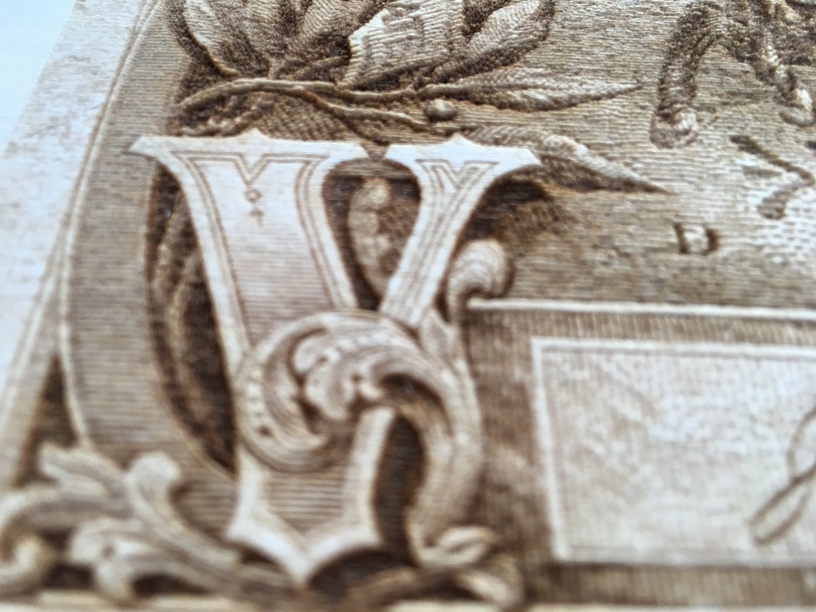
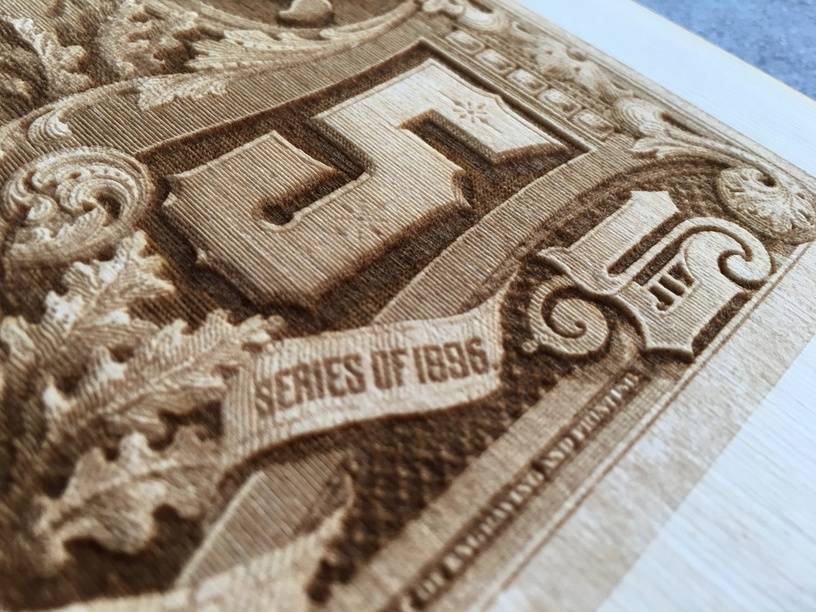
Thank you for the detail images and WOW that is just amazing (from the subtle accents in the 5 and V to the small text of “engraving and printing”) and it is done with wood!!
You’re single-handedly making me rethink engraving. I thought I just wanted to cut stuff, but then you brought Mucha into it, and now you’re sharing all your secrets.
My next iteration might be to fool with lpi and engrave size to see if matching the two to the original image resolution yields better results. I’m starting to wonder what the ultimate resolution is governed by, beam size or wood fiber size? Would other surfaces let you go even tighter? I have a piece of white corian coming, might be a good candidate.
There’s only so many hours in a day to try these things and keep a job and feed dogs, you know?
I am also wondering if an oil finish that penetrates the wood and stabilizes the wood fibers would yield better results? I have coated a couple of sheets of Baltic birch pywood with Danish oil finish for a project. I may have some scraps to test some engraving. It does darken the wood some though. One could use acetone thinned polyester casting resin to stabilize the wood fibers. The resin is clear so the wood would not darken. I have logs that I have milled into planks that I intend to treat this way for water proofing. I have only read about the process and not actually done it yet. Such a treatment would take some experimentation to get right.
Minwax has a wood hardener that is is clear. I think that it is polystyrene dissolved in acetone, but there is no information on the polymer used.