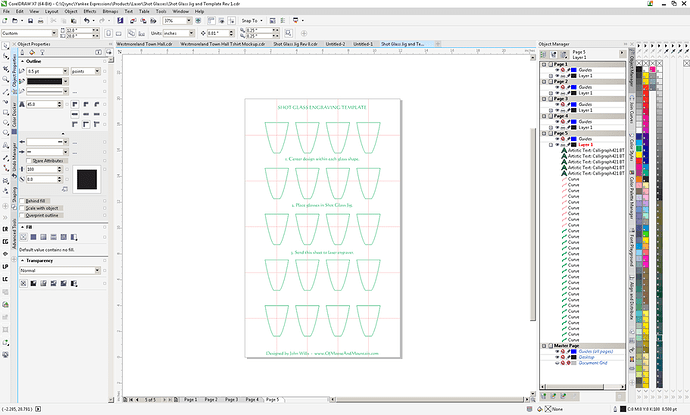
I’m buying a Glowforge primarily to expand the range of gift and souvenir products I sell. That will likely involve low-volume production of various items including etched shot glasses. As nice as the Bur-Lane Rack Star system seems, I’m concerned about whether (A) it will fit in the limited z-height of the Glowforge and (B) how long it will take me to sell enough shot glasses to pay for it. After much thought and some experimentation on how to make a jig that will hold several shot glasses in place within the Glowforge, I finally came up with something that I think can work.
In the sharing spirit of the Glowforge forum, I’m sharing the final design and a tutorial that you can use to guide you through creating similar jigs for other items.
Note that I have never used a laser before nor have I cut these files. It will be one of my first projects when my Glowforge arrives. Please let me know if you see flaws in my design.
Tools Used
Digital Caliper (to size up your widget)
Fusion 360 (to model your widget)
123D Make (to slice your jig)
CorelDraw or other vector software (to maximize your efficiency)
I used a combination of Fusion 360, 123D Make, and CorelDraw to create this jig and associated template. I can probably count on my fingers the number of hours I have spent learning and experimenting with Fusion 360. This is the first real design I successfully created with it. Similarly, I have very little experience with 123D Make. I do have a lot of experience with CorelDraw and I’m sure any of you comfortable with Illustrator or Inkscape or other vector software will be able to duplicate these results in those tools.
Sizing Things Up
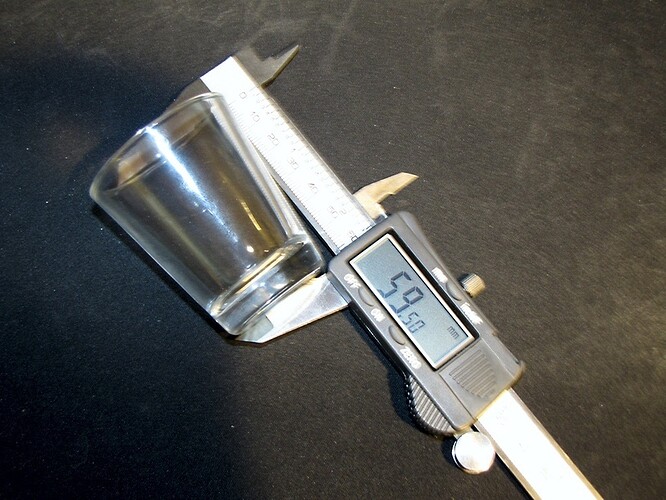
First, you need accurate measurements of your widget. In the case of my shot glasses, I needed to know the diameter of the top, the diameter of the bottom, and the height of the glasses. I got these measurements by using a digital caliper. I made sure to buy blank shot glasses with a top diameter of less than 2 inches to ensure they’ll fit in the Glowforge. While I didn’t measure it, earlier experimentation on how to build this jig led me to determine that the taper from top to bottom is 7 degrees. That proved important to know in a later step.
Also measure the thickness of the material you’ll use for the jig. In my case, I went with multiple sheets of corrugated cardboard. If this jig proves successful but not durable enough, I can see replacing it with EVA foam eventually.
Model Your Widget & Jig
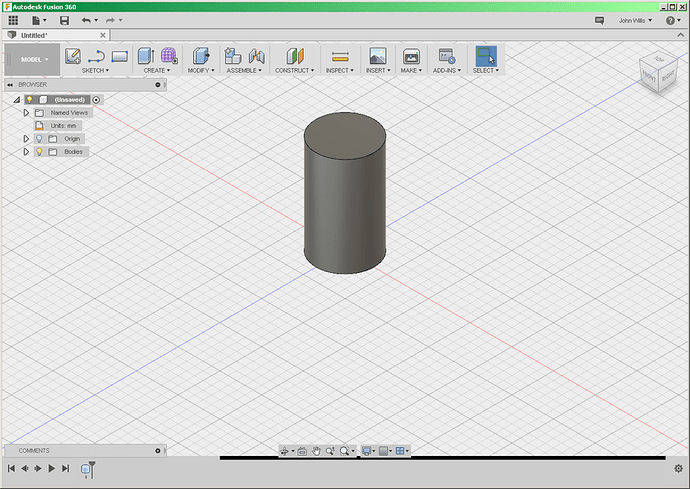
Modeling a shot glass in Fusion 360 provided me with a crash course in learning a few features of this powerful tool. After some experimentation and research, I determined the best approach was to create a cylinder the height of the glass at the diameter of the base of the glass. Using the smaller diameter made the next step easier although someone with more F360 experience probably could have initially created the cylinder using either diameter.
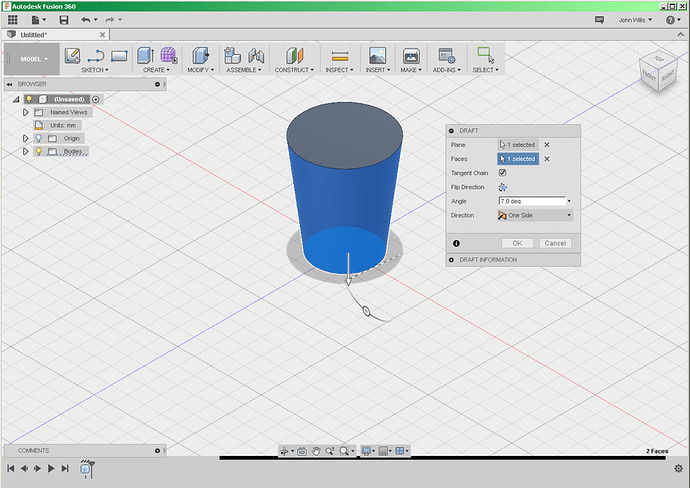
Next, set the taper. It took some research to learn that what I call taper, F360 calls draft. The Draft function is under Modify. I selected the bottom surface as the plane and then the side of the glass as the face. I then specified the angle of taper to be 7 degrees. Again, I determined this angle through earlier experimentation. I would have preferred to enter the new diameter for the top but I couldn’t figure out how to do that. I did check the resulting diameter to ensure it was correct.
When the glasses are lying sideways in the jig, I want the etching surface to be parallel to the plane of the laser. I’ll rely on the 1/2" focus range to carry the image around the curvature of the glass but I want it to be in line, top to bottom. That means I need to tilt the model 7 degrees. I did this with the Move function.
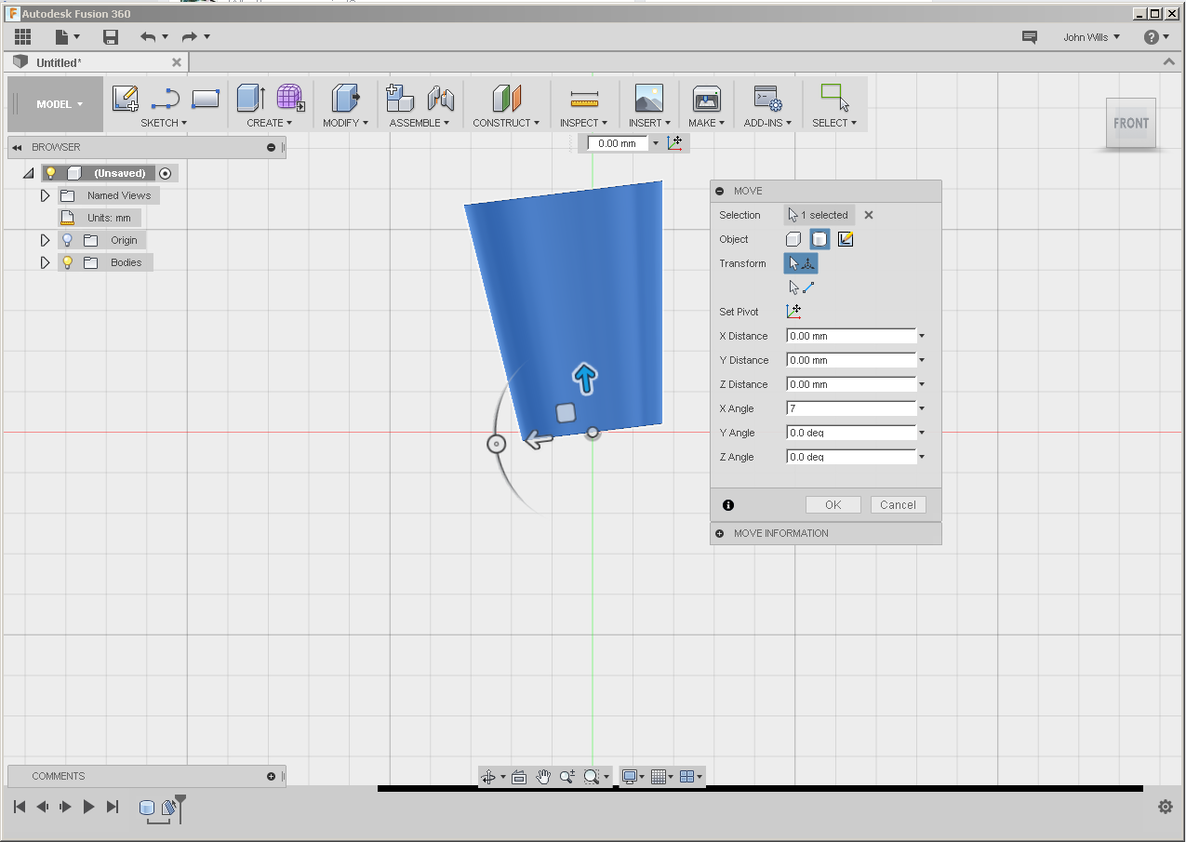
Because I want the shot glasses to be cradled by a stack of corrugated cardboard, I needed to create a rectangle slightly larger than the width and height of the glasses and as thick as the number of sheets of cardboard I thought I needed. I chose to go with 4 sheets. I created the box off to the side because my lack of experience with F360 resulted in my glass model getting segmented every time I tried to create the box in place. Once I had the box created, I moved it so it was aligned with what will be the lowest point of the shot glass when it is lying in the Glowforge with the glass centered in the other two dimensions.
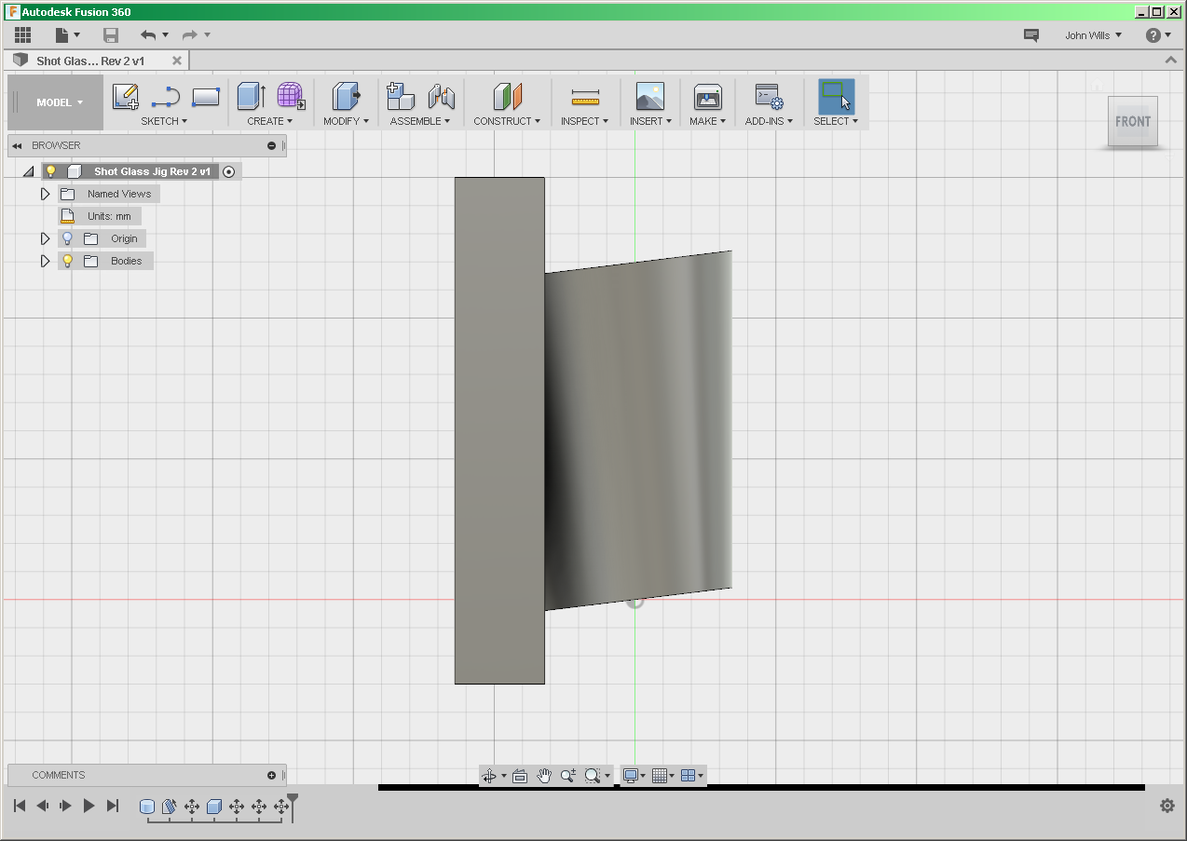
After some more research, I found that I needed to use the Combine/Cut feature to subtract the shot glass model from the box representing the stack of cardboard. I now had a mold to perfectly cradle a shot glass so it will sit level under the laser head.
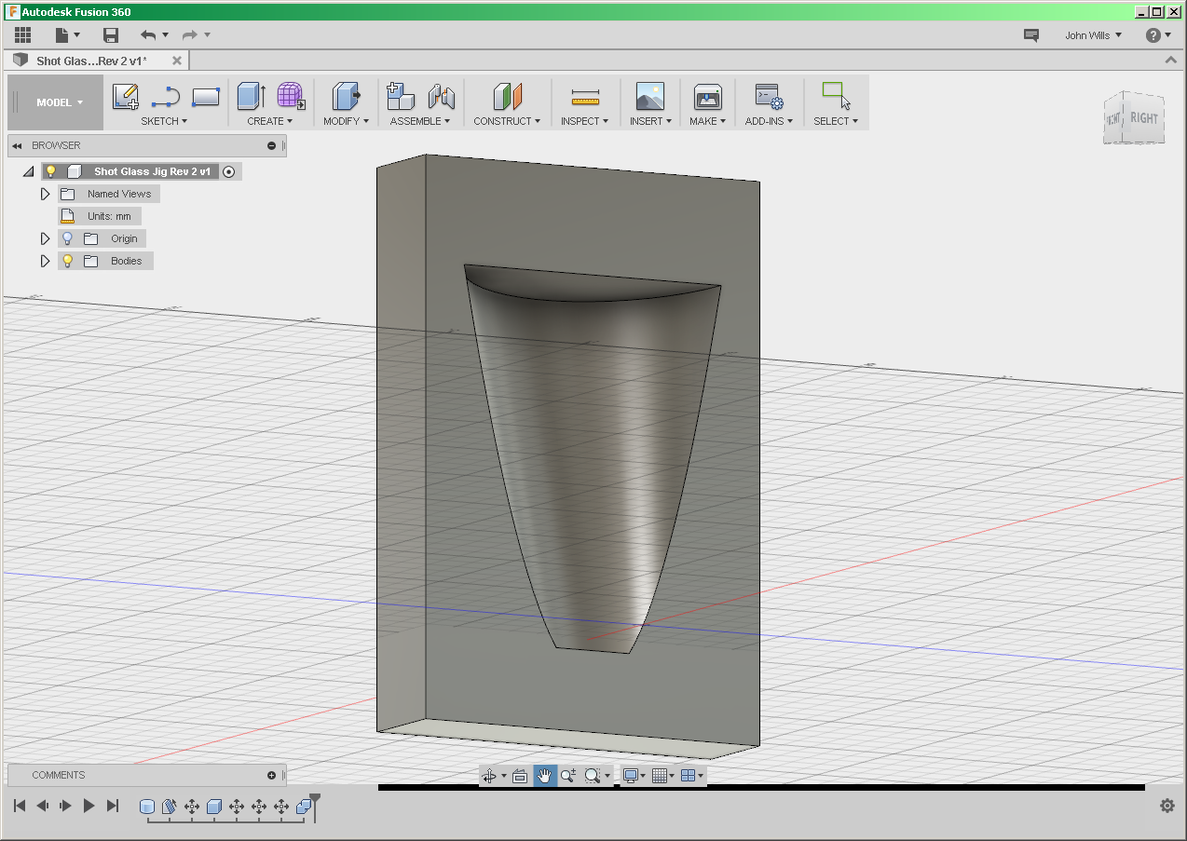
Finally, I saved my work and exported the “mold” as an STL file to my local computer. That wasn’t as easy as it sounds. I eventually learned you can do this by right-clicking on the name of the model in the browser area on the left and choose Save as STL. Then, select the object and click OK.
Slice Your Jig
Time to slice up the “mold”. I imported the STL file into 123D Make. When I first imported it, the Object Size was set to Uniform Scale which was somehow enlarging the model. I changed it to Original Size and all was well.
I had previously defined a Manufacturing Setting called Corrugated Cardboard configured to be 12" x 20" x 0.177". I selected that and then chose the Construction Technique called Stacked Slices. My lack of experience with these tools meant it took a little effort to get 123D Make to slice on the plane I wanted it to but I got there by clicking on Slice Direction and then rotating until I got it right. This sliced the mold into 4 layers including dowel holes for alignment and an etching of the layer above to assist in alignment when assembling the layers.
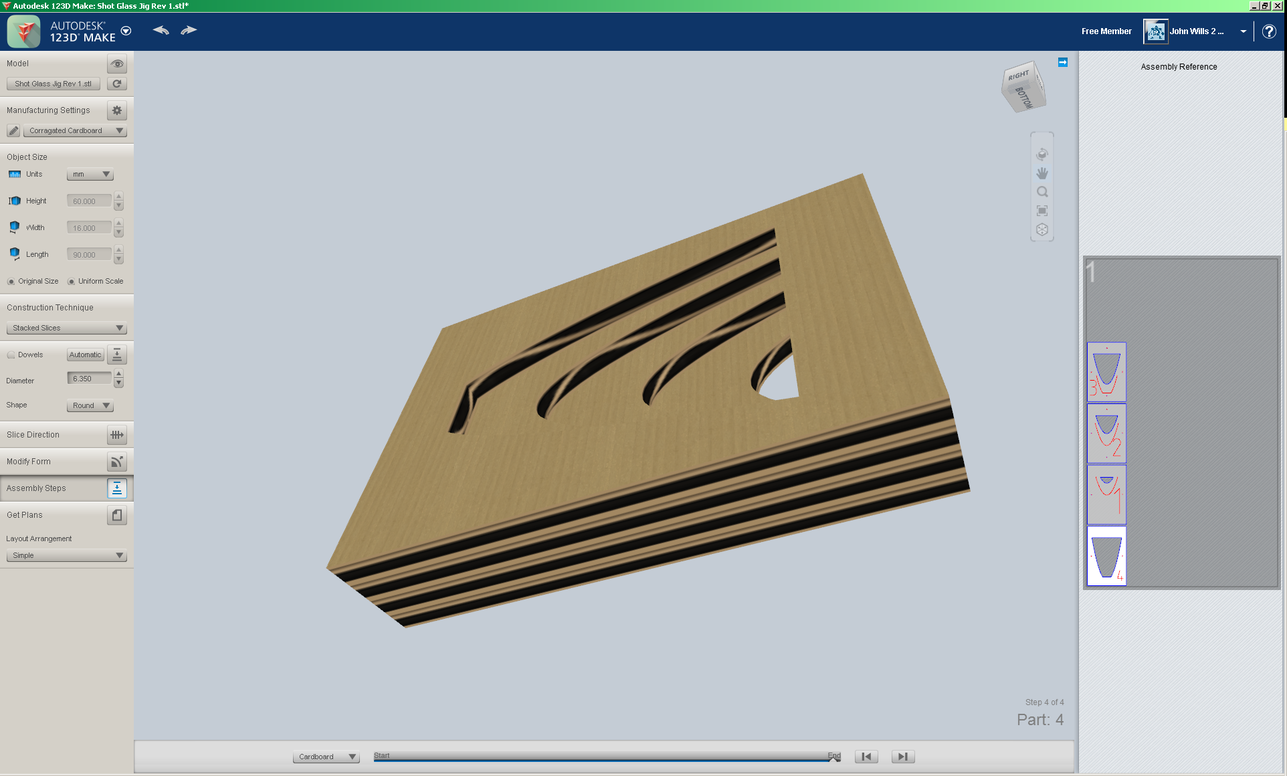
If you only want to etch one widget at a time, you’re ready to go. When your Glowforge arrives, cut out the file produced by 123D Make, assemble the pieces, and start engraving.
Save your work and then export the output by choosing Get Plans in the lower left. I chose to export to EPS because I wanted to do additional work in CorelDraw.
Maximize Your Efficiency
In my case, I want to be able to etch several shot glasses at once to improve my efficiency. I hope to load 20 shot glasses, start the engrave, and (once the excitement of watching a laser engraver do its thing wears off) work on something else while remaining within eyesight and earshot of the Glowforge. To that end, I exported the 123D output as an EPS file and imported it into a new blank CorelDraw document defined as 12" wide and 20" tall. I placed the imported vectors off to the side to leave room to assemble my jig.
I ungrouped the vectors. I then grouped everything related to layer 1 and moved that to the upper left corner of the page. There are a number of ways to lay out multiple copies of something. For me, I often find the fastest way in CorelDraw is to do the following.
- Select the grouped vectors.
- Copy & paste another copy (Ctrl-C, Ctrl-V) directly on top of the original.
- While holding the Ctrl key, left-click the mouse on the black box on the left edge of the object. Continue to hold Ctrl and the mouse button.
- While still holding Ctrl and left-click, drag the mouse to the right roughly to where the right edge of the second copy should go. Holding Ctrl retains the width of the object.
- This causes the copy to get flipped over but placed in exactly the correct location.
- Now choose Mirror Horizontally to straighten it back out.
Now select both the original object and the new copy and repeat the steps above. That will give you four copies of your object lined up across the page.
Now select all four objects and repeat but this time flip down instead of across.
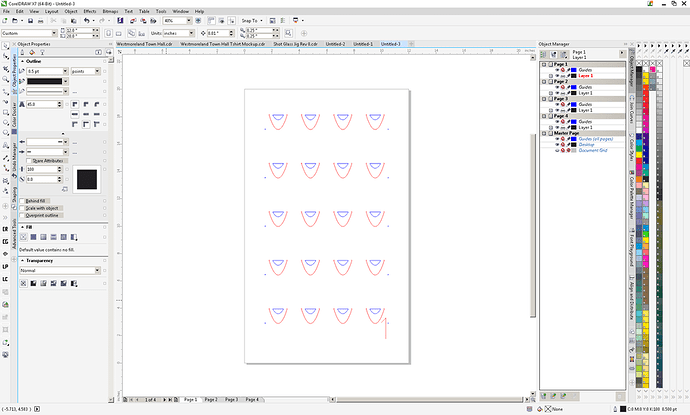
Repeat these steps until you have filled the page with as many widgets as will fit. In my case, I got four across and five down. Now group all of the objects and center them on the page (with the group selected, type P on the keyboard).
That may sound like a lot of steps but, once you have done it a few times, it goes fast. It look me about 30 seconds to do this for each page.
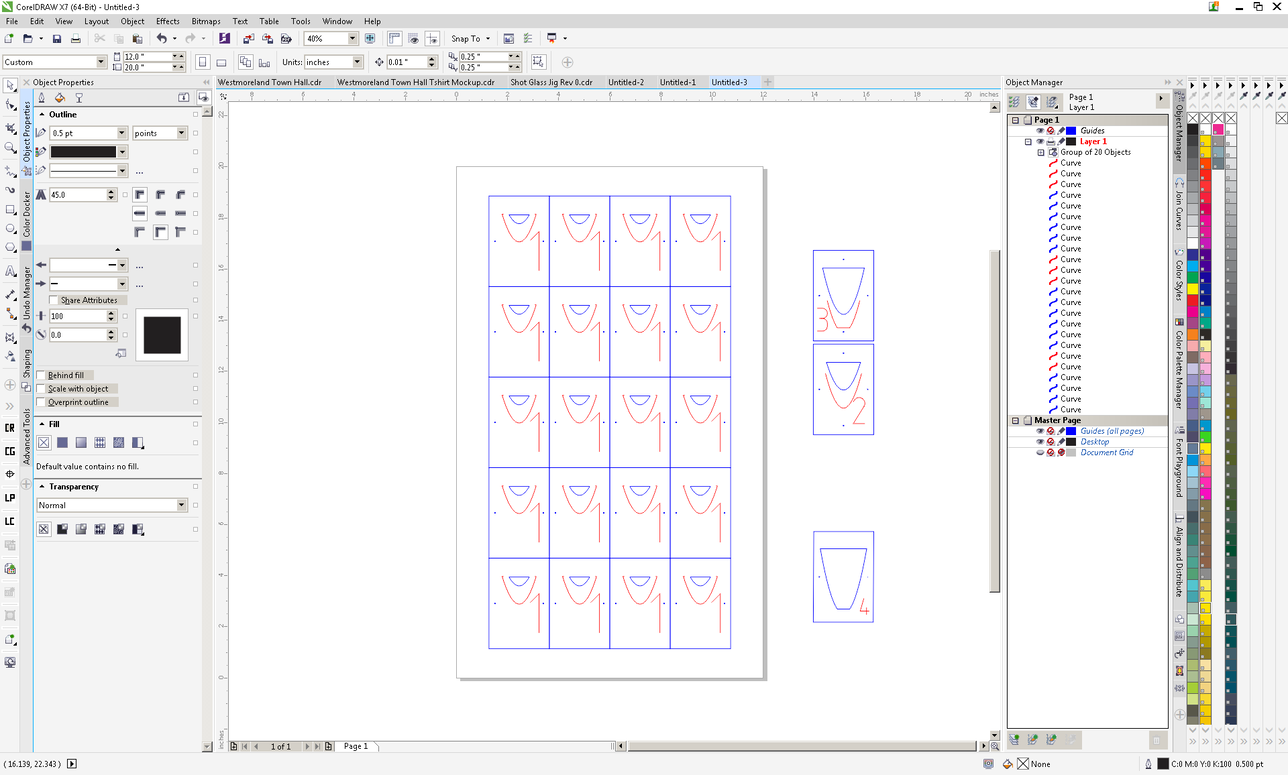
Add a new page and repeat this for the next layer and so on until each layer is laid out on its own page (four layers in my case). Because they are all inside that rectangle you created the mold from and the group of all objects is centered on the page, you know each layer will precisely line up.
Now that everything is lined up, clean things up by ungrouping all and deleting the outer rectangles of each object and most of the alignment markers. Keep a couple to help you line up the full sheets. Delete all but one of the layer labels (the big red 1s, 2s, etc.). Each page should now just have 20 cutouts for that layer, 20 etches of the layer above, a few alignment markers, and one etch indicating which layer it is.
Save your document and export each page as an SVG file ready to be cut and etched when your Glowforge arrives. Once cut, stack them in order and glue the sheets together.
Prep Your Artwork
Don’t forget the template. Now that you have a jig, you need to be sure your artwork lines up with it when you engrave. In this case, the cutout for the top sheet of the jig represents most of the effective etching zone on the shot glasses so I just made another copy of that sheet. If you use this same approach, be sure to change the color of the cut lines to a non-cutting color. The lines are just on the template for reference and should not be acted on by the laser. Likewise, labels and instructions should be in a non-cutting color.
I also added some alignment marks to speed up centering artwork. I added vertical lines down the center of every glass and horizontal rules just above center. My graphic design sense tells me I’ll want the artwork a little above center top-to-bottom but that could change after I etch a couple glasses.
You can save this sheet as a template for future use. To do that, I created a new document of the same dimensions and pasted all the contents of the template page and then chose Save As Template.
Here are the SVG files for the four layers of cardboard as well as a PDF of the template:
NOTE: There’s a problem with how the SVG files look. I’ll see what I can do to fix them soon.
Until I figure it out, here’s a multi-page PDF containing the four sheets and template:
Shot Glass Jig and Template.pdf (65.3 KB)
Shot Glass Jig Sheet 1
Shot Glass Jig Sheet 2
Shot Glass Jig Sheet 3
Shot Glass Jig Sheet 4
Shot Glass Jig Template.pdf (65.3 KB)
