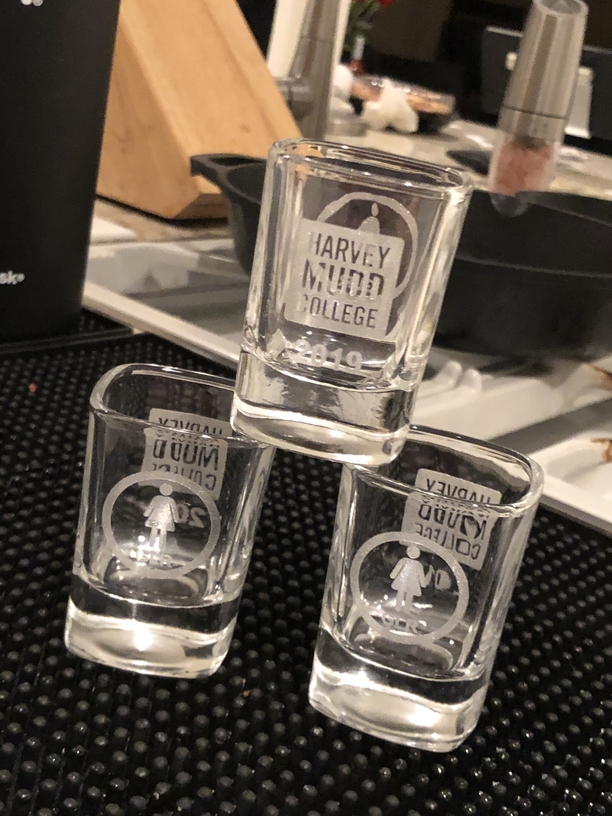
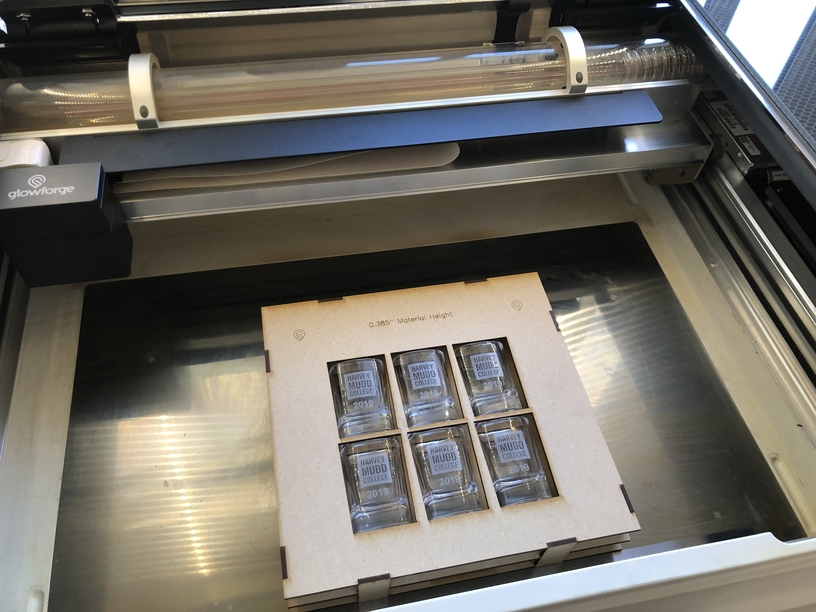
Here’s my quick journey into shot glass engraving. I created this to help my daughter engrave some shot glasses for her and her graduating suite mates at college:
I also used his 950/100 at 225lpi settings to engrave - AND - his super clever tip about a thin film of dish soap to get better results. I had 100% success on the engraves.
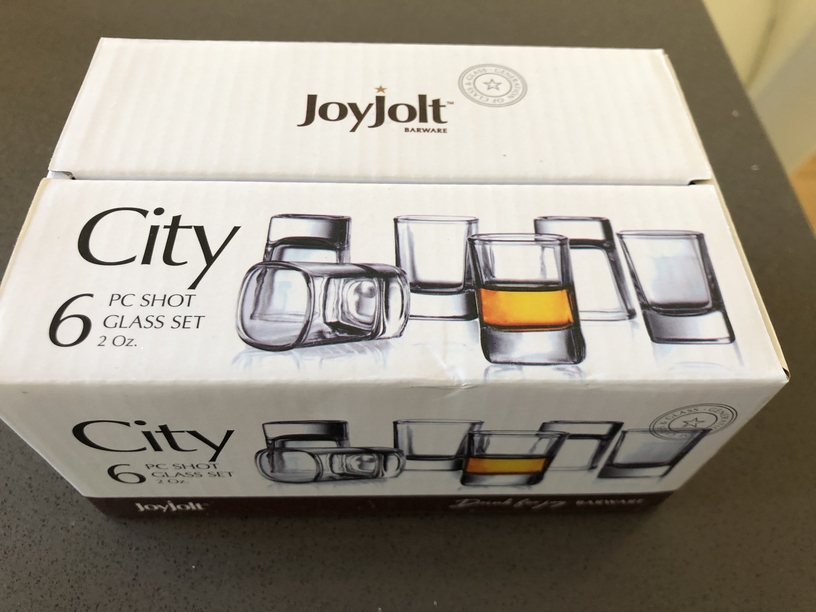
The jig is designed for use with these square shot glasses I found on Amazon. They look good and are pretty cheap. Most importantly they provide a nice broad surface to engrave on.
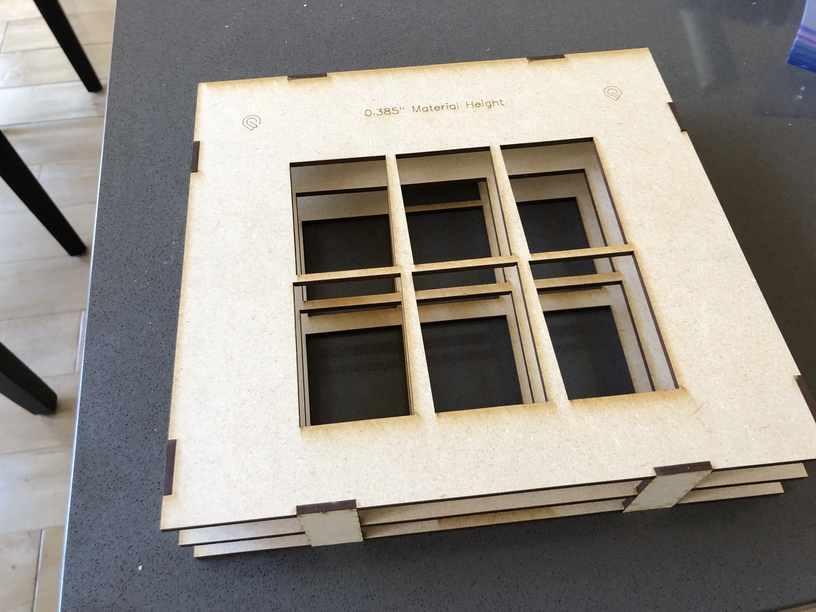
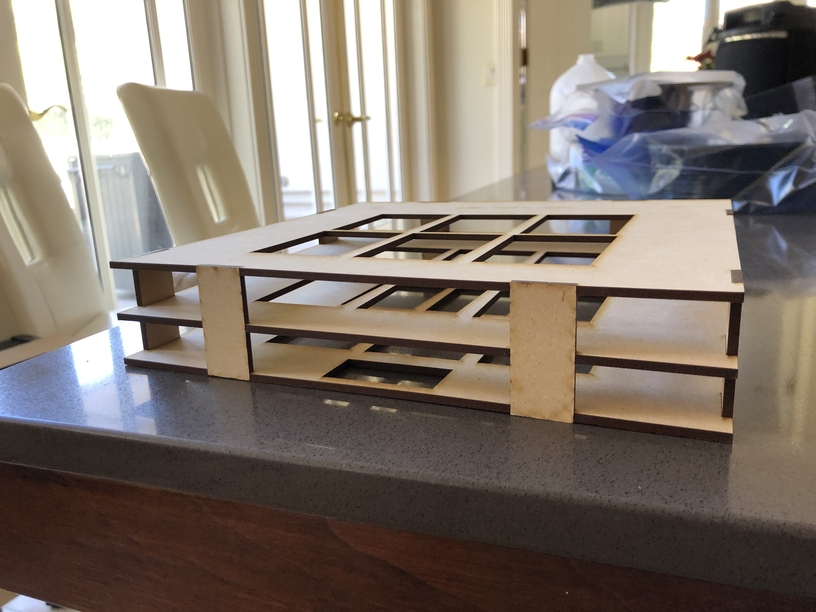
I choose to create the jig out of 3mm MDF that I have laying around. This material is a bit thinner than the proofgrade MDF, but I I designed the jig so it shouldn’t matter. I’m lucky enough to have snapmarks enabled so I used those as well
And finally the SVG - Make sure you assemble with with the bottom/middle/top in the correct position since each panel is slightly different to put the glass at the correct angle, hold it in position, but still allow insertion and removal from the top. The side panels have a score in the center to help align the center layer.
Hopefully this is useful to someone!
-Jeff
@jules - FYI - this was the jig I was having the problem with, but it worked like a champ today.
v1.2 of the zip has ben updated to break out files by layer to simplify usage. The original layered file is still included ‘- All Layers.svg’ in case some of you would rather work with the layered orignal.
Hopefully this makes it easier to use for everyone!
Yep, @dan is a Mudder too. (He was a senior when I was a freshman so I didn’t meet him when I was there. We do have a handful of mutual acquaintances though.)
I wonder if anyone can help me with this issue I’m having. I want to make the jig to do more than 1 glass at a time but I don’t have the material at the moment to do that, so I’ve been doing one glass at a time. I ran into an issue where it randomly said “Unable to complete print” and says my measurements are off even tho I’ve literally not changed a thing other than the shot glass in the machine. This is after multiple successful shot glasses. I’m using the exact same square shot glasses as used in this post. The shot glass itself is 1.7" so when it comes to selecting the material and focus height, what measurements should I use so it doesn’t keep saying I need to be up to .5" with tray and 0 - 1.5" without tray / Motion Planning Error.
The crumbtray is about 1.4" tall. And I mean about. There are slight differences. If your shot glass was 1.7" tall that means it is 0.3" higher than the crumbtray, or 0.3" higher than the zero point. So IF your measurements are accurate you would enter 0.3" for the material height. But just use the Set Focus tool because it should take the measurement automatically.
I appreciate the reply. The weird think is I’ve been running the glasses as mentioned. I took one successful glass out, put another in, hit print but then it randomly started with the material measurement error even tho I never changed a setting. I had 15 successful runs. I’m apparently also now getting a “An error occurred while preparing this print” message.
When you say use the Set Focus tool, I’m not familiar with that? Where is that tool?
That set focus tool fixed my issue, I really appreciate it. I’m still just confused as to why it randomly started throwing errors in middle of my run after it completed multiple glasses and nothing changed other than the glass I put in the bed of the printer.
Could have been anything from the external lighting causing a glare, the head camera having some dirt, or just might be hit and miss to pick up material height on glass.
This SVG is a layered design, you’ll have to open this up in Inkscape (or whatever) to print each layer independantly. You’ll find the sides as part of the middle and bottom layers. They are part of the material that is cut out to create the shot glass holes.