Hi, I’m very new with my GF. I just used a link someone in the GF community shared for a jigsaw puzzle. I added a photo, and the names of my children on top of the photo. It only engraved the names and cut the puzzle pieces, and did not not engrave the photo at all. The order of the steps were the names first, the photo second, and the puzzle last. I used medium draft board. Does anyone know why this happened??
HI. Double check the settings for the photo engrave part…the power may have defaulted to ‘1’…which won’t do anything. There’s no way a photo engrave in addition to cutting and text for that would take only 4 minutes.
2 Likes
3 minutes to complete the job would be a tip off that something was wrong as an engrave this size would be quite a bit longer. Did the machine act like it was engraving over the entire area but not actually fire the laser? What file format is the photo? Is it possible you have duplicates of the photo layered on top of each other?
3 Likes
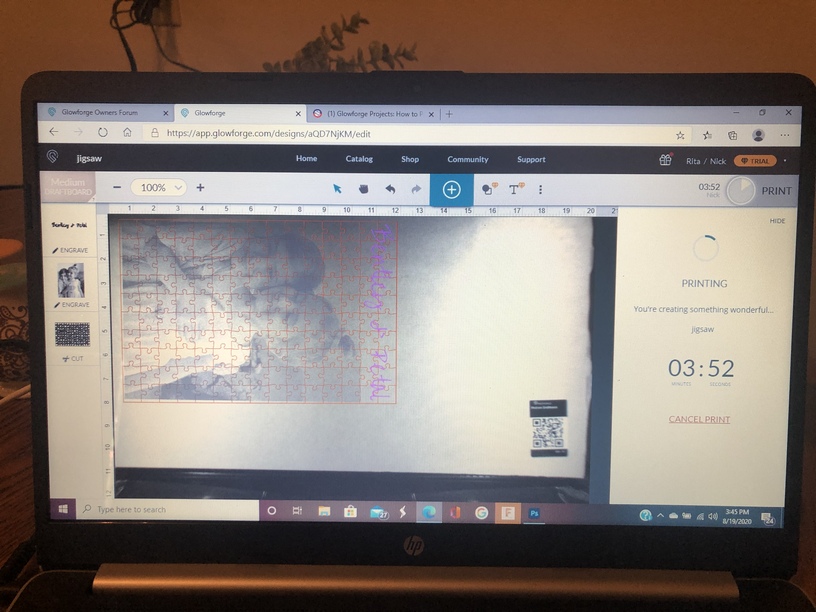
It is possible also that the photo engrave area is outside the allowable print area. Doe the photo area light up when you select it in the interface? If you move the entire project over to the right does the photo light up when selected?
11 Likes
Yup.
Pretty certain your image is outside the engrave area, so it will be skipped.
5 Likes
This.
4 Likes
I’m so sorry to hear that you’ve hit this snag!
I’ve extracted the log files from your Glowforge to review this print. It appears the engrave step that you configured for the photo may have been placed outside of the engrave area. This will cause the step to be skipped, as the Printer Head needs space to “speed up” to start the engrave.
Would it be possible to move the photo engrave design closer to the middle of your material, and see if it engraves properly?
Let us know how it goes!
2 Likes
Thought I would explain what the others are saying in a little more detail since you are new. When you engrave the laser head is moving back and forth faster then when you cut. The faster the laser head is moving back and forth, the more room it needs to slow down to change direction which is why the margins will be smaller the higher the speed. That is why you could cut on the far left edge (use more of your material) but not engrave to the far left edge. Make sense?
5 Likes
I was typing at the same time as @MarcM  He explained the same thing in just a different way.
2 Likes
I have done this to myself a few times because of the desire to make efficient use of the resources. The engrave is last to prevent debris contamination, and it fails because beyond the allowed parameter.
Pay particular attention the the engrave when placing, and be not concerned if it looks like you are wasting material.
That is not why I am responding though. It seems like the UI programming could give us a heads up if something selected is not going to print. Not sure why it does not unless the entire design if out of range
2 Likes
yeah, it was 30 minutes when it started, but I will definitely check next time. How do I know what the settings are supposed to be though? I mean, I guess the power being set to 1 is obvious, but how would I know where to set it too? I am just so lost when it comes to the settings. I don’t know how to properly use them and every time I try to research settings, especially for photo engraving, I cant find anything.
The original time was 30 minutes, and this is the first time I had ever done this so I didnt know, although I did suspect that the time was short. No, it did not act like it was engraving the photo, it just completely skipped the step. When it finished I restarted it with just the photo and then it started to move like it was engraving but it was barely cutting through the tape. I cancelled the print, and restarted it as a 3D engrave and it worked. Its not that pretty, but it worked. Obviously Im not very knowledgeable with the settings.
Yes, the photo lit up every time I selected it.
Thank you so much for the info!
Yes, that totally makes sense. Thank you for explaining it simply for me. I have been scared to ask questions in the community because everyone in the community seems to be very knowledgeable and I don’t see many newbie questions like mine on here, so I feel like I’m asking dumb questions.
2 Likes
Chuckle! You’re not reading far enough back…we all asked them. Just ask when you have a problem, folks are happy to help.
4 Likes
Feel free to ask me questions. I think on a very basic level
Have you gone through the first prints, GF tutorials??? Finding the link now. It is very beneficial.
2 Likes
Here it is. I strongly suggest walking through all these steps. A few might not apply to you if you don’t have the given software, but read through everything otherwise. I still refer back to them every once in a while because I have memory issues.
2 Likes
Only because they’ve been here longer. We all started as newbies here ![]()
Jump in and ask away.
3 Likes
Oh no, please don’t be afraid! We’ve all been in your shoes and we’re happy to help if we can. We may only be able to give you reassurance that support will be along to give official help, but you’re not in this alone. Please reach out if you need something.
2 Likes