Slicing and Tiling a Raster Image in Illustrator
Tiling a raster image is a useful technique for engraving an image across several pieces of substrate to create a composite image. Slicing is the end result of the image being cropped and exported as individual images with the proper dimensions and cropping for each piece of material that will be used. Raster editing programs like Photoshop have the ability to slice but I’ve found that it’s easier and quicker to perform this technique in Illustrator due to having the ability to use individual artboards to mimic your material size and placement of the image across the materials.
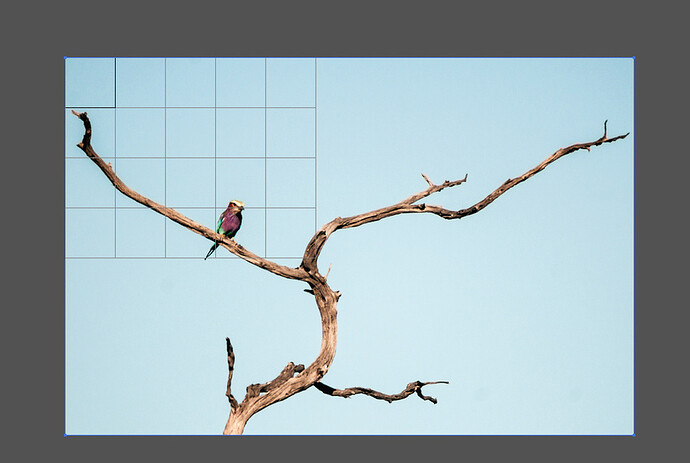
For this example, I’ll use an image of a South African Lilac Breasted Roller perched in a dead tree that will be engraved across a span of 4.25” tiles. Maybe this will be part of a happy little tile backsplash and we know the exact area that we want to cover, which is 4 tiles wide and 5 tiles high.
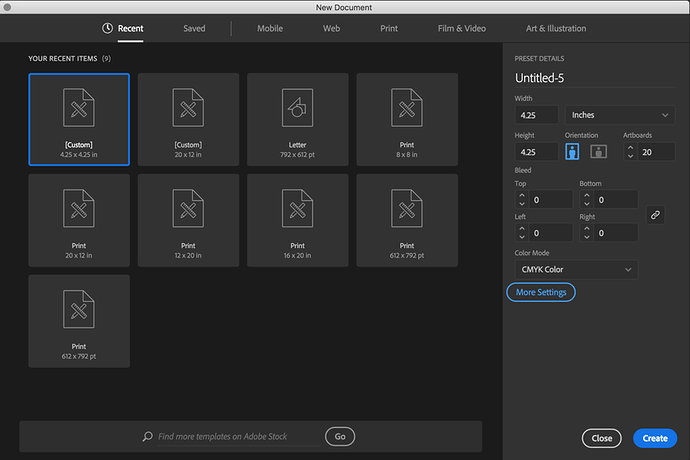
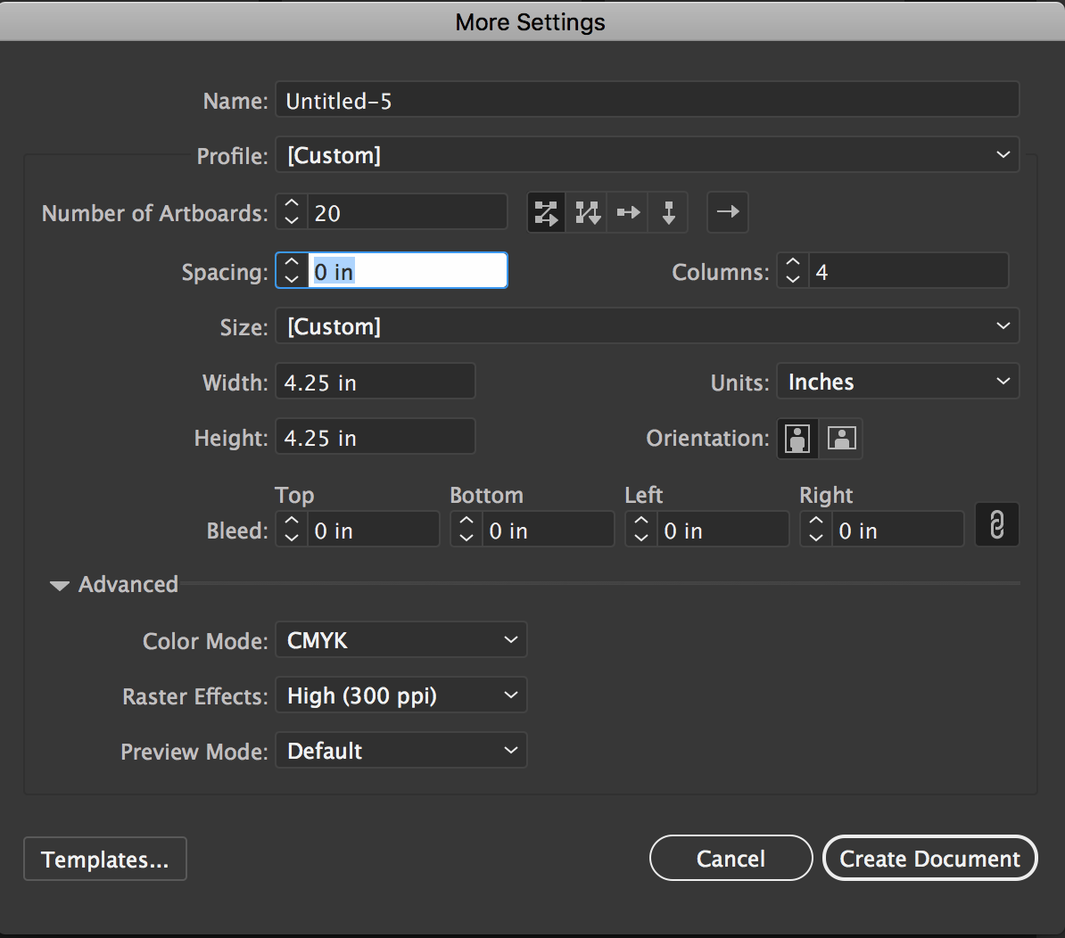
To begin, I will create a new document in Adobe Illustrator using the dimensions of a single tile for the artboard. I know that the tile is 4.25” square and that we will need a total of 20 tiles to cover the area. As the image below shows, the width and height of the new document is typed in as 4.25 inches. Each artboard will represent one tile in my end product, so I also change the number of artboards to match the number of tiles that I need, which in this case is 20.
Arranging and Spacing Artboards
As is typical in Adobe software, there are multiple ways to accomplish arranging and spacing your artboards. The first method can be achieved by selecting the “More Settings” option on your new document creation screen. I know that my design will be 4 tiles wide and 5 tiles high, so I indicate that I need my artboards in 4 columns. I also want the artboards placed flush to one another so I use 0.00” for my spacing. (If spacing is used, the parts of the image that fall in the “gutter” between artboards will be lost/not exported/not engraved - this could be used in certain situations).
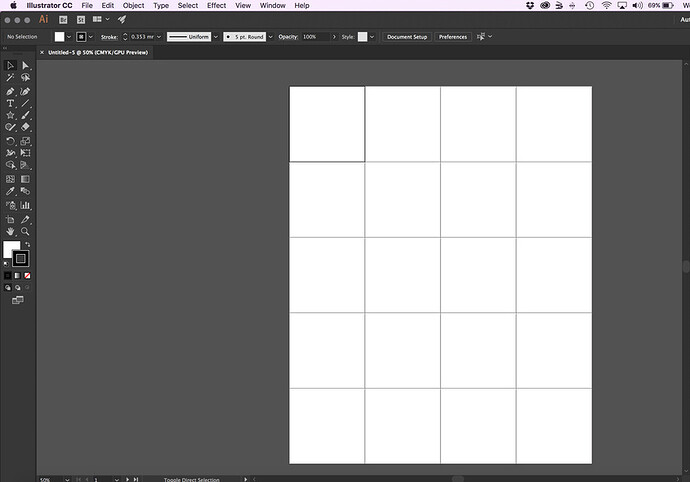
After clicking “Create Document”, I end up with a new document containing 20 artboards that looks like this:
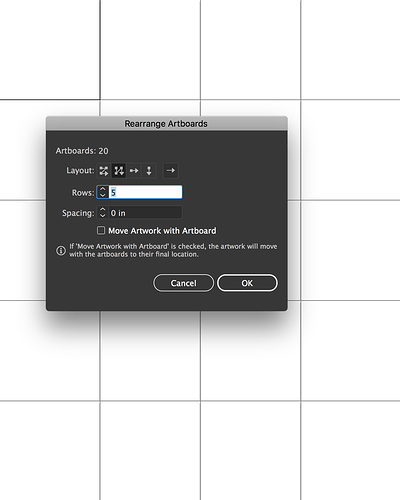
But, I just realized that I misconstrued the dimensions and that it’s actually 5x4 and not 4x5. This is our second method of adjusting our artboards placement. From the file menu, select Object > Artboards > Rearrange. Here, I can change the layout of my artboards to reflect the appropriate number of columns and change the spacing, if needed.
Placing Raster Image
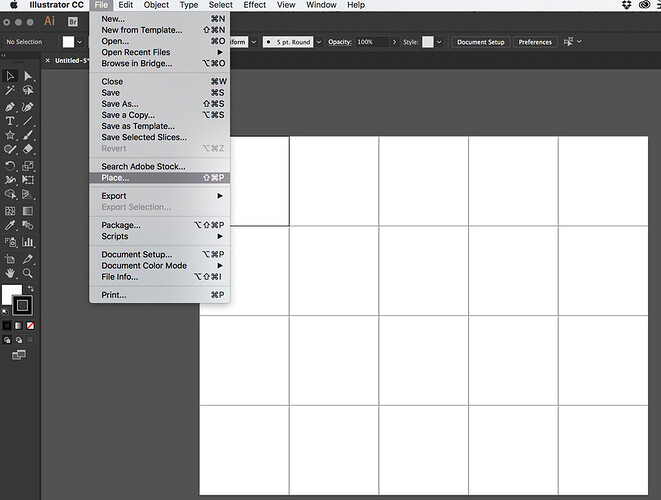
To place my raster image for engraving, I go to File > Place and then select my image from the appropriate location.
The image you selected will then follow the mouse cursor around waiting for you to click on a spot and place it. I like to just click to the anchor on the top-left corner of my document. One click will place the image.
Scaling Your Image to Fit the Design
Your image will likely be much larger than the artboard display, so zoom out using either the magnifier tool or the keyboard combination (Control/Command and - keys) until all 4 corners of the image are visible.
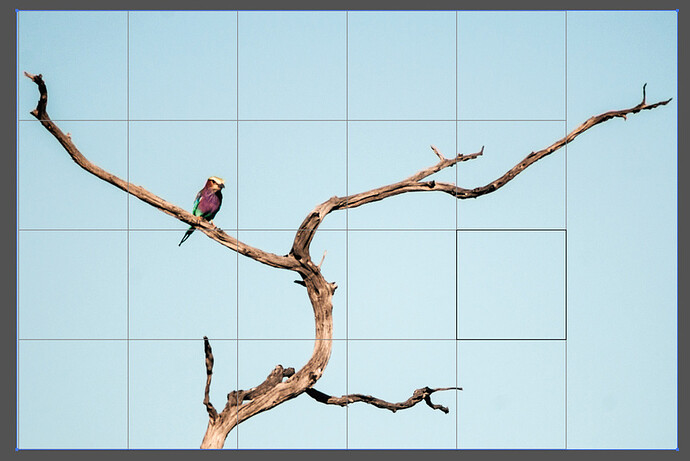
Here, we can scale and position our image as it would appear on our final product. Select the bottom-right corner of the image while holding Shift (the shift key constraints the image height/width ratio) and drag the corner towards your artboard layout. After you’ve fit your image closer to the final size, you can drag the image around to create your tiling layout. You can scale the image up or down (using shift) to fine tune the placement, keeping in mind that anything falling outside of the designated artboards will not be exported.
The portion of the image that extends beyond the artboards on the right, in this example, will not be exported.
Exporting Your Image(s)
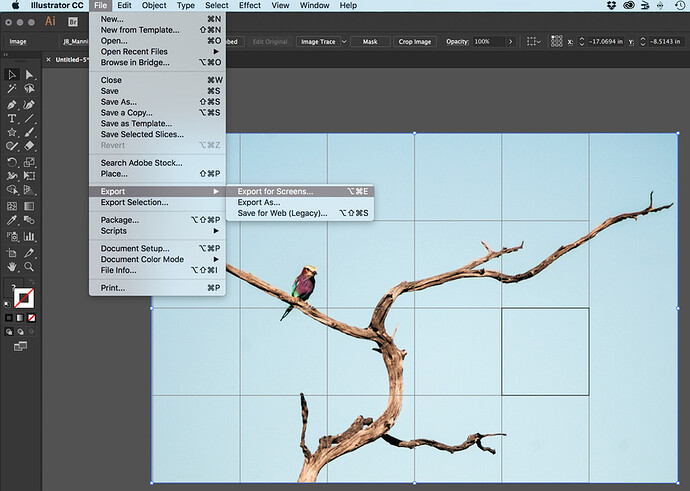
The final step is exporting the image for engraving. To do this, go to File > Export > Export for Screens.
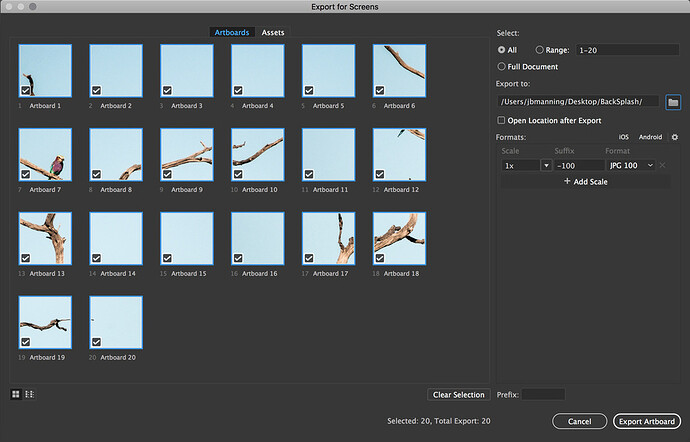
On the Export for Screen dialog box ensure that “All” is selected and select an export location. For engraving, selecting JPG or PNG will be suitable.
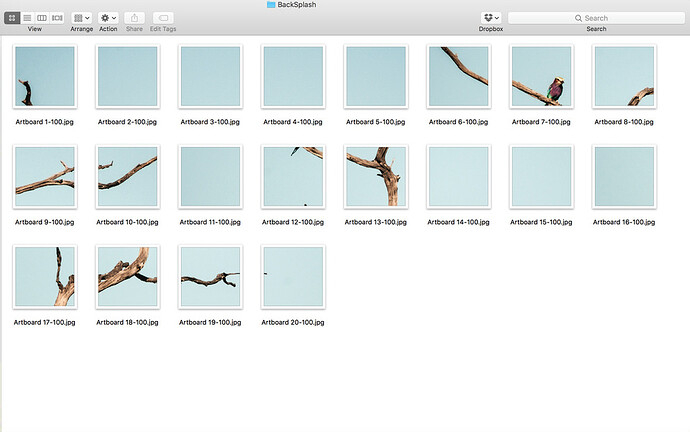
After exporting, you’ll end up with 20 perfectly sliced images ready to engrave in the Glowforge.
