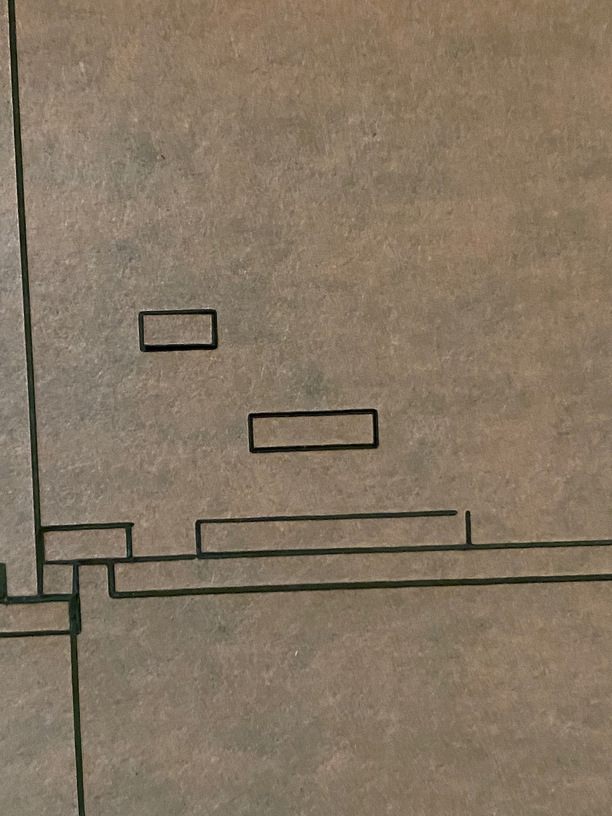
So my machine was having some backlash issues with engraving, but only at higher speeds. I thought maybe the belt on the carriage plate had come loose, so I tightened that down, but no effect. Then a couple days later, one of the wheels on the carriage plate broke in half - which probably was contributing to the backlash. Fortunately I had a spare carriage plate that I put on, but I am still getting backlash and, more worryingly, now regular cuts are off as the job proceeds. I have included a photo showing how the cuts are off. You can see gaps and overlaps between lines that should have been lined up. I have tightened the belt with proper tension on it, so that is unlikely to be an issue. With the machine off I can slide the carriage head back and forth without any issues and it doesn’t feel sticky. Any suggestions on what the problem may be?
With the machine off, roll the head all directions - do you feel any resistance anywhere? There’s always a chance that a different wheel has a crack, or there is debris or a tooth wearing down somewhere in the belt system.
Belt tension, even too much tension, can cause issues like this. Cracked wheels also, as well as wheels that have worn spots on the rail contact (small ridge on the face of the ‘V’), dirty wheels, or dirty rails all have the potential to cause these issues… and loose optics (mirror or one fo the lenses).
I’m sorry for the recent trouble with your Glowforge. Thank you for letting us know that you already tried a new carriage plate.
In order to take a closer look at this for you, would you please send me the following photos? I’d specifically like to take a closer look at a pulley that’s located on the underside of your unit’s laser arm, on the right-hand side.
First, power off your Glowforge and remove the crumb tray.
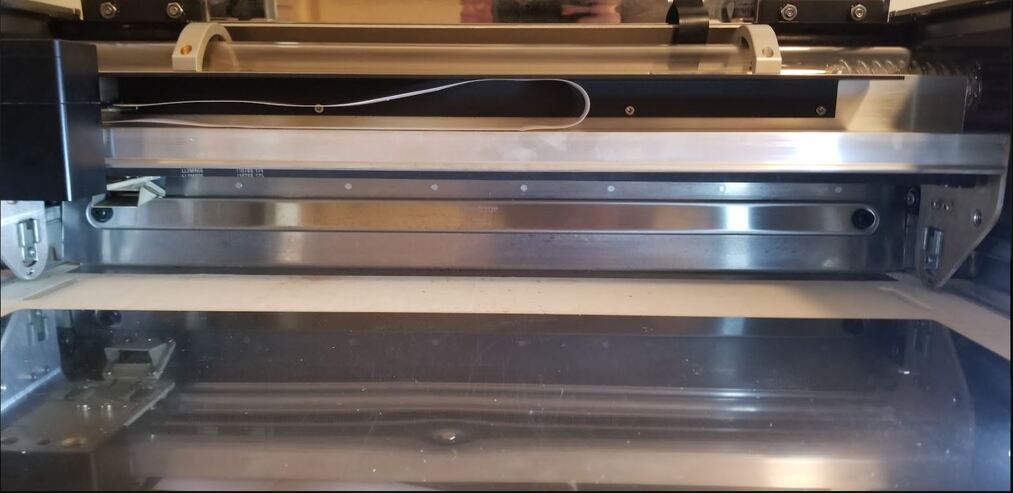
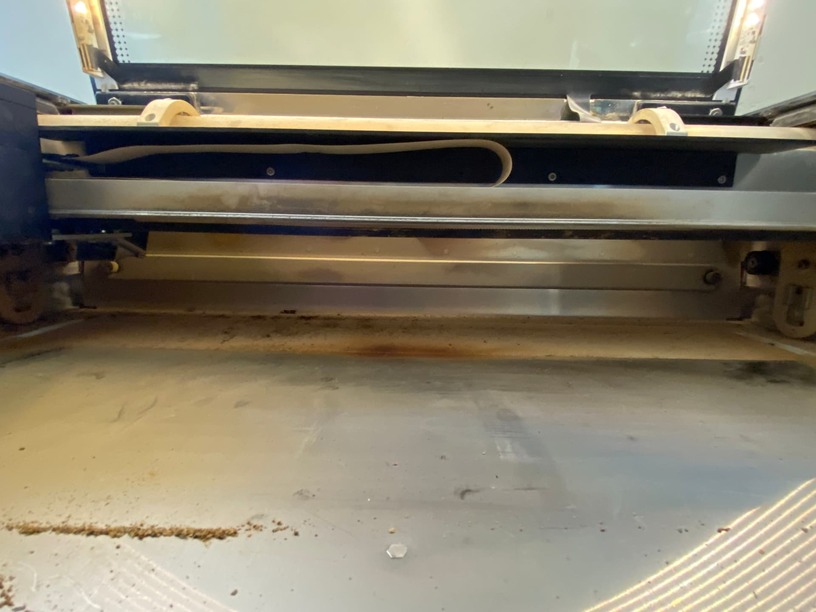
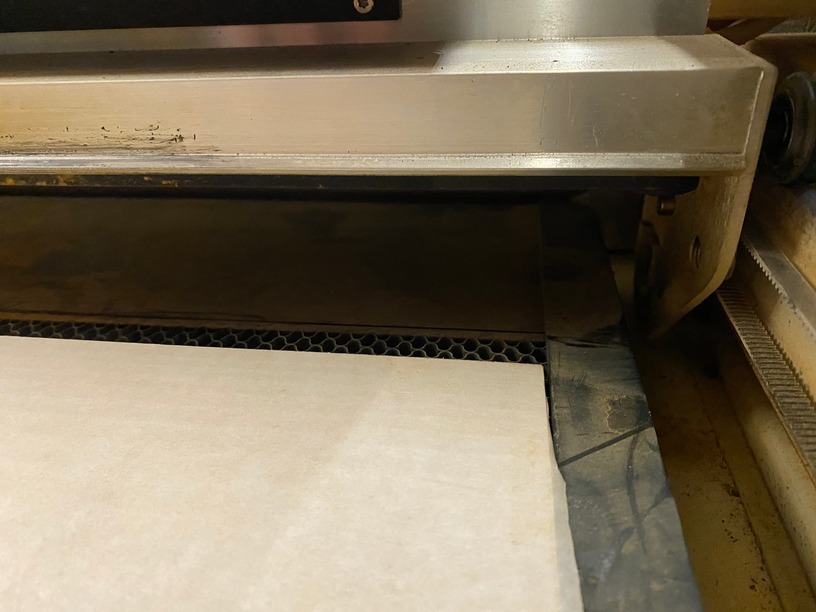
1.The belt under your laser arm with the head pushed to the left:
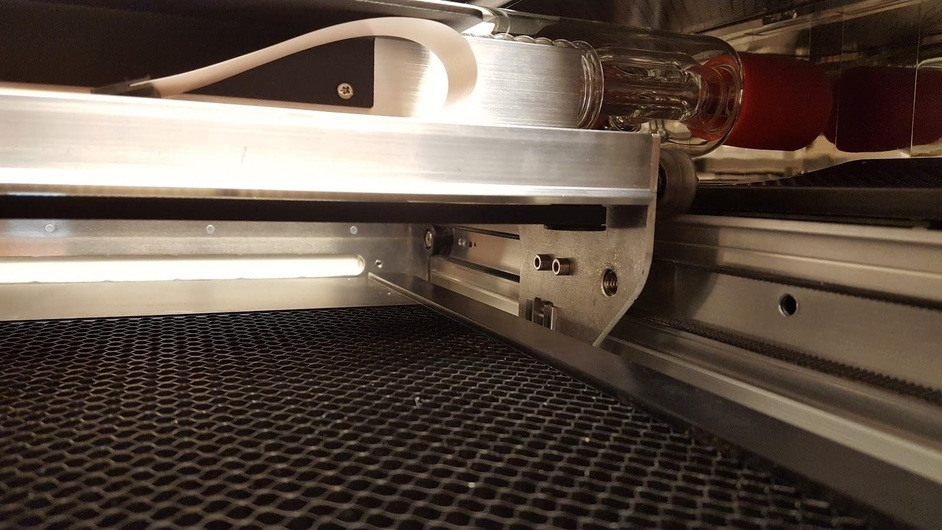
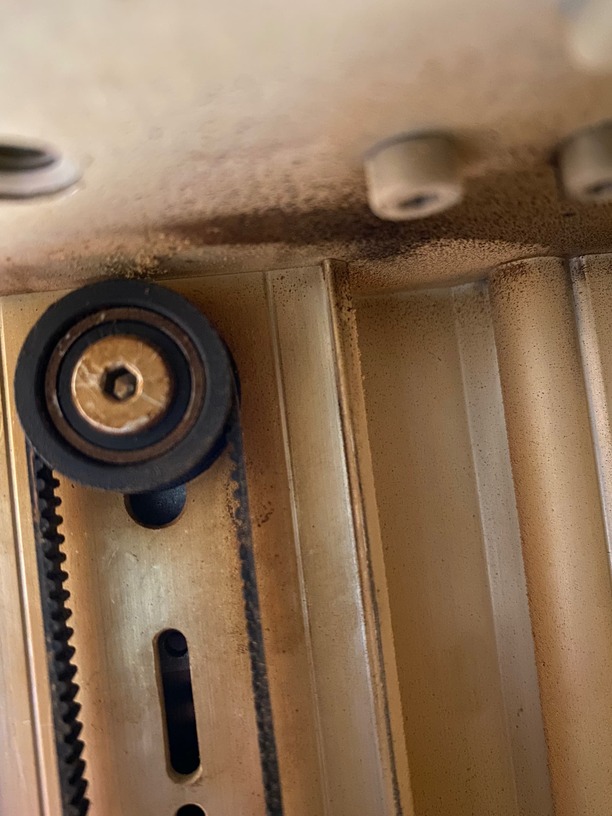
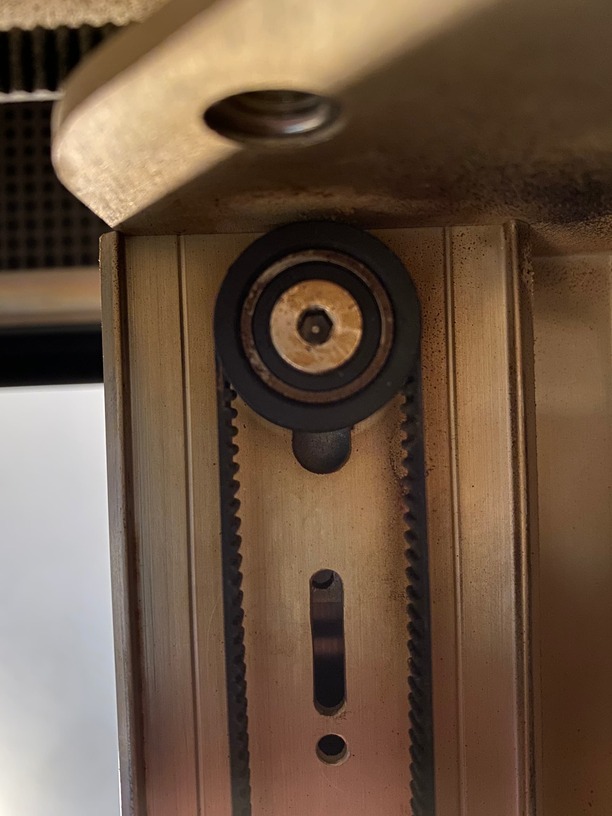
2. The pulley under the laser arm on the right side from the front:
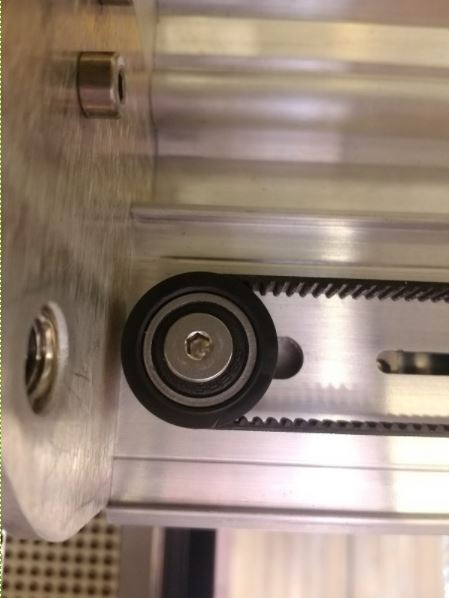
3. The right side pulley under the laser arm from underneath:
Once you’ve shared these photos, I’ll review them and follow up with next steps.
Attachments
![]()

![]()
Thank you for the detailed photos. Based on what I can see in the images, it looks like your carriage plate belt under the laser arm is loose and will need to be tightened.
For a guide to how to adjust that belt, you can follow this link for instructions to adjust the tension of the carriage plate belt. Please let us know how it goes!
Ivan, I will try to adjust the tension in the belt tonight or tomorrow morning and let you know if that resolves the issue.
Hi @benjamin.george. Thank you for the update and follow up. We’ll look forward to any results whenever you have a chance to try adjusting the belt tension. Thank you!
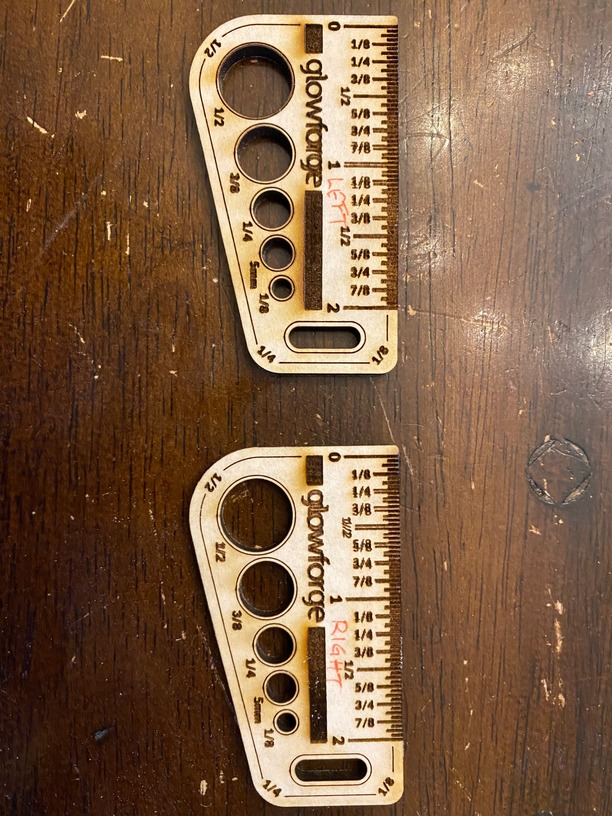
I tightened the belt again and put as much tension on it as I could. If I cut on the left side of the bed, it seems to be fine. But in the right side it is still off just barely. See the attached photo. The right piece was on the right side and you can see how the small hash marks are shifted over the vertical line, whereas they are in the correct position on the one on the left. Any suggestions for fixing this final little hiccup?
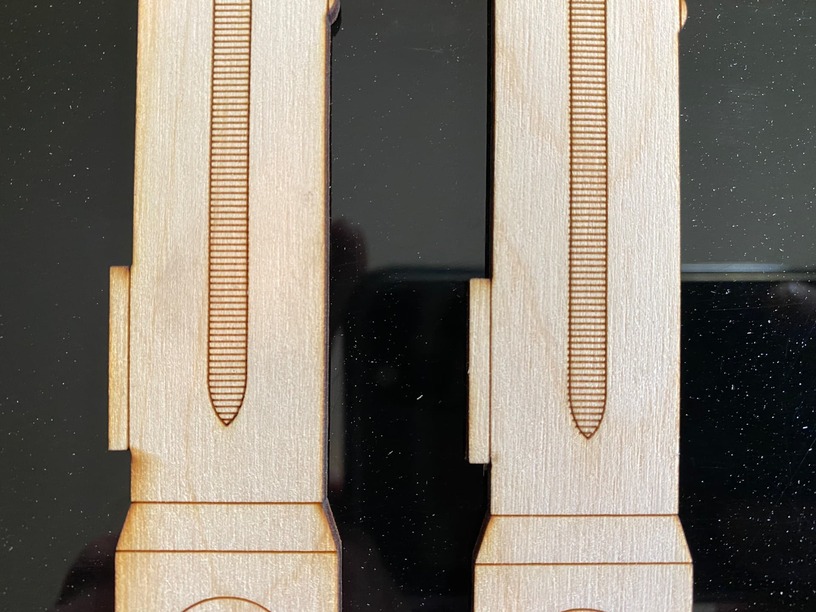
If it’s on the far right side, I’d be looking at beam alignment. The only other explanation I can think of for the consistency of the error is that the steps/inch calibration for the X axis stepper is wrong (which shouldn’t be possible since it’s the same for all machines, not a “run time” calibration). If it was a slipping belt or missing steps issue, the error would be cumulative, it’d get worse and worse as the print progressed. If it was backlash or belt “slop”, the offsets should be more random. The only thing I can think of that’d be as repeatable as shown in this picture is the beam itself.
Hi @benjamin.george. Thank you for posting the photos to help us review the most recent results for any continued issues after tightening the belt. Can you confirm the date and time of the print from the photos and verify if this was on your Glowforge Pro or Glowforge Basic printer? I wanted to confirm that to help me as I continue to review this.
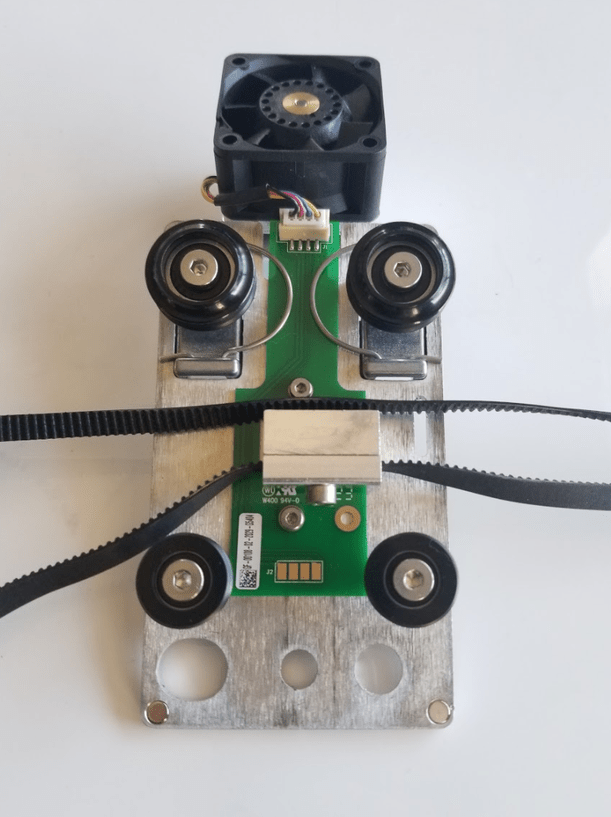
Also, I’d like to get a look at the carriage plate and wheels just to rule those out. I saw you replaced the carriage plate with a spare you had on hand, so it can help to take a look to rule that out. Could you please do the following?
Turn off your Glowforge
Closely inspect the carriage plate wheels from the top for any cracks or other damage
Closely inspect the sides of the wheels for any cracks or other damage
Take photos of the wheels from both angles in the reference images above.

Thank you!
Attachments


thanks Brandon,
It was the prints on the Pro around 2:40 this afternoon. If you really need to see the carriage plate I can take it off and take photos, but when I said spare what I meant was it was a brand new one that I had purchased as a back up. I literally opened the package to put it on. So it is factory new. If you would like a photo of it still, I can do that, just let me know.
Hi @@benjamin.george. Thank you for getting back to me with the added information. The review of the carriage plate wheels is not needed, but wanted to see those just to be sure. If you’re not noticing any issues with the wheels move across the rails, it should be fine.
I was trying to review the print further in the log files, but wanted to follow to see if you could run our test print to help me capture more print data to help resolve this. Can you run our Gift of Good Measure test print using the steps in the link below? Please try placing a copy of the design to the left and right areas of the material. This will help me capture any continued alignment trouble under the controlled conditions of the test print.
https://support.glowforge.com/hc/en-us/articles/360033633374-1-Gift-of-Good-Measure
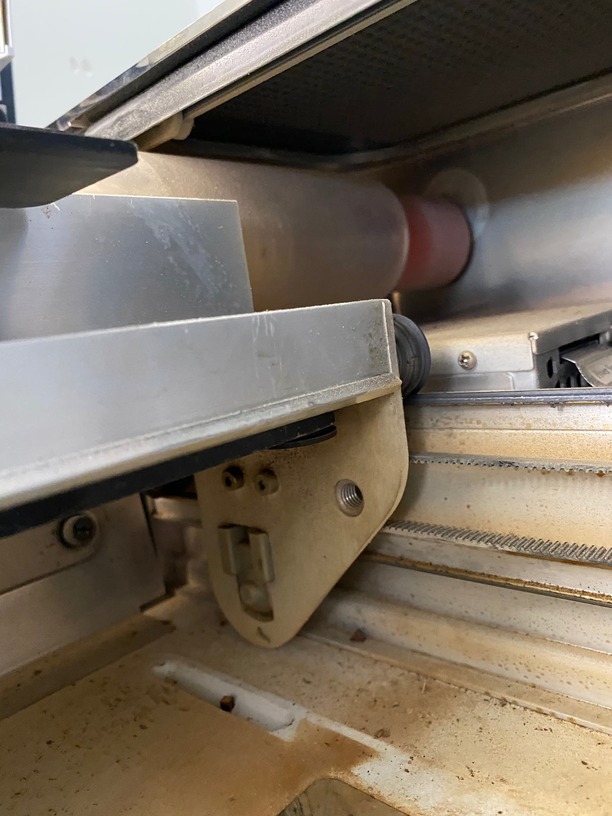
Next, I wanted to get an updated look at the carriage plate belt and pulley. With these, can you also send a close up of the rails of the laser arm (towards the right where you notice the most offset occurring with prints. I can review those further and appreciate your time with this.
Sorry, I meant to leave a note. I am traveling for the next few daya ao it won’t be until wednsday or Thursday before I can test.
Sent from my iPhone
On Nov 8, 2021, at 10:03 AM, Glowforge <support@glowforge.zendesk.com> wrote:
Hi @benjamin.george Thank you for working with my colleague Brandon. we look forward to the results of the test and will be happy to pick up from where we left off. Thank you!
Hi, @benjamin.george Thank you for running and including photos of that test print. There are definitely some issues with the engraving. My apologies for having to ask this again, but could you please send in photos of the new carriage plate you just installed?
This suggests that you could be having trouble with a wheel on your carriage plate.
Could you please do the following?
Turn off your Glowforge
Closely inspect the carriage plate wheels from the top for any cracks or other damage
Closely inspect the sides of the wheels for any cracks or other damage
If you notice anything damaged or out of place, please take a photo and attach it to your reply.
Lastly, Could you also check the side belt tension?
We’ve discovered that photos don’t always come through well in emails, so you can follow this link for instructions to adjust the tension of the side belt.
Let me know how it goes!
Attachments


No problem. Here are photos of the carriage plate and wheels. Processing: 8973CA80-1DD2-4BF4-AC9C-70AF511967D3.jpeg…
Processing: 95C5FBF7-1D2D-49E8-89CF-2F509EF14F38.jpeg…
Processing: AA881D55-8BAD-4AA4-954E-ED9263124566.jpeg…
Processing: D406235E-C0EF-40C2-956C-7CA9F503FE62.jpeg…
Processing: DB09E8BF-4D3E-4155-A848-864E824C623D.jpeg…
Processing: 22C9B4AB-EB57-4422-A6FD-CF7FB305E3E7.jpeg…
Might want to retry those pictures. The post went through before they finished processing.
@benjamin.george
Thanks for trying to upload the photos could you please try to upload them again since it does look like the photos were still processing when you posted your last post.