Good morning all, I was hoping someone could give me some help. I’ve come across what I think is some sort of alignment issue. Essentially the glowforge isn’t cutting where the camera view in the app says it should be.
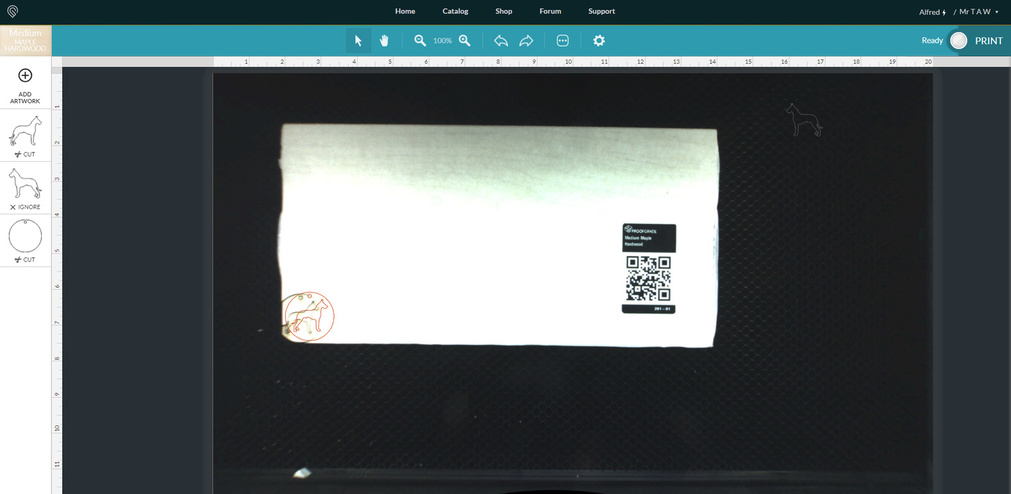
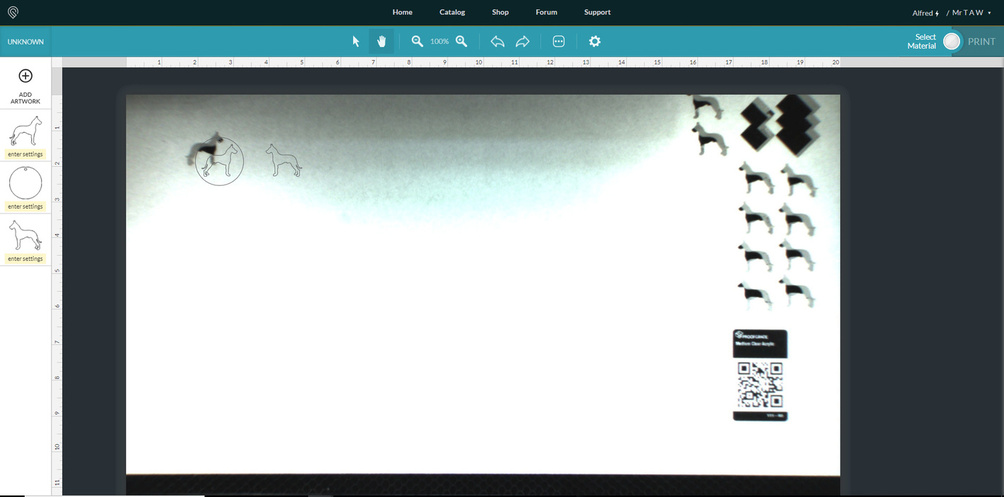
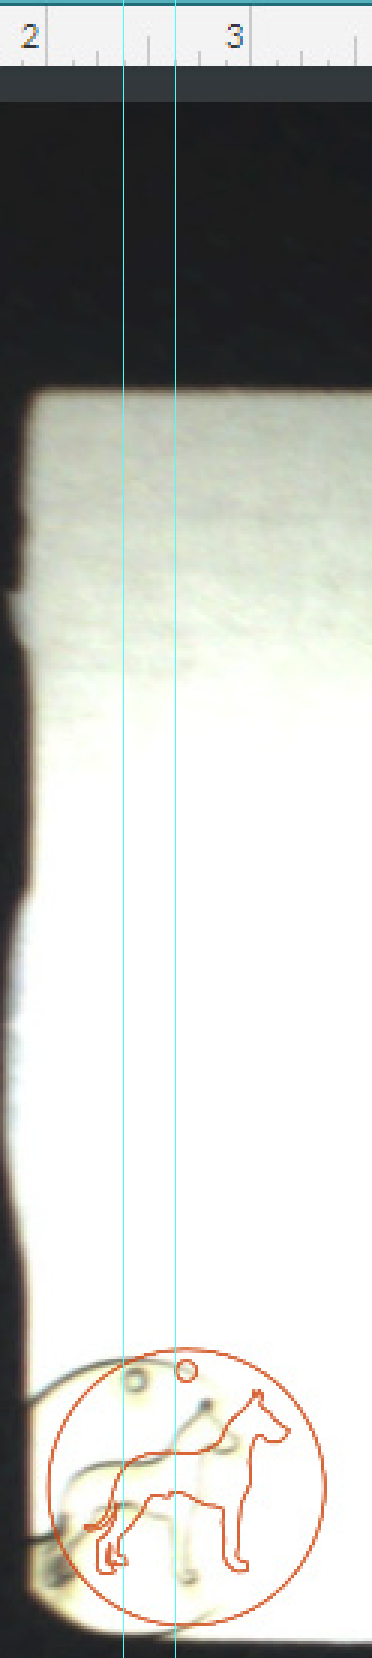
In the example below you can see where I placed a design and where it actually cut. I haven’t moved anything at all. It seems that the cut is happening a little down and to the left of where it was meant to.
I now appear to have another, possibly related, issue. The camera doesn’t want to focus, to the extent that it can’t read the barcodes for my proofgrade material. Now I’m really stuck, anyone have any ideas?
The current spec is for within 1/4" an inch from the on-screen display. This is being worked on and should improve. From what I can tell, you’re right up against that spec.
Things you can do to help it - with Proofgrade materials:
make sure the material is absolutely flat
make sure that your lid is closing properly and completely (which means your machine needs to be completely flat - the case is subject to a bit of torsional flex if it’s not on a flat surface, or if it’s been moved awkwardly. You can try lifting up each corner and “unbinding” it a bit. You can also try shimming at the corners to get the machine flat. A lot of times things seem flat, but they really aren’t - and this is a fairly large distance for uniform flatness.)
leave a 1/4" “bleed” allowance for your design
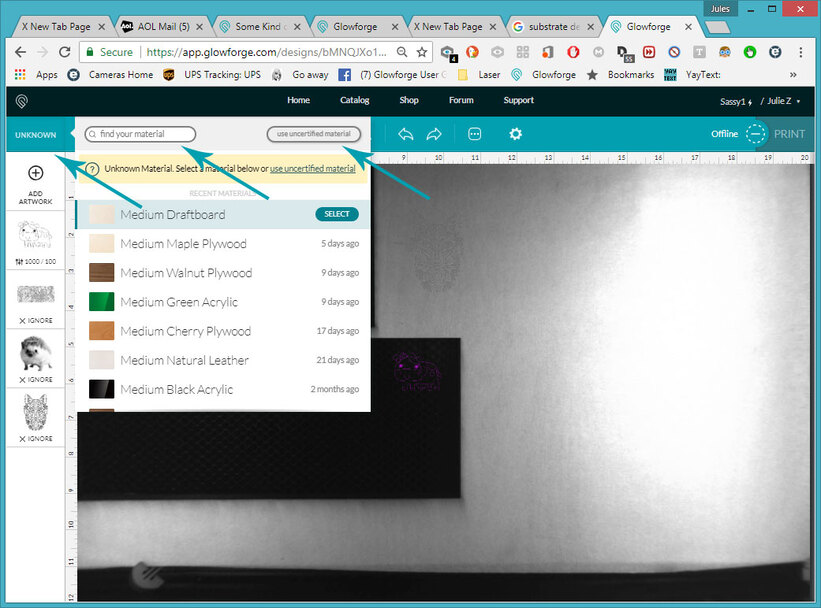
As for not reading the barcode, sometimes that happens when it’s in just the right place to get glare from an overhead light or the lid lights. If you just click on the UNKNOWN tab on the upper left, you can select your Proofgrade material from that handy little list.
I’ve had the same issue for a while. I spoke with Glowforge reps several times and in the end they said it was “within the acceptable range”. I really hope they work on this alignment stuff. There’s no way I could ever engrave a thin piece of a leather bracelet. I have to guesstimate already but need room to do that.
There are several examples of how to do this in the tutorial section. The technique can vary depending on if you’re cutting the bracelets or using a blank from somewhere else. But all in all, it takes just a couple of minutes to set up a jig that allows for perfect reproduction.
For all of you having alignment issues…it’s a known variance that is caused by the fisheye effect of the lid camera. You will get closer alignment if you place your projects directly underneath the lid camera (less fish-eye effect there) and as you place designs farther out towards the edges of the bed, the effect gets worse.
Glowforge uses an algorithm to correct for the fisheye effect, and one very important component of getting that algorithm to work is to enter the accurately measured height/thickness of the material in inches. The QR codes enter that information for you, BUT the material should not have any warp in it, because that affects the actual height as opposed to what the QR code says it is.
Okay so…three things to do for better prints:
1. Make sure the height is entered correctly.
If you are using non-Proofgrade material that does not have a QR code, or if the QR code can’t be read because of glare on the sticker, then you can input the information yourself.
You can use the Search magnifying glass to find the settings for any Proofgrade material - click on it and it loads the values automatically. If you are not using Proofgrade - click on the Use Uncertified Materials button and enter the thickness of the material in inches, as measured with calipers.
Do this first, before you try to place your prints. It’s step one.
2. Make sure the material is completely flat. Even a mm of warp will throw off the cuts and the placement. (Also make sure that the legs of the tray are completely seated down inside the dimples in the machine - it’s easy for them to not be completely seated in there and it throws off the placement.)
I absolutely love to use these Honeycomb Pins to tack the material down - even thick plywood, before cutting it. You’d be surprised at how much warp there is in wood that looks completely flat.
3. If it’s a really important alignment on something that you are not cutting, try to place the design and material directly underneath the lid camera for best results.
If you are cutting and engraving at the same time, the best way to get perfect alignment is to put both the cut and the engrave into the same file, and then do all steps out of one file. The parts will align themselves perfectly relative to each other.
There are a bunch of tutorials that you really ought to read in order to get the most out of your machine - most are just a page or two, but taking the time to read them is going to save you months of “discovery on your own” time.
I’m going to list them below to get you started:
Here you go:
Then if you want to get started designing your own stuff quickly, the Matrix has a lot of tutorials and video links showing the best of the tips and tricks:
For using the Glowforge:
For Using Photoshop, GIMP and Paintshop:
For using Illustrator, Inkscape, CorelDRAW and Affinity Designer:
For using Fusion 360, OnShape, Openscad, Rhino, etc.
Thanks for the great help in this thread, everyone! @tawatkin2000, we’d like to have you try a few troubleshooting steps for us:
Turn off your Glowforge.
Mitigate any external light sources, such as lamps or direct sunlight, that may be causing glare or excessive brightness in your lid images.
Check for small pieces of debris or dust.
Check the lower door to make sure it closes all the way. It may require some force to open, but open it, wipe any dust off the edges, and close it all the way.
Remove the tray and clean any dust or debris from the surface underneath. Pay careful attention to remove all debris from the four dimples where the tray rests.
Check the lid to make sure it closes all the way. Small particles of material, such as dust or debris, can prevent it from closing completely.
Check the surface your Glowforge is on to make sure it’s flat. Ensure it is not twisted slightly and that there is no debris propping up one side of the machine.
Turn your Glowforge back on.
We included an extra piece of Proofgrade Draftboard with your materials shipment for troubleshooting. Place Proofgrade Draftboard in the center of the bed and print the Gift of Good Measure using the default settings.
When the print finishes, without moving your artwork or your material, take a screenshot of the workspace to show us the difference between the artwork placement and the actual print placement. Make sure to include the rulers in your screenshot and show as much of the bed as possible.
Mac: Press Shift-Command-4 and click and drag a box around your image. You’ll find the screenshot file saved on your desktop.
Windows: Click on the Start Menu and search for the Snipping Tool. Open the Snipping Tool > New then click and drag a box around your image. Click the Save icon and name and save your file.
Send us the screenshot along with the date and time of the print, and we’ll investigate.
It’s been a little while since I’ve seen any replies on this thread so I’m going to close it. If you still need help with this please either start a new thread or email support@glowforge.com.