Hi there, I’m Chronos.
The latest in my series of sanded-edge boxes, I got the idea to accentuate the layers and went from there.
Notes:
- Lots of wood species here, it’s a mix of 1/8" thick hardwoods and 0.040" raw non-PG veneer.
- Overall dimensions are 1.25" tall and just over 2" wide at the widest point.
- Sanded to 600 grit.
- Finished with satin wipe on polyurethane.
- I added a poll below, please click here or scroll down a few comments to find it.
I know what you’re here for, let’s do some pictures.
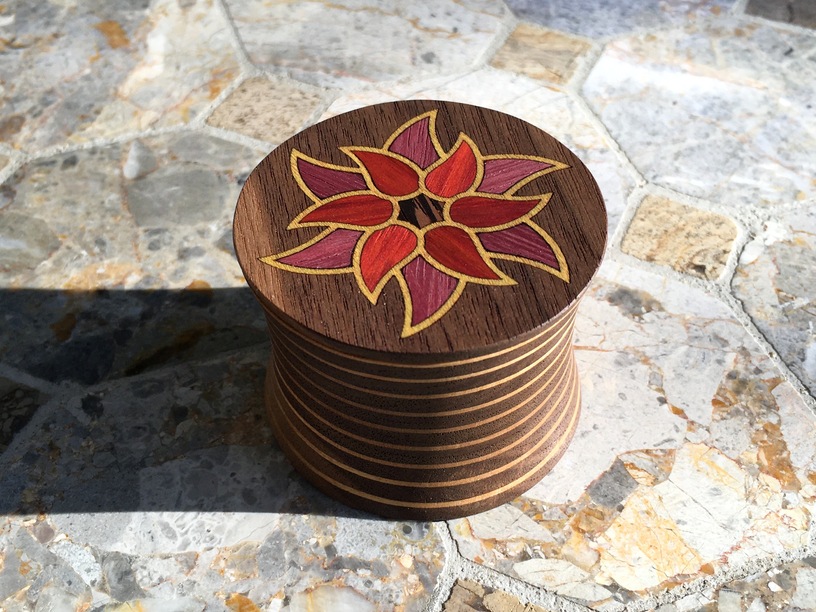
I knew the shape of the box and the edge style before I did anything else – the inlay design came later. I got the idea to lean into edges, so much of what I’ve been doing lately has been designed to minimize the look of the edges – I went the other way this time, choosing to accentuate them.
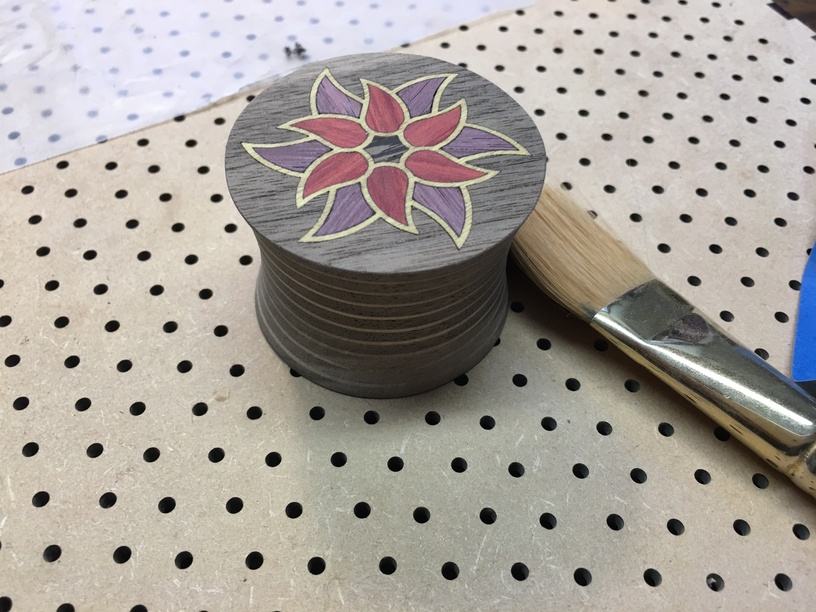
For the inlay, I aligned all the petals with the grain of the wood so it would have a consistent “radiant” look to it. As a bonus, it means that the various woods catch the light at different angles, giving a very satisfying range of looks as you turn it in your hand.
(Walnut, Yellow Heart, Red Heart, Purple Heart, Wenge)
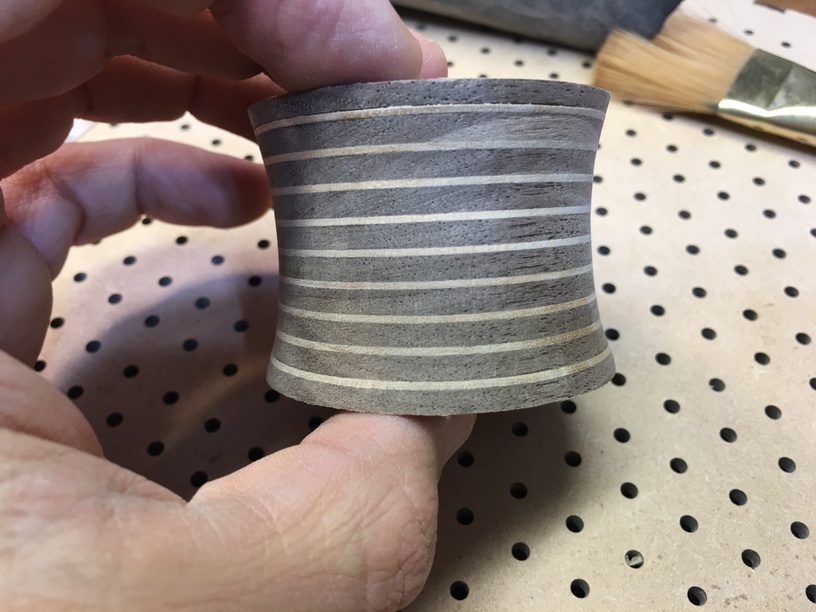
Here you can get a really good look at the edges. I went through my stock of veneers and looked at what I had. This veneer pack was off eBay, and the species are unknown, but this one looked very much like yellowheart, which I knew would contrast nicely with the walnut of the main structural layers. As it happened this decision also drove the inlay design later.
Also of interest: I rotated the design for each layer of veneer by 20 degrees, yellowheart has great chatoyancy, rotating the grain orientation like this lets the edges catch the light as you spin the box. It’s a very cool effect, and difficult to photograph. You can see how the second-third layers really glow gold, and the bottom one is starting to catch it as well. As you rotate, the “flash” travels up/down the box depending on which way you turn it.
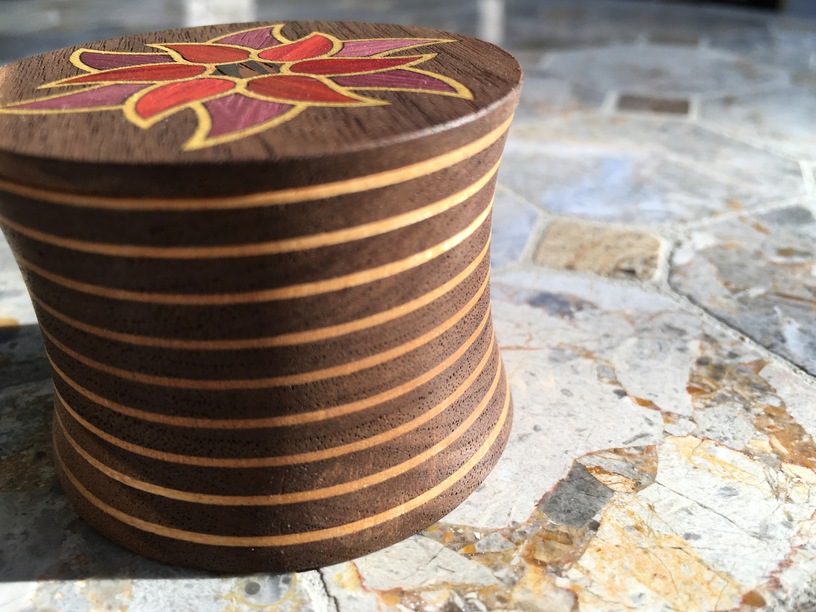
(Walnut, Yellow Heart, Red Heart, Purple Heart, Wenge)
Similar shot, but pulled back a bit so you can get a sense of how the whole box presents. The inlay was intended to tie the design together by using yellowheart as a border for the flower, which does two things for me:
- By using a thickness of 0.040" for the “line weight” of the yellowheart border, it subtly calls back to the layers in the sides of the box.
- This solves the “three pieces” problem when trying to get kerf-adjusted flipped inlay. This is probably something that only people who have tried complex inlays would know, but trust me, keeping your inlays so that each piece can flip-mate cleanly with its neighbors yields a much better result.
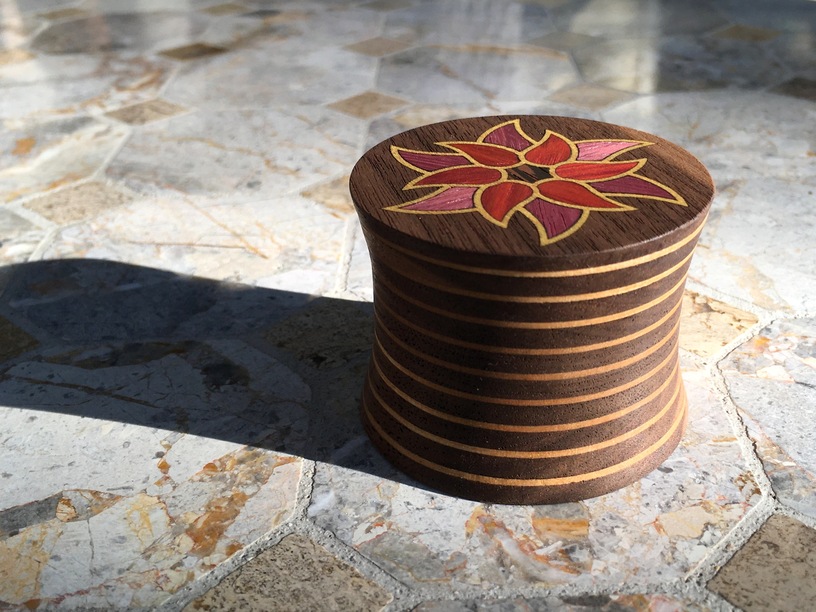
(Walnut, Yellow Heart, Red Heart, Purple Heart, Wenge)
Forgive the bad exposure here, the lid caught so much light that it blew out the camera a little. The colors sure did pop though. Start with high quality hardwoods, and you can’t really go wrong.

(Walnut, Yellow Heart, Red Heart, Purple Heart, Wenge, Brass Rods, Neodymium magnets)
This interior will start to look familiar if you’ve been reading my recent posts. What can I say, if it works, it works.
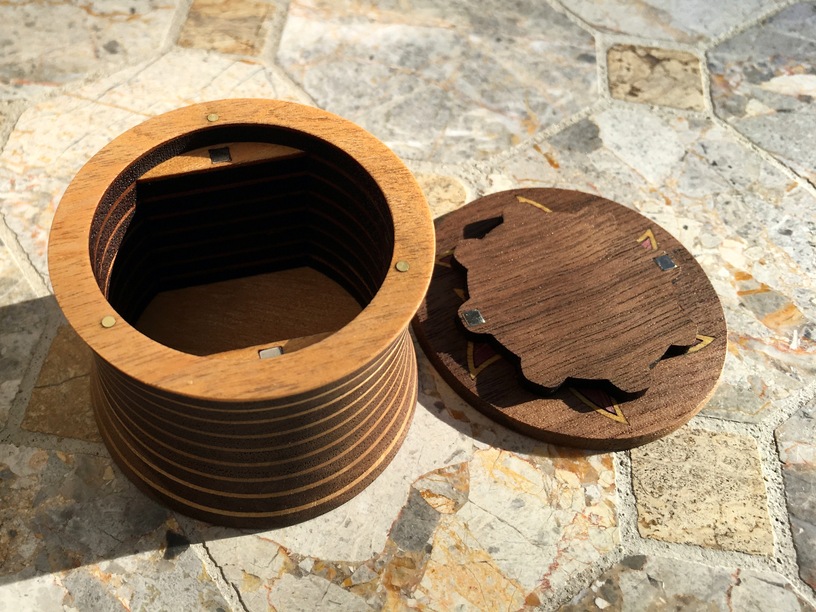
(Walnut, Yellow Heart, Red Heart, Purple Heart, Brass Rods, Neodymium magnets)
So, I wanted the design to feel intentional, and wanted a convex spindle shape. I think I ended up exactly where I wanted to with this design. The extra layers led to a longer assembly glue up, but it wasn’t too bad.
What now? I’m not sure. I feel like this technique of edge sanding can be used to get pretty good sculptural results. I’ve got a few ideas kicking around, we’ll see where it takes me. Inlaying the lids like this is more effort since you have to inlay first, and engrave a pocket for the underside of the lid later… but the inlay turned out really nicely, I think. Worth the effort.
Since you made it this far, let’s geek out about how I prep the edges.
Click here for edge nerdery.
What follows are raw photos, no rotation or cropping, you get what you get here.
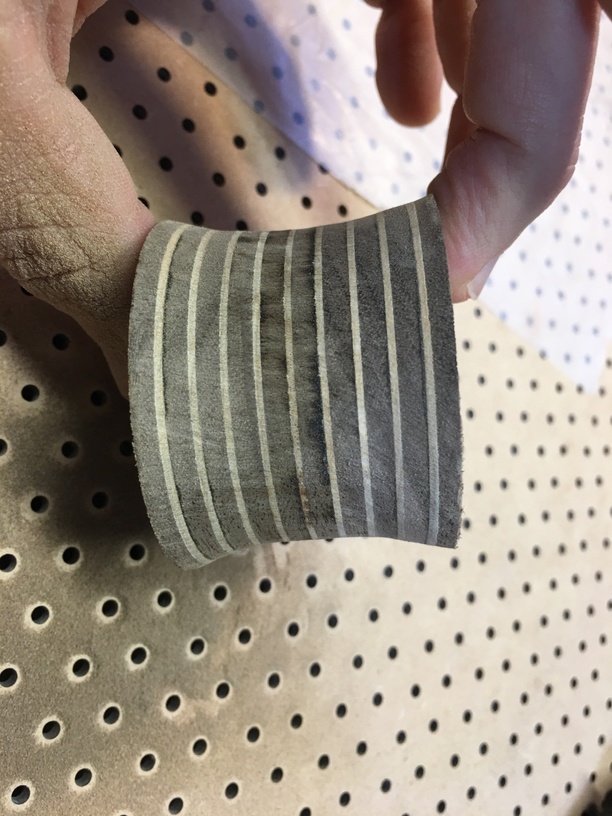
Just starting, you can see how the dremel helps with rough shaping. As you grind down, the black edges wear away, and it’s very easy to see when you are done. You want to grind away until the black just barely disappears, then stop.
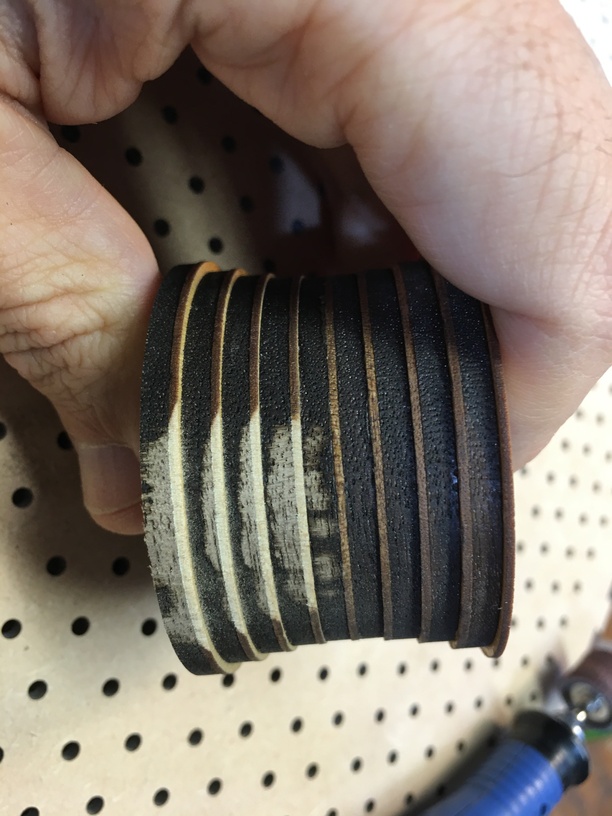
See? the black’s just barely gone, or maybe a hairline remains. Perfect.
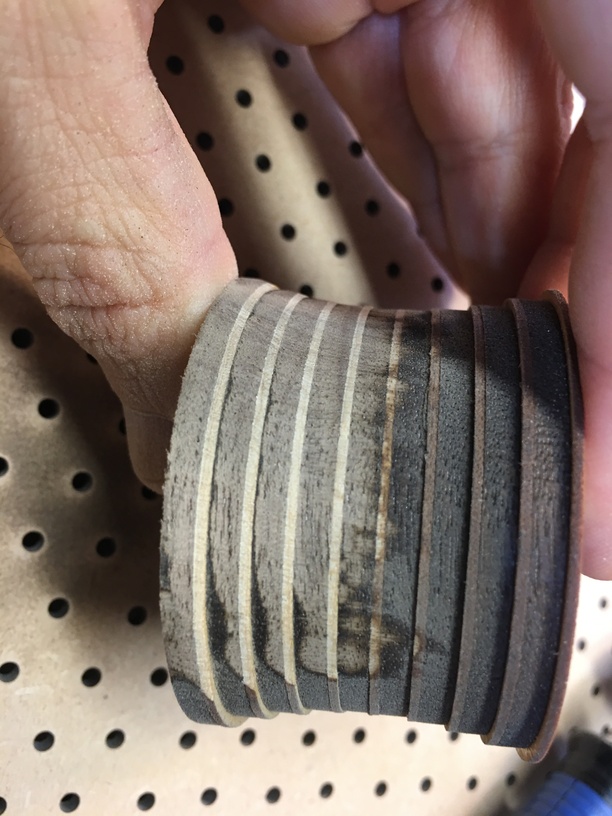
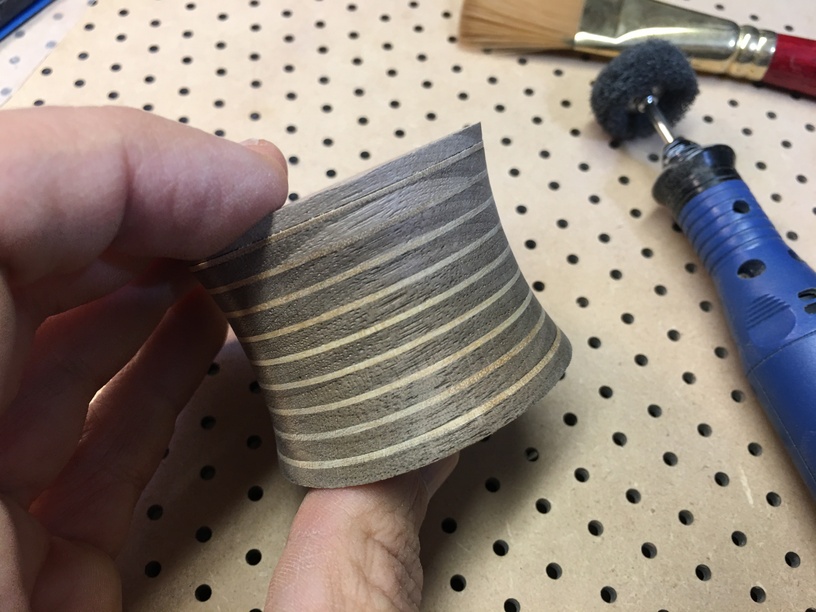
Keep at it. You can see I have my downdraft box (search for it in MOAG, everyone should have one), it keeps the sawdust under control. That brown residue is the dust that hasn’t gotten sucked down into the table yet… a gentle brush is all it takes, and it’s all gone.
Really close to ready for hand sanding. I stop and brush all the sawdust off and look for any spots that look rough or not complete and clean them up with the dremel.
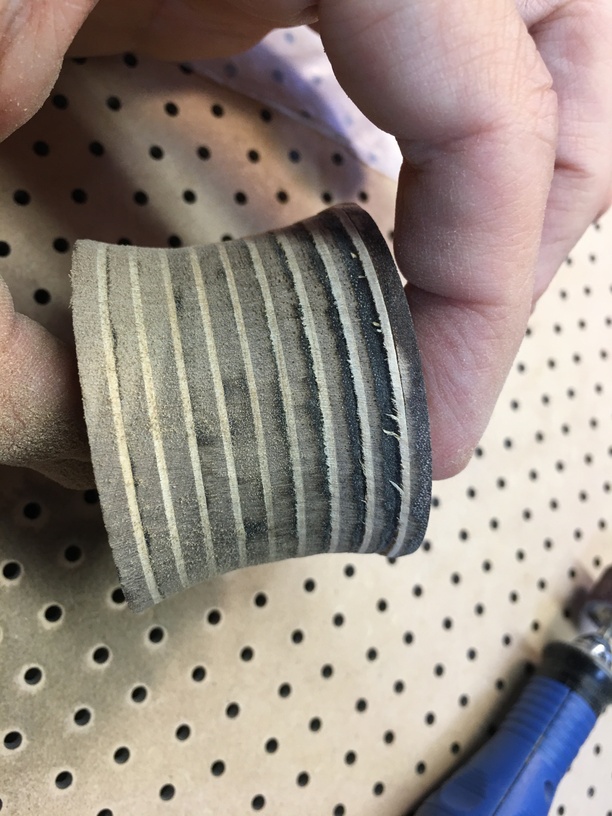
Mid hand-sanding. Really getting there.
I got these grind/buffing puffs for the dremel. They actually do a really good job of smoothing out some stuff as you go and giving it a final buff before final hand sanding with 600 grit.
And now here we go, hand sanding complete, edges eased just a bit, it feels really nice in the hand. Ready for polyurethane… the colors just don’t pop yet. That polyurethane step just made me go “oh wow”, it’s so pleasing to see the colors come out.
By the way, I timed it this time, end to end total sanding time was about 50 minutes. If I had a spindle sander, I think I would have been done in 20 or less.
 on how to build antici…pation.