Greetings All -
I’ve had an idea for a while and with the 3d printer, I can now give it a life. I present to you, the Aquarium - two actually…
Initial premise - Porthole design with a video screen in the middle for looping an aquarium video and 3d printed ‘objects’ around the perimeter. This was not conducive to incorporating a 24" 16:9 TV screen. And the resulting mock up was, less than inspiring.
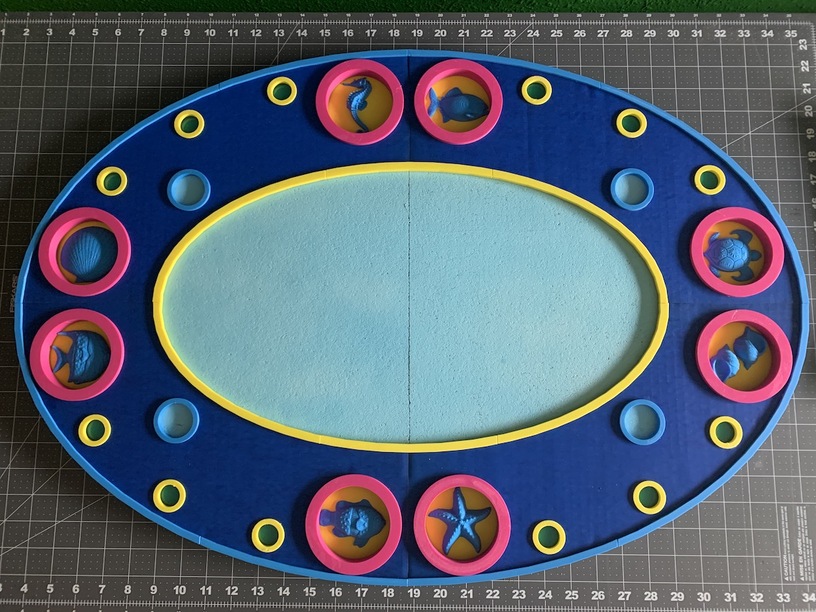
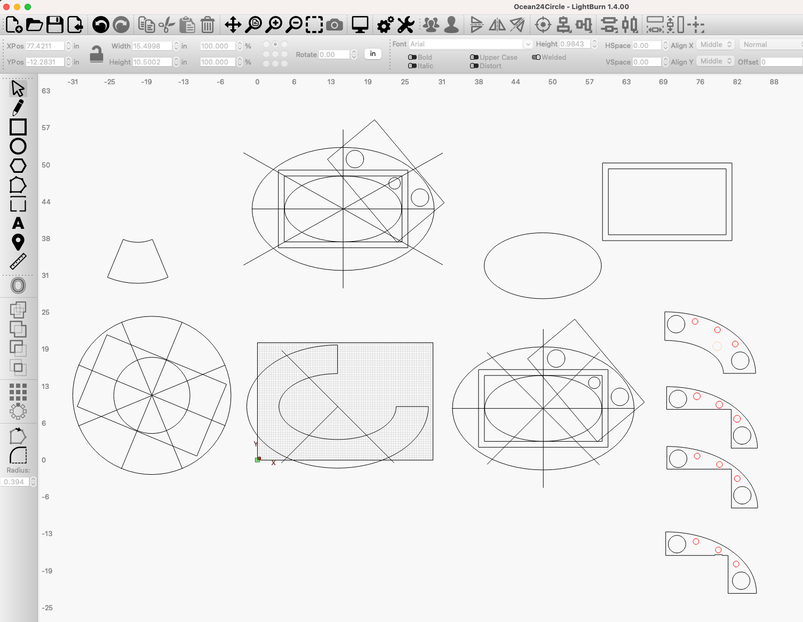
Plan B - Go for an oval with a 16:9 ratio, and give it some circle cut outs for the 3d objects, smaller ones for effect, include the measurements from the TV screen and frame, and split it into 4 pieces. This was a good exercise for using Lightburn.
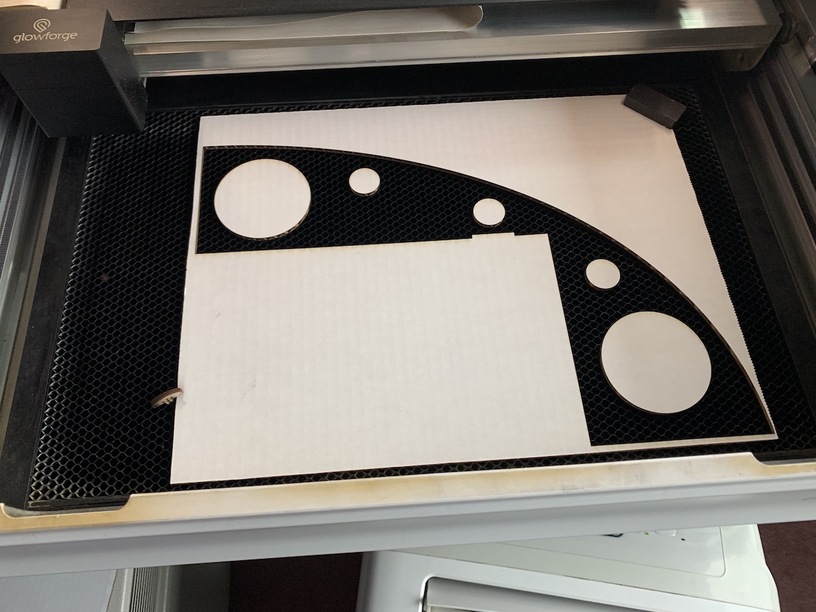
Now on to the Prototype. Cut layers and repeat. Now I really want a ‘copies’ feature in GF…
There’s a couple different ‘layers’, one for the top which has an oval cut out, the next are notched for the TV frame, represented by the black foam board.

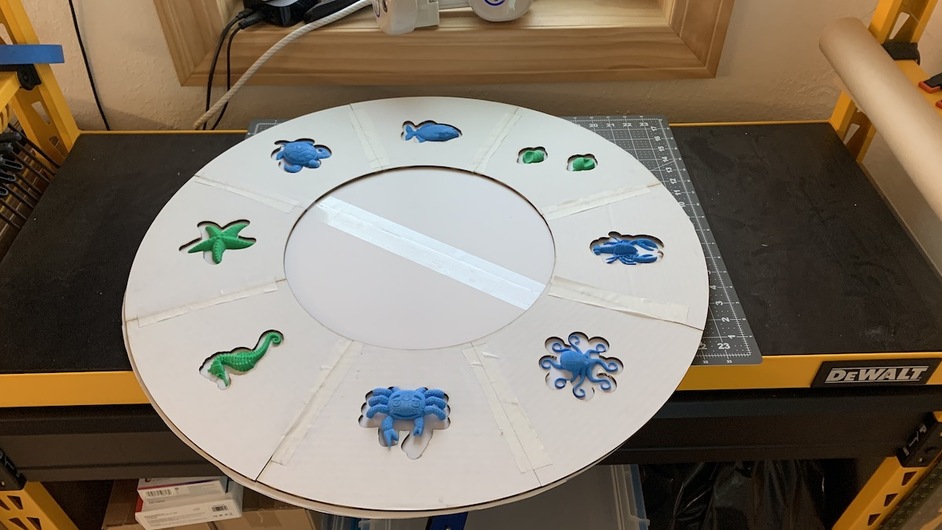
I mentioned this project was a twofer - This prototype I made into a cork board - so here’s how that went real quick, before we march on to the TV version. I taped the layers together to aid in aligning them during glue up.
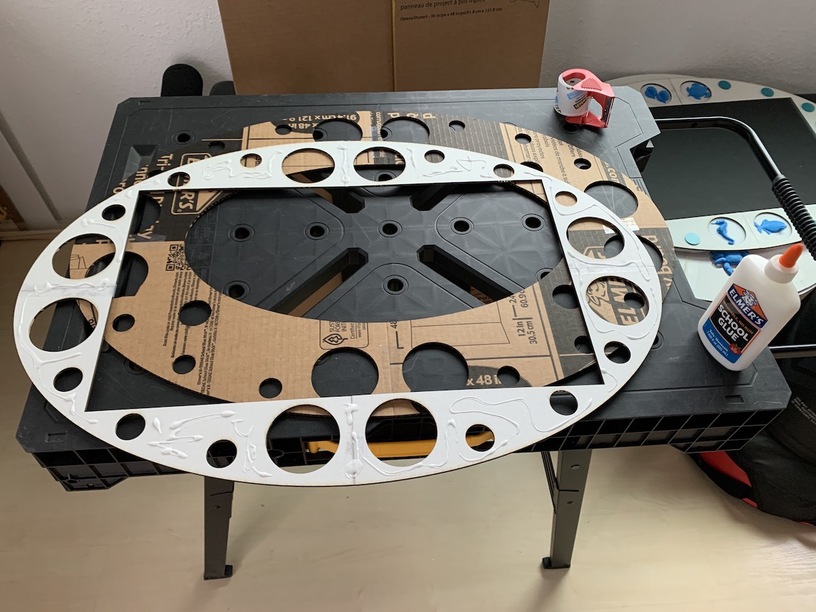
Spray painted some cork panels, cut some medium teal circles for the small holes, Elmers, Elmers, and more Elmers… ![]()

I outline traced and cut the back from one piece of cardboard, squashed it all together, and let it dry.
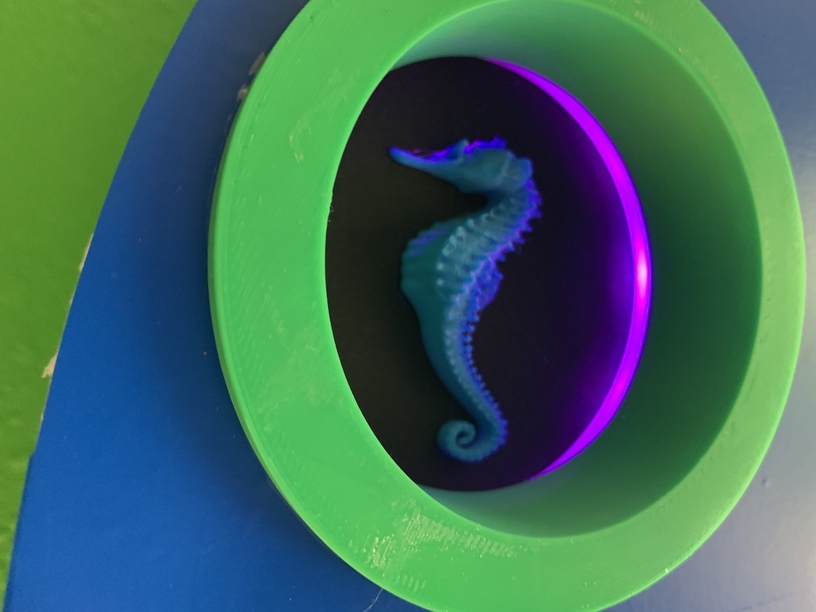
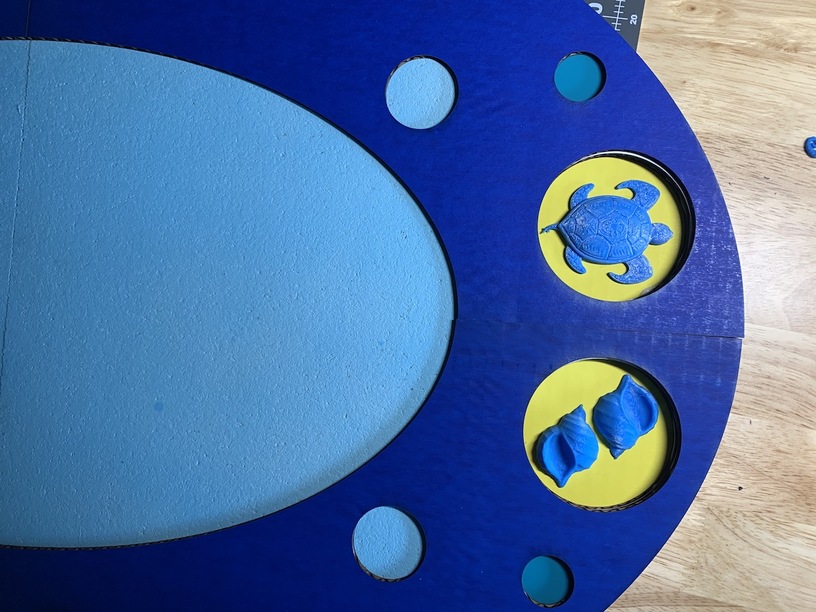
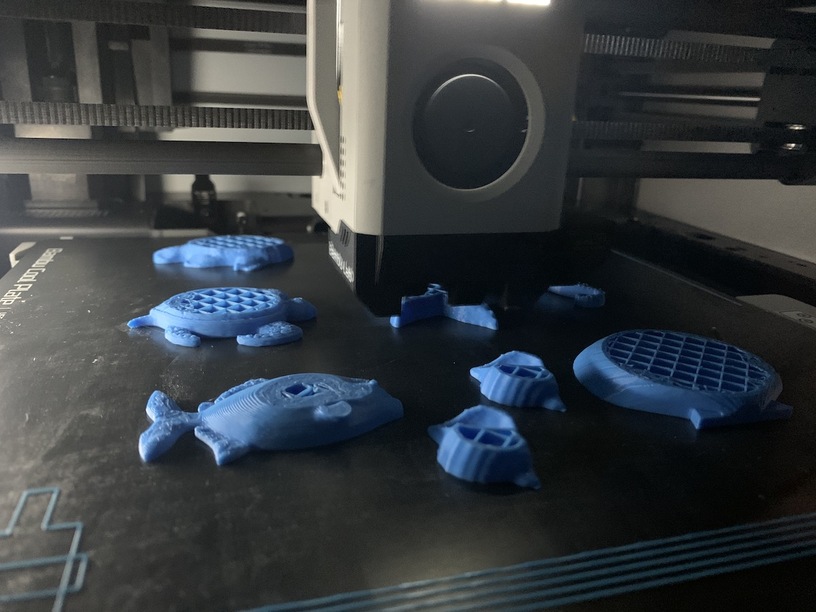
Experimented with a few different 3d ‘sealife’ objects and glued them in - Bling!

Close up -
Very fun little cork board. Now, on to the main event!
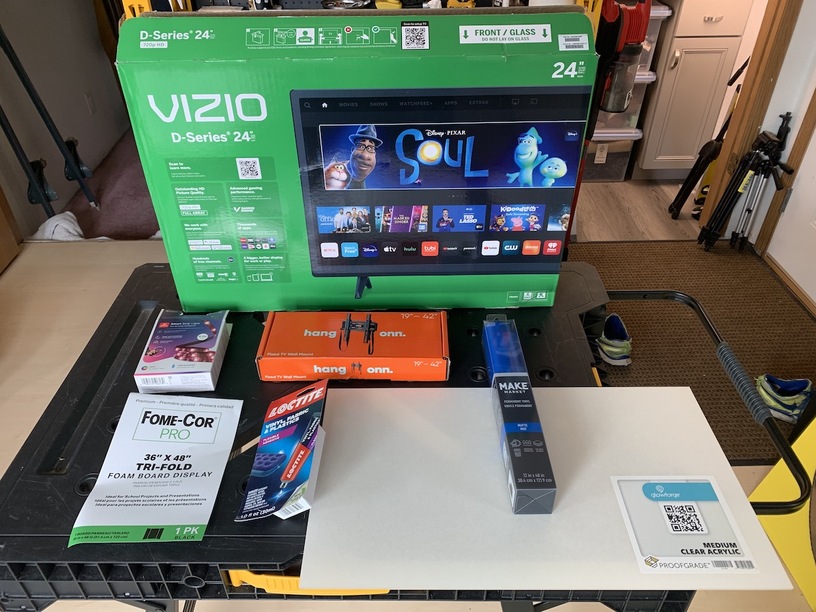
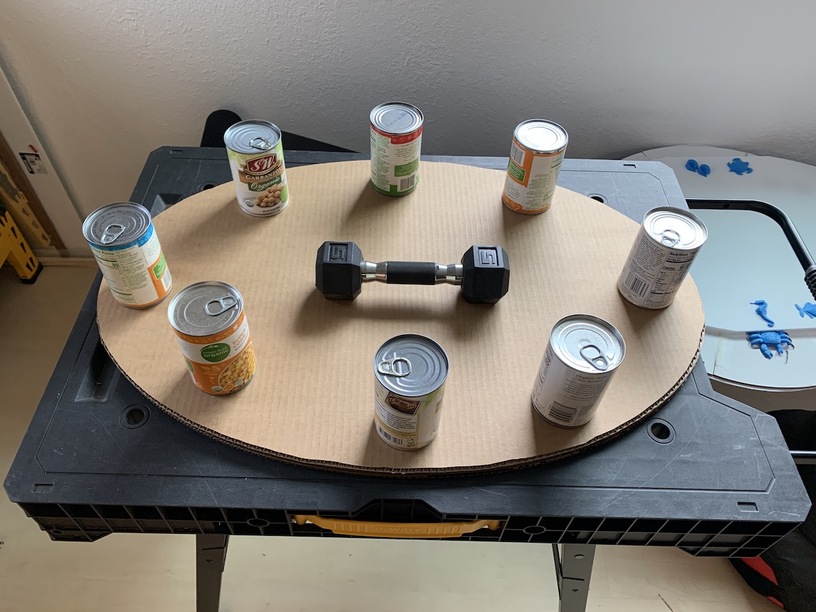
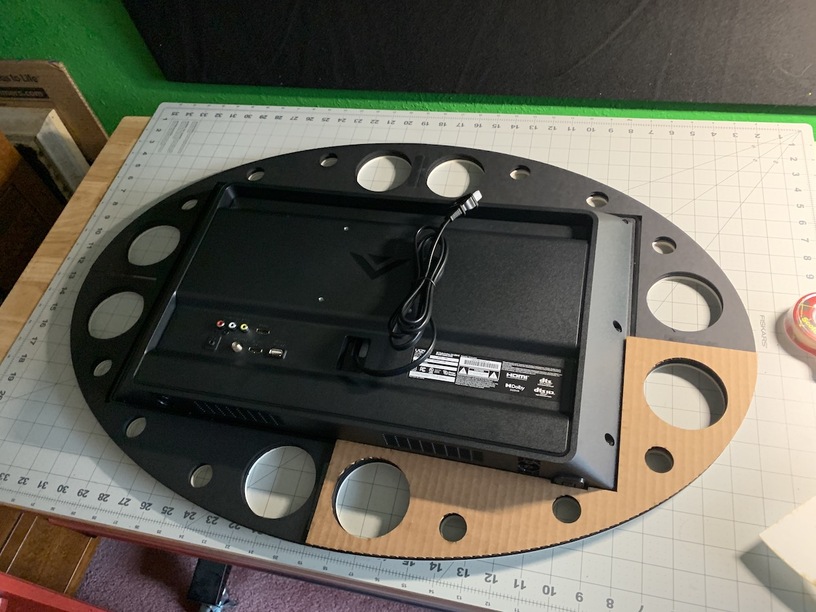
Same basic assembly process, except I used foam-cor for the layers instead of cardboard. Placed the TV in for fitment and had to ‘notch’ for the power button, and stepped ‘in’ the inner edges to lock in the screen. So one cardboard template to get that right…
Oh, and did I mention, this thing is going to be lit! No skipping to the end…

Since this version is a lot more layers, I made the Sealife taller - just waiting for the final print.
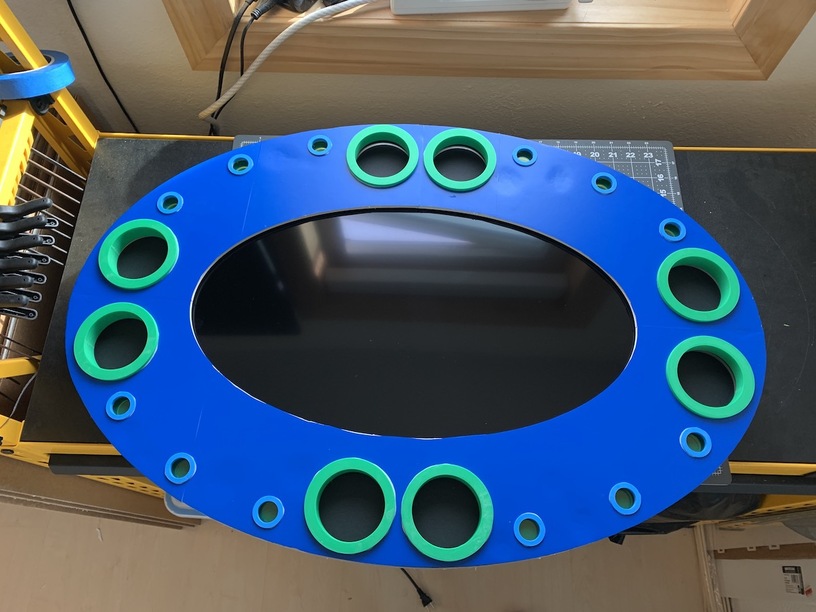
The ‘display holes’ need some grommets to make them more finished looking. I learned just enough about 3d modeling to use the Bambu Studio to make these -

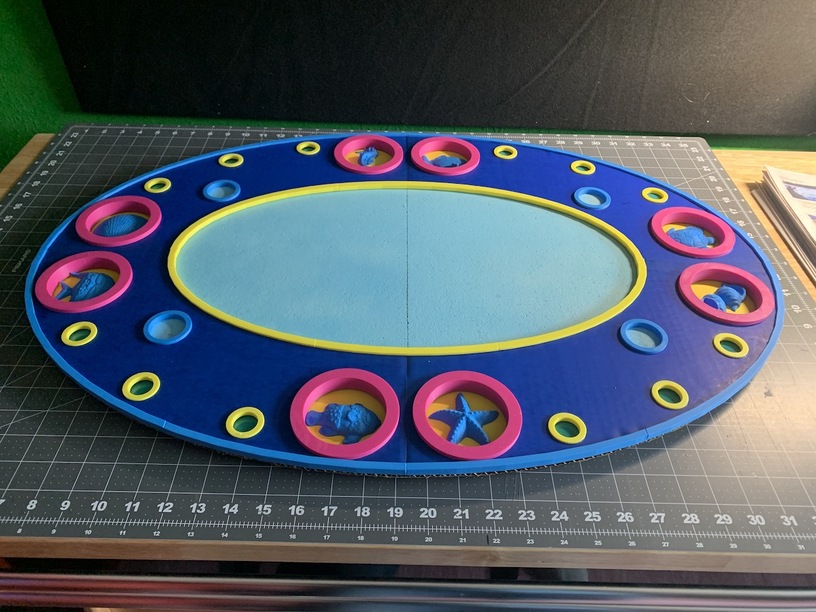
And here we go with final trim glue up, and I covered the surface layer with permanent vinyl to get a nice blue color.

I wish I had used black for the surface layer so the cut edge didn’t stand out. But, I have the inner oval SVG, so I’ll 3d Print some trim in sections for that as well, to learn how, and improve my skills. But this is going well, so let’s keep on it. That’s better -
The layer just above the ‘bottom’ (black) that the sealife items glue to, I did a layer of Medium clear acrylic. I’m hoping that light from the led tape around the edge of the TV will cast through that layer and light those pockets. Fingers crossed -
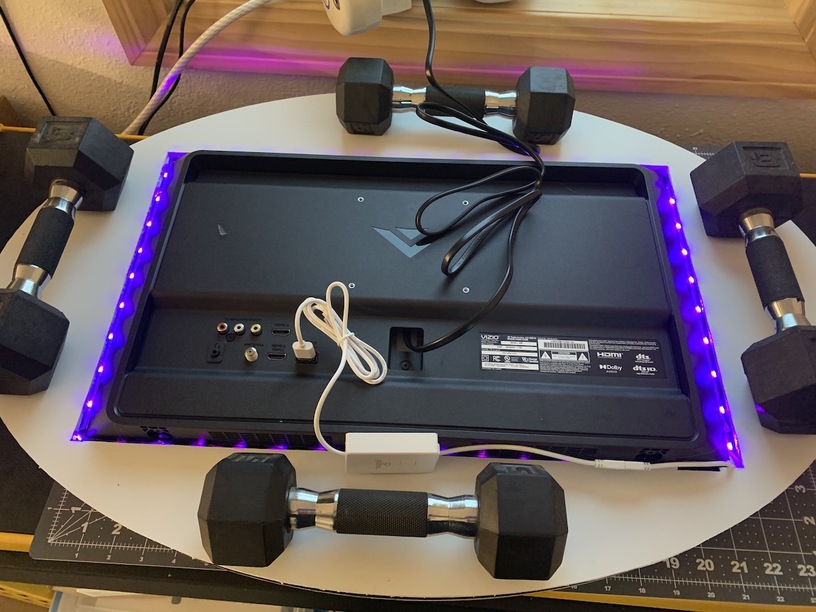
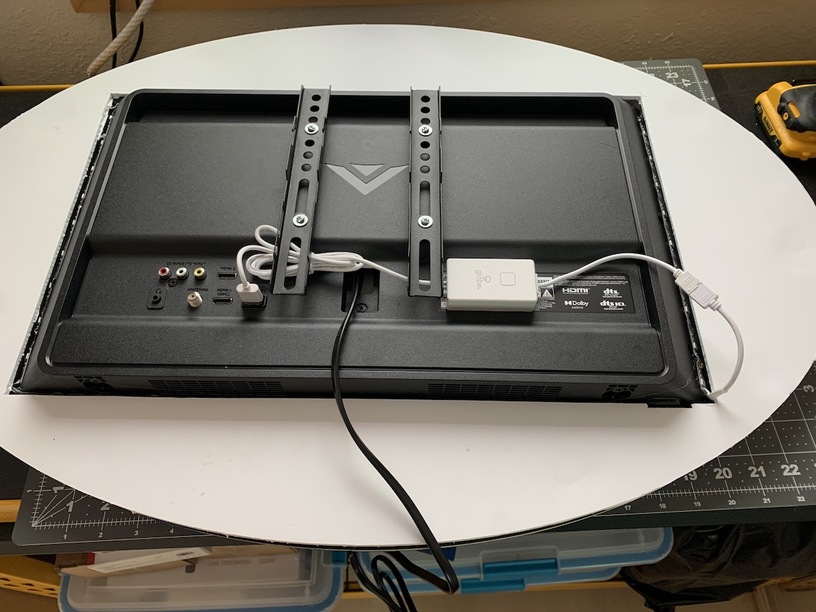
FYI - I had no idea if the USB socket on the TV would power the LED strip, or how it’s triggered. Worst case, I would just run the USB cord with the power down to a wall wart. But turns out the USB is always powered on if the TV is plugged in, even if the TV is technically ‘off’. Perfect…
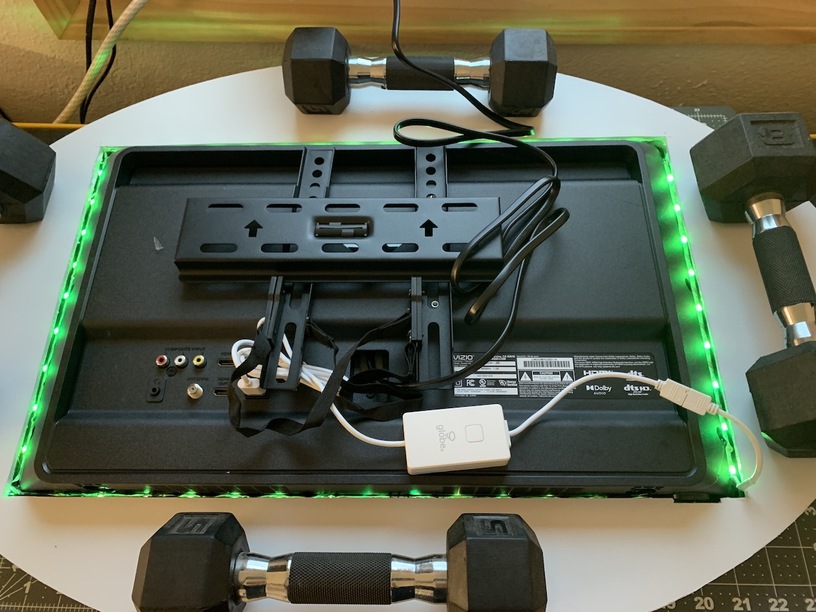
Got the wall bracket mounted and the LED wiring cleaned up and done.
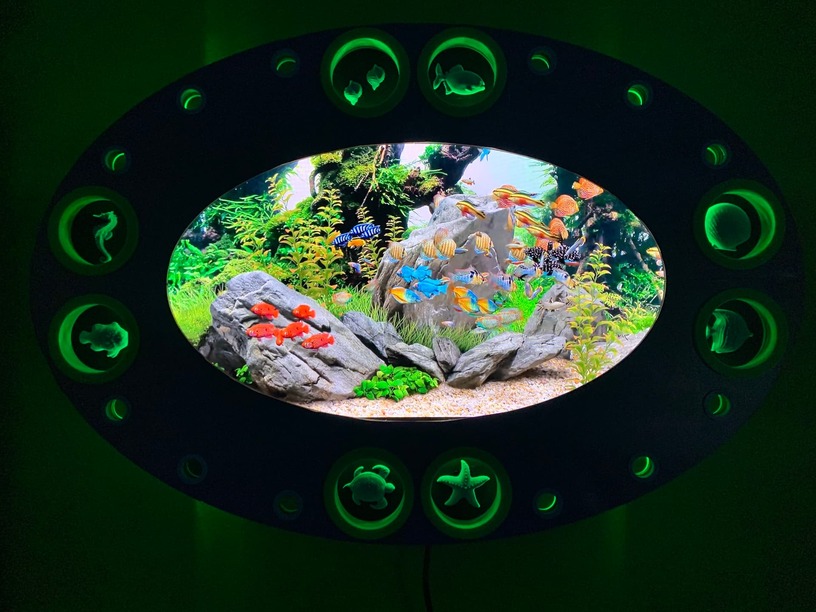
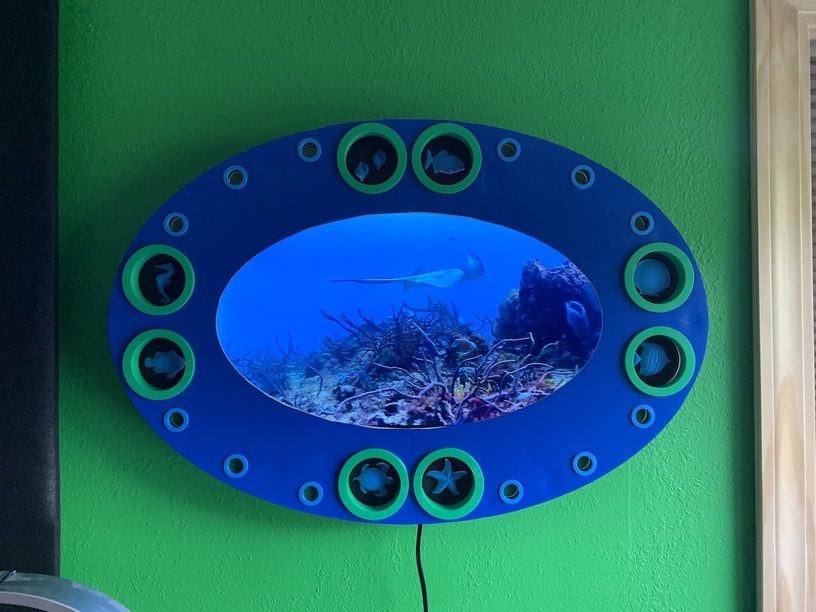
Ready to mount this thing and light it up? That is redonculous! The display hole lighting worked absolutely perfect.

Used Medium Fluorescent Green Acrylic for the small holes just for depth effect, and to look good when not lit. And final step, get the ‘Aquarium’ YouTube video going. When the room is lit, this is very pleasant to look at and pretty cool.
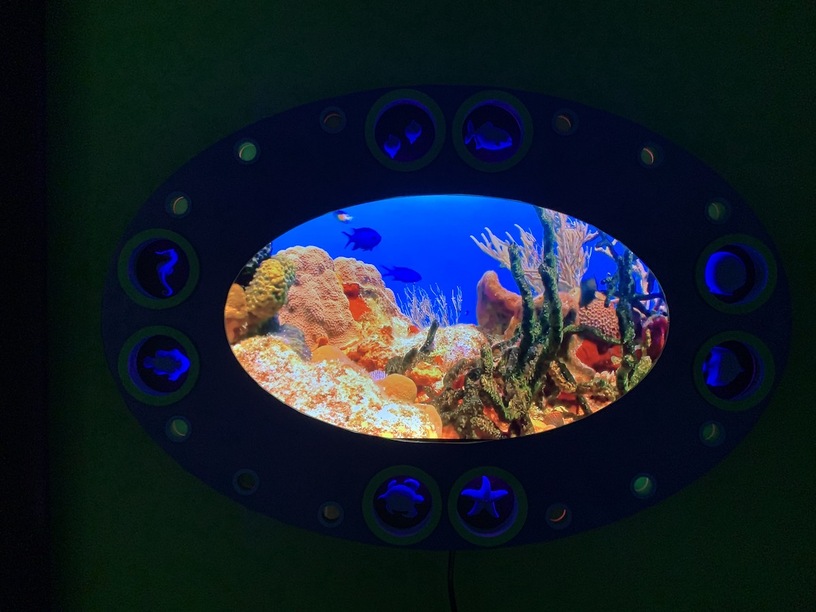
When it’s dark - This completely exceeds my expectations -
I’m very happy with this project, and thanks for checking it out!

HL