A little late but here’s an ornament I made for my new parent friends and sold on my Etsy shop this year (it sold pretty well!)
Those desk names were cut out of some craft wood sold at the 99cent store. Three pieces of (really nice) 6x7.8 plywood for only 99 cents. The odd think is the engraving doesn’t appear to darken -as seen in the names above. Here are some simple “wall ornaments” a co-worker requested. I would make one a day for her…
The engraving was light brown on these (same wood)
Love Love that star tree topper
This may be my favorite thing ever!
Just received my Glowforge first week of Dec, so I combined my leather craft and Glowforge for these ornaments. They were gifts for my daughters High School Rodeo Team.
I started with something simple.Those are awesome.
What type of wood did you use? I used proof grade (photos further down (or above) this thread)? Yours look great.
Thank you. Our old stand-by had become dented beyond repair, so I decided to spend a couple of hours.
Thanks Grizzarkhov. I used a non-proof grade walnut ply from a local wood store. It was unfinished, so I applied two coats of polyurethane on the front and back before lasering.
Thanks for the quick response. I need to venture into other woods and materials.
Gary, what do you use for your masking? What materials and settings are you using most often?
Someone at work requested an “AZ wildcats name ornament” in memory of her husband… I decided to add color with acrylic inlay…
I believe this was on the cherry
The contrasting colors are great.
Love the reindeer
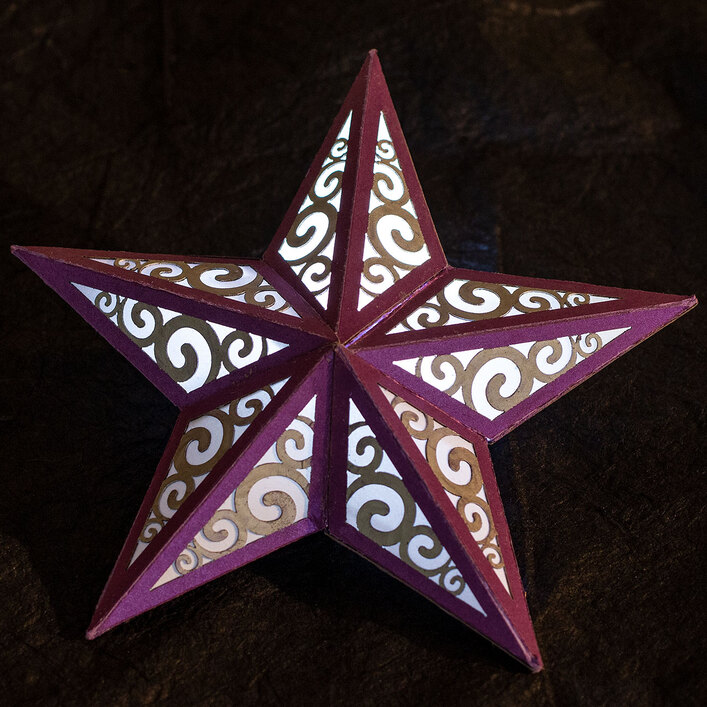
Very late to the party! I did this over the holidays and, took a few quick pics while cleaning up in the studio today.
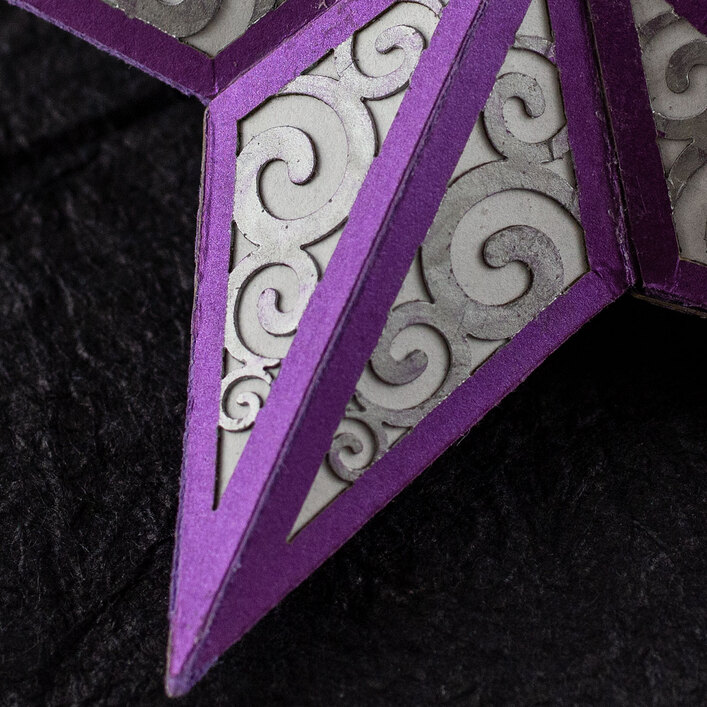
I have been wanting to make an illuminated paper star to use for package ornaments for years and, finally had a quick go at it in December. This is about 4.5 inches across.
I am not entirely happy with this prototype. For starters, it was way too much work. I used a medium-tack masking on the stock. Removing the masking for the section over the Interlacing to paint the silver parts was pretty tedious. Gluing in the translucent panels (tracing vellum) was not bad. Final assembly, though was pretty grim. Getting the last point glued in was particularly challenging. The result is overly fragile.
I am using some little LED flashies for the lighting but, swapped in a steady LED for the photo.
The solution to making it work better might be a lighter-weight stock. This one is a very rigid 130lb that made it difficult to collapse the points while gluing them together. I am contemplating design changes to improve for the next pass. As always, suggestions welcome.
Looks fantastic in the photos!