Good idea about the holes, I’ve got this tool that I use to pull up tiny pieces using the tacky end. The thin curved end also pries up pieces pretty well. I may modify your hole idea though and cut holes in the cardboard that are just the size of my magnets to keep it from shifting.
3 Likes
Wow that is a huge variation. Never would have guessed. Almost 50% delta (or 100% if you thought the thin measurement was your base). Well off the nominal .125.
Spot on about mic’ing everything. Calipers are your friend. ![]()
1 Like
Variance is normal for all acrylic, even within the same sheet. I had this saved in my flies for deference.
Plastic sheet thicknesses can vary by + or - 10% (not only from sheet to sheet, but even within the same sheet).
Nominal acrylic or ABS thickness, actual thickness
1/16", 1.5 mm (~ 0.06") + or - 10%
1/8", 3 mm (~ 0.118") + or - 10%
3/16", 4.5 mm (~ 0.177") + or - 10%
1/4", 6 mm (~ 0.236") + or - 10%
3/8", 9 mm (~ 0.354") + or - 10%
1/2", 12 mm (~ 0.472") + or - 10%
6 Likes
What I love about this project at first glance, I thought, “Oh, cool. A simple Trophy.” But the amount of thought and work that went into this simple trophy makes it quickly modular/editable? That’s awesome… Then you build it further with a custom holder for multiple trophies out of cardboard? This simple project went from, “Here’s a trophy design,” to full-blown solution from beginning to end. Way to be! (sorry for the measurement issue…)
3 Likes
Nice project. I appreciate your posting and analyzing the process. As to the acrylic, I discovered this the hard way trying to come up with a tight tolerance on friction fit tabs and slots in acrylic. @palmercr enlightened me on cast acrylic and since then I know I have to check which batch of acrylic or which full sheet I am cutting from. I expect that some of this variation is further justification of having a nominal dimension as “medium” rather than specifics [not that I want to open up that discussion!]
I have some chemcast 1/4" that I have cut from larger sheets. Some of the pieces have some funky dimensions at a factory edge. The Proofgrade has been pretty consistent within the sheet, but I have learned to measure on all for sides of a piece and average if I am needing super close tolerances.
7 Likes
The silly thing for me was that I did know that cast acrylic did have some thickness variances, I just didn’t think that the difference would be this much or that I had gotten my fit so precise. Now I know and will give calipers a workout before finalizing any other acrylic projects. I’m going to use the @hansepe suggestion that he attributes to you. I am about ready to setup and cut a cardboard template with 2 colors so I can cut the outline of each piece, then remove and replace the cutouts with the old pieces and cut/engrave only the larger slot for the acrylic, ignoring the outside cut line.
I’ll also have to go back and adjust the template I made for the name faceplate that I’ll cut on the day of the event. I’ll have to keep track of which ones are set for the old acrylic thickness and make sure I engrave the winner’s names on a plate that matches the thickness of that acrylic.
Live and learn, and post on the forum so that it gets brought up again and is ingrained in memory so others don’t make the same mistake.
10 Likes
Thanks for sharing your clever trophy design as well as the challenges in making them. Hope one of the suggestions to widen the slot works for you.
So smart, this group!
2 Likes
I love that design, and thoughIhate the trouble you have had, i appreciate this conversation
2 Likes
Here’s an update on the project. First, @Rita reached out to me about the Proofgrade. While she echoed the fact that there is always some variance in cast acrylic, she is having me send a sample of each batch for them to look at. Very quick and considerate response from her.
Now on to the project. I took the advice of @hansepe via @marmak3261 and set up the project with slightly expanded slots to cut and engrave. Made sure to use 3 colors in the design, so I could turn on and off actions in the GUI. One for the outside base cuts, one for the full cut through slots, and one for the partial cuts that were originally deep engraves. Here’s the resulting cardboard template with just a few of the last pieces in place.
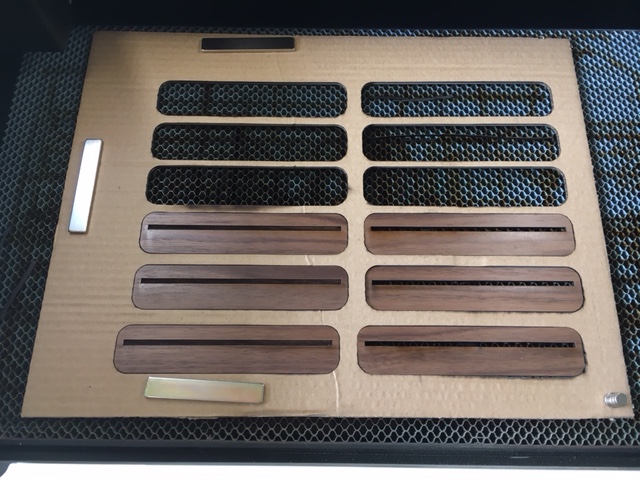
I put in the cardboard and held it down with super strong magnets and just cut the outside base cuts, setting the others to ignore. Then carefully removed the base cutouts and replaced them with the original Walnut ply. I set the outside cuts to ignore, and the fully cut through slot as a default cut. The engraved slot took a little fiddling. I ended up setting that up as a cut, but at reduced power so it wouldn’t cut through all the way. If I engraved the full groove like I had originally done, it would have widened the groove, but would have gone too deep in the area already engraved. Last bit to do was to knock loose the VERY thin pieces cut out of each side. I used a scrap of the acrylic to slide through and remove the small slivers. It worked like a charm and provided a test of the thickness before I went to assemble.
Here’s the finished batch of Trophies in their fancy transport/display tray:
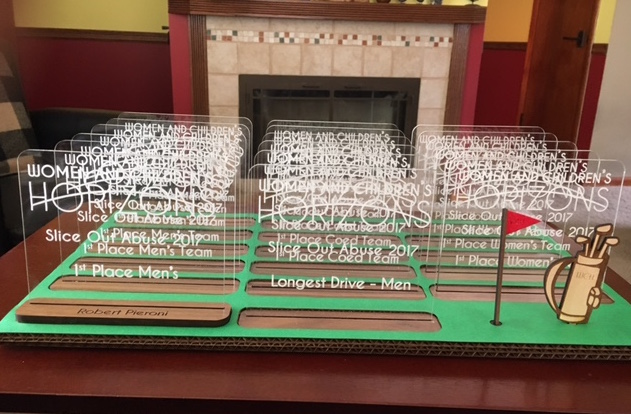
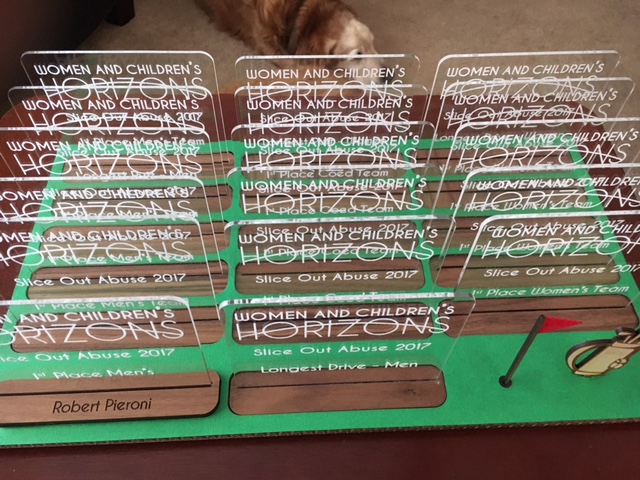
Since I saved money by rescuing the hardwood bases, I “splurged” with a big sheet of cardstock to dress up the base and cut a golf bag and pin flag for the display. I was ready to toss the green cardstock cutouts/ Then realized they were a perfect fit to drop into each slot. It’ll even look nice when the trophies begin to be removed. I’ll deliver these ahead of time, then just have to wait for the winners’ names to engrave and cut on the night of the event.
Thanks to everyone for their comments and suggestions about this project.
41 Likes
Now that is some serious thrift! Repurposing the jig is going above and beyond the call of duty! 

4 Likes
Wow, it looks great and I’m so glad you were able to salvage the pieces.
4 Likes
Really glad to see that idea worked out for you. 
Now, just make sure you keep the 2 sizes separate somehow for when you engrave the names, that way you’ll get the right fits 
4 Likes
Already done, but thanks for the reminder. I adjusted the template that is ready for the names by leaving 5 of them at the original thickness and putting the finish place in the text holder (example: 1st Place Men’s Team). The other ones have the thicker slots and now also have the finish places set as the text holder. 
1 Like
Those turned out wonderfully!
3 Likes
If I was you, I think I’d keep those designs handy. I have a feeling you’ll be getting more requests for additional events once those go out.
3 Likes
Very well done. I’m so happy that the jig worked out for you. It’s a little planning but it does make a difference in something like this.
5 Likes
What an amazing project!
As noted, the casting process for acrylic leaves a lot of room for variation - a big part of why we didn’t include any actual measurements in the product description. But your experience helps us learn and think of ideas to improve, so this was great feedback.
5 Likes
Love the green cardstock. Really takes this already great project to a whole different level!
1 Like
The addition of the pin and golf bag is awesome! It almost makes me think of making dioramas in grade school!
1 Like
Great project!
The glossy acrylic looks so uniform, I had always assumed it was as consistent as glass.
1 Like