I’m currently using our Glowforge to cut precise moulding templates as a tracing guide for our metal profile grinder. Each profile has to be perfect & without any chatter or the final moulding product reflects the imperfections (no matter how small). As such, & despite much R&D I’m still at a loss for cutting a smooth edge on a 3/16" acrylic without any of the laser lines showing up.
I was using a CNC router with a 1/32" bit to do all of the cuts, but was excited about the precision & speed a laser cutter offered. Unfortunately, I’m not getting great results & have wasted a lot of acrylic in the process.
Any help, tips, offset measurements, & specific settings that other users have found would be incredibly helpful. Thanks
Have you tried defocusing the laser? I personally doubt that you get a perfectly smooth engrave, but if you haven’t tried it, it might be worth a shot.
Are you using a raster with engrave or more of a vector and score or full cut through? Can you provide a sample of the input and output so support folks can tell you if it’s within expected tolerances?
Make sure to use a vector line, and try slowing the cut down a bit. The faster you go the rougher the edges. Sometimes using half the power and doing 2 passes helps get a nice clean square edge
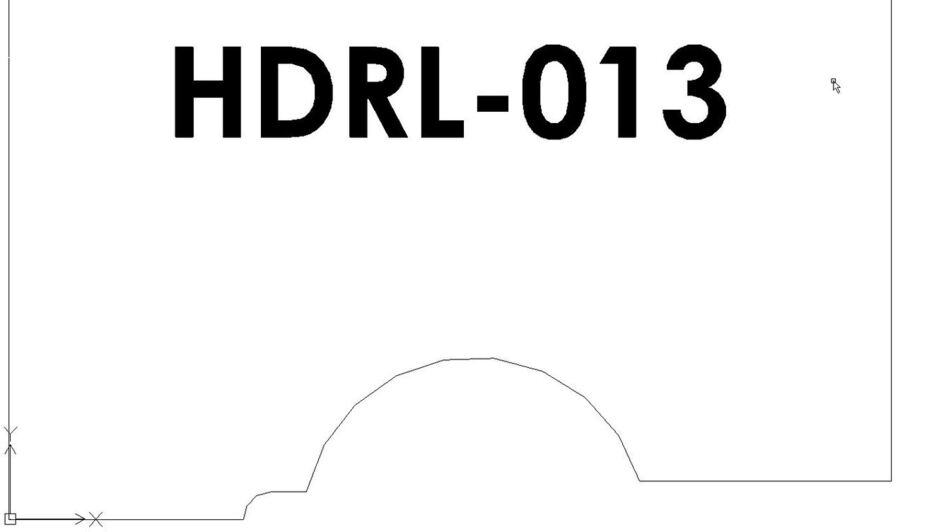
I draw out the profiles in TurboCad, convert to single poly-line & then offset by .004 (roughly bisceting the laser cut). Then i have to save the file as an SVG in Inscape to be able to export in Glowforge.
Within Glowforge, I’ve done every set-up imaginable for cutting; From proofgrade thick acylic, different speeds: 150-100, w/ full power to 115, w/ focus from .094 to .375. Either way, still not getting a smooth edge.
Not sure if theres a way to verify the file is vector within inkscape, or if that is the best setting.
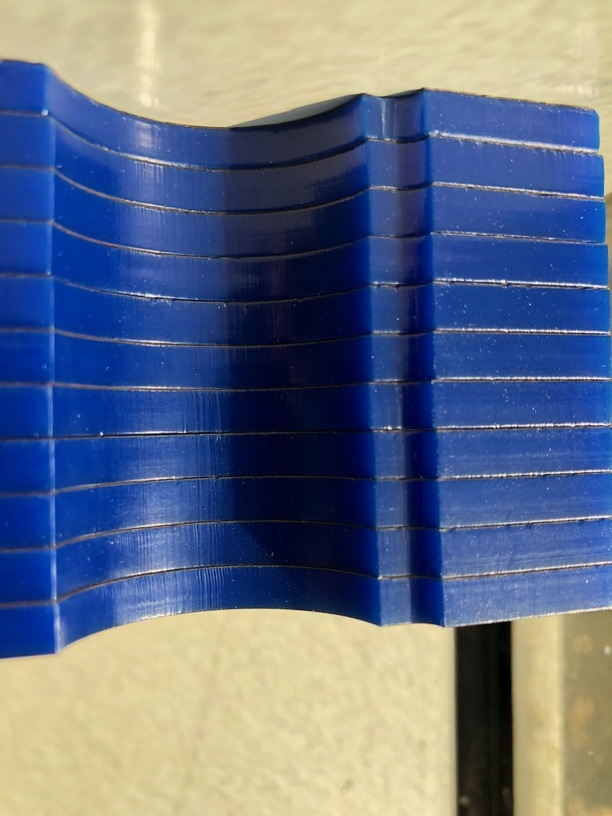
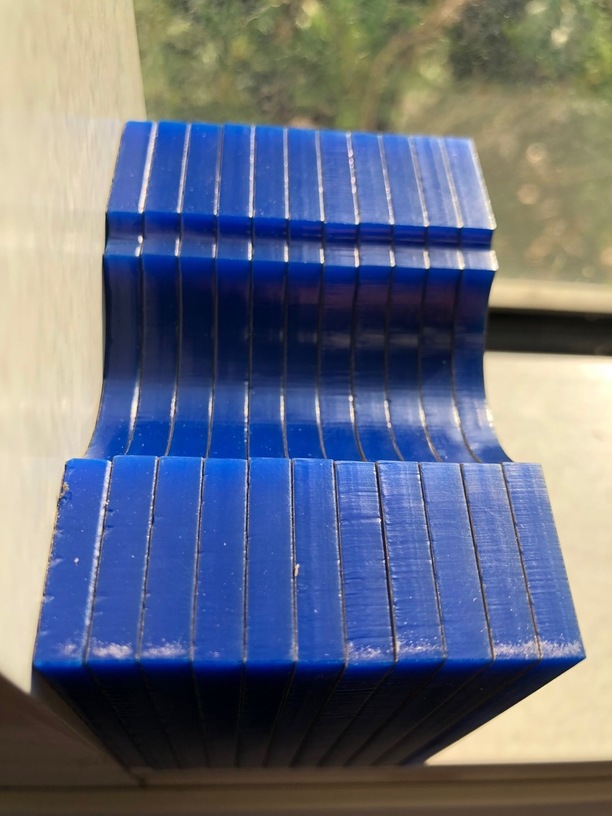
wow a picture sure helps. I would never have expected something that rough to have come out. I’m sure the much smarter than I members of this forum will likely have a bunch of actually useful suggestions.
I would start by looking at the CAD file. I don’t use TurboCAD, (never have), but a lot of the CAD programs render curves using short connected straight line segments instead of smooth Bezier curves that the 2D drawing programs like Illustrator and Inkscape use.
The way the laser works is to travel from node to node on the line, and if there are a lot of short choppy segments making up the curve, you can get a choppy edge on your final result.
Reducing the nodes and rendering a smooth curve might give a better result.
The other thing to check is the kind of acrylic it is…cast or extruded. One kind melts with a smoother finish in the laser than the other, and I don’t remember which one now. (I think it’s the cast acrylic, since that’s what the Proofgrade is, and I’ve never noticed a lot of edge banding, but I’m not completely sure.) I’ve never seen the pitting on the surface on the Proofgrade acrylic that shows in a couple of your images there…that just looks like a bad batch of acrylic. Or maybe flashback from the wrong settings if that is the bottom edge. Using masking on it while cutting will help with that.
Third thing is to understand that you are not going to get a perfectly smooth edge without flame polishing it afterwards. The results you have up there don’t look bad at all to me, but if you want them to look glassy smooth, you could try a brief flame polish on them after cutting.
Video here of a flame polisher actually used for the purpose, but you can use any small torch. (I’d use a creme brulee torch from the kitchen section, but I’m a girl.)
The link I posted describes defocusing, but looking at the pictures you posted, I misunderstood your challenge, so I don’t expect defocusing is going to help much for this issue.
Ooo. Yeah, what @Jules said. CAD softwares render short segments, rather than connected lines, so there’s a lot of on and off, and the intial burst is going to take more force (melting) than a continued cut (like a waterjet, for example).
If you’d like me to adjust your file and see if it helps, let me know. Otherwise Inwould suggest using Inkscape/Illustrator to join all the segments into multipointed lines.
If you do that it’s worth getting one just for your GF work. I’m not a girl or I’d probably know that you don’t want to use the kitchen one and then put it back. Something about non-food cootie contamination. DAMHIK
Live dangerously. Not only have I used the stove to ignite the torch when I couldn’t find the striker, I’ve also used it in the kitchen rather than pay so much for a fancy kitchen one.
Remember there are plenty of reasons not to do as I do and actually be safer.
I have noticed those lines on pretty much everything I cut; not that bad but even on 1/8 they show up just because of the resolution of the steps the glowforge takes