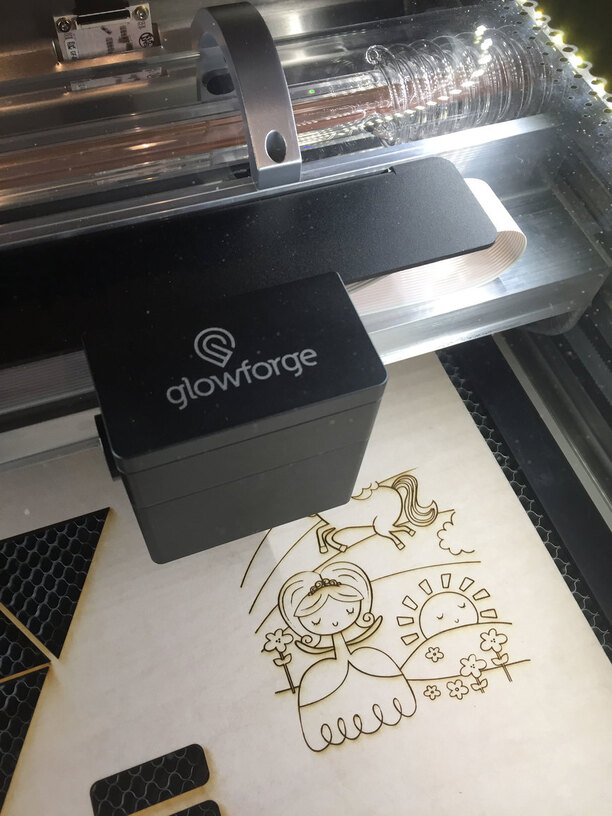
During that first, late night with Emmet (our ![]() ), my wife came up with the idea to print our daughter a puzzle. She loves unicorns and loves to paint so there was a canvas nearby with a coloring page style graphic I decided we could use. My first thought was to trace it in the machine, but realizing from previous projects it would probably trace some of the texture of the canvas too & take forever to engrave, I figured I’d quickly trace it in Illustrator. To my surprise, the estimated time was still going to be 36min. We decided to wait and cut it in the morning.
), my wife came up with the idea to print our daughter a puzzle. She loves unicorns and loves to paint so there was a canvas nearby with a coloring page style graphic I decided we could use. My first thought was to trace it in the machine, but realizing from previous projects it would probably trace some of the texture of the canvas too & take forever to engrave, I figured I’d quickly trace it in Illustrator. To my surprise, the estimated time was still going to be 36min. We decided to wait and cut it in the morning.
While my family was arriving for the Glowforge Party, the puzzle was already being cut, and upon first sight, they were blown away!

Despite their excitement, I was frustrated to see the puzzle was coming out all pixelated and blurry. It was as if it completely ignored the vector artwork and made it a really terrible raster image. Turns out, that’s exactly what happened because this was before I discovered the “Add Artwork Button” automatically treats any file like a bitmap. (Note: this image is not poor quality. See the crisp detail of the table? That pixelation is what the Glowforge actually engraved)
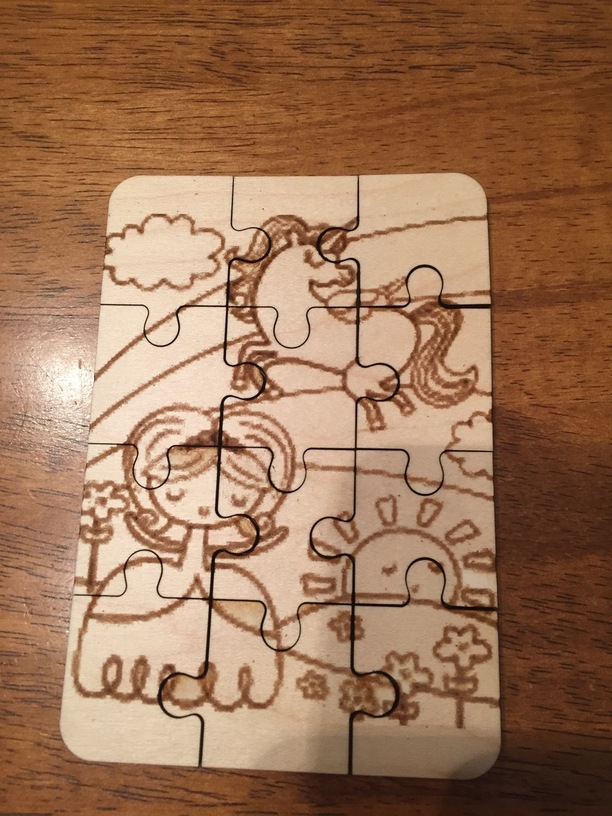
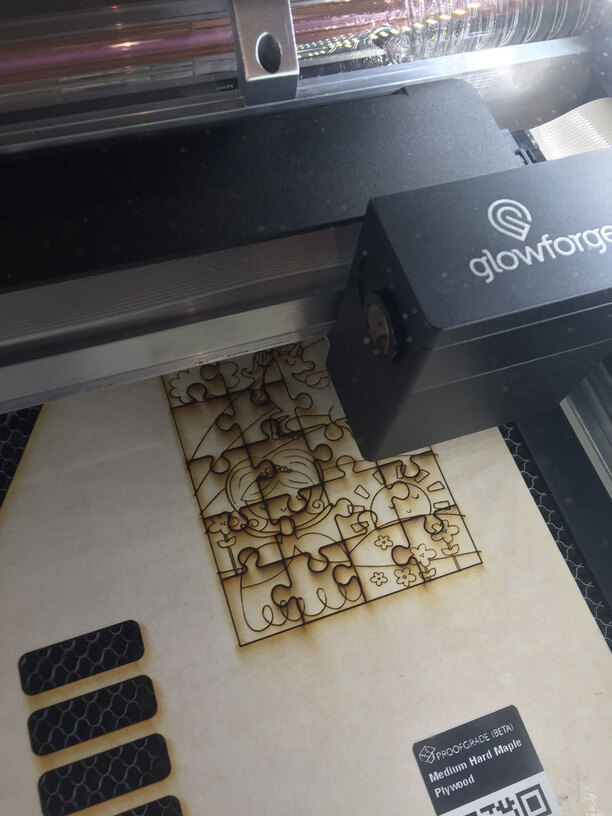
My daughter was thrilled and already colored it all in, but I decided when I had a chance I was going to upload the SVG file and do it again without the Add Artwork button. Only problem was, there’s no way to then overlay the puzzle cut that was already in the Glowforge interface (at least not that I’m aware of… would be cool to have a folder or something where we can store layers or graphics to add onto any file we upload, like the luggage tag or puzzle type of things). So I quickly downloaded a puzzle file from online, threw it into my illustrator file and uploaded the svg. This time it estimated the project would take 29min. A little shorter, but I figured the vector version wouldn’t end up engraving as much so it would go quicker.
It started cutting the file and IMMEDIATELY I could see beautiful, crisp, clear lines! And it was getting through the graphic much faster, so I was wondering what would make it take so long still. I just assumed it must’ve been the extra cut lines since this puzzle template had 20 pieces to cut instead of 12. As soon as it started cutting I realized where all that time went. It cut the first piece. Then it cut the second piece, including where the lines overlapped the first.
LIGHTBULB! This is one of those moments @marmak3261 pointed out to me the other day: [quote=“marmak3261, post:15, topic:9179”]
Just about everything is on the forum that needs to be known, but sometimes you don’t know you need to know it or understand why until you have the laser and GFUI right in front of you.
[/quote]
I’d seen some stuff in the forums about files where lines overlapped and “Splashback”, but not having my hands on the ![]() yet, I hadn’t realized this was what everyone was talking about. Since I didn’t set-up the puzzle file I was using I didn’t know it was put together by individual puzzle pieces. When we printed the first puzzle I remembered being surprised when it started cutting the lines for each row & column and thought, “Oh, that’s a really smart way to do that.”
yet, I hadn’t realized this was what everyone was talking about. Since I didn’t set-up the puzzle file I was using I didn’t know it was put together by individual puzzle pieces. When we printed the first puzzle I remembered being surprised when it started cutting the lines for each row & column and thought, “Oh, that’s a really smart way to do that.”
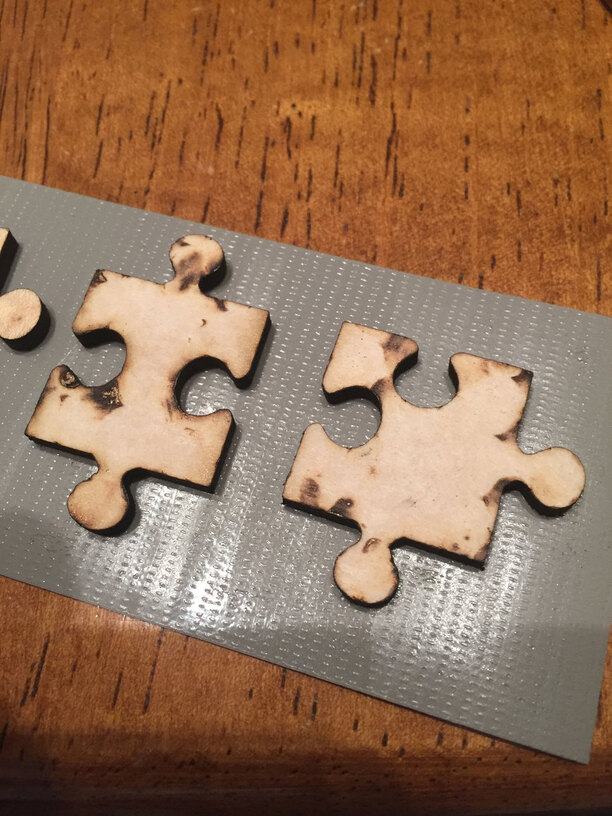
Sure enough, this puzzle would’ve cut faster without the duplicate cuts. And I ended up with some burning on the back of my puzzle pieces due to splashback where the laser simply shot through a hole it already made. Luckily, the proofgrade material has masking on both sides (which I keep forgetting to take it off the back of my projects too) so most of it never made it on the wood. There’s a few small spots on the back but overall it turned out MUCH better.


 be patient…be patient…be patient…can’t be patient