Vacuum tray replacement for cutting lightweight materials

Why would you do that? It’s totally functional with zero mods, seems like your way would be much harder with no gain?

I mean it’s a fancy idea, and that would be interesting and cool on some level, but it seems like putting wifi on a hammer. :slight_smile:

2 Likes

Hmmmm WIFI on a hammer!!! you may be onto something there!!!

3 Likes

Worthless without an accelerometer embedded in the head.

4 Likes

I have known blacksmiths that won’t use hydraulic hammers as it is harder to be as precise about the hit. Perhaps with camera s and AI they could work much faster?

1 Like

New part recommendation: fan model THA0412BN

This fan pulls far more vacuum than the other models in the series, 2.4 in H2O, compared to ~1.4 for the THA0412AD series.

https://www.digikey.com/en/products/detail/delta-electronics/THA0412BN/2745095

8 Likes

I know I am very late to the vacuum tray party but, I finally got around to making one. This project owes a lot to the previous examples here.

I did the design in Inkscape. I used one of the tabbed box generator extensions ( GitHub - paulh-rnd/TabbedBoxMaker: Inkscape tabbed box generator plugin - quickly design complex "finger jointed" boxes ) for the two main bodies: the tray and the fan box. I modified the output to break the pieces into sizes the Glowforge can cut and, to add additional features like holes for the fan and electronics and channels for air flow.

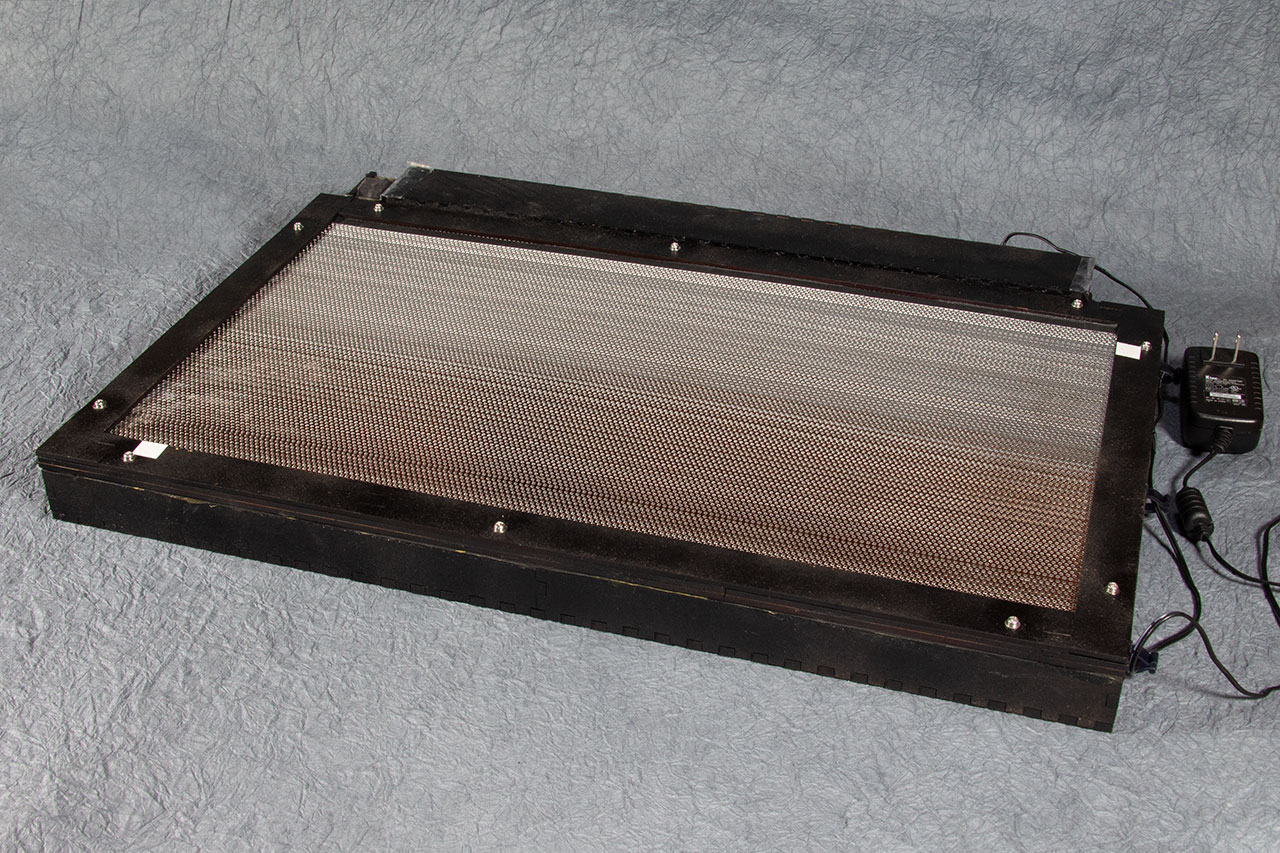
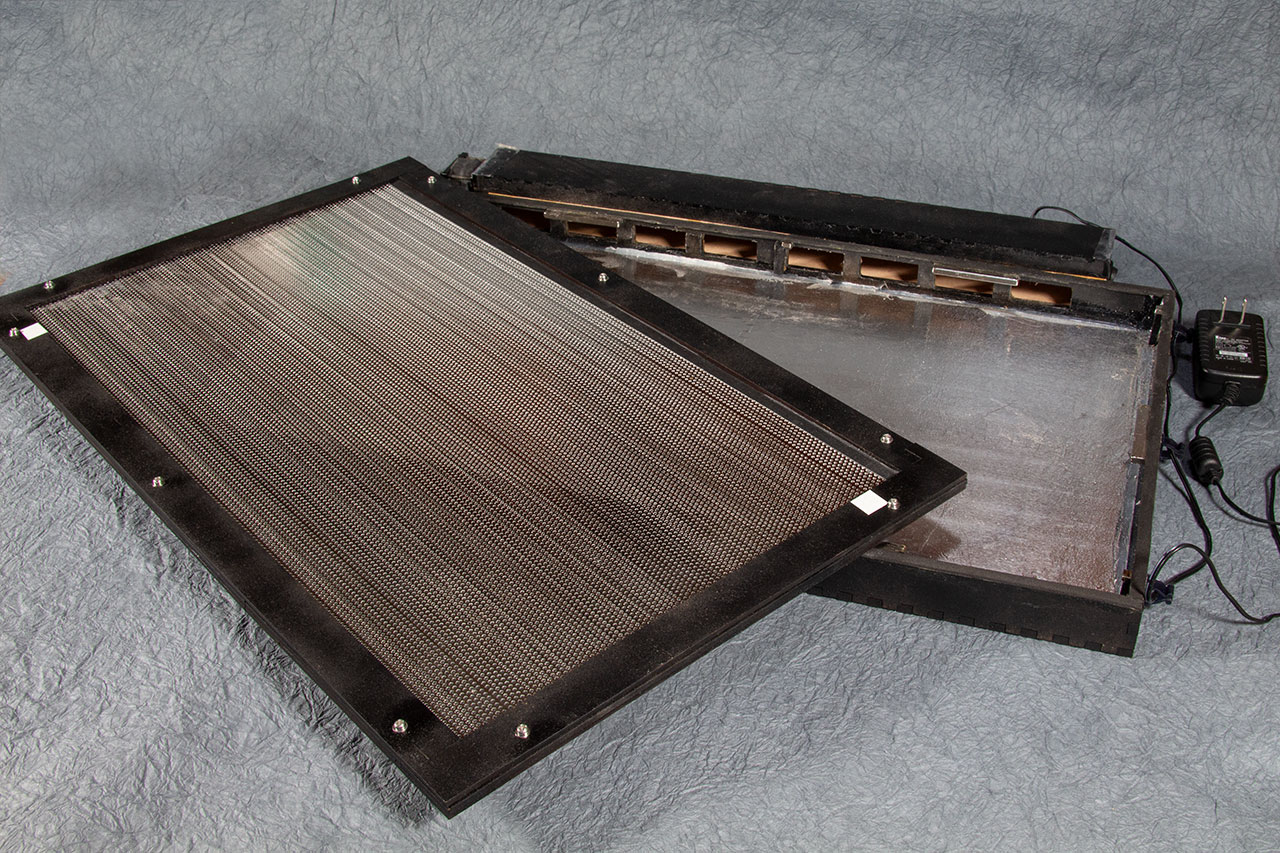
The tray is Thick Draftboard. I lined the bottom with aluminum foil for extra protection in case any stray lasering gets through. It’s probably overkill but, I sealed the seams with silicone caulk to reduce air leaks. The cutting surface is a piece of perforated stainless steel plate sandwiched in a layered Medium Draftboard frame. That is held down to the rest of the tray using magnets, with an EVA foam gasket to help with air leaks.

My original intent was to use the same mesh others were using. I couldn’t get it as flat as I wanted. So, I switched to the perforated steel plate.

The fan box is Medium Draftboard with press-fit holes for the power connector and switch. The fan is bolted on to the end opposite the switch. This uses a 12v fan and a standard 12v power supply. The cord hangs out through the front of the lid of the machine. The electronics are basically a summary of the recommended parts from this thread.

I painted all the MDF black so it would look more finished and less cobbled together.

Cutting the plate steel without access to a shear was a new adventure for me but, worked out really well.

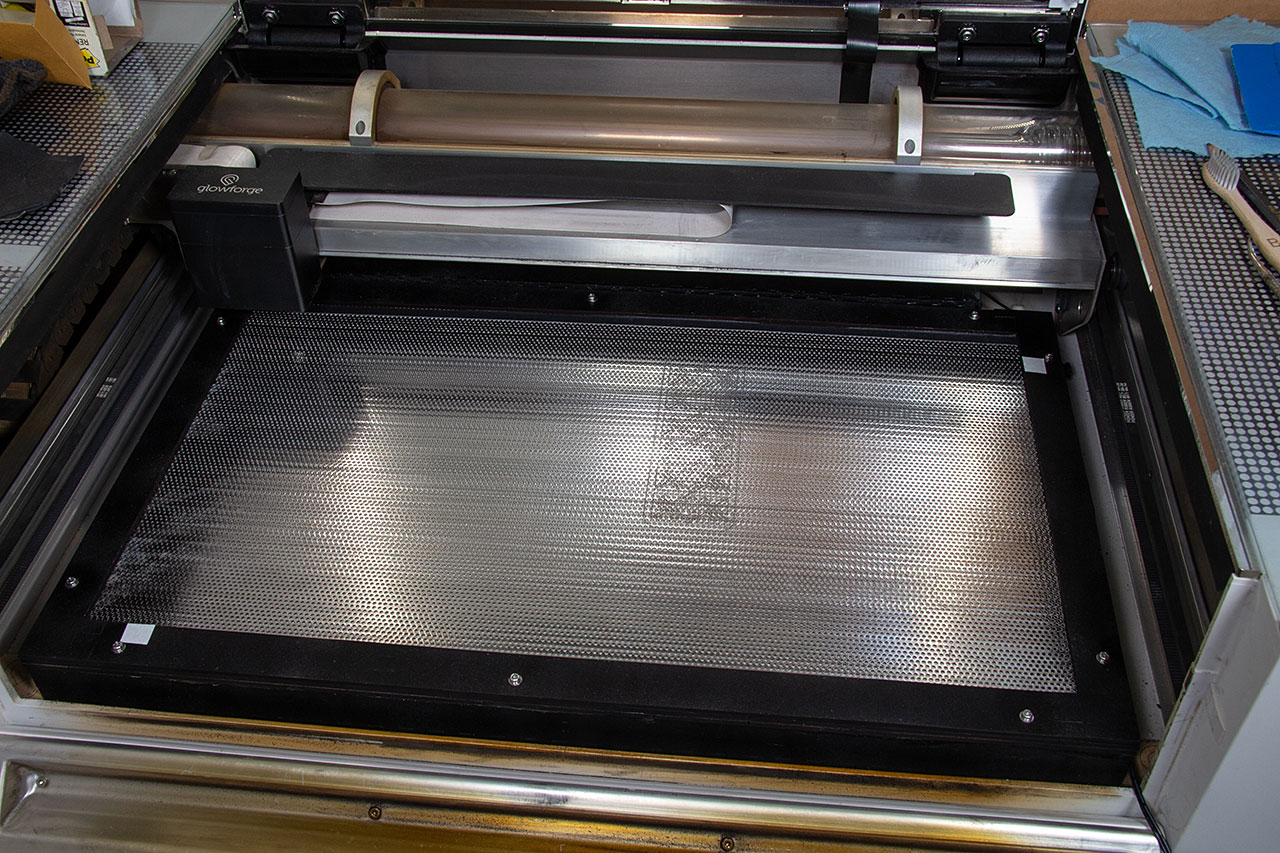
The cutting surface is a little higher than the standard tray and, the air assist clears the fan box by a hair. If I were going to make another one, I am confident I could shave some height off both components. It works well. So, I probably won’t, unless I run into problems as I use it more.

Here is a 1.6-minute video of it in action:

Blog post with more photos: Vacuum Work Hold-Down Tray - Evermore Stud.io

23 Likes

Very snazzy looking! If you don’t cover the rest, does it not pull down at all, or just not enough?

3 Likes

Wow! Well executed. This will certainly by nice to have when you are cutting your fantastic pop up cards.

4 Likes

The more area that is covered, the stronger the hold-down. There is some with some of it uncovered but, there is a big increase with most of the surface covered.

6 Likes

Yeah I keep printer paper handy to lay down on the screen around my workpiece. Suction drops off quickly with open space.

6 Likes

very nice. i don’t do enough paper to go through this much work, but if that ever changes, i’ll be coming back to this thread to make plans.

i wonder if it might be even easier to place/hold the non-paper area if you cut a sheet of magnet instead of EVA foam. then you also don’t need to worry about whether the head will clear the foam, since the magnet is significantly thinner and will hold strongly to the perforated steel sheet (unless, of course, it’s stainless steel).

6 Likes

Yeah, this particular sheet is non-ferric. Magnets won’t stick to it.

I found a few options for perforated sheets but, they mostly don’t mention this. It would require interacting with the vendors to find out.

You could probably glue (or weld or something) a matching rim of magnet sheet or just plain steel to one side of the perforated sheet, though. Worth considering.

My other goal with the frame was to cover the sharp edges of the steel sheet. I ground the edge I cut down but, even the original edges could give you a nasty cut if you brushed against it wrong. I’m sure other things could be done for that, too.

The head clears the main tray area with plenty of room (enough to cut Thick Draftboard, at least). The foam is 2mm thick and, I could probably make the tray a cm or so shallower, if I built a new one. It’s just the fan box in the back that is close to the height of the air assist.

7 Likes

Welcome to the club, nicely done!

6 Likes

Maybe we can engineer a new version! An electrostatic mat.

7 Likes

Huh. I’d be a little concerned about static electricity discharge into the gf’s electronics but I’d be really curious about your results if you try it!

7 Likes

This is so great! It’s really making me want to make one - I’ve been hand-cutting water color paper recently and it’s very hard on my hands.
Thanks for sharing your build!

5 Likes

I sure hope the water color paper project is Glowforge related and you will share the results.

5 Likes

Just posted a pic in the “Everything Else” category :grinning:

4 Likes

Holy Sheets, the things I missed when I got sick. This just totally rocks

9 Likes

Welcome back!

2 Likes