So, I am thinking (since I don’t have access to power saws in my apartment) that I am going to cut all my material down to 12x20 (I ordered the basic) before I bring it to my apartment and store near my GF (I know I will end up with a lot of scrap). I was wondering if you guys had any genius ways of storing materials in an orderly fashion?
Thanks as always!
Chronologically.
18 Likes
Haha!
If everything is cut down to at least 12x20 you can probably get a bookshelf and store it all on edge. That way you could dedicate shelves or parts of shelves to different materials, and re-shelve the usable scraps near the larger pieces of the same stuff.
I will never be that organized, but it sounds good, right?
3 Likes
Oh, yeah, I like the idea of doing it vertically on a bookshelf. Hadn’t thought of that. I’ll probably do a set of laser test engraving and material info next to it in the material its made of.
A cross between:
And:
2 Likes
Trying to picture how that would look.
Since the material samples have a fair bit of width to them, either you mount them sticking out perpendicular to the cabinet, or you put them up on the cabinet, adding vertical or horizontal dead space.
But, if you give yourself enough space to store a fair amount of each material, then you could add doors to each cabinet section, and put the sample engrave sheet on each door. No dead space, and some guaranteed visibility prior to accessing material.
Maybe (if you have enough room) having a 2 tier cabinet. Raw materials (still pristine 12x20) on the bottom, with scrap in a space above (scrap large enough to still slide in and sit side-by-side, for smaller random tidbits, a common scrap bin in a corner)
3 Likes
Oh, I like the cabinet idea. Much cleaner. And the scraps below. Hmm… I hadn’t considered the height issue. Maybe I’ll have to buy some stronger version of this kind of adjustable shelving:
So I can adjust the height better. Weight will probably be an issue.
I’m imagining cubes (or cubbies) with a flip-up (or down) door. The door would be the test/sample.
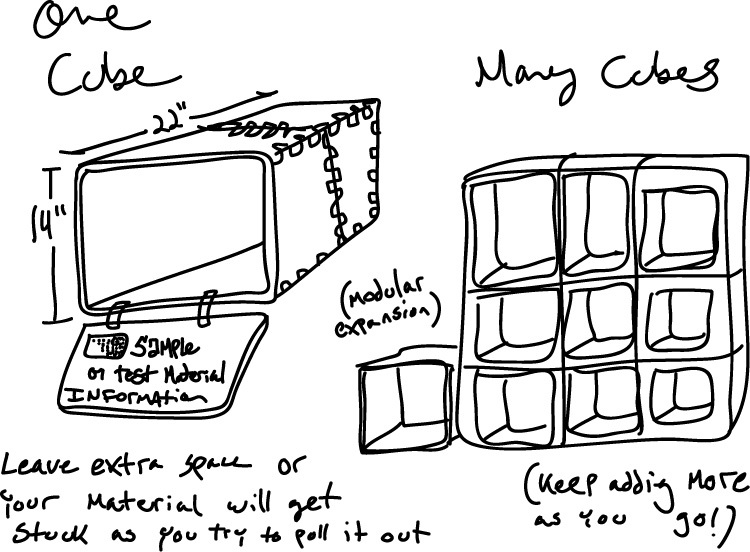
based on an idea from Nomadic Furniture by James Hennessy
2 Likes
also just came across this cardboard materials shelf build: https://www.youtube.com/watch?v=XERs4X-rtc8&nohtml5=False
no comment on his video work, but the idea is worth at least a skim
I like the idea of gravity-held bins, especially for scrap–you can see what’s in them, including amounts.
1 Like
Ikea “as is” room. Just saying…
4 Likes
Suggestions for fabric, soft leather, vinyl, and other soft goods:
Basic principle: If it’s soft, don’t let it wrinkle! If it’s hard (like thick leather) don’t let it warp!
Option 1
Hang up fabric, soft leathers, etc. like so:
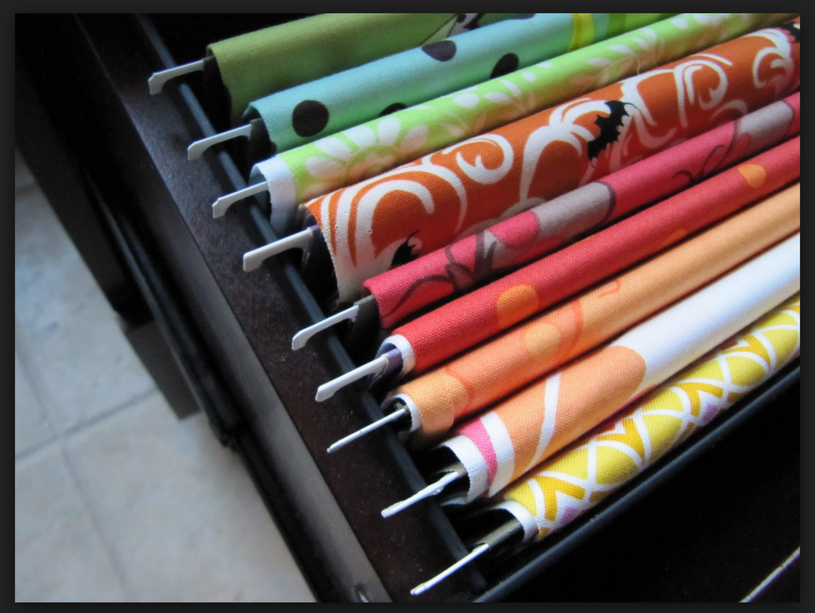
inside a legal size file cabinet (designed for 12" width paper) or legal sized versions of one of these:
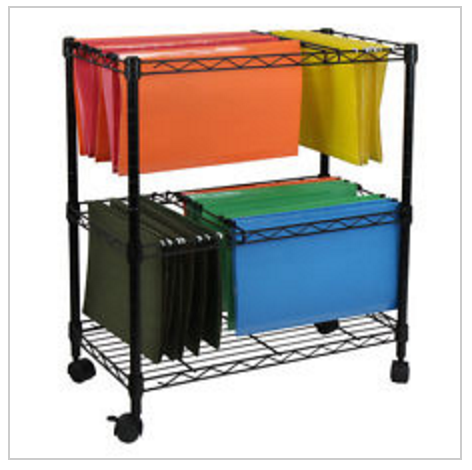
or these
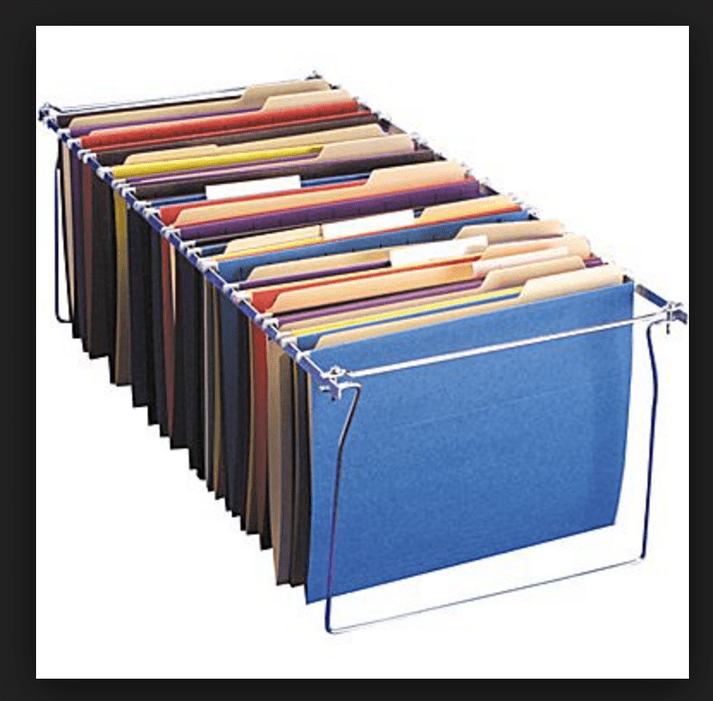
Be sure to hang your fabric/leather/etc. over something that’s thick enough that it creates a soft curve, instead of a hard line that has be ironed out.
Option 2
For fabric only, wrap it around some plastic or acid-free cardboard, pin it to make it stay, and store it on a shelf, thusly:
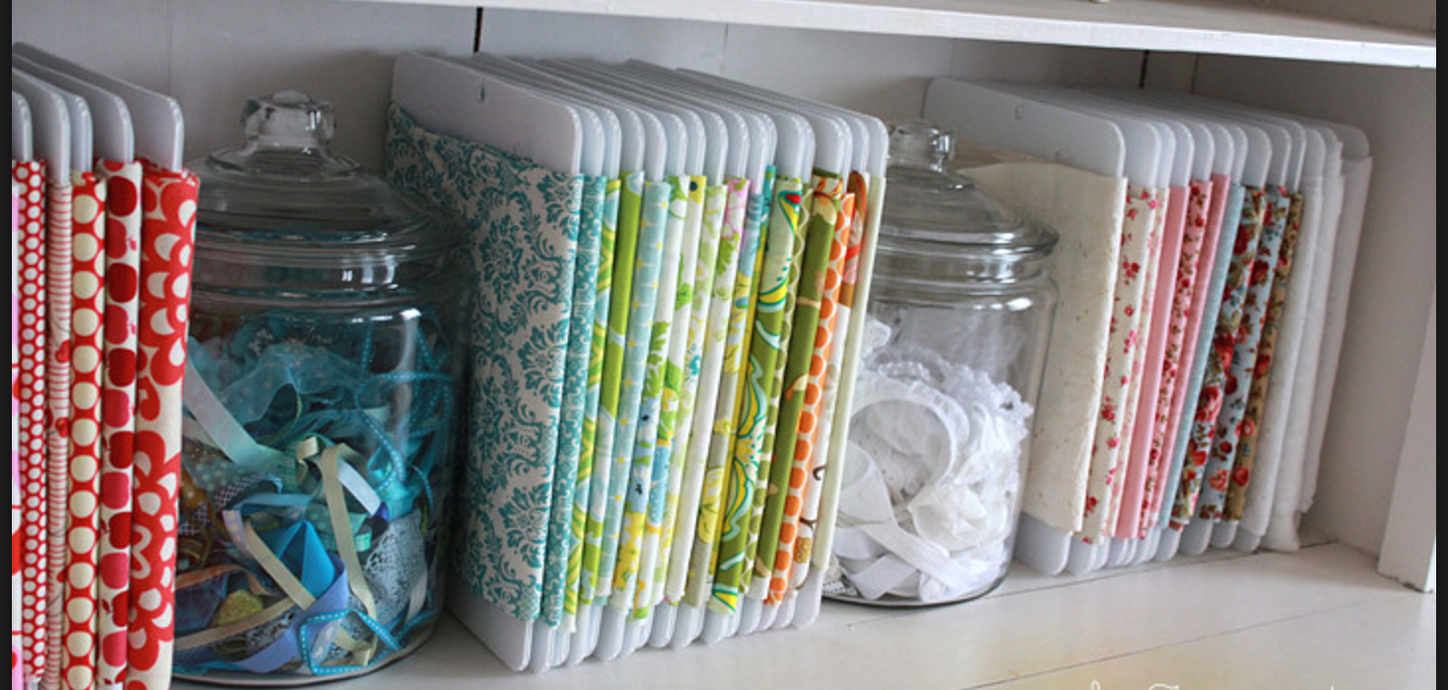
Option 3
May I suggest that for leather, you either stack it horizontally (flat) or hang it, without folding? Thick, hard leathers will warp and softer leathers will just collapse on bookshelfish arrangements, and they can’t be pinned.
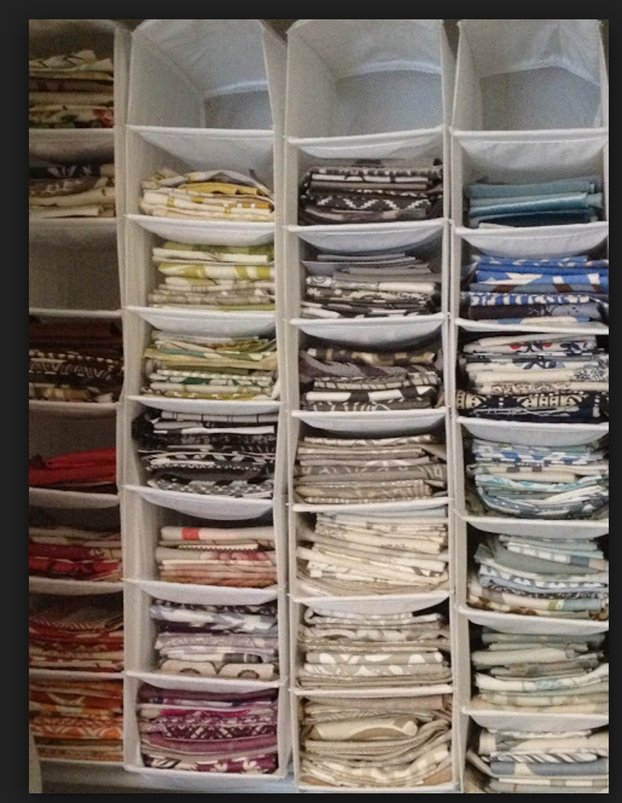
Hanging clothes cubbies work OK and can be cheap, though they sag a bit:
If you hang it, I’d suggest leaving some kind of tab or extra-long edge that you can use a hanger to grip, so that it doesn’t compress and therefore permanently damage the usable part. You can trim the tab or edge off when you’re ready to cut. I use gorilla clips hanging from shower curtain rods. You could use pants hangers as well.
8 Likes
@jbv I LOVE that! The modular design would be extremely useful as I expand my material collection. I’ll start brainstorming implementation!! Thank you!!
@morganstanfield I hadn’t even thought about soft materials. This is extremely helpful! Thank you! I lovveeee the cart idea. I may have to use that for all my materials. It would be incredibly handy!!
2 Likes
Also, I’d recommend not cutting your soft goods down to size–keep any hides, long yardage, etc., in the size it comes in and cut by project. You just need a desk and self-healing cutting mat to do the cuts. You’ll waste less material on margins when you do small projects, and if you have projects that are bigger bigger than 12x20, you can just fold up the edges inside the forge and cut in the middle.
For leather, I keep my whole hides mostly rolled up gently, tied with yarn or ribbon so they stay rolled, and then I clip a binder clip to one top edge. I slip a metal shower-curtain ring through the handle of the binder clip and hang the curtain ring over a bar (I have a bunch of spring bars inside a cabinet). To get a hide out, I just unclip the binder clip.
4 Likes
Oh, good points! Thank you. I was going to ask about leather storage! I’ll remember to keep hides in tact. It’s just things like wood and such that I can’t cut on-site. 
1 Like
I went old school, just a $45 purchase in Amazon. The same shelf space I use in my garage. Older picture from first day of setup, but it gives an example of what I ended up with
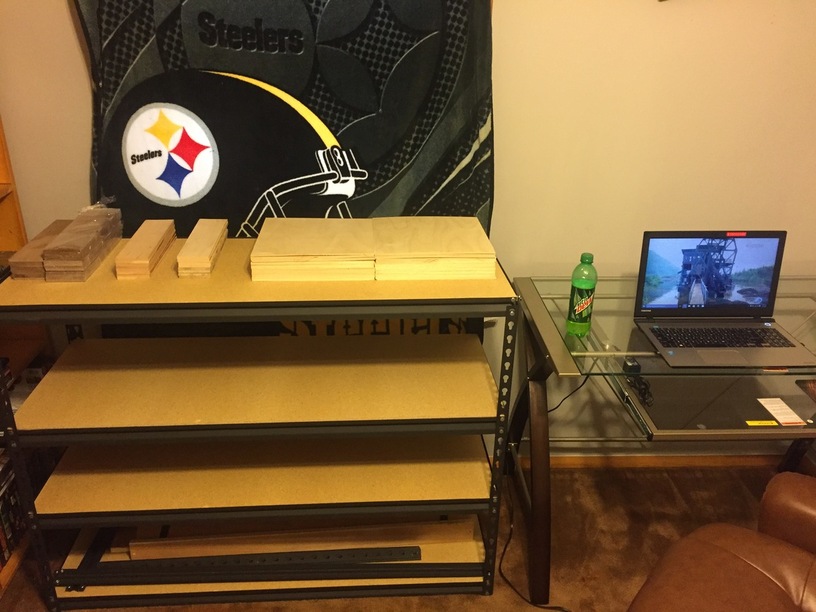
4 Likes
I like it.
You could also go about it comic book style. Just make the appropriate size containers and a shelf to store them. Then each material would not needs it own box just a labeled divider.
1 Like
Oh, that’s an interesting idea… I’ll let that simmer as I come up with a plan! Thanks
I store all my thin wood/plywood (1/8" & 1/4" “3 & 6 mm” flat) the bigger stuff 1/2" and up standing up on it’s long edge.
All my art paper and frisket/transfer sheets lying flat or hanging.
It appears to me the thin material bows easier standing on it’s edge than the thicker stuff. I do just like elsman18 does in his picture. Flat is my preferred way to store materials.
I did not say it is right just my preferred way.
2 Likes