Why wont my glowforge cut without doing it 2=3 times.
Either you’ve set multiple passes (which you would know if you did, more than likely), or your file has some stuff going on causing it do so.
Can you zip and upload a file that’s giving you trouble?
1 Like
Would this also cause my room to fill up with smoke while cutting? I have tried a few different designs downloads and I cant get it to cut. It is venting properly but the smoke comes out the front. I thought it was because it was new but now i cant use it due to the eye irritation I get. When I go outside to see the ventilation smoke does go out side , but more inside.
This is almost certainly due to your file having cut lines stacked up. Post a sample and people will take a look.
2 Likes
Are you saying that your Glowforge that you need to use extra passes to make it through material that should cut in one go?
Printed the Gift of Good Measure using default settings? Done all the usual checks as to cleaning, material flat, Ensure the power and speed are correct. Focus correct. Material thickness correct?
All these things are factors in why it might not cut through as expected.
I do know that Glowforge support can verify settings, material and design from the logs remotely to see if the usual suspects aren’t in play and that there is an actual hardware issue.
Hope your machine is ok.
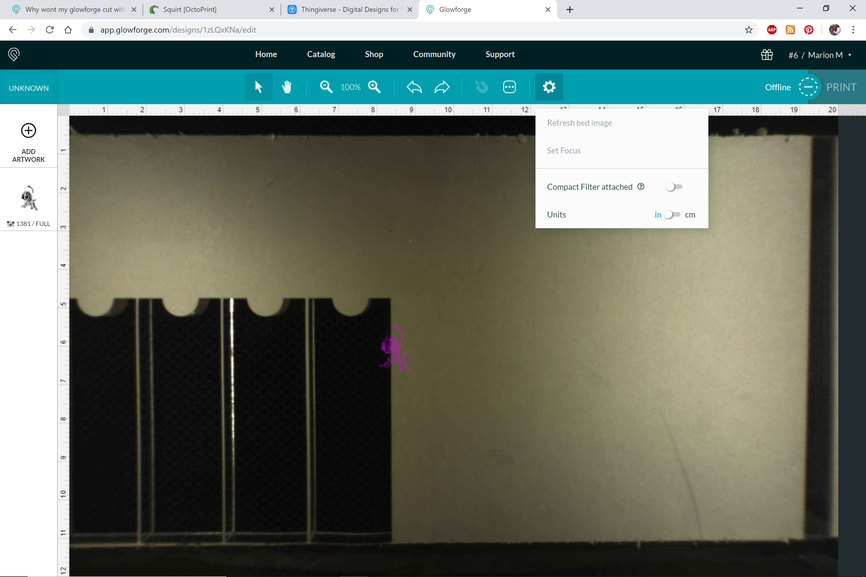
Did you accidentally turn on the Compact Filter setting which changes exhaust profile? It’s under the gear icon.
Are your fans clogged? Especially the one on the back lower right.
1 Like
I have tried different speeds and settings but it does not cut thru. anything. I am going to try on the material from glowforge tomorrow. I tried everything but I just don’t know. the camera stops in the middle of the bed. I do not know what is happening?
I just took off the hose on the back of machine and it is clean. I really have not been using to much do to it takes sometime 4 passes to cut thru a 1/16 piece of wood,??
Give us a little info on what your design is like, what your material is like, and what you are trying to do. As @GrooveStranger said, sometimes double vectors cancel out each other.
Ok. This is just not right at all.
Did you check that the compact filter option isn’t turned on?
I will ck for compact filter on.
1 Like
No one asked this…do you HAVE a compact filter?
2 Likes
I have shut down glow forge and completely cleaned checking the connections on my hoses and fans all were clean, I will try to do another cut and let you know how it turns out. I am just learning it should not run like this,
no my filter is out the window
If smoke is coming out the front, it is most certainly not venting properly.
Have you checked that the intake (on the bottom right side of the GF) is not blocked by paper or other debris?
If you are filtering out the window, do not set Compact Filter to ON in the GUI – this will turn your exhaust fan OFF!
Is the window completely sealed so that smoke is not reentering the room? Have you taped and sealed the hose connection(s)?
3 Likes
All is taped up since day one and I have taken the hose of both ends to make sure no debis is blocking. I just tried cutting again 3 times and got burnt wood but no cut, ok where is the setting to ck filter. whoa very smokey in here.
yes all is taped with the metal tape and then a layer of masking tape. it is coming out the top where the glass is to close cover. I have checked all little rubber on edge all is straight,
did you get the pic. I sent’
Sorry, no. DId you use the Discourse forum personal message feature? It’s the envelope icon.
If you are using tape to stop smoke from coming out of the Glowforge, something is wrong. You still haven’t answerd questions about the compact filter. Click the gear icon on the toolbar in the interface and make sure the slider is to the left.
If you have the air intakes underneath the Glowforge and other places blocked, then you don’t get good airflow. You do not need to tape anything. Only make sure the connection to the exhaust port on the back lower left is secure.
1 Like
Make sure your lens isn’t in upside down. The flatter side should be down toward the bed of the Glowforge.
1 Like
Thank You I did ck. and make sure, that was fine.
thank you thou.
I know you said you cleaned, but I’ve had M.C.Etcher for almost 2 years, and 2 months ago I discovered a fan I had no clue about. I have no idea how long you’ve had your machine, so let’s run down the cleaning list:
- The camera on the underside of the lid, along with the sensor window on either side of the camera lens.
- Remove the printer head from the gantry, remove the lens using the magnetic tool, and clean both side. Take care to replace that lens correctly. (I still make that mistake, but I can tell when I look at it.)
- While the printer head is loose, clean the two windows on the underside of the head - on either side of the lens you just replaced.
- Turn the printer head over and/or around, and clean the tiny fan that blows smoke away from the head. 8 months before I found that one. I then thought that it was the air assist fan. It is not.
- Also, clean the window on the left side of the head.
- While you have the head off, have you ever cleaned the air assist fan on the underside back of the gantry platform? This involves slipping the belt off, and popping the gantry platform off, so that you can even see that fan. This is the latest one I’ve discovered, about 2 months ago. I also had to disassemble the directional shield to get to the back of that fan. If you haven’t had your machine very long, you might want to skip this until you KNOW all the other fans are working.
6a. If you did step 6, replace the gantry platform and belt. - Replace the printer head, making sure the ribbon cable is laying nicely and the printer head makes it all the way back on the gantry platform.
- Clean the mirror up in the left side of the machine. You need to move the printer head over to the right, and look up in the left side to see it. This one catches a bunch of people. It was 6 months before I even knew it was there.
- Remove the top of the printer head (held on by magnets) and clean mirror. Replace both mirror and top.
- This one is a major pain: Move the gantry to the front, and clean the front of the fan blades on the exhaust fan. Jules has an excellent write up on how to do this. If the fan has crud on the front of the blades, you will not be able to clean it from the back of the machine.
That is my full cleaning list. I too got to the point where proofgrade material wasn’t cutting all the way through, and there was smoke leaking out around the lid into the room. Once I instituted my (daily/monthly/when it doesn’t seem to be working) cleaning list, I haven’t had that problem again. YMMV
5 Likes