It’s rings and letters, stacking 4 disks accurately over and over is a bit time consuming and getting the letters on straight takes ages too.
I’ve not actually tried that, the 0.8mm ply is pretty flexible. It just feels like getting it to be exactly the right length is going to be tricky but I guess I can iterate with the laser.
Sorry for reviving an old topic, but these plans are excellent! I’m putting one together, and have run into two sticking points.
The materials used were a gorgeous 2.7mm and 2.0mm plywood. Medium proofgrade draftboard (less attractive, but what I have on hand) is 3.40mm.
To compensate, I enlarged the whole project by a factor of 3.4/2.7 = 1.259 to make sure the widths of slots will match the thickness of the material. For the inner box which was originally 2.0mm, I also had to resize the holes to 3.45mm to compensate for the material I used and ensure a clean fit.
Perhaps it is a byproduct of me scaling the project, the material change, or both - but the tolerances on the gears are very tight.
I’ve only made one gear to test the mechanism, but it required a lot of sanding to turn with ease. To conserve sand paper and patience, I will modify the .svg to have 1-2mm gaps wherever the wood needs to move freely. Hopefully this doesn’t allow too much movement, because I do love the crisp feel of the original tolerances - it’s just too hard to turn. Hopefully the 1-2mm bump will produce proofgrade pieces that can be glued together straight out of the 'forge.
@m_raynsford, if you don’t mind I would love to share the .svg with you for the Google Drive once I’ve hammered out the modifications.
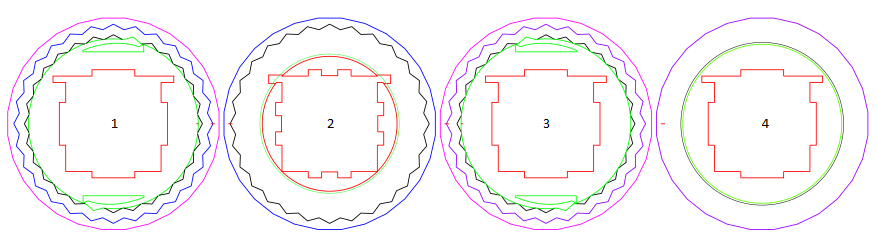
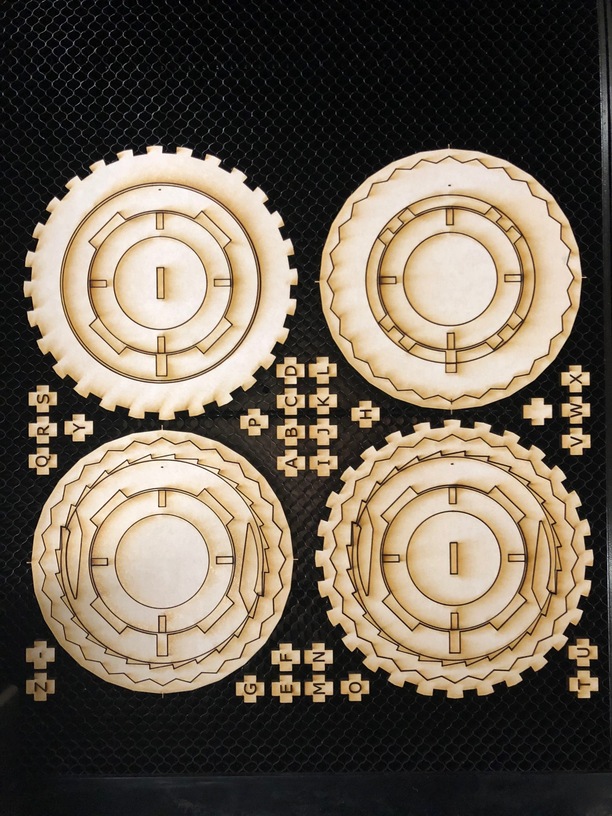
I numbered the layers of each ring 1-4, left to right. I also added stroke colors so that the cut order would be consistent. As a force of habit, I always cut from the inside of figures outward to avoid cut pieces falling into or out of the laser’s path.
I added “wiggle room” on layers 2 and 4 (see the circles with +2mm diameter). The additional room should remove friction within these layers when spinning the ring. I want to keep moderate internal friction between the green and black portions of rings 1 and 3, as they produce the ratcheting effect.
The portion of layer 2 between the black and the green strokes needs to spin freely relative to the other layers. I’m open to ideas here, but I’m going to try sanding ~1mm off that part just for the quick fix. I may eventually modify the drawer to provide some space between layers 1/2 and 2/3 or use separate material for that portion of layer 2. This all gets ugly, as it means I’d be cutting that layer twice and wasting half the material.
Once I get home, I will zap a new ring and see how well it turns!
I made 5-Ring one of these as well a few months ago. I used Balsa wood (1/32", 1/16" and 3/32") to approximate the various thicknesses. When glued together in layers, balsa is surprisingly strong.
I did have to adjust the inner “prize box” because the change in thickness caused it to not line up correctly.
Another thing I found out while trying this is to not go longer than about 7 letters. I tried 9 and couldn’t get the rings on because the locking bars that support them were so long that they couldn’t get angled enough to insert the ring without having the ends of them hit each other.
One the original, the end cap that holds the lock bars into place has a bolt through the middle onto the knob. Unscrewing this bolt completely disassembled the end cap and allowed the bars to come out completely. There was no need for angled bars because I could put the bars in straight onto all 9 rings at once.
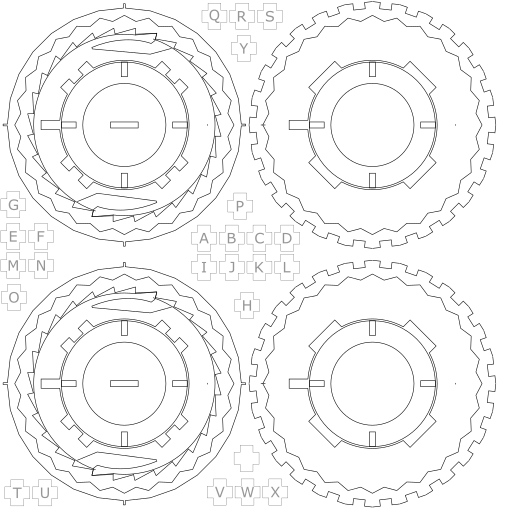
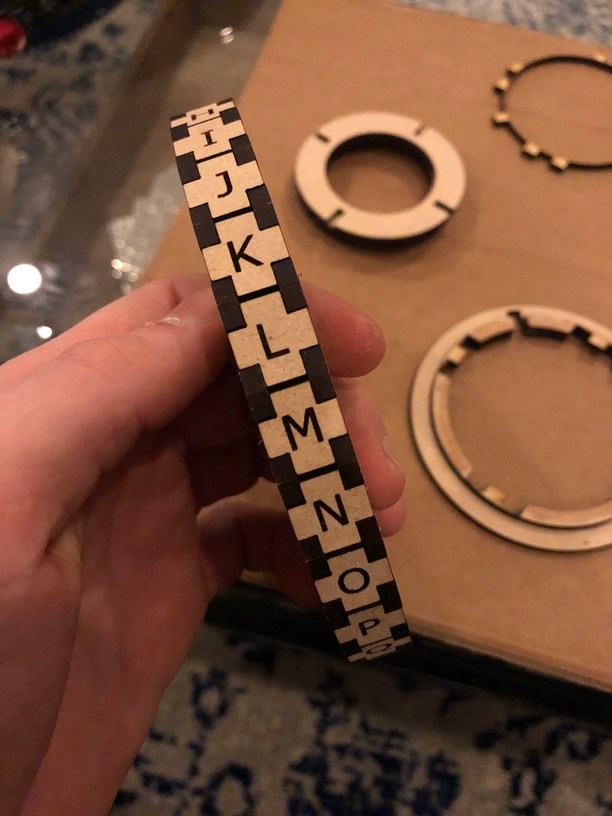
Added little nubs to the outermost layer. When assembling, these will help align the otherwise very uniform 28-sided portions. On the first ring I made, the alignment was off by ~1mm and it made the fit impossibly tight.
Changed the detenter into a ratchet. It only spins counterclockwise, but the shallower bend should also spin easier. Rotating clockwise to a hard stop ensures alignment of the outer letters.
For personal preference, I changed the square drawer into a tube. Option for a friction fit solid tube or you can delete some of the innermost rings for a skeletonized tube. Skeleton tube would have to be glued to keep the layers aligned. Friction fit solid version only needs a few thin bars to add / remove a ring now!
Apologies for the lack of color on this sketch. I’ll colorize before I cut! Once I know the model works, I’ll clean it up to the standards of the original .svg so you can share.
The centre is square because it’s much easier to build a straight box with 6 pieces of material than it is to build a straight tower of disks perfectly vertical while keeping a snug fit with the rest of the cryptex. I hope it works out for you.
The detent mechanism on the original actually only ratchets in one direction anyway and it’s that mechanism that I’ve never been happy with. Cutting the pawl within the ratchet was never going to provide the accuracy I wanted for the lettering. It’s that detent mechanism that is still stumping me now despite several experiments.
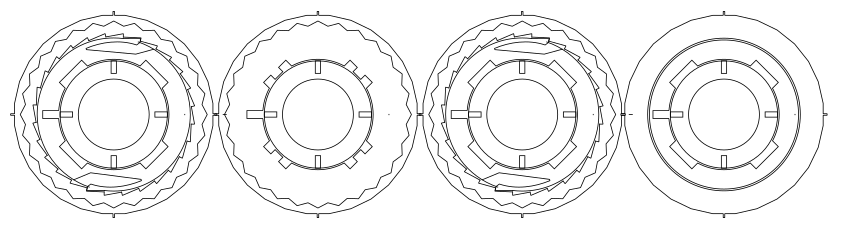
Update time! Here is the ring .svg that I finally pulled the trigger on for a full scale test run, with a few post-run modifications. I made the stroke thicker so you can see them here:
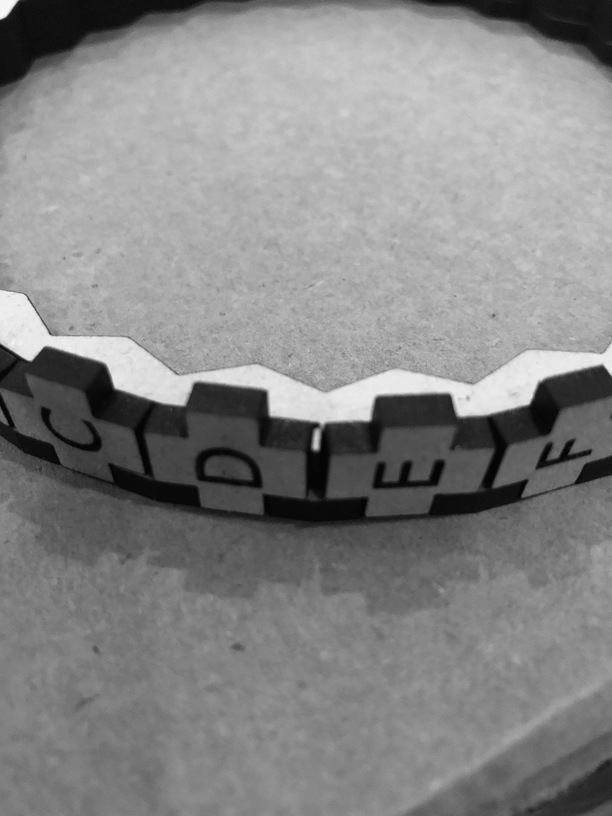
Mid-assembly. The four alignment nubs on the outer ring’s middle layers actually helped wedge the letters into place! You can see this in action between the “D” and the “E.” I’m going to revisit the .svg and make these a legitimate part of the design. don’t know if I’ll put them between every letter, but I’m certainly tempted to.
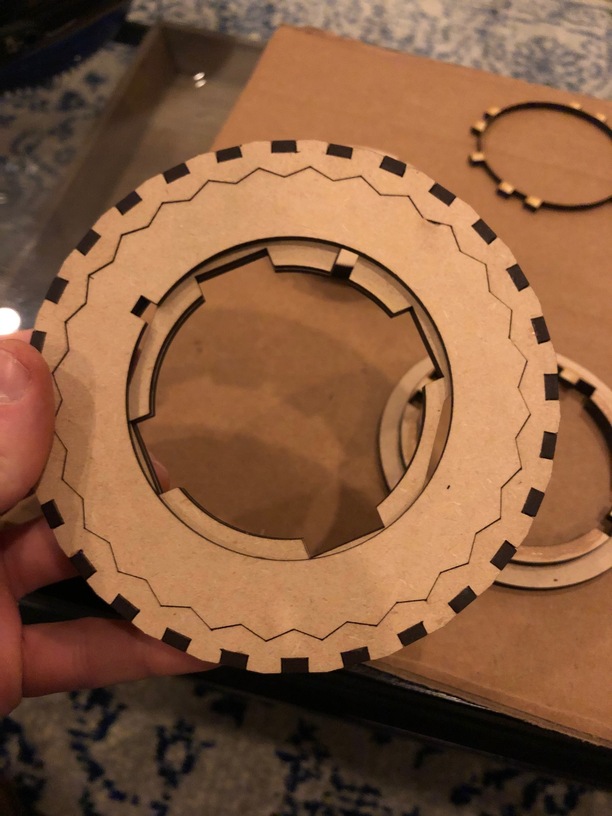
An assembled ring. I foolishly left off the portion that attaches this ring to the other rings, otherwise it’s great. Turns easily in one direction with a satisfying “click,” but locks up tight when turned the other way.
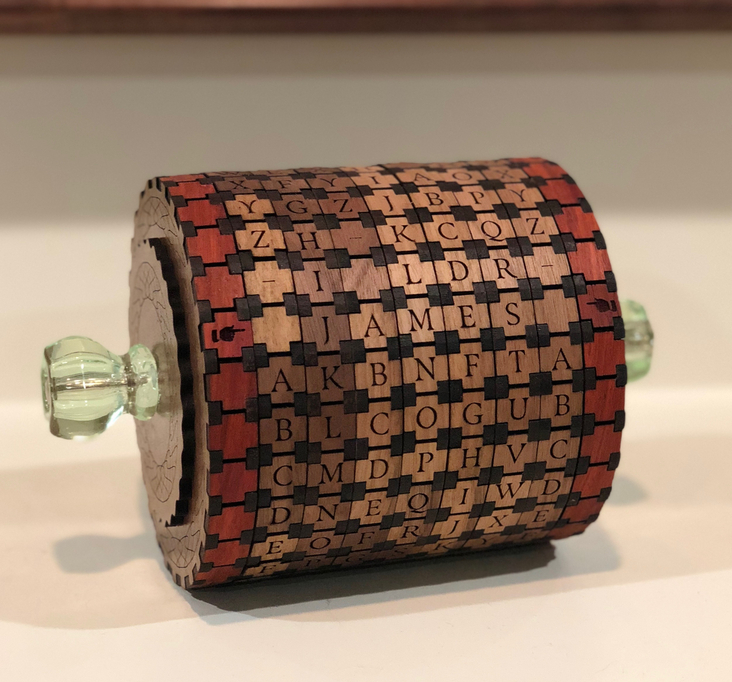
Bootstrapping from this thread I decided to give this a go. I went with the original square internal box files & modified for my materials. Pretty happy with the results. Many, many thanks to @m_raynsford for the share & for the fabulous modularity of original files making the edit so straight-forward.
After all is said and done I tend to agree that the ratchet is a bit floppy, but I didn’t have the energy to reinvent the wheel here and the original works just fine really. Great design all around!! Thanks so much for the share! I loved this project.
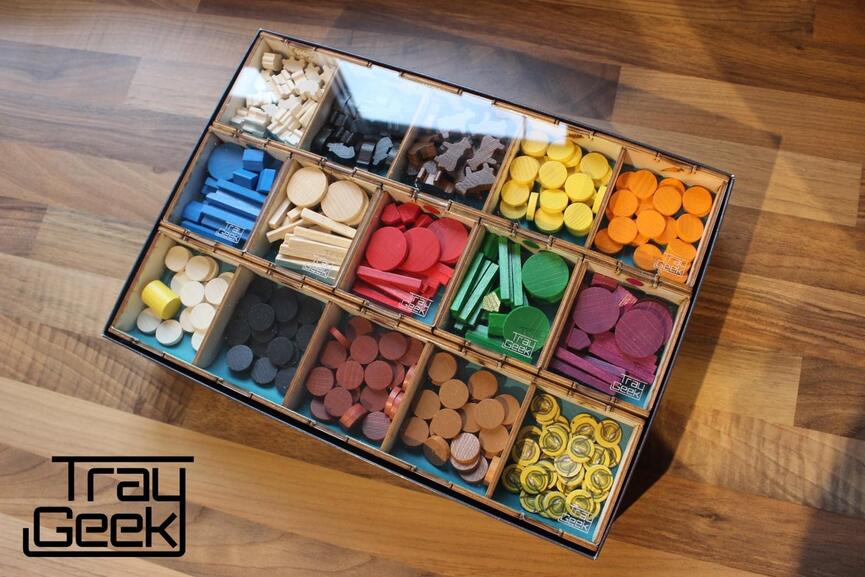
One complaint however. Now I am out of my favorite hardwoods so this is a total catastrophe!!
Very late reply here - work has kept me pinned down. I’m eager to try using cheap ply / draftboard for the internal disks, but some quality materials for the end caps and letters. Over the course of several disks, I’m sure it would save a few $'s! Until it’s solved, you’ll only see the laser-crisped edges of the internal disks anyway so I doubt there would be any adverse effect on the aesthetics of the puzzle.