Hello again. When I first started using my GF ![]() , I was a bit paranoid about the material moving while cutting. This was all before I thought about cut order. I looked around on the forum and sure enough there were all kinds of ideas to make hold downs. I liked the magnetic ones like the one by @pubultrastar the most
, I was a bit paranoid about the material moving while cutting. This was all before I thought about cut order. I looked around on the forum and sure enough there were all kinds of ideas to make hold downs. I liked the magnetic ones like the one by @pubultrastar the most
but I don’t have a 3D printer - but I do have a GF, right?
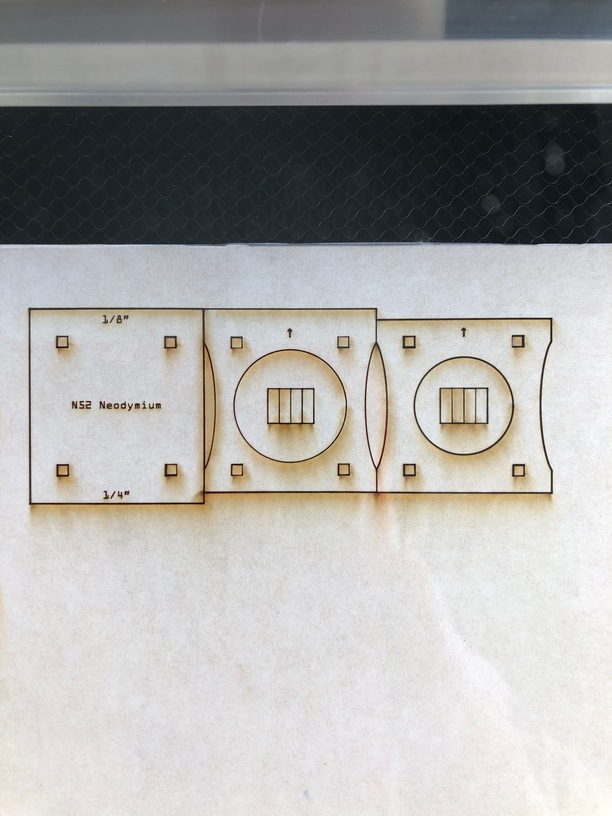
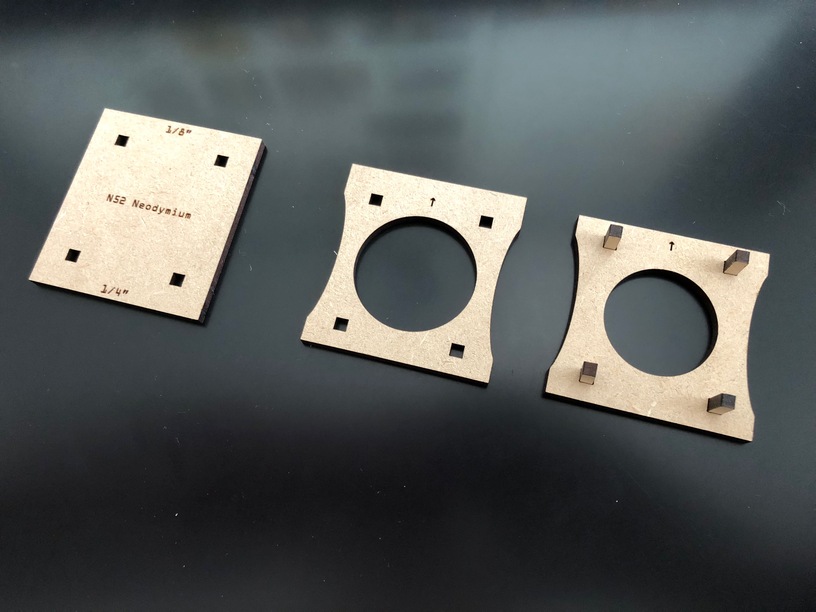
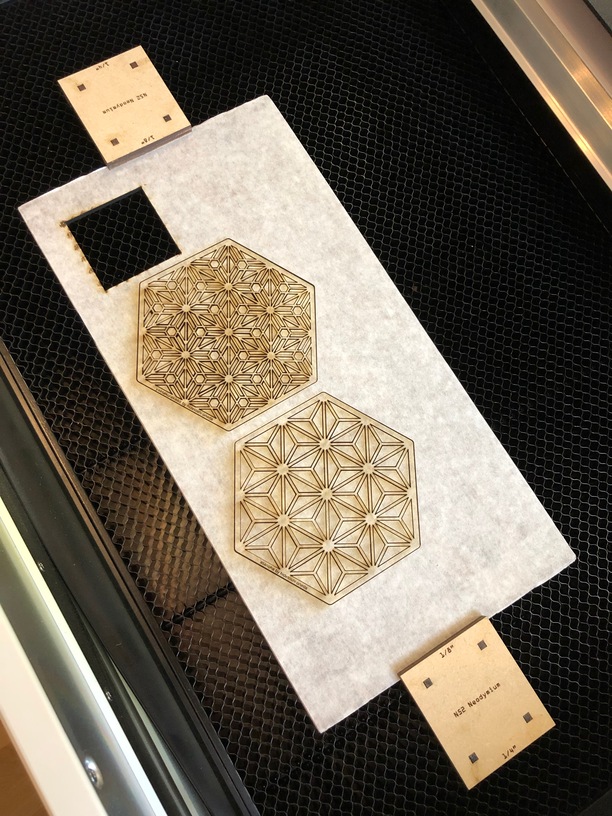
My idea was to create a sandwich of three 1/8” draftboard layers. The bottom layer would keep the magnet from falling out. The middle layer would hold the magnet. The top layer would be cover but also be the lip for when I want to hold down 1/4” material. I also cut four “pins” to make sure the alignment was correct.
I bought some very strong neodymium magnets from Amazon:
I got N52, since I was worried about the thickness of the 1/8” bottom layer. As it turns out, I could have used weaker. In fact if these magnets stick together by themselves, good luck getting them apart again. You need to slide them off with one of them behind some kind of ledge. I couldn’t with my finger strength, simply lift them off vertically. They come shipped with a 1/8” non-magnetic spacers so that they are easier to pull apart. But beware - the magnets can fly out of your fingers and attach to the rest of them if you’re not careful. This is another reason to have the magnet held in by that bottom layer and not epoxied in and directly exposed.
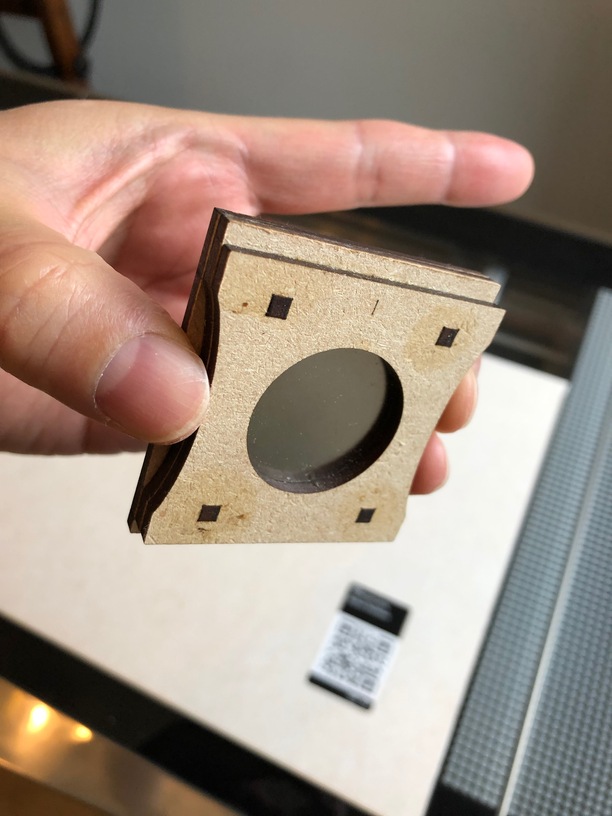
So the top edge (when looking at it from above) holds down 1/8” material while the bottom edge holds down 1/4” material. Moving is probably not an issue with big 1/4” boards but can be if we are using smaller remnants - or at least that’s what I’m predicting. For thinner material up to and including 1/8” you can place them directly on top and it will still grip the crumb tray with good force.
I also cut two curves on each side of the bottom two layers to provide a kind of “grip” when you want to lift them off.
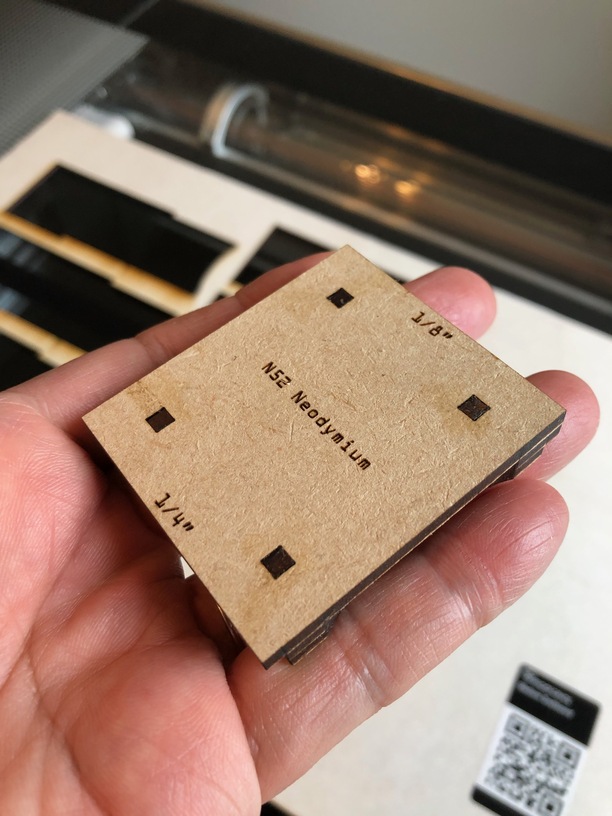
Didn’t know what to put on the top layer, so I just engraved 1/8” and 1/4” to indicate ledge height and “N52 Neodymium” in case I forgot how strong it was - duh. Actually it’s so strong I want to make sure I don’t bring it near sensitive electronics, like… a… laser cutter…? No issues with that so far. I did some cuts where the head went right by them and it was not affected (as far as I could tell). I also marked up arrows on the lower two layers because orientation is a factor - the middle layer is longer than the bottom layer and the top layer is longer than the middle layer. The orientation of the pins is critical too - clean sides toward you, burnt sides to the sides as in the photo - because of the way the kerf was designed. On my .svg file I made two sets of four pins because they were so small I thought I might loose them or drop through the crumb tray and didn’t want to have to cut them all over again.
The whole thing was then glued together.
Here it is in action.
Here are the .svg files if anyone is interested. Kerf is for 1/8” draftboard. Use at your own risk, okay? I have not tested every possible condition. Also try not to put these magnets near hard disks, mechanical wrist watches, and pacemakers - just to be on the safe side. Use weaker magnets if you feel uncomfortable. Also feel free to change the engraving to whatever cool design you like. If I do it again I think I’ll engrave something more inspiring on them.
GF Magnet Hold Downs.svg.zip (2.9 KB)
UPDATE: Okay, the .svg issue should be fixed now. It is now a .zip file. Uncompress and it should work fine. Big thanks to @ChristyM for the solution.

 Thanks for sharing,
  rests on a steel table so my magnets stick there pretty readily and won’t crawl over to my sock drawer, but we’ll see.