Is the alignment in the photo below within specifications?
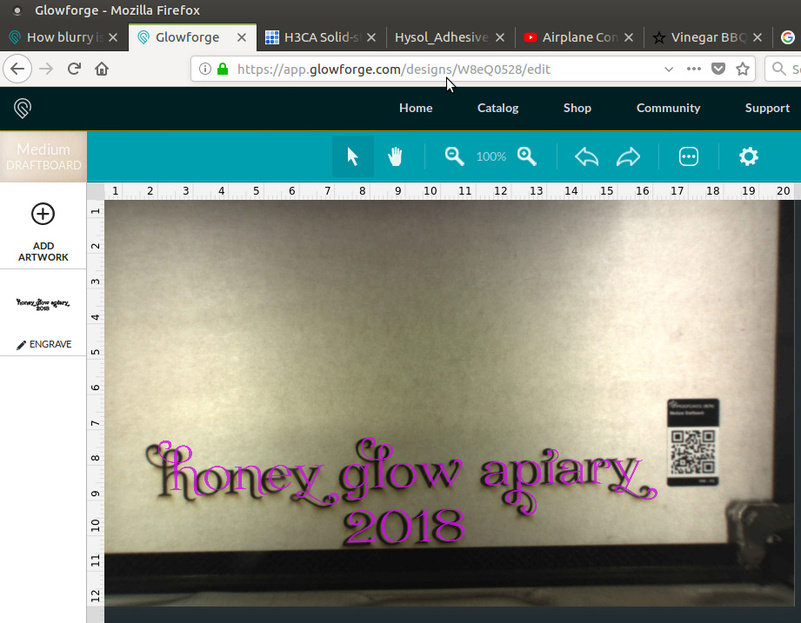
It looks as “honey” and the “y” in apiary may be close to the 1/4" range but the rest look well within the range expected…
Yeah, hard to tell with the print so far from the ruler, but by using the highly scientific method of holding a straight edge up to my computer screen, it looks like it’s right at 1/4" to me.
@jgf you could try positioning some thin crosshairs at the far upper left (left side X alignment looks to me like it’s the farthest off); line them up with a mark on the top onscreen ruler, score them, and then zoom in to screenshot the result for better visibility. That will give a more accurate view of whether it’s over the 1/4" tolerability limit or not.
1 Like
I’d probably do vertically aligned crosshairs at top and bottom left, then zoom in and screenshot the top one, then scroll the bottom one up closer to the ruler and screenshot it as well – just to make sure whether top and bottom alignment are both within specs.
1 Like
I can’t look at 1/4" as some sort of fixed limit over which I would ask for a replacement. As long as it’s not a H/W issue, (the cut is square and true), almost any error is correctable via S/W updates. If my unit is otherwise working and “close” to 1/4" I’m not going to risk a refurbished replacement.
6 Likes
I concur. I am certainly not looking for a replacement.
My unit has performed admirably. I was a little surprised how asymmetric
the offsets were, and thought that it would not hurt to put up an image and
get other user’s opinions.
1 Like
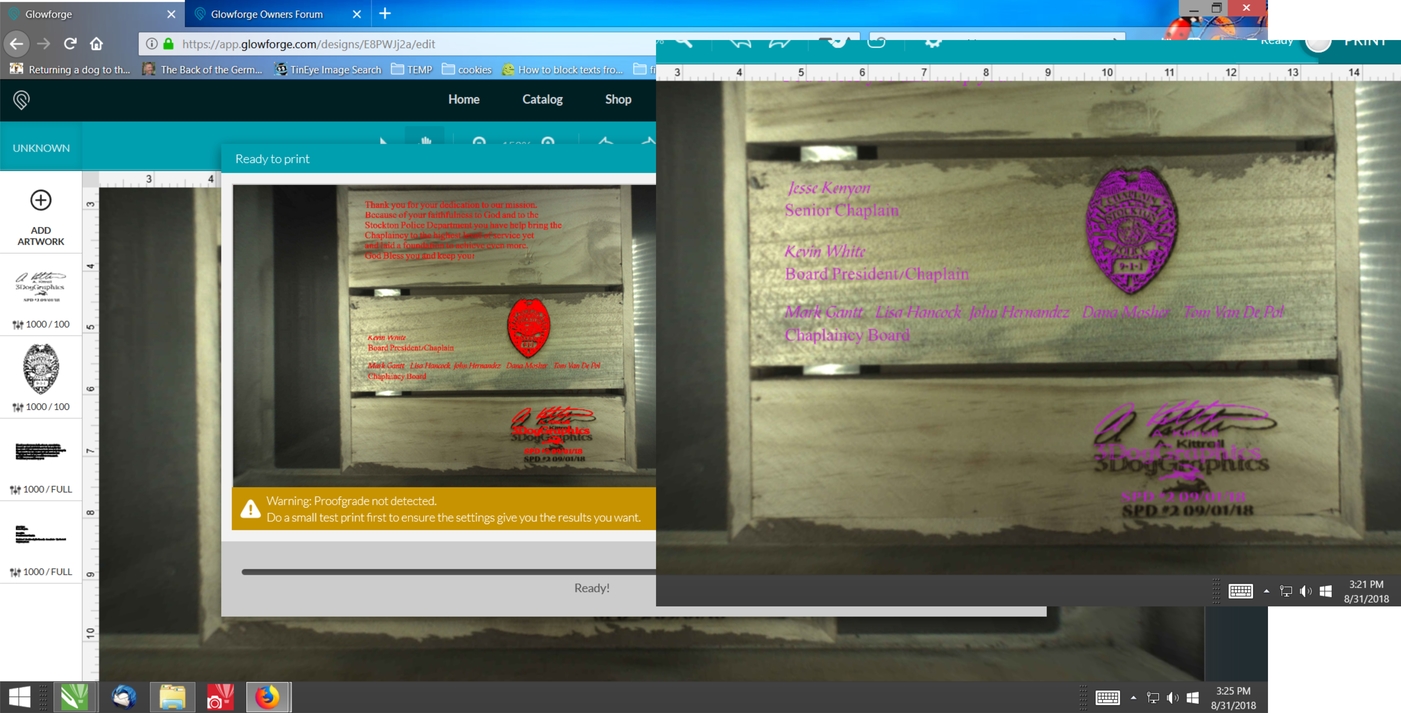
Easiest way to do it accurately (in Photoshop) is to include the on-screen rulers in your screenshot. Then:
- Image > Analysis > Set Measurement Scale > Custom
- Drag a straight line between two of the inch marks (this sets the pixel length measured to 1 logical unit)
- Grab your measuring tape (virtual, not real… shortcut key is i)
- Measure from wherever you need to measure from
For this one, I measured the very left side - the flourish on the H : that shows .38" logical units (which is really .38" since we the logical unit to match the inch marks) of X-offset. The Y-offset using the serif of the H shows an offset of .18".
The offset at the center (10" mark) shows an X-offset of .14"; Y-offset of ~.04".
The X-offset for the flourish on the Y (right-side of job) is .2"; and .07" Y-offset.
1 Like
That looks like a post-op image. The cut happens right on the original placement (on mine and the PRU I used anyway), but the after image is always displaced.
I think it was Jules who found if you were to add artwork after the op, you could achieve your best registration by lining up with the after image even though it shows displacement.
3 Likes
Use illustrator to make 1 inch circles with a 1.5 inch vertical and horizontal lines through it. Place them in the corners and other places around the bed. That’s what I did and it it easy to see.
I guess thinking about it now it would be even better to make .5 inch circles with 1 inch lines through it. If your post laser image is outside of the circle then its over the .25 inch guide. Then you can contact GF support to analyze your information and make a decision.
I was very fortunate when mine was over .25 inch, they replaced my laser in less than a week and my replacement has been aligned so well that you can’t even see the laser marks under the artwork in the post laser image. I was very fortunate.
1 Like
It’s tough though when your hitting being off right at the 1/4" cutoff. My alignment was so much better a few months ago and I hope they get things improved. It’s tough to accommodate for it when it’s all over the map. It’s interesting my bad alignment is in the exact same area as the OP too.
Not so surprising. The original snapshot from a lid camera is a fisheye image. It’s mathematically straight forward to remap the image to match reality but will still have significant errors at the image edges since each GF lid lens is slightly different.
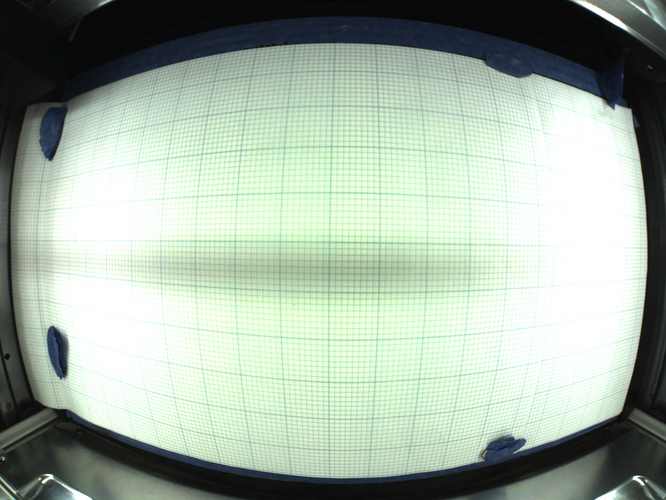
Check out the original and remapped images from the link below. (@scott.wiederhold)
4 Likes
Thanks for asking about this.
Most alignment problems come from the material being closer or farther from the camera than expected. When you open your Workspace in the Glowforge app, the camera on the lid of your Glowforge uses a wide angle lens to take a photo of the entire bed. The software then uses the height of the material to correct the image so the image you see matches what’s in the bed. The software is still improving, and you may see an alignment offset of up to 1/4".
You can take these steps for the most accurate alignment results:
- If you don’t use Proofgrade materials, use a precision set of calipers to measure your material, and enter the thickness in the “uncertified materials” dialog.
- Use material that is not warped or tilted.
- Place your design near the center of the bed.
- Clean the area underneath your crumb tray, particularly the four indentations on the floor.
- Reboot the machine. Alignment can drift over time, particularly if you bump the head of your Glowforge while removing material.
Should you finish all of these steps, and find that you have an alignment error of more than 1/4", please let me know so I can investigate.
To quote the eternal question The Bee Gees asked, how flat is your desk?
3 Likes
The Glowforge unit is resting on 3/4" cabinet grade, hardwood sheathed plywood.
My straight edge does not show any warping.
Thanks for the tips. I made a new test image, but I think that I have hit a reproducible positioning bug. I will start a new thread to show the before and after image and upload the svg files.
So you know for next time, posting in the “Problems and Support” area actually creates a support ticket. Opening a new thread rather than continuing in the same one is going to muck things up on their end and can slow down resolution of your problem. 
Yep. 100% correct. The after image is off, but if you don’t move anything on the bed or on the screen and send a second cut, it will cut in exactly the same place. 
1 Like
Yes, I do know this. The new thread is for a different issue with the positioning jumping when engraving in the lower right. The alignment cannot be evaluated when there is a jump in the head putting the rest of the alignment off.