Ummm… flexible-ish then? In any case not quite the same sort of bend.
Now that is just st the most gorgeous thing I’ve seen in a long time. Thanks for sharing the process!
1 Like
This is my first cut that even now the GFUI tries to go there and as I have tried to get rid of it the GFUI crashes and goes to the start screen every time I start it.

It was exactly what you are talking about I was just using a finer spacing.
1 Like
Time to start designing a GF-made clamp ?
John ![]()

Reading old posts apparently uses up likes really quickly.
6 Likes
I wish I could dump 1000 likes on this. I can’t wait to see what I can do with it.
3 Likes
I would think that you had another box with only owls (and perhaps a third with only ravens)?
You might think that, but you’d be giving me way too much credit. ![]()
Click on the “The hard way” text, and I show how I figured it out. I basically did it incorrectly, slapped myself on the forehead, and tried again. Irritating because I didn’t combine the engraves into a single image, so it did them all separately and it took about 25 minutes to cut a set of sides.
1 Like
I found the opposite problem when I set up what is now my business card with engraved dragon on one side and text on the other. I started with an array of them and ended up with 16 layers with just the dragon image. So I uploaded just one and copy/pasted 15 more in the GFUI still able to move them about to take advantage of scrap (And even scale a bit to fit) but only one image to assign properties to. It still did them one at a time but as the round shape makes a short trip top and bottom, there is less travel not doing anything making it possibly faster.
Yeah I considered this possibility, and the loss of mobility of the pieces if I locked all the engraves into a single raster. In the end I decided to suck it up and deal with the length of the job. It all worked out in the end.
If engraved sideways so it skipped over the blank spaces you would have a much quicker job.
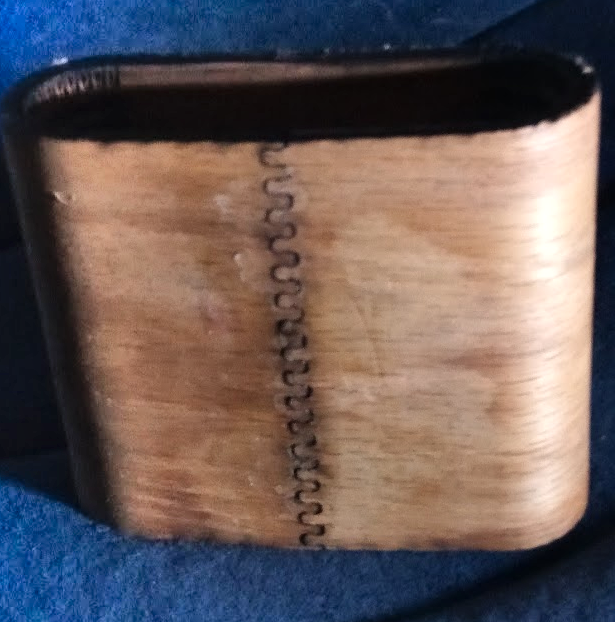
When I did my first experiments it was literally my first ever use of a laser so did not know anything about variable depth cuts and so made a lot of them depending on the kerf in each cut. now I am wondering about using a standard “living hinge” design engraved on just one side to bend thicker wood, putting all the give in compression and none in stretch as is the concept we are talking about, but also not providing a break line where it is bent.
1 Like
Minimizing white space on engrave jobs is always good advice. Next time I’ll spend some time to optimize that part.
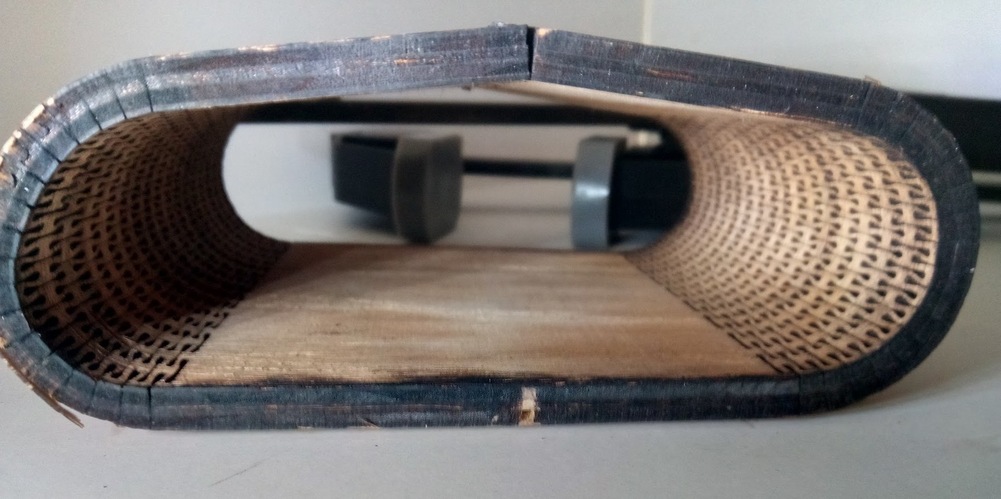
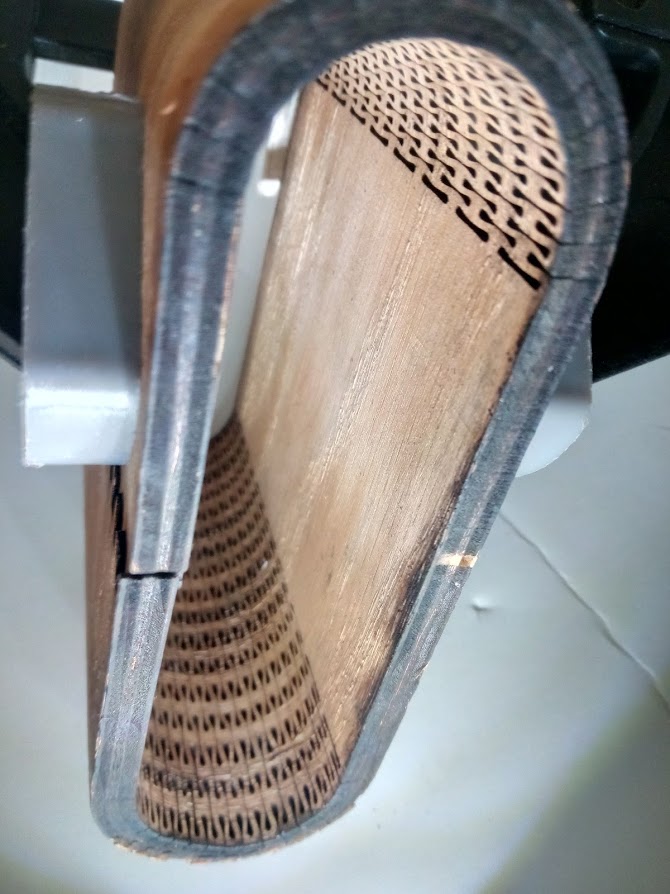
I ran another experiment box. most wood would just bend if properly treated but Oak Plywood I think would provide the toughest challenge and two 180 degree bends about as tough a job as I could think of. I first tried with cutting a hole for a box lid, and also was not deep enough with the engrave, the second with no lid and almost deep enough worked out very well. It still needs to dry a bit to hold its place but I was able to get a few fair photos.
oh yes instead of grooves I made a living hinge design that just did not go all the way through.
16 Likes
Wow, tight bends! 
(You know, I just realized I might actually be a maker…most people probably don’t comment on bends in wood.) 
4 Likes
Thanks for running that experiment.
You’ve given me food for thought with regard to my current fan display case design.
John 
1 Like
The Man with the fans. You could be a Rock with so many fans.
Now far fewer.
I’ve just donated my complete collection of the fans we made for period films etc, to the Royal Shakespeare Company Costume Department.
That way they will have a future as a well cared for collection. The RSC do a lot of teaching too, so they will have a good and useful future, all being well.
Meanwhile, I start again in Mississippi, but making fans in frames !
John
9 Likes
Rest assured, you are definitely a maker…
5 Likes
A trouble maker…
5 Likes